Setting Up a Tomcat Server in Eclipse
We target everything to the Java Servlet spec v2.4. Though you can use most any compliant container, we use the Tomcat 5.5 series by default. Download the latest version here:
http://tomcat.apache.org/download-55.cgi (broken/obsolete)
http://tomcat.apache.org/download-60.cgi (for tomcat 6)
http://tomcat.apache.org/download-70.cgi (for tomcat 7)
Uncompress the software package somewhere permanent.
Under the general Eclipse "Preferences..." menu item, browse to "Server -> Runtime Environments", as shown in the following figure:
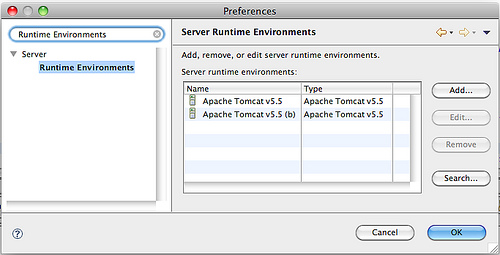
Click "Add" to add a new runtime. Select the "Apache Tomcat v5.5" runtime.
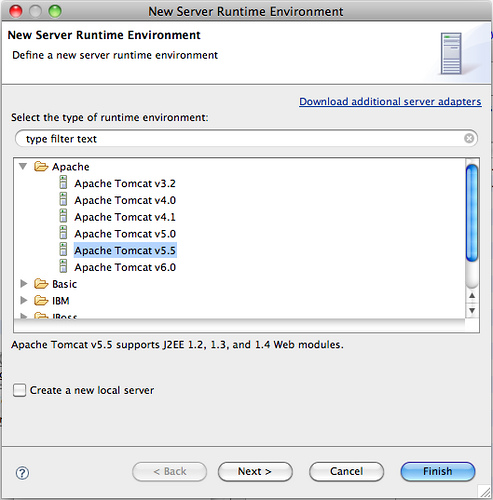
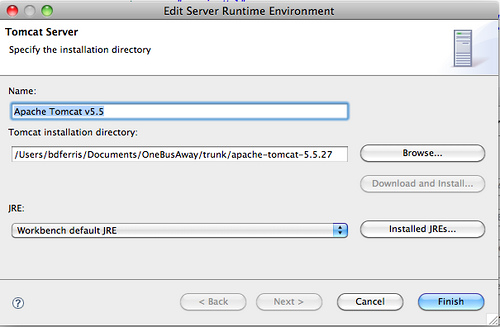
Once selected, you need to specify the path to your download of Tomcat:
We need to open the "Server" view so that we can add a new server instance. In Eclipse, select the following menu item chain "Window -> Show View -> Other... -> Server -> Servers". This should add a "Servers" tab window to your workbench. Right click in that "Servers" window, select "New -> Server". It should bring up the following dialog:
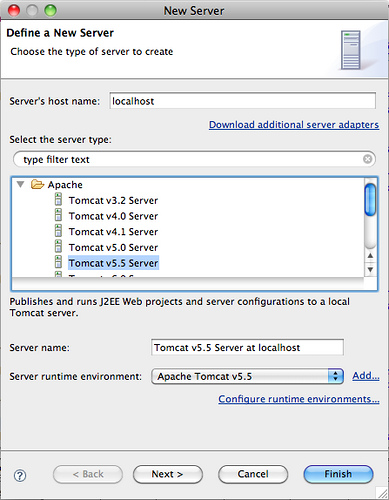
Keep the host name as "localhost", select the "Apache Tomcat v5.5 Server" Or whatever tomcat server version you created above, as the type, name the server whatever you like ("onebusaway" perhaps?), and make sure the Server runtime you installed is selected in the drop down list. Click "Finish" and there should now be a server entry with the name you specified in the "Servers" window.
By default, Eclipse will deploy your webapp to a folder in the following location:
<path to Eclipse workspace directory>/.metadata/.plugins/org.eclipse.wst.server.core/tmp0
Since that's a little unwieldy to work with, I like to change it to something more direct. To change the location, double click on the server entry with the name you specified that should now be listed in the "Servers" window.
In the Server Locations tab, change to "Use a custom location" and select a more reasonable path (I like <path to Eclipse workspace directory>/apache-tomcat-config/server_name myself). See as an example:
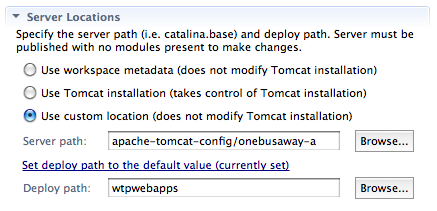
Note that to update this setting, the server must not have any projects assigned to it yet (as in the next section) and the server must be published (right click on the server entry and click "Publish").
We also recommend that you give Tomcat a large amount of time to startup, since loading the bundle can take a while. Increase the startup timeout in the Tomcat configuration page by expanding the "Timeouts" section, and change the start value to a larger number (e.g., 300 seconds).
We now want to add project modules to the server so the server can host their content. Right click on your newly created server entry and select "Add and Remove Projects..."
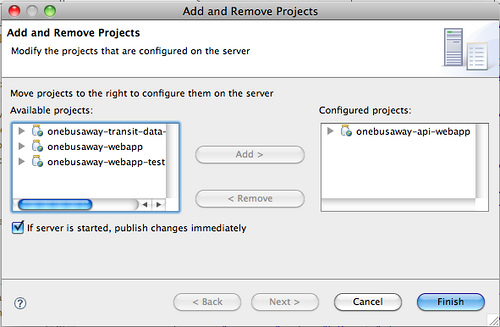
Add any or all of the OneBusAway webapp projects that you wish to work with.
Once you've added a few project modules to a server, it's ready to run. Right click on your server instance and you should see methods for starting and stopping the server instance, as well as running the instance in debugging mode.
When you run a server instance, an entry is actually created in the standard Eclipse Run Configurations, which controls the command line options, classpath, and other settings for running applications, unit tests, etc in Eclipse. You can specify additional command line options there to, for example, increase the amount of heap memory available to the server or define other system properties.
When the server is started, it will begin spitting out messages to the console about its startup progress. When all has gone well, you'll typically get a message like:
Oct 10, 2009 8:06:21 AM org.apache.catalina.startup.Catalina start
INFO: Server startup in 4563 ms
However, go back and check for any exceptions that might have been thrown when attempting to load the project module into the container. Almost always, it will fail now because your application modules are not fully configured as you can see that in your error log console. So go back to the previous page and finish the configuration for you modules https://github.com/OneBusAway/onebusaway-application-modules/wiki/Developer-Guide#setting-up-a-tomcat-server-in-eclipse.
If all has gone well, you should now be able to see your project at:
http://localhost:8080/name-of-project-module-here
I've experienced strange situations where Tomcat would silently fail on startup. By enabling additional logging, it's sometimes possible to see what's going on. To enable additional logging, add the following lines:
log4j.rootLogger=info, R
log4j.appender.R=org.apache.log4j.ConsoleAppender
log4j.appender.R.layout=org.apache.log4j.PatternLayout
log4j.appender.R.layout.ConversionPattern=%-5p %-30.30c{1} %x - %m%n
to the following file in my Tomcat installation (this file is not existing in tomcat 7 - see "For tomcat 7" below)
$CATALINA_HOME/common/classes/log4j.properties (as indicated above this is Tomcat 5 dir structure).
For tomcat 7: $CATALINA_HOME/lib/log4j.properties (and/or use this instruction http://tomcat.apache.org/tomcat-7.0-doc/logging.html#Using_Log4j)
Note for log4j setup: I found it is hard to find so here are the packages you will need. To find "Extras": Read carefully! https://tomcat.apache.org/tomcat-7.0-doc/extras.html leads you to http://apachemirror.ovidiudan.com/tomcat/tomcat-7/v7.0.61/bin/extras/ you will get tomcat-juli and tomcat-juli-adapters
To find log4j.jar: http://archive.apache.org/dist/logging/log4j/extras/1.2.17/
Have problems? Check out our Troubleshooting page to see if we have a known solution.