To support the diverse python workflows and high levels of customization Research Computing users require, Anaconda is installed on the CURC system. Anaconda is an open-source python and R distribution that uses the conda package manager to easily install software and packages. The following tutorial describes how to:
- activate the CURC Anaconda distribution and our default environments
- how to create and activate your own custom Anaconda environments
- how to create a kernel to use your custom environment in RC JupyterHub
- how to use your custom envirnoment in RC JupyterHub
For future reference, the following documentation is available:
Follow these steps from a Research Computing terminal session (on a Summit scompile or compute node, or a Blanca compute node).
Your /home/$USER directory (also denoted with "~") is small -- only 2 GB. By default, conda downloads packages to your home directory when creating a new environment, and it will quickly become full. The steps here modify the conda configration file, called ~/.condarc, to change the default location of pkgs_dirs so that the packages are downloaed to your (much bigger) /projects directory. Additionally, we will specify the location of envs_dirs so that your custom environments are also installed in your /projects directory.
Open your ~/.condarc file in your favorite text editor (e.g., nano): (note: this file may not exist yet -- if not, just create a new file with this name)
[johndoe@shas0137]$ nano ~/.condarc
...and add the following lines (add the first two at a minimum:
pkgs_dirs:
  - /projects/$USER/.conda_pkgs
envs_dirs:
  - /projects/$USER/software/anaconda/envs
...then save and exit the file. You won't need to perform this step again -- it's permanent unless you change pkgs_dirs by editing ~/.condarc again.
Note that there are lots of other things you can customize using the ~/.condarc file.
[johndoe@shas0137 ~]$ source /curc/sw/anaconda/latest
(base) [johndoe@shas0137 ~]$ conda activate idp
The first command activates the "base" Anaconda python3 environment. You will know that you have properly activated the environment because you should see (base) in front of your prompt. E.g.:
(base) [johndoe@shas0137 ~]$
The second command (conda activate idp) activates the Intel python distribution (idp), which is optimized for many mathematics functions and will run more efficiently on the Intel architecture of Summit and Blanca. You will know that you have properly activated the environment because you should see (idp) in front of your prompt. E.g.:
(idp) [johndoe@shas0137 ~]$
(idp) [johndoe@shas0137 ~]$ conda list
(idp) [johndoe@shas0137 ~]$ conda deactivate
*Note: In the examples below the environment is created in /projects/$USER/software/anaconda/envs. This assumes that the software, anaconda, and envs directories already exist in /projects/$USER. Environments can be installed in any writable location the user chooses.
[johndoe@shas0137 ~]$ source /curc/sw/anaconda/default
Create a custom environment "from scratch": Here we create a new environment called tutorial1 that has a base python version of 3.6:
(base) [johndoe@shas0137 ~]$ conda create --name tutorial1 python==3.6
- _Note that you can also create a custom environment by cloning a preexisting environment. For example, you can clone the preexisting Intel Python3 distribution in the CURC Anaconda environment, creating a new environment called mycustomenv:
(base) [johndoe@shas0137 ~]$ conda create --clone idp --name myidp(we won't do this in the tutorial).
(base) [johndoe@shas0137 ~]$ conda env list
(base) [johndoe@shas0137 ~]$ conda activate tutorial1
(tutorial1) [johndoe@shas0137 ~]$ conda list
in this example we install ipykernel so that we can create a Jupyter kernel later. It will take a couple of minutes
(tutorial1) [johndoe@shas0137 ~]$ conda install ipykernel
(tutorial1) [johndoe@shas0137 ~]$ conda list | grep ipykernel
Jupyter notebooks are an excellent resource for interactive development and data analysis using Python, R, and other languages. Jupyter notebooks can contain live code, equations, visualizations, and explanatory text which provide an excellent enviornment to use, learn, and teach interactive data analysis.
CU Research Computing (CURC) operates a JupyterHub server that enables users to run Jupyter notebooks on Summit or Blanca for serial (single core) and shared-memory parallel (single node) workflows. The CURC JupyterHub runs atop of Anaconda. Additional documentation on the CURC Anaconda distribution is available and may be a good pre-requisite for the following documentation outlining use of the CURC JupyterHub.
CURC JupyterHub is available at https://jupyter.rc.colorado.edu. To log in use your RC credentials. If you do not have an RC account, please request an account before continuing.
To start a notebook server, select the Summit interactive (12hr) option in the Select job profile menu under Spawner Options and click Spawn. Available options are:
- Summit interactive (12hr) (a 12-hour, 1 core job on a Summit "shas" node)
- Summit Haswell (1 node, 12hr) (a 12-hour, 24 core job on a Summit "shas" node)
- Blanca (12hr) (A 12-hour, 1 core job on your default Blanca partition; only available to Blanca users)
- Blanca CSDMS (12hr) (A 12-hour, 1 core job on the Blanca CSDMS partition; only available to Blanca CSDMS users)
The server will take a few moments to start. When it does, you will be taken to the Jupyter home screen, which will show the contents of your CURC /home directory in the left menu bar. In the main work area on the right hand side you will see the “Launcher” and any other tabs you may have open from previous sessions.
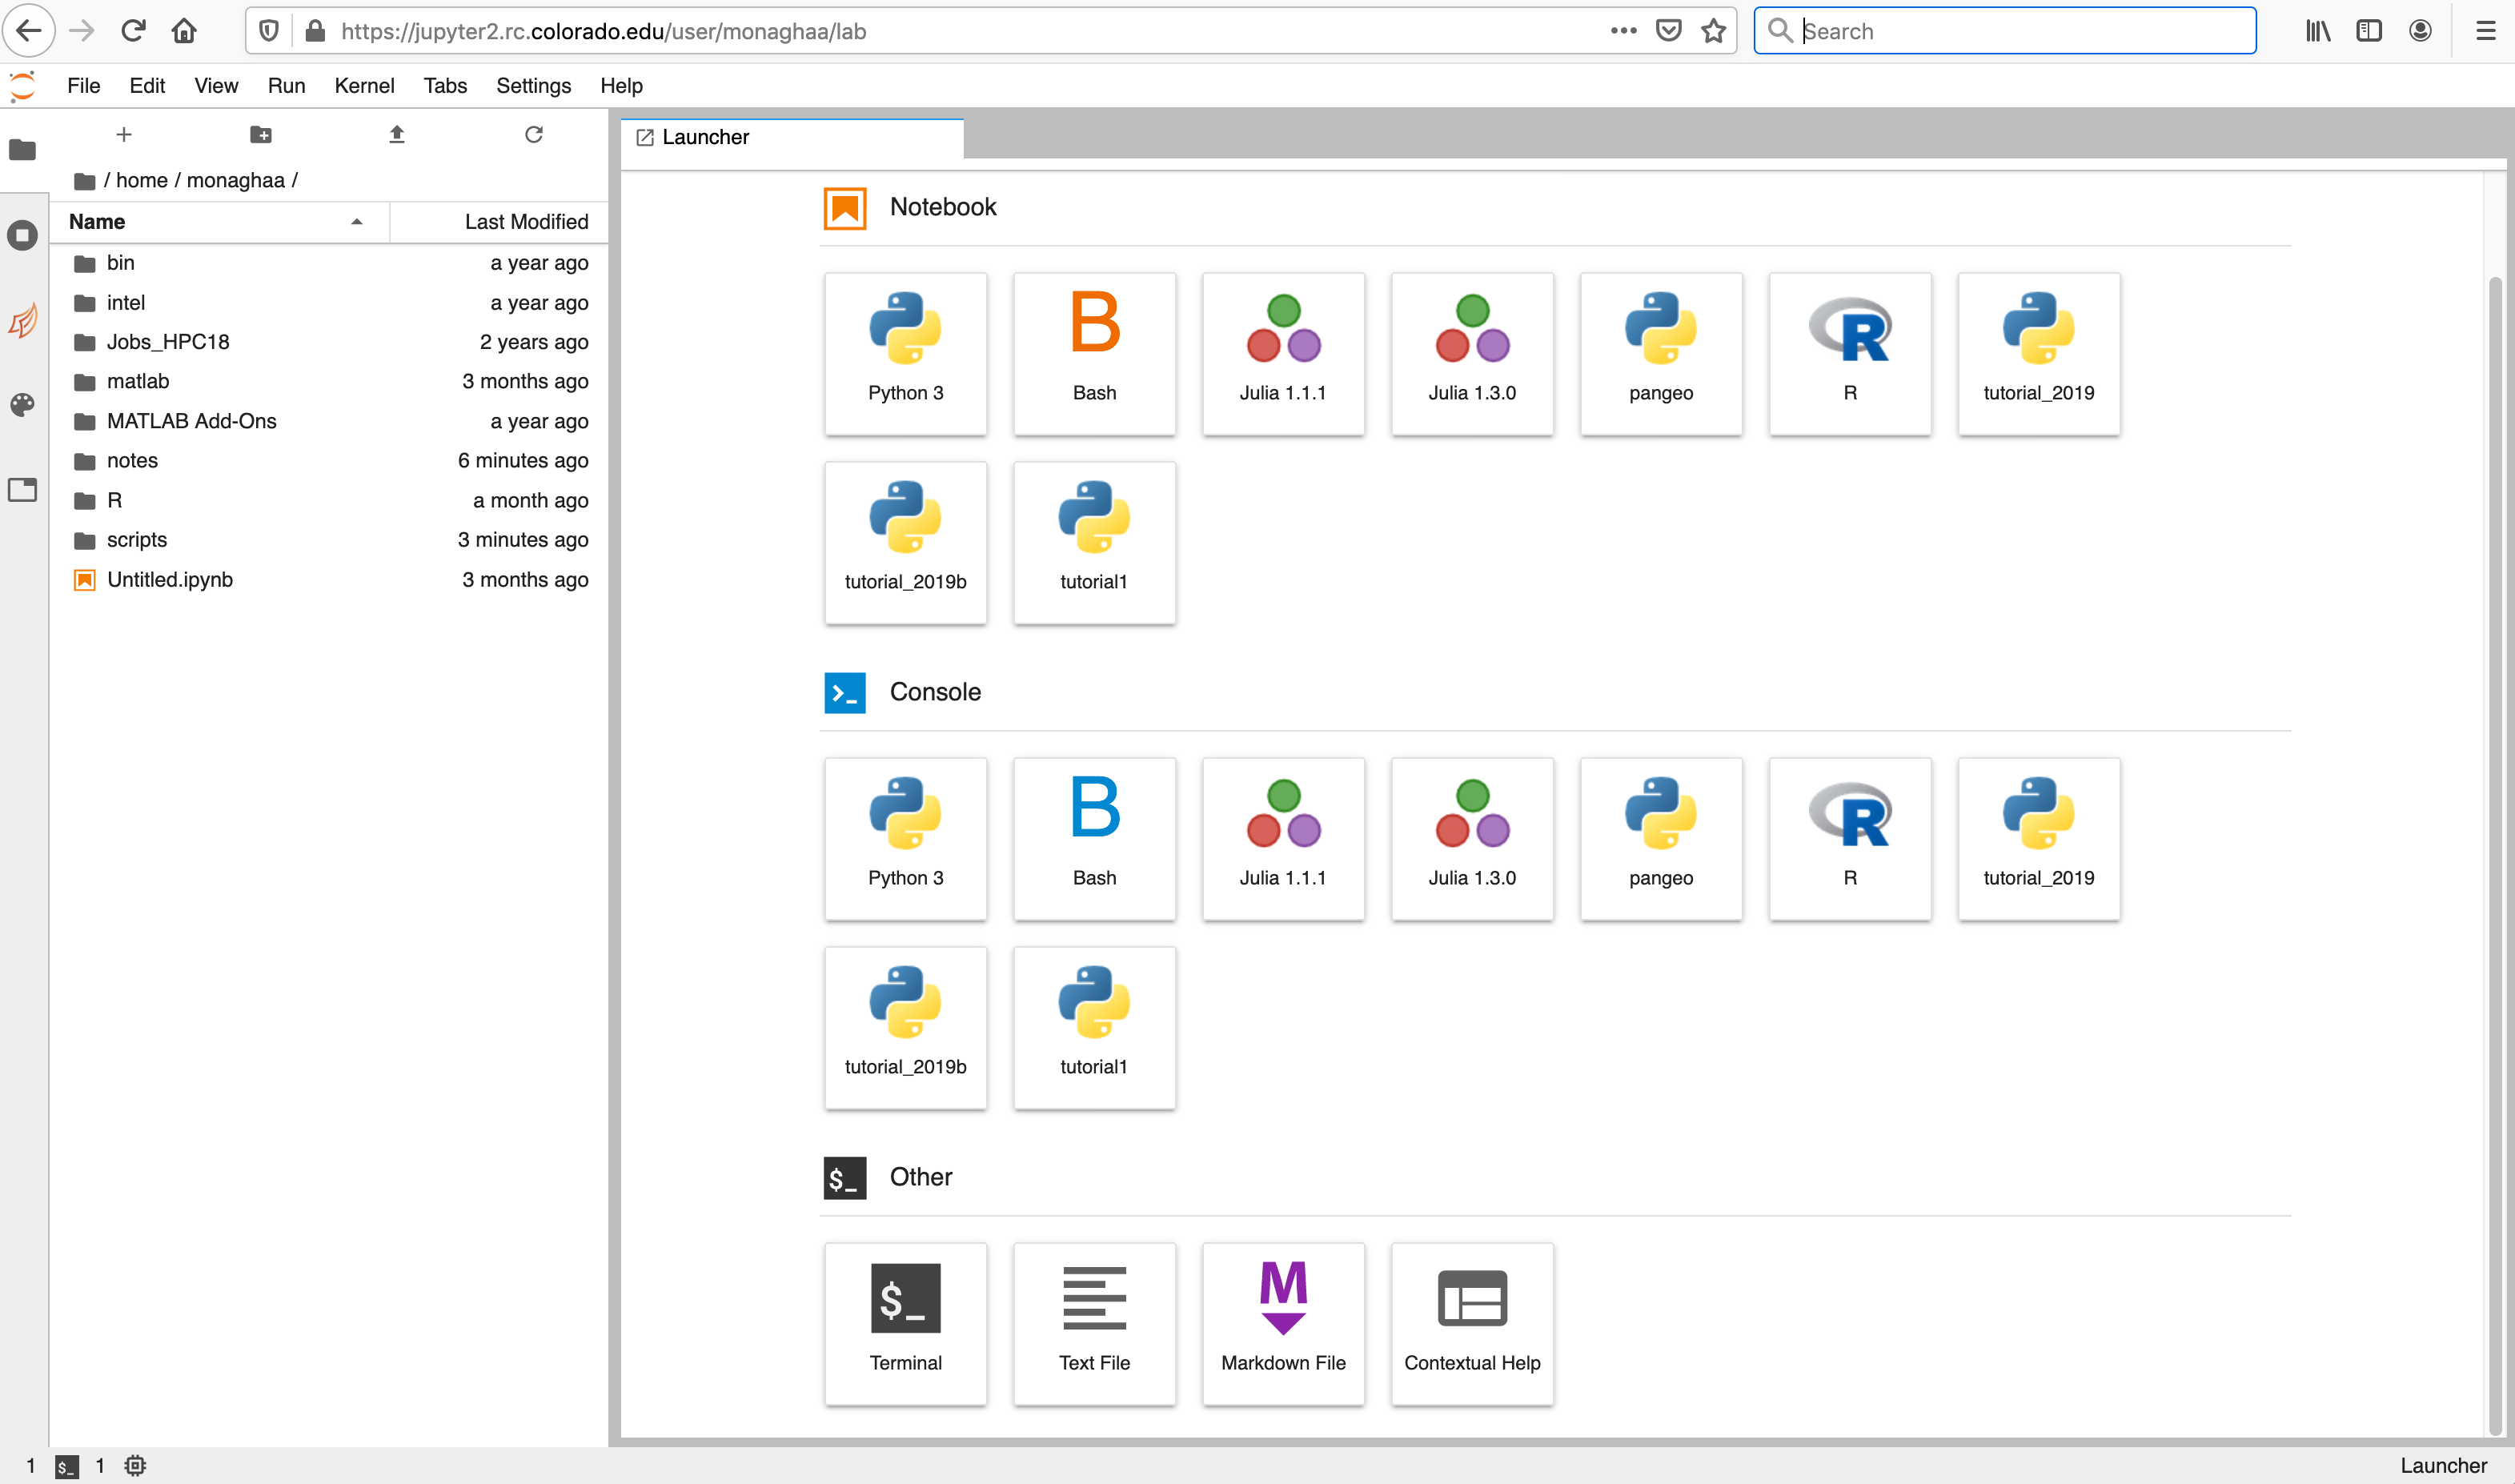
- Left sidebar: Click on a tab to change what you see in the left menu bar. Options include the file browser, a list of running kernels and terminals, a command palette, a notebook cell tools inspector, and a tabs list.
- Left menu bar:
- The file browser will be active when you log in.
- You can navigate to your other CURC directories by clicking the folder next to
/home/<username>. Your other CURC file systems are available too:/projects/<username>,/pl/active(for users with PetaLibrary allocations),/scratch/summit/<username>(Summit only), and/rc_scratch/<username>(Blanca only). - To open an existing notebook, just click on the notebook name in the file browser (e.g., mynotebook.ipynb).
- Above your working directory contents are buttons to add a new Launcher, create a new folder, upload files from your local computer, and refresh the working directory.
- You can navigate to your other CURC directories by clicking the folder next to
- The file browser will be active when you log in.
- Main Work Area: Your workspaces will be in this large area on the right hand side. Under the "Launcher" tab you can:
- Open a new notebook with any of the kernels listed:
- Python 3 (idp): Python3 notebook (Intel Python distribution)
- Bash: BASH notebook
- R: R notebook
- ...and any other custom kernels you add on your own (see the section below on creating your own custom kernels).
- Open a new console (command line) for any of the kernels.
- Open other functions; the "Terminal" function is particularly useful, as it enables you to access the command line on the Summit or Blanca node your Jupyterhub job is currently running on.
- Open a new notebook with any of the kernels listed:
- See Jupyter's documentation on the JupyterLab Interface for additional information.
There are two ways to open a notebook:
- To open a new notebook: In the launcher click on the icon for the programming language or environment for you wish to use in the notebook (e.g., python, R, bash). Once you are in the notebook, you can save it to myfilename.ipynb using the File -> Save as.. option.
- To open an existing notebook: In the file browser click on the myfilename.ipynb notebook that you want to work in. This will open the notebook in the appropriate kernel (assuming that kernel is available on CURC Jupyterhub).
Tip: The Python 3 notebook environment has many preinstalled packages. To query a list of available packages from a python notebook, you can use the following nomenclature:
from pip._internal import main as pipmain
pipmain(['freeze'])
If the packages you need are not available, you can create your own custom environment and Jupyter kernel.
Go to the "File" menu at the top and choose "Hub Control Panel". Use the Stop My Server button in the Control Panel to shut down the Jupyter notebook server when finished (this cancels the job you are running on Summit or Blanca). You also have the option to restart a server if desired (for example, if you want to change from a "Summit Interactive" to a "Summit Haswell" server).
Alternately, you can use the Quit button from the Jupyter home page to shut down the Jupyter notebook server.
Using the Logout button will log you out of CURC JupyterHub. It will not shut down your notebook server if one happens to be running.
TThe CURC JupyterHub runs on top of the CURC Anaconda distribution. Anaconda is an open-source python and R distribution that uses the conda package manager to easily install software and packages. Software and associated Jupyter kernels other than python and R can also be installed using conda. The following steps describe how to create your own custom Jupyter kernels for use on RC JupyterHub. The kernel is simply a file that provides a linkage between JupyterHub and a given conda environment. We will create a Jupyter kernel for the tutorial1 enviornment you created earlier.
Follow these steps from a terminal session. You can get a new terminal session directly from Jupyter using New-> Terminal.
[johndoe@shas0137 ~]$ source /curc/sw/anaconda/default
(base) [johndoe@shas0137 ~] $conda activate tutorial1
(tutorial1) [johndoe@shas0137 ~]$ python -m ipykernel install --user --name tutorial1 --display-name tutorial1
This command will create a kernel with the name tutorial1 and the Jupyter display name tutorial1 (note that the name and display-name are not required to match the environment name -- call them anything you want). By specifying the --user flag, the kernel will be in /home/$USER/.local/share/jupyter/kernels (a directory that is in the default JUPYTER_PATH) and will ensure your new kernel is available to you the next time you use CURC JupyterHub.
-
Anaconda
- CURC also hosts several python modules for those users who prefer modules over Anaconda. Type
module spider pythonfor a list of available python versions. Each module employs the Intel python distribution and has numerous pre-installed packages which can be queried by typingpip freeze.
- CURC also hosts several python modules for those users who prefer modules over Anaconda. Type
-
Creating conda environments
- You can create an environment in any directory location you prefer (as long as you have access to that directory). We recommend using your
/projectsdirectory because it is much larger than your/homedirectory). - Although we don't show it here, it is expected that you will be installing whatever software and packages you need in this environment, as you normally would with conda).
- We [strongly recommend] using the Intel Python distribution (idp) if you will be doing any computationally-intensive work, or work that requires parallelization. The Intel Python distribution will run more efficiently on our Intel architecture than other python distributions.
- You can create an environment in any directory location you prefer (as long as you have access to that directory). We recommend using your
-
JupyterHub kernels
- If you have already installed your own version of Anaconda or Miniconda, it is possible to create Jupyter kernels for your preexisting environments by following the steps above from within the active environment.
- If you need to use custom kernels that are in a location other than
/home/$USER/.local/share/jupyter(for example, if your research team has a group installation of Anaconda environments located in/pl/active/<some_env>), you can create a file in your home directory named~/.jupyterrccontaining the following line:
export JUPYTER_PATH=/pl/active/<some_env>/share/jupyter- If you need assistance creating or installing environments or Jupyter kernels, contact us at rc-help@colorado.edu.
- If you are having trouble loading a package, you can use
conda listorpip freezeto list the available packages and their version numbers in your current conda environment. Useconda install <packagname>to add a new package orconda install <packagename==version>for a specific verison; e.g.,conda install numpy==1.16.2. - Sometimes conda environments can "break" if two packages in the environment require different versions of the same shared library. In these cases you try a couple of things.
- Reinstall the packages all within the same install command (e.g.,
conda install <package1> <package2>). This forces conda to attempt to resolve shared library conflicts. - Create a new environment and reinstall the packages you need (preferably installing all with the same
conda installcommand, rather than one-at-a-time, in order to resolve the conflicts).- Troubleshooting: Jupyter notebook servers spawned on RC compute resources log to
~/.jupyterhub-spawner.log. Watching the contents of this file provides useful information regarding any problems encountered during notebook startup or execution.
- Troubleshooting: Jupyter notebook servers spawned on RC compute resources log to