| name | category | bzurl | oldwikiname | prodimagename | surveyurl | sku |
|---|---|---|---|---|---|---|
USB-CAN Analyzer |
114991193 |

The USB-CAN Analyzer is a cost-effective high quality and easy to use USB to CAN adapter. Compared with the 50$ or more expensive CAN Bus Analyzer, CAN Bus Tester, or CAN Bus Sniffer, the USB-CAN Analyzer only needs half the price, but it is even more convenient and easy to use. You can just communicate your CAN Bus device with your computer via the USB cable, then this tiny case will work as your can bus analyzer tool, can bus diagnostic tools, or can bus scanner.

- Optimized the conversion protocol, improved conversion efficiency.
- Saving the customized settings automatically.
- Hex number converts to Decimal number visualized in the software. Decimal number show both value with symbol and without symbol, don’t need to use calculator.
- Customized receiving ID, easy to debug.
- Visualized CAN bus status. Convenient for analyze CAN Bus problem.
- Can be saved as Excel or TXT file.
- Receiving data can be refreshed and checked in order.
- Integrated TVS Surge Protection
- Including 120 ohm matched resistance.

You can see an onboard green jumper cap as the following figure shown. When you add this jumper on, a 120Ω terminating resistor will be added to the circuit. Conversely, when you remove the jumper cap, the resistor will not be added into the circuit. Normally, you need to keep this jumper cap because the CAN device under test and the CAN analyzer are at the ends of the CAN network. If you want to know more, please check 120-ohm terminating resistor page from NI.
-
Support CAN2.0A(Standard) and CAN2.0B(Expansion)
-
CAN baud rate(5K~1M), customized CAN baud rate.
-
CAN send and receive data with time tag,can show the receiving data in order,can refresh data easily.
-
Data can be sent by single frame, multiple frames, manually, regularly, you can even set a certain time to send.
-
Response to data received from a certain ID.
-
Can check CAN Bus status manually.
-
Can set to receive from the wanting ID directly, without setting filtering ID or shield ID.
4 working mode
-
Standard Mode: CAN communication
-
Loop Mode: Self-testing, in this mode, the analyzer will send and receive data itself, and also send data to CAN Bus.
-
Quiet Mode: Only use to monitor CAN Bus without influence.
-
Loop Quiet Mode: Warm testing
-
Data can be saved as TXT or Excel. Baud rate of virtual COM port can also be modified, default baud rate over 1M, so don’t need to worry about conversion efficiency.
-
All customized settings saved automatically.
-
Easy secondary development,only need to handle 1 command.
-
Transparent Transition function
-
Software supports English
| Raspberry pi | USB-CAN Analyzer | Arduino Board | CAN-BUS Shield V2 |
|---|---|---|---|
 |
 |
 |
 |
| Get ONE Now | Get ONE Now | Get ONE Now | Get ONE Now |
Also we need to two male to male jumper and power cables to power those boards.
-
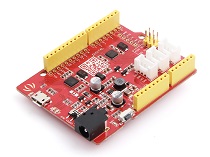
Step 1. Plug the CAN BUS Shield V2 into the Seeeduino(or Arduino) Board
-
Step 2. Use the jumpers to connect the CAN terminal of both shield.
| USB-CAN Analyzer | CAN-BUS Shield V2 |
|---|---|
| CAN_0_L | CANL |
| CAN_0_H | CANH |
!!!Tip You can find the silkscreen at the back of the shield.
- Step 3. Power the USB-CAN Analyzer and Seeeduino from computer.

1.For Linux
Get the CH341SER driver code. and install all linux kernel drivers
git clone https://github.com/SeeedDocument/USB-CAN-Analyzer.git
cd ~/USB-CAN-Analyzer/res/Driver
unzip CH341SER_LINUX.ZIP
cd /CH341SER_LINUX
make load
!!!Tip It is not required for Raspberry to install this driver . Because OS of Raspberry has installed this driver
2.For Windows
You should click the link to get driver and double-click to install it
For Arduino CAN BUS Shield, we provide the Arduino Code, if you don't know how to use Arduino, please check here.
Arduino Code for CAN BUS Shield:
// demo: CAN-BUS Shield, send data
// loovee@seeed.cc

#include <mcp_can.h>
#include <SPI.h>

// the cs pin of the version after v1.1 is default to D9
// v0.9b and v1.0 is default D10
const int SPI_CS_PIN = 9;

MCP_CAN CAN(SPI_CS_PIN);                                    // Set CS pin

void setup()
{
    Serial.begin(115200);

    while (CAN_OK != CAN.begin(CAN_500KBPS))              // init can bus : baudrate = 500k
    {
        Serial.println("CAN BUS Shield init fail");
        Serial.println(" Init CAN BUS Shield again");
        delay(100);
    }
    Serial.println("CAN BUS Shield init ok!");
}

unsigned char stmp[8] = {0, 0, 0, 0, 0, 0, 0, 0};
void loop()
{
    //send data:  id = 0x00, standrad frame, data len = 8, stmp: data buf
    stmp[7] = stmp[7]+1;
    if(stmp[7] == 100)
    {
        stmp[7] = 0;
        stmp[6] = stmp[6] + 1;

        if(stmp[6] == 100)
        {
            stmp[6] = 0;
            stmp[5] = stmp[6] + 1;
        }
    }

    CAN.sendMsgBuf(0x00, 0, 8, stmp);
    delay(100);                       // send data per 100ms
}
// END FILE
For USB-CAN Analyzer , we provide two way that include windows and linux .
1.For Linux
cd ~
git clone https://github.com/kobolt/usb-can
cd ~/usb-can
gcc -o canusb canusb.c
./canusb -d /dev/ttyUSB0 -s 500000 -b 9600
we assume that you only inset one USB to TTL on your raspberry.
2.For Windows
You should click the link to get software.
- [PDF] Software on Windows
Please submit any technical issue into our forum or drop mail to techsupport@seeed.cc
