![]() The best JSON to HTML resume generator.
The best JSON to HTML resume generator.
- You can keep all your resume information separate from it's layout in a JSON file.
- Once you give JResume your resume JSON file and the desired theme, it will output an HTML resume for you.
- Dont like the layout of your resume? You can simply choose a different theme. This has advantages over using Word because:
- If you wanted to completely change the look of your resume in Word, you may need to redo your resume from scratch because the content is intertwined with the presentation
- JResume allows you to keep the content of your resume separate from its presentation.
- You can easily upload your resume to your website because it's really just another webpage (although you will need to upload the generated
resourcesfolder in addition to the HTML file).
- You can simply use your browser's print-to-pdf feature to save the resume as a PDF file.
- A web frontend is being developed at jresume-web :)
- Can run as a server.
- You can send your JSON resume as a POST request to /webresume and get a full zip containing the HTML file and its resources.
- You can currently test it out by going to jresume-web. This is a frontend that sends the generated JSON to an instance of JResume running in server mode.
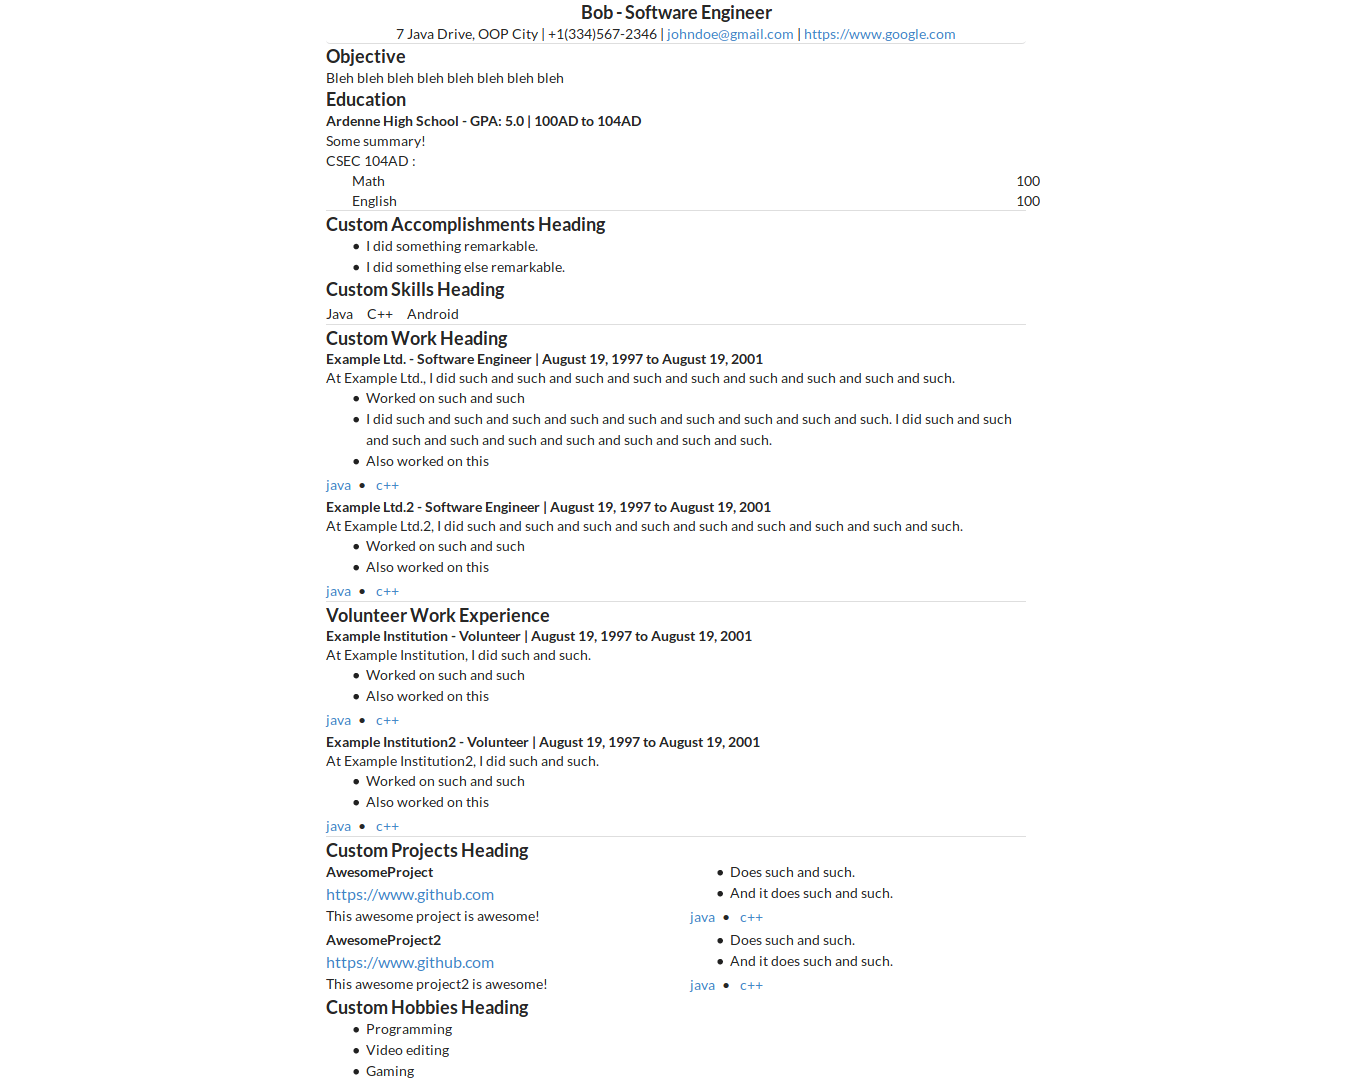
{
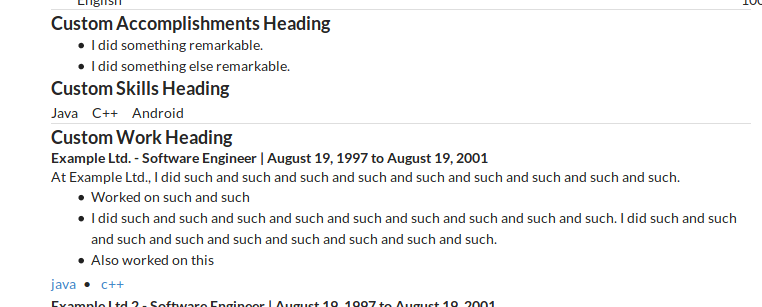
"skillsHeading": "Custom Skills Heading",
"jobWorkHeading": "Custom Wowellrk Heading",
"accomplishmentsHeading": "Custom Accomplishments Heading",
"projectsHeading": "Custom Projects Heading",
"hobbiesHeading": "Custom Hobbies Heading",
"person": {
"name": "Bob",
"email": "johndoe@gmail.com",
"address": "7 Java Drive, OOP City",
"phoneNumber": "+1(334)567-2346",
"jobTitle": "Software Engineer",
"website": "https://www.google.com",
"objective": "Bleh bleh bleh bleh bleh bleh bleh bleh"
},
"skills": [
"Java",
"C++",
"Android"
],
"accomplishments": [
"I did something remarkable.",
"I did something else remarkable."
],
"jobWork": [
{
"company": "Example Ltd.",
"position": "Software Engineer",
"summary": "At Example Ltd., I did such and such and such and such and such and such and such and such and such.",
"startDate": "August 19, 1997",
"endDate": "August 19, 2001",
"highlights": [
"Worked on such and such",
"I did such and such and such and such and such and such and such and such and such. I did such and such and such and such and such and such and such and such and such.",
"Also worked on this"
],
"keywords": [
"java",
"c++"
]
},
{
"company": "Example Ltd.2",
"position": "Software Engineer",
"summary": "At Example Ltd.2, I did such and such and such and such and such and such and such and such and such.",
"startDate": "August 19, 1997",
"endDate": "August 19, 2001",
"highlights": [
"Worked on such and such",
"Also worked on this"
],
"keywords": [
"java",
"c++"
]
}
],
"volunteerWork": [
{
"company": "Example Institution",
"position": "Volunteer",
"summary": "At Example Institution, I did such and such.",
"startDate": "August 19, 1997",
"endDate": "August 19, 2001",
"highlights": [
"Worked on such and such",
"Also worked on this"
],
"keywords": [
"java",
"c++"
]
},
{
"company": "Example Institution2",
"position": "Volunteer",
"summary": "At Example Institution2, I did such and such.",
"startDate": "August 19, 1997",
"endDate": "August 19, 2001",
"highlights": [
"Worked on such and such",
"Also worked on this"
],
"keywords": [
"java",
"c++"
]
}
],
"projects": [
{
"name": "AwesomeProject",
"description": "This awesome project is awesome!",
"highlights": [
"Does such and such.",
"And it does such and such."
],
"keywords": [
"java",
"c++"
],
"url": "https://www.github.com"
},
{
"name": "AwesomeProject2",
"description": "This awesome project2 is awesome!",
"highlights": [
"Does such and such.",
"And it does such and such."
],
"keywords": [
"java",
"c++"
],
"url": "https://www.github.com"
}
],
"education": {
"schools": [
{
"name": "Ardenne High School",
"startDate": "100AD",
"endDate": "104AD",
"summary": "Some summary!",
"gpa": "5.0"
}
],
"examinations": [
{
"name": "CSEC",
"startDate": "104AD",
"subjects": [
{
"name": "Math",
"result": "100"
},
{
"name": "English",
"result": "100"
}
]
}
]
},
"hobbies": [
"Programming",
"Video editing",
"Gaming"
]
}
java -jar jresume.jar --input whatever --server-mode --server-port optional_server_port
The server will listen to port 8080 by default
Then send send a POST request to localhost:8080/webresume. That will return the html file for your resume. Then send a GET request to localhost:8080/resources to get a zip file containing the css/js/etc used to make the resume look pretty.
In the same folder where you downloaded the html file, create a directory called "resources" and extract the contents of the resources zip file to the new resources folder. Then simply open up your web resume html file in your browser.
To make jresume use ssl, you need to set the jresume_keystore_location and jresume_keystore_password environment variables.
To create a keystore from an existing letsencrypt certificate, run the following:
openssl pkcs12 -export -out keystore.p12 -inkey privkey.pem -in fullchain.pem
keytool -importkeystore -destkeystore MyDSKeyStore.jks -srcstoretype PKCS12 -srckeystore keystore.p12
Set the jresume_keystore_location and jresume_keystore_password variables to the location and password of the new keystore respectively.
Then finally to load JResume in SSL mode, pass --server-mode --ssl-mode to the jarfile.
- Chrome Headless for creating PDF from HTML (available on Chrome 59 on Linux and Unix, Chrome 60 on Windows)
- Inliner; used to embed Javascript and CSS resources into singular HTML output (requires npm to install; https://www.npmjs.com/package/inliner)
java -jar jresume.jar --input example.json --output output
You can either compile it using Intellij IDEA or Maven.
- Clone the repository.
cdinto the repository.- Install
maven. - Run
mvn package. - You can then utilize the jarfiles in the
targetsubdirectory.
You can customize the various headings by adding the following to your resume JSON file:
- skillsHeading
- jobWorkHeading
- volunteerWorkHeading
- projectHeading
- educationHeading
- accomplishmentsHeading
- hobbiesHeading
Example:
{
  "skillsHeading": "Custom Skills Heading",
  "jobWorkHeading": "Custom Work Heading",
  "accomplishmentsHeading": "Custom Accomplishments Heading",
  "projectsHeading": "Custom Projects Heading",
  "hobbiesHeading": "Custom Hobbies Heading",
  "person": {
    "name": "Bob",
    "email": "johndoe@gmail.com",
    "address": "7 Java Drive, OOP City",
    "phoneNumber": "+1(334)567-2346",
    "jobTitle": "Software Engineer",
    "website": "https://www.google.com",
    "objective": "Bleh bleh bleh bleh bleh bleh bleh bleh"
  },
  ...
Output:
Requires inliner from npm. Install it via sudo npm -g inliner
If inliner is available, jresume will automatically create an HTML file that has all the CSS and JS dependencies inlined into a single file.
You can just open the webresume HTML file in your browser, press Ctrl+p and then follow your browser's instructions. I personally prefer Chrome's PDF creation capabilities.
You need to have at least Chrome 59 on Linux/Mac or Chrome 60 on Windows and able to be executed via google-chrome. You may need to create a symbolic link. You will also need to globally install the chrome-headless-render-pdf npm package
- Find out where chrome is currently installed by running
whereis <name_of_chrome_executable_on_system>. In my case, the name of the executable wasgoogle-chrome-stableit was located at/usr/bin/google-chrome-stable - Create a symlink to Chrome using
sudo ln -s /usr/bin/google-chrome-stable /usr/bin/google-chrome
Just execute sudo npm install -g chrome-headless-render-pdf
On execution, a Chrome Headless command is executed using the html file output and releases a pdf output in the "output" directory.
- Create a new file in the
themesfolder and give it a name of <new_theme_name.html> - Examine the contents of
themes/default.htmlto see how themes work - Put any resources you may want to use in the resources/resources.zip .
- Link your resources properly by using
config.resourceDirectory. For example, the following links to a file that is in the root directory ofresources/resources.zip:
<link type="text/css" rel="stylesheet" href="${config.resourceDirectory}/fonts.css">
=D