Unity exporter tutorial
This tutorial illustrates how to export a simple scene from Unity3D to J3D. The scene is composed of geometries, materials, textures, light sources and a camera. J3D currently supports a limited amount of materials and directional light only.
To complete this tutorial you'll need these 2 packages:
- The package containing a sample scene that will be exported to J3D/WebGL
- The package containing the Unity Exporter scripts
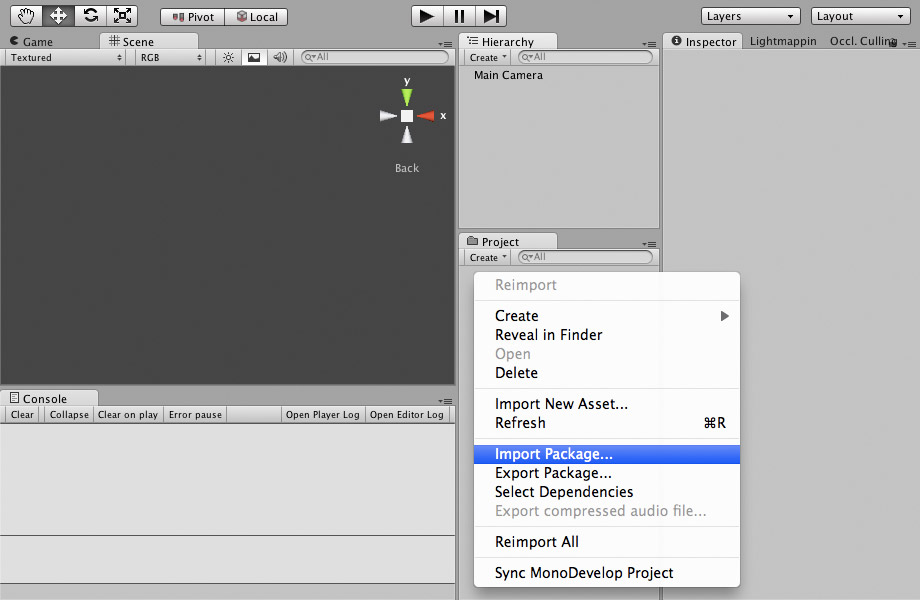
Download both files to your hard-drive, open Unity3D and create a new project. Next, right-click in the Project panel and choose "Import Package..."
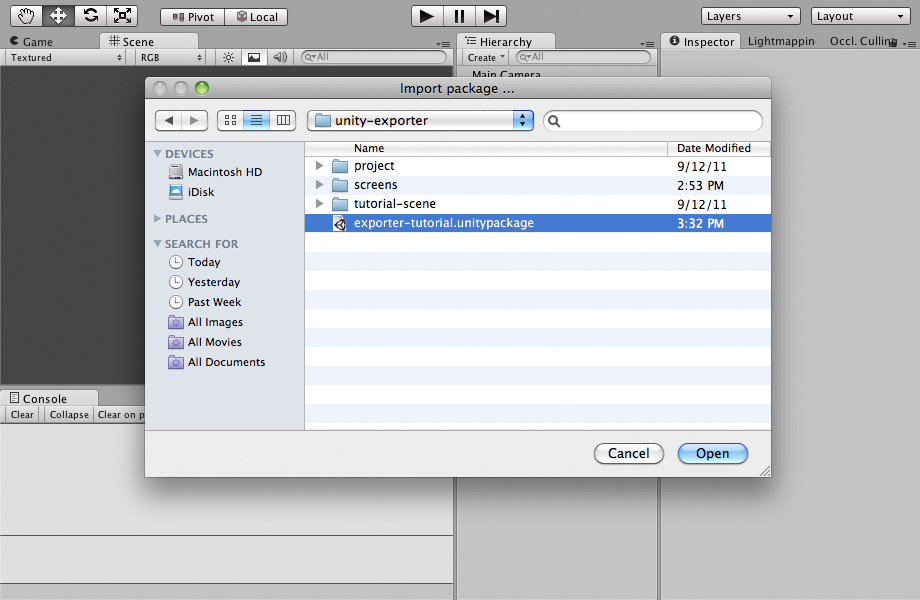
Locate the tutorial UnityPackage file and choose it.
The project contains a few assets - meshes, materials and textures, as well as a scene called tutorial-scene. Open that scene and you should see something like this:
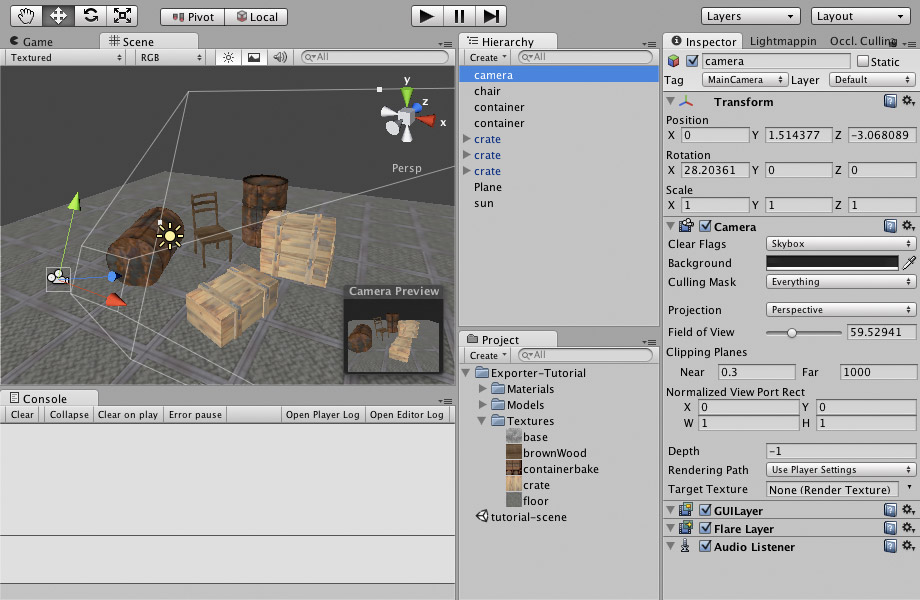
The scene features a few objects on a floor as well as a camera and one light source. J3D supports only directional lights so far, so this is the type of light used here. Please also note that multiple objects with the same name are not supported in J3D, so all objects have distinct names like container1 and container2 (this limitation is likely to be removed in the future).
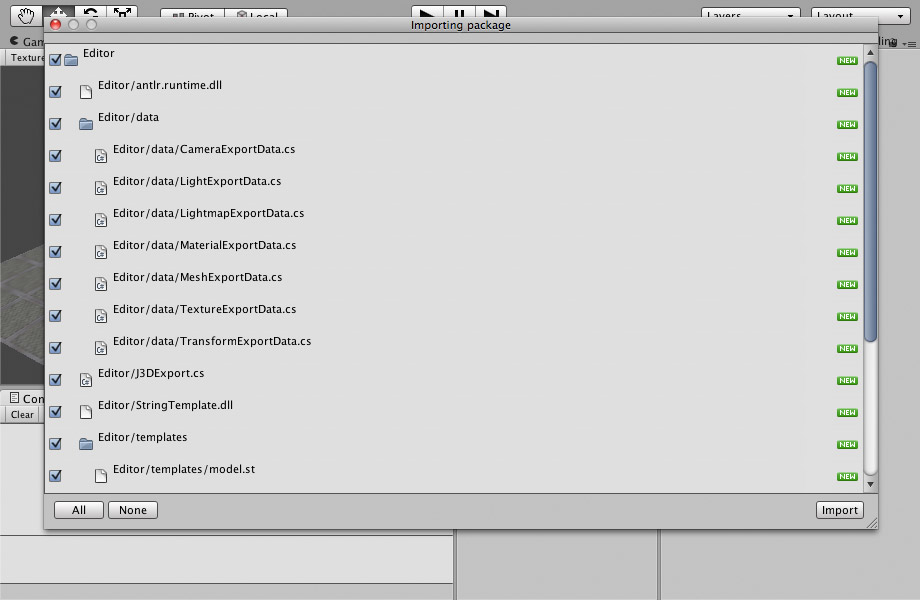
Right-click the Project panel again and choose "Import Package..." again. This time choose the UnityPackage that has the J3D exporter scripts in it. Unity always show you what files are in a package. In this case that's what you should see:

As soon as you import the package, a new folder called "Editor" will appear in the project panel and a new top menu item called J3D. It typically comes between Terrain and Window menus. Select all the objects on the scene using Crtl/Cmd+A in the Hierarchy panel or in the Scene view and from the J3D menu choose "Export".
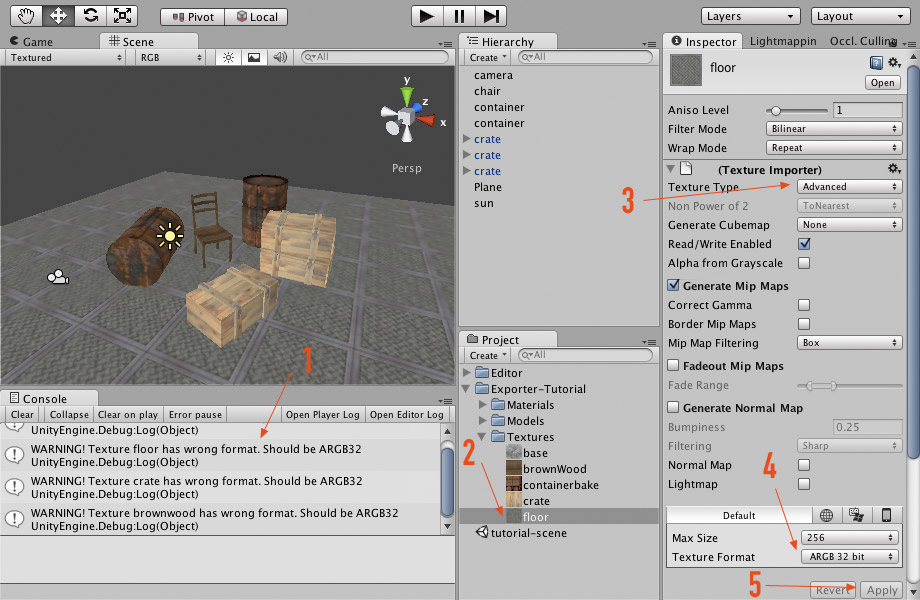
When you try to export the scene for the first time, you can get warnings similar to ones on the screen above (1). Unity has a built in PNG encode function, but it only accepts textures in a specific format. Until I managed to automate this process, you'll need to set ALL the textures that are being exported (2) to the format expected by the PNG encoder: the texture type should be "Advanced" (3), texture must be marked as readable and texture format must be "ARGB32" (4). After you set those values click apply (5). Do this for all the textures in the folder and then export the scene again - you shouldn't get any warnings anymore.
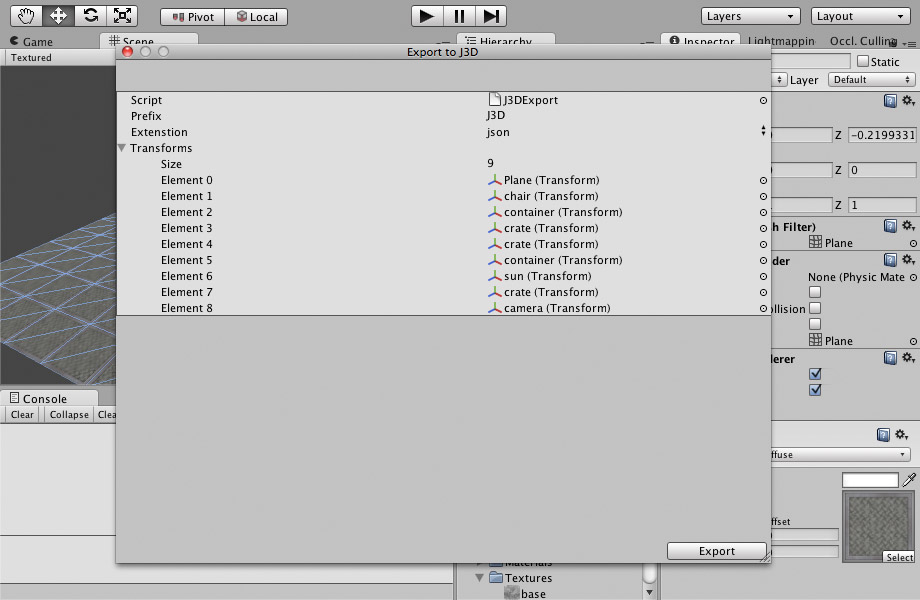
A panel giving you a few options will appear. You do not need to modify anything, just hit "Export" at the bottom. Choose a name for your file (I named it just tutorial.json) and save it in a folder of your choice.
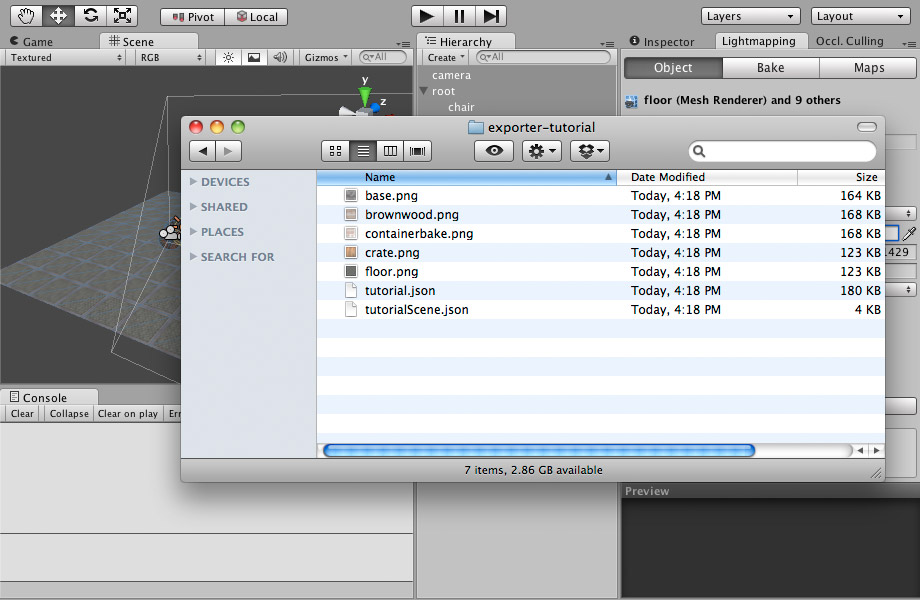
This are the files that the exporter script should save in your directory. Basically these are textures files in PNG format and two json files.
In the same folder as the exported files create an HTML document that looks like that:
<html>

<head>
<meta http-equiv="content-type" content="text/html; charset=ISO-8859-1">
<script type="text/javascript" src="https://raw.github.com/drojdjou/J3D/master/build/j3d.js"></script>
<script>
	var mx = 0, my = 0;
	var root, chair;

	window.onload = function() {
		engine = new J3D.Engine();

		J3D.Loader.loadJSON("tutorial.json", function(jsmeshes) {
			J3D.Loader.loadJSON("tutorialScene.json", function(jsscene) {
				J3D.Loader.parseJSONScene(jsscene, jsmeshes, engine);
				root = engine.scene.find("root");
				chair = engine.scene.find("root/chair");
				draw();
			})
		});
	}

	function draw() {
		root.rotation.y += 0.005;
		chair.rotation.y -= 0.01;
		engine.render();
		requestAnimationFrame(draw);
	}

</script>

</head>
<body></body>
</html>
Of course you can set the path to j3d.js to a local copy if you have it around. Now you can run this file in your web browser, but remember to run it through a web server since the code makes HTTP requests and those work only with http:// protocol, not when file:/// is used.
What this code does is to load the tutorial.json using the J3D.Loader.loadJSON method. This file contains all the geometry data for all the objects in the scene.
Once that file is loaded, the code loads another file called tutorialScene.json. This file was created by the exporter as well - it holds the information about the scene, including paths to textures, materials, geometries and all the position, rotation and scale information for each object in the scene.
When both files are loaded we can create the scene in J3D. It's very easy - just call the J3D.Loader.parseJSONScene method passing the geometry JSON and the scene JSON files as arguments. The third argument is the instance of the engine created just at the beginning.
Next, using engine.scene.find you can get hold of individual objects in the scene. To find it pass the name of the object. Remember that the Unity exporter converts all the names to lower case and replaces spaces with the underscore character. Getting references to the object in your scene is useful, for example if you want to animate those objects.
Finally, the draw function is called, which uses requestAnimationFrame to call itself repeatedly. All you need to do at each frame is to call engine.render(). This is also a good place to animate any objects - like the chair and the root transform of the scene above.
If everything went ok, you should see the scene like this:
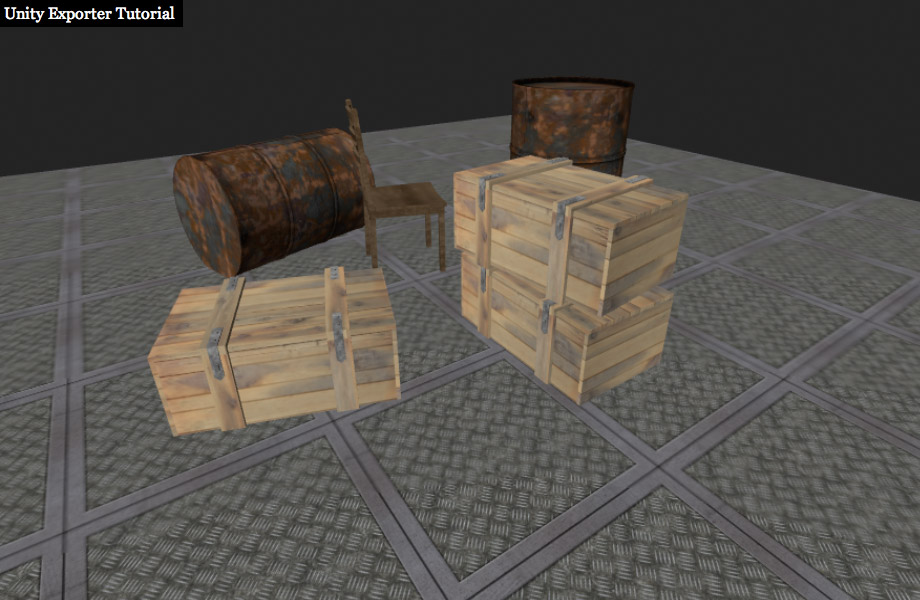
You can also see the example live here. In case of problems, all the exported files are also in the repository.
That's all for now! If you have any questions open an issue above or send me an email to bartek / at / everyday3d / com.
Thanks!