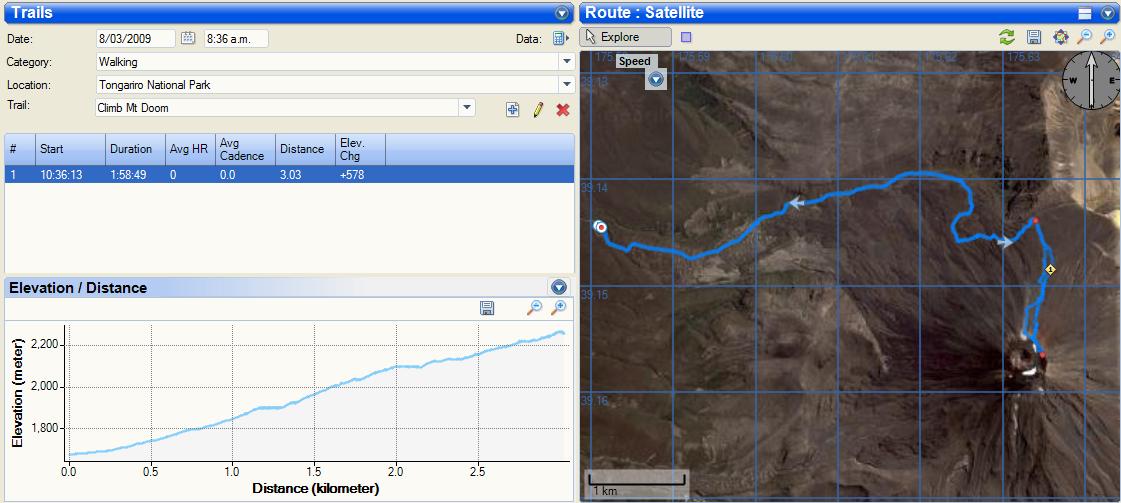
Tutorials
- Create Trail
- Edit Trail
- Examples
You can create a trail from the splits in the current activity (edit the Reference Activity) or by selecting points on the route view.
- Select one or more activities in Daily Activity or Reports view. Ctrl-click or Day/Week/Month in Daily Activity, summary line in Reports view.
- Select trail in the drop down list: Splits (for all Laps) or Reference Activity (Active laps only)
- If you have selected more than one activity, you may need to set the reference result for the activity: Right click result list to set reference activity.
- Select Edit button (the pen).
- Edit the Trail name and radius as seen below.
- Optionally adjust the position of trail points by selecting a point in the list, then dragging the points on the map.
-
Select a single activity (in Daily Activity or Reports view).
-
Ensure that the trails currently has selected points.

- In Route Explore mode, click the GPS point that marks the beginning of the trail. A "small" selection will select one point, a longer will select both the beginning and the end as points. It is possible to multi select on the route too Multi Select or Ctrl-click in the graph. (In ST2 you can select subsequent GPS points on the route by holding down Ctrl, see here.)

-
Press the Add button.

-
Press No in the popup to add a new trail (Yes to create a copy if the trail is generated, add to current if the trail is user defined).
-
Give the trail a name, and specify a radius to be used for each point of the trail. Optionally unselect Required option (see Partial Trails) and set a name for points.

-
Press Add
, position the point on the map with drag&drop -
You have now added a trail. To add more points after creation, see Edit Trail.
Note: When editing a trail, the trail matching is more forgiving and for instance shows matches also if they are not in order, to support editing the trail.
Similar to Select on Map.
- Select a single activity (in Daily Activity or Reports view).
- Select the trail to edit.
- Select a point on the map (more than one can be selected, see Select on Map).
- Press Add button .
- Press Yes to add to current trail.
- By default, the point is added after the current point in the trail. Use Arrow buttons to move the point to correct position.
- Use refresh to check the trail points for the current activity. Note that the position calculation also displays points out-of-order compared to normal trail calculations, so what matches in Edit trail may not match normal trails.
- (Optionally) Add a new trail point.
- Double click any of the fields: Latitude, Longitude, Name, Distance or Time.
- Update values. Distance and Time is related to the activity. When done press Tab to leave the field, Esc to cancel.
I run similar tracks regularly. These are especially interesting to compare for me. The tracks are standardized, with minor variations, so comparing makes sense. As the tracks are quite short and run with colleagues at maximum speed, the performance is an indication of the current fitness. All these tracks start with a warmup, stretching then the fast part. There is a slower lap in the middle for one of the tracks (on the top of a hill), occasionally there is a cooldown too.
Before Trails, I used Active/Rest laps to mark the interesting (fast) parts as active. The lap classification is mostly automatic, by using MiscPlugin. However, there are still differences in the taken path. This shows the time/distance/average pace. However, there are no graphs (other than split times) and not possible to simply compare details between activities.
See Create from Splits to create from one of the activities, using the trail 'Reference Activity'. Some editing for positions is often necessary. As I have set Active laps for the activity, the trail is mostly OK already. However, I often move the start point a few meters after the normal start and the end a few meters early. This will include most situations. If there are alternatives (like winter routes) or common detours, I edit the points accordingly: Moved to better positions or set as non-mandatory.
First, the activities to be searched have to be selected. This could be done by searching for activities in the Reports view. However, I normally view a single activity (in Daily Activity or Reports), then press 'i' in the Result List to insert activities in the same category.
As the name of the activity is set at import, the trail is normally selected when selecting the Trails activity page. Otherwise select the name of the Trail in the dropdown list.
The results are shown on the map. To see the results in the chart, select with Ctrl-Click or Shift-Click in the list.
As only active laps are interesting to me, I use 'a' to handle rest laps as pauses. The graph I am interested in is Delta Time over Distance, so that is used as the left side chart. Often Elevation and PaceSpeed is interesting, but many charts are confusing. Therefore 'r' graph keyboard shortcut is used to show these for the reference result only. As the difference graphs should compare the same parts, options trailpoint-synchronization and Resync Diff at Trail Points are used.
To distinguish charts for an activity, deselect/select it in the list to mark charts. Similar, to see all charts for an axis, click the axis to mark charts.
In specific situation, delete trail results and change result colors.
Compare specific snippets of an activity, for instance hills and sprint sections.
To compare a special section, it is often easier to select the trails points one by one. The options to create from complete activities often requires deleting points.
See Comparing, except that the Trail often have to be selected explicitly (automatic Trail selection is done if the name matches, otherwise another match is selected, which may not be the desired Trail).
- Create activity with one point.
- Set the desired activities.
- Use menu option "Add inbound activities as results" to see them on the map.
Compare the data from several data sources. Some general hints:
-
For tracks recorded at the same time, normally differences based on Time is preferred with Trailpoint Synchronization deactivated. The special trail _Splits - ReferenceActivity can be of use.
-
For tracks not recorded at the same time, Distance X-axis is normally more interesting.
-
Using trail Splits is better for complete activities, to avoid subtle trail detection differences.
-
In general, it is interesting to "Zoom map to selection" when comparing data sources. Ctrl-a shortcut
Some background: Device.
-
Import the Distance track if not done. Previously, this required that the activity is imported twice, the second time updating the speed/distance. Tips: ST stores a copy of the imported activity, including the distance track: User Specific Settings and Data
-
Select the Device->Diff Distance Graph
-
Select the "interesting" parts of the difference in the chart.
-
An example from a Garmin ForeRunner 305 for a slow section where the device seem to make a better job than post-processing the points, like ST does.
In addition, see Ctrl-s shortcut to see the device readings (like Manual Calculations) for the result.
Virtually every GPS will report a different distance for an activity. You can compare activities to find where on the track activities differs. In addition to distance, you can compare for instance heart rate, cadence and power. The plugin has some specific features to support these comparisons.
Note: When comparing activities based on time, it is often better to base offset on DateTime than elapsed time. See Ctrl-t shortcut.
-
Select one of the activities.
-
Insert other activities Shift-t shortcut
- Set X-axis in chart to Time, as same datasources are best compared per time.
- Set the results that overlaps the reference results to use the reference result pauses Ctrl-Alt-t shortcut. This makes it possible to compare results also when pauses differ. One example is to compare interval trainings, where one of the activities are using Rest is Pause 'a' shortcut or list menu.
- Set the results that overlaps the reference results to distance diff based on time-of-day Shift-Ctrl-Alt-t shortcut. Together with using the same pauses, the distance-diff-over-time is more accurate.
-
Add Diff-Distance graph Differences to show differences between the source.
-
Add other sources to see the tracks (but no difference implemented), for instance heart rate. Note: If you have hidden other than reference results, Ctrl-r shortcut, activate them again.
-
If the tracks are out of sync, you can align them by dragging in the graph and using keyboard shortcut (Alt-o and Shift-Ctrl-o](Features#graph).
-
An example for HR diff where one of the devices seem to have too high readings in the end of the activity. Note that neither of the HR tracks can be trusted before 6 minutes (the warmup is not included in the displayed trail, so it is first about after 12 minutes that the devices start recording relative reliable data).
-
An example for the distance differences for two devices. The yellow device seem to have a overshot at the zoomed part. Note also that the yellow device distance increases slightly more than the green device in the end (but 30m is not a lot accumulated distance diff).
-
An example for 51 activities, differing from 4176m to 4276m (average 4208m). The activities with slightly different path has been removed from the results. The longest result were a combination of small detours aroung ice patches and bad GPS reception, giving a total of 1.5% over the average result. Most "long" results are slow, the distance is shorter for faster results (the wiggling GPS track has less effect). See also standard deviation Ctrl-o shortcut, to see the quality of the data.
A case study with detailed steps is avalable here: 920XT Analysis
GPS elevation is normally inferior to barometric elevation. However, a barometric device like a bicycle computer may not have a GPS or a GPS that is not suitable for activities like running. The plugin can combine the information and present the results without changing the activities.
- Import the two activities as separate activities. For example the primary "GPS activity" in My Activities and the "barometric activity" in My Friend's Activities.
- Enable "Use Device Elevation for Calculations" Shift-e shortcut.
- Enable "Insert Device Elevation from other activities" Alt-e shortcut. This will not work well if there are activities (from friends) not from the interesting activity. The workaround is to add the interesting as results if possible, for instance see Shift-i shortcut.
- Possibly adjust the device elevation to elevation points. See Barometric Elevation Adjustment.
- Possibly set offset mode 'a' shortcut, if the device elevation is off (barometric elevation often is).
- Select the trail and activities.
- Possibly select the results with device elevation tracks, to analyze them further with Ctrl-e shortcut, maybe delete other results with Shift-DEL.
The plugin can adjust barometric elevation tracks to compensate for elevation offset and drift. See also Elevation Points. The changes is for display only.
- Set elevation for at least one trail point matching an activity.
- The best result is normally achieved if the first and last activity part only matches. An exception is if the pressure suddenly changes during the activity, then multiple elevation points may help.
- The trail point elevation can be set for any trail point that matches the activity, not necessarily for a trail matching the activity. However, if a trail matches the activity, these points only are used. So if you have several activities starting at for instance "Home", it is enough to set elevation for one point in one trail.
- Set elevation for a trail point by editing a trail, click the elevation field for the trail point to set, set the elevation (possibly specify unit), press TAB, save trail.
- If the activity do not have a separate elevation track (not added by all ST importers), you must configure the device name in the plugin settings.
- Configure the elevation adjustment with the Shift-Ctrl-e shortcut.
- Select the device elevation chart. If the device does not have an elevation track, the plugin will use the GPS track.
The device elevation track as displayed can be applied to the Activity related to the result. The "complete" elevation track is used, not just the result, but there is no guarantee that the track covers the complete activity. The plugin adjusts the elevation in the GPS track so the information is used by default in all of SportTracks.
- To apply the device elevation track as displayed but also using parts of the elevation track that are not displayed, use Ctrl-f shortcut.
- The feature can automatically adjust the elevation at import for barometric devices. Activate the feature in the plugin settings.
The plugin can be used to filter activities, but display complete activities.
- See Limit Activities to limit the selection of activities.
- Select Splits trail to see the complete activity.
The plugin can create a track with the pace adjusted to the grade. See Grade Adjusted Pace. This can be used to get a course that can be used for pacing in a hilly course.
- Get a track for the activity, preferably one with a barometric elevation.
- Set the time on the track.
- If the activity has no Distance track, go to Summary page, set manual calculation, set the activity time.
- If the activity has a Distance track, select Edit->Data Tracks, Data track "Distance". Export the Distance track. Remove all but the first, second and last line. Change Seconds column on the last line to the desired time.
- Set time on GPS points, use MiscPlugin.
- Optional It is possible to set a split time, if you for instance want to have a negative split (first half faster than second), see Reference Diff.
- Select Trails Activity Page, Splits or Reference Activity trail, Edit button. See export a trail to an activity.
Trails has no real dot-racing feature, but can show the position when comparing activities.
- Select activities and Trail.
- Select the interesting results and the Summary result.
- View activities over time.
- Set options, for instance Trailpoint Synchronization and Zoom to Selection with Ctrl-z
- select on the Summary line to see the position on the map.
Moved to 920XT Analysis.