Users and installations
Mobile Messaging SDK employs specific terms in order to address different type of information that you can synchronize towards Infobip Platform. You will see User and Installation terms in the SDK similarly to what you can see at People section at Infobip Portal.

-
Installationis a specific installation of your application. You can see it asMobile App Messaging (Push Notifications)destination under "Contact Information" tab of a user profile. A single user can have zero or more installations of different applications. You can change some specific settings of each installation of a user, addCustom attributesto it or do a remoteLogoutof a specific installation. -
Userrepresents a single person profile withStandard attributes,Custom attributesandTagswhich you can set via the SDK.
Both user and installation objects are initialized once Mobile Messaging SDK is successfully started.
Installation is a specific installation (or instance) of your application on a user's device. One user can have multiple installations.
You can get current installation details from server using function MobileMessaging.fetchInstallation(callback, errorCallback):
mobileMessaging.fetchInstallation(
    installation => {
        // Here you can use the installation object
    }
);
Moreover all current user installations are available under user profile.
var user = ...;

var installations = user.installations;SDK allows you to temporarily "disable" installation in order to not receive push notifications.
mobileMessaging.getInstallation(installation => {
	installation.isPushRegistrationEnabled = false;
	mobileMessaging.saveInstallation(installation,
	    updatedInstallation => {
	        // Here you can use updated installation
	    }
	);
});On the Infobip account, a single user profile can have one or more mobile devices with the application installed. You might want to mark one of these devices as the primary device and send push messages only to this device (e.g. receive bank authorization codes only on one device). To achieve this and similar use-cases, you can utilize the APIs provided by the Mobile Messaging SDK.
For this feature to work, the API request for sending the push notification must include a special parameter targetOnlyPrimaryDevices set to true. Parameters for sending a single push notification can be checked in the Infobip API Docs. With this parameter, push notifications will not be sent to any installations that are not marked as primary. This means that for this feature to work, both the mobile implementation and the API request parameter must be used in conjunction.
By default, all installations are marked as non-primary. To set a particular installation as primary, either the Contact Information API or the following Mobile Messaging SDK API can be used:
mobileMessaging.getInstallation(installation => {
	installation.isPrimaryDevice = true;
	mobileMessaging.saveInstallation(installation,
	    updatedInstallation => {
	        // Here you can use updated installation
	    }
	);
});
You can set/reset primary setting for any other installation of a current user:
var pushRegId = '< Push Registration ID of another installation >';
mobileMessaging.setInstallationAsPrimary(
    pushRegId,
    true,
    () => {
        // Success callback
    }
);An Installation can have custom attributes the same way as User does, so that you would be able to reach only specific installation of a user.
mobileMessaging.getInstallation(installation => {
	installation.customAttributes = { OneTimePasswords: true };
	mobileMessaging.saveInstallation(installation,
	    updatedInstallation => {
	        // Here you can use updated installation
	    }
	);
});
These custom attributes can be seen under push destination on portal:

You can provide additional user's data to the server, so that you will be able to send personalised targeted messages to exact user and have other nice features. Library supports a set of predefined attributes as well as custom ones.
mobileMessaging.fetchUser(
    user => {
        // Here you can use fetched user instance
    }
);Each user can have Phone numbers, Emails and External user ID. These fields are unique identifiers of a user profile on Infobip platform and provide capability to personalize any app installation with a user profile. The platform provides data grouping functions based on these parameters. For example, if two installations of a particular app will try to save the same Phone number, then both of them will be collected under a single user. Phone number, Email and External user ID are also widely used when targeting users with messages across different channels via Infobip platform.
Following restrictions apply:
- Phone number: string, https://en.wikipedia.org/wiki/E.164, i.e.
"79210000000") - Email: string, format described in https://tools.ietf.org/html/rfc2822, i.e.
"user@mail.com") - External User Id: any string, except any form of "null", "Null", "NULL" etc are not supported and would be considered as JSON
null
var user = {
    phones: ["79210000000"],
    emails: ["john.doe@infobip.com"],
    externalUserId: "ExternalId",
};

mobileMessaging.saveUser(
    user,
    user => {
        // Here you can use updated instance of the user
    }
);
Please note that saveUser() may return a USER_MERGE_INTERRUPTED error if you have provided an already existing Phone number, Email, or External User Id that are already taken by another existing user profile. In other words, that particular phone/email/externalUserId is a unique identifier of an already existing user, different from the one that this installation is currently personalized with. You can find more details about this, and other possible errors at Server errors. If you wish to personalize the app installation with another existing user, that is, merge current user with another one, please use our Personalize API:
var userIdentity = {
    phones: ["79210000000"],
    emails: ["john.doe@infobip.com"],
    externalUserId: "ExternalId",
};

mobileMessaging.personalize(
    { userIdentity: userIdentity },
    () => {
        // Success callback
    }
);You can use External User ID to uniquely target your user. External User ID is meant to be an ID of a user in an external (non-Infobip) service. It can be any string and can be shared across different instances of your app, so that a user with multiple devices can still be targeted as a single user of your app. Notice: for externalUserId any string values such as "null", "Null" or "NULL" are not supported and would be considered as JSON null.
You can depersonalize current installation to detach it from current user profile so that the user won't receive messages when targeted by any person attribute.
mobileMessaging.depersonalize(
    () => {
        // Success callback
    }
);
You also can depersonalize any installation that is personalized with the current user (perform remote logout).
var pushRegId = '< push reg id of another installation of user >';
mobileMessaging.depersonalizeInstallation(
    pushRegId,
    () => {
        // Success callback
    }
);
Q: When should I log out my users? A: Application users can (and probably should) be logged out if the app meets all the following conditions:
- you leverage user attributes functionality
- your application has "log out"/"sign out" feature
- you don't want a newly logged in (signed up) user to be targeted by other user's data (such as phone numbers, first name, custom attributes etc.) and receive personalized messages
- you want logged out (signed out) user to still receive broadcast notifications (if not, you need to disable push registration)
If you want previous personalization to be reset, in other words, you want current users other installations to depersonalized, SDK allows you to do this by providing a special argument: forceDepersonalize.
var userIdentity = {
    phones: ["79210000000"],
    emails: ["john.doe@infobip.com"],
    externalUserId: "ExternalId",
};

mobileMessaging.personalize(
    { userIdentity: userIdentity, forceDepersonalize: true },
    () => {
        // Success callback
    }
);You can set different standard attributes of a user, such as First name, Last name, Birthday etc.:
var user = {
    firstName = "John",
    lastName = "Doe",
    gender = "Male",
    birthday = "1968-02-10",
};

mobileMessaging.saveUser(
    user,
    user => {
        // Here you can use updated user instance
    }
);Apart from a list of standard attributes, each User can have a set of custom ones. These are commonly used to cover any use-cases about targeting and segmentation, which are not covered by the platform out of the box. Custom attributes are key-value pairs. Keys are of string type, values can be of string, number (converted all to Decimal number type), boolean, date, datetime or list of objects data type. SDK allows both getting and setting these custom attributes.
Difference between date and datetime types is that usage of date doesn't sync time to the server (e.g. "2020-11-30"), but with datetime we provide timestamp as well that can be visible on web.
var user = {
    customAttributes: {
        favoriteMeal: "pizza",
        bootSize: 9,
        installationDate: "2019-01-01",
        lastVisitDateTime: "2020-12-01T08:50:18Z",
        isSubscribed: true,
        height: null,
        favsList: [{
            id: "1",
            price: 99.99,
            sale: true
        },
        {
            id: "2",
            price: 149.99,
            sale: false
        }]
    }
};

mobileMessaging.saveUser(
    user
    , (user) => {
        // Here you can use updated user instance
        console.log('Success' + JSON.stringify(user));
    }, (error) => {
        console.log('Error' + JSON.stringify(error));
    });
With this data, you can segment users by using Segments and target them by their custom attribute values:
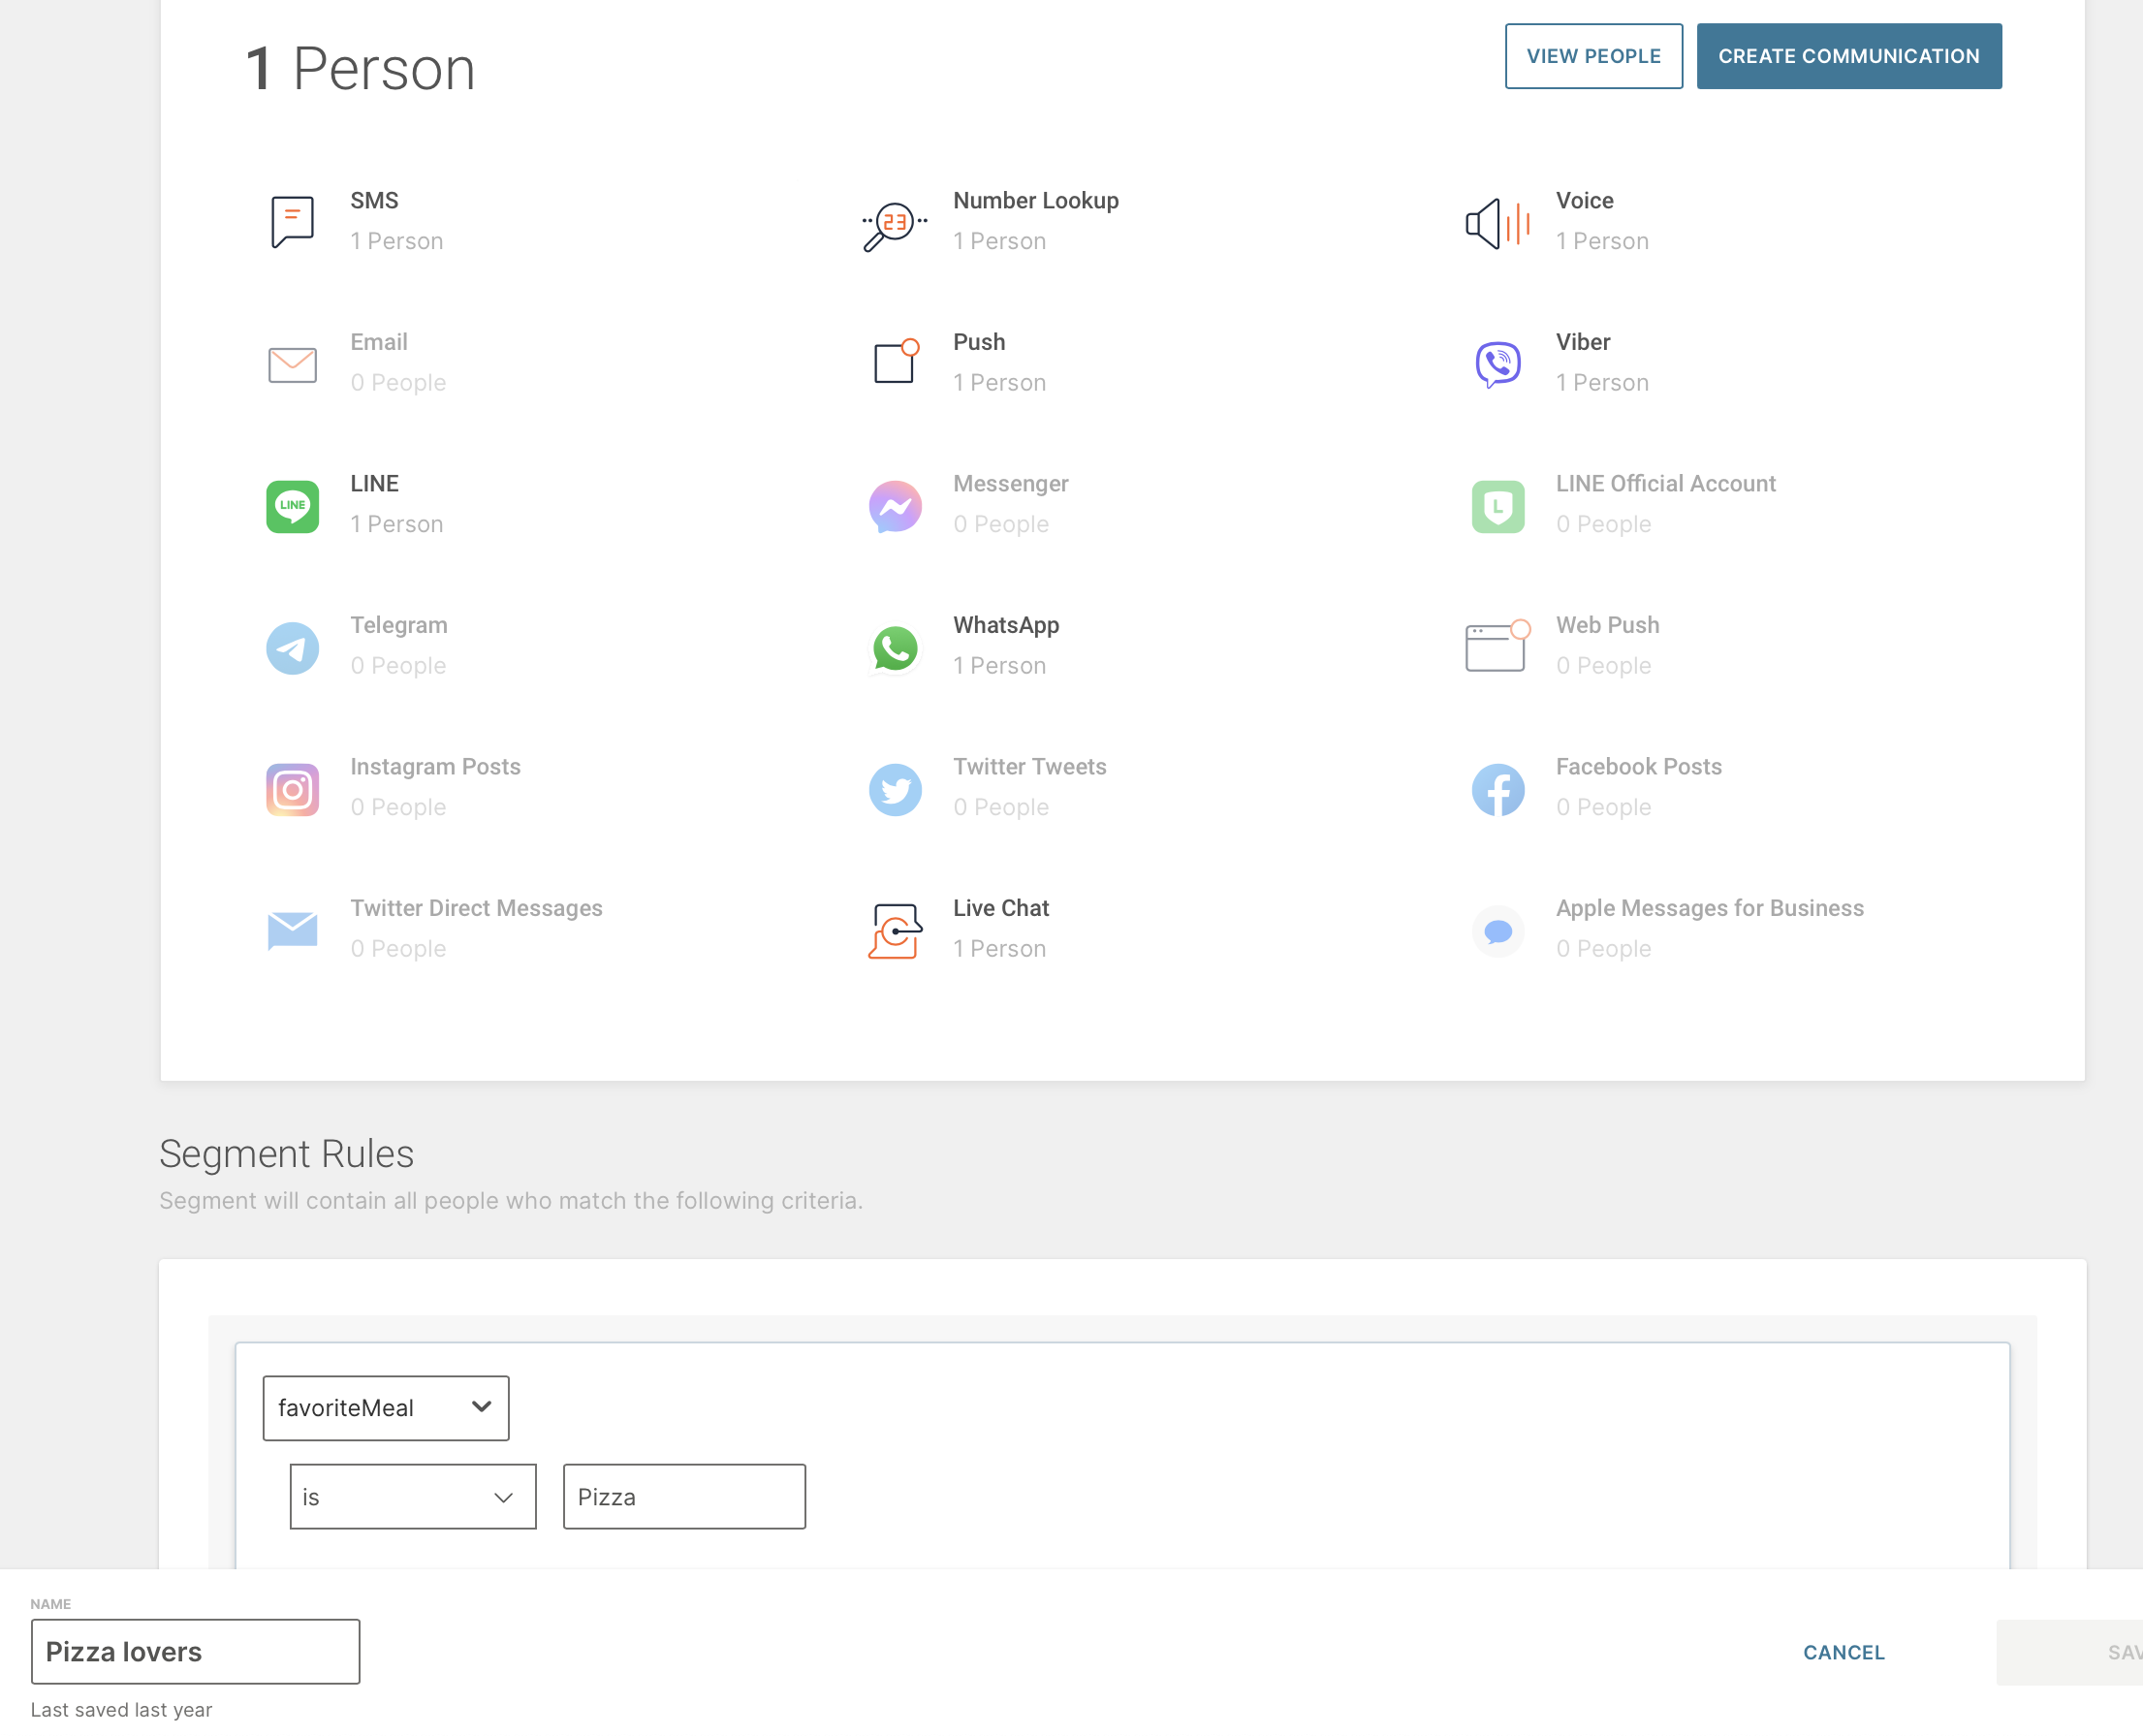
Detailed description on what list of objects is, some common use cases and how to set it on web are provided here. Mobile implementation specifics:
- as provided in the upper example of updating custom attributes, list of objects can be set as a custom attribute, but this type is more complex
- list of objects needs to be created on web
- it needs to have the same structure as on web when it's provided from SDK, otherwise error will be returned as an error response
- supported types are:
string,number,boolean,dateanddatetime
You can add or remove Tags from users based on their preferences or interests. Using Tags you can easily segment users which are interested in any specific topic and send messages only to such users.
var user = {
    tags: ["Promotions", "Transactions"]
};

mobileMessaging.saveUser(
    user,
    user => {
        // Here you can use updated user instance
    }
);
Afterwards you will see these tags in a user profile and will be able to segment such users when sending targeted messages or campaigns.
