
I got a Samsung 840 EVO SSD. The drive is really fast, supports full disk self-encryption with 256-bit AES algorithm, has a great price/value rate because of the Samsung TLC NAND memory, and also should be quite reliable and long lasting for a normal user. At the time when EVO was released it didn't support TCG Opal, therefore didn’t utilize Windows 8 Bitlocker or other software supporting complex SSD drive management. It took Samsung about half a year to support TCG Opal 2.0 and IEEE 1667 standards and now from December of 2013 they are officially supported.

In the past, I used Drive Crypt Plus Pack to encrypt the whole HDD partition, so the new SSD really intrigued me to encrypt data without any additional software.
By doing experiments with it, I accidentally lost the password. I thought "no problem", lets just do a PSID revert and reset to factory defaults. Well..
Samsung has been promoting for about half a year (2013) that 840 EVO supports TCG/Opal and IEEE 1667 standarts.
But I couldn't find any user-grade solution to do this.
I found more people struggling with this issue.
http://forum.hddguru.com/viewtopic.php?f=10&t=27027
http://www.overclock.net/t/1106725/samsung-ssd-ata-locked
The Samsung support wasn't helpful. By Googling I couldn't find anything useful that could help me to solve this problem. Only promotional articles declaring that you can. For example:
When you forget your SSD security password, PSID protects your data on the drive by executing a cryptographic erase which returns the drive to its factory status, preventing any unauthorized access to your data
There are a few toolkits to manage OPAL drive from Windows. Looks like ULINK Technology has a tool supporting a PSID revert.
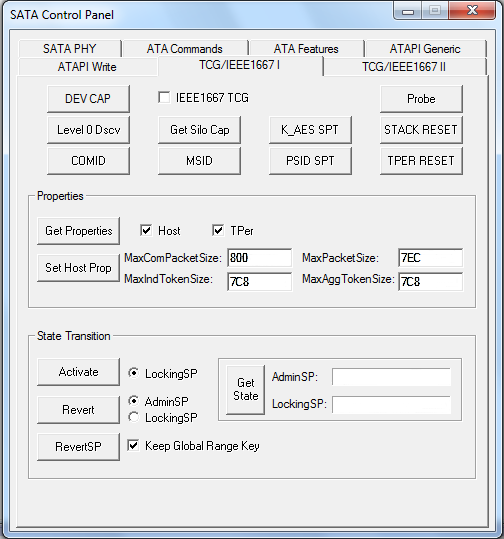
McAfee also has a paragraph about the PSID revert in its product called “Endpoint Encryption” description page.
Q: Can you restore an Opal drive to its default factory state?
A: All drives support this if a drive credential is known (known as reverting the disk), but not all drives support this if a drive credential is not known (known as a PSID revert). If the drive doesn’t support a PSID revert and you’re locked out (and for some reason EEPC’s normal recovery functions do not work), the drive is now a paperweight, your data is lost, and you need to purchase a brand new Opal drive. If the drive does support a PSID revert, then you can return it to a default factory state even without unlocking the drive first, but all of the data on the drive will be lost. Tools are available to do this (it is not a supported use-case in EEPC).
But all of them are non-user-grade tools, probably more expensive that a new SSD drive.
And of course the drive must support TCG/Opal and IEEE 1667 standards to perform the PSID revert.
Even though Samsung had been promoting for about half a year that Samsung 840 EVO supports TCG/Opal and IEEE 1667 standarts,
in reality, there was no support for this feature until the December of 2013.
It seems that only the EXT0BB6Q firmware update enabled this feature.
But if you locked your drive before, you can't just upgrade the firmware, you have to unlock it first :)
The good thing is that I knew "something" about the password.
I connected the SSD to another Ubuntu system to better understand its current state.
Used hdparm ATA disk utility to extract information about it and, as expected, the SSD was in the “locked” state.
martynas@martynas-G31M:~$ sudo hdparm -I /dev/sdg
                    ...
           *    SMART Command Transport (SCT) feature set
           *    SCT Write Same (AC2)
           *    SCT Error Recovery Control (AC3)
           *    SCT Features Control (AC4)
           *    SCT Data Tables (AC5)
           *    reserved 69[4]
           *    DOWNLOAD MICROCODE DMA command
           *    SET MAX SETPASSWORD/UNLOCK DMA commands
           *    WRITE BUFFER DMA command
           *    READ BUFFER DMA command
           *    Data Set Management TRIM supported (limit 8 blocks)
Security:
                supported
                enabled
                locked
        not     frozen
        not     expired: security count
                supported: enhanced erase
        Security level high
        2min for SECURITY ERASE UNIT. 8min for ENHANCED SECURITY ERASE UNIT.
Logical Unit WWN Device Identifier: 50025388********
        NAA             : 5
        IEEE OUI        : 002538
        Unique ID       : 8a0093837
Checksum: correct
There are two ways to unlock a SSD (or HDD) with an ATA password.
By using the user password or the master password.
But there is a small difference between those two.
While the master password has an unlimited number of attempts, the user password is limited to 5 only!
After that you need to power cycle the drive.
Ok, so if your master key is set and you know it - you are lucky.
But if you are left with the user password as the only
option to access the the drive,
then everything becomes much more complicated.
Here is how the hdparm command and the output looks when trying unlocking with the user password.
martynas@martynas-G31M:~$ sudo hdparm --user-master u --security-unlock "my password" /dev/sdg
security_password="my password"
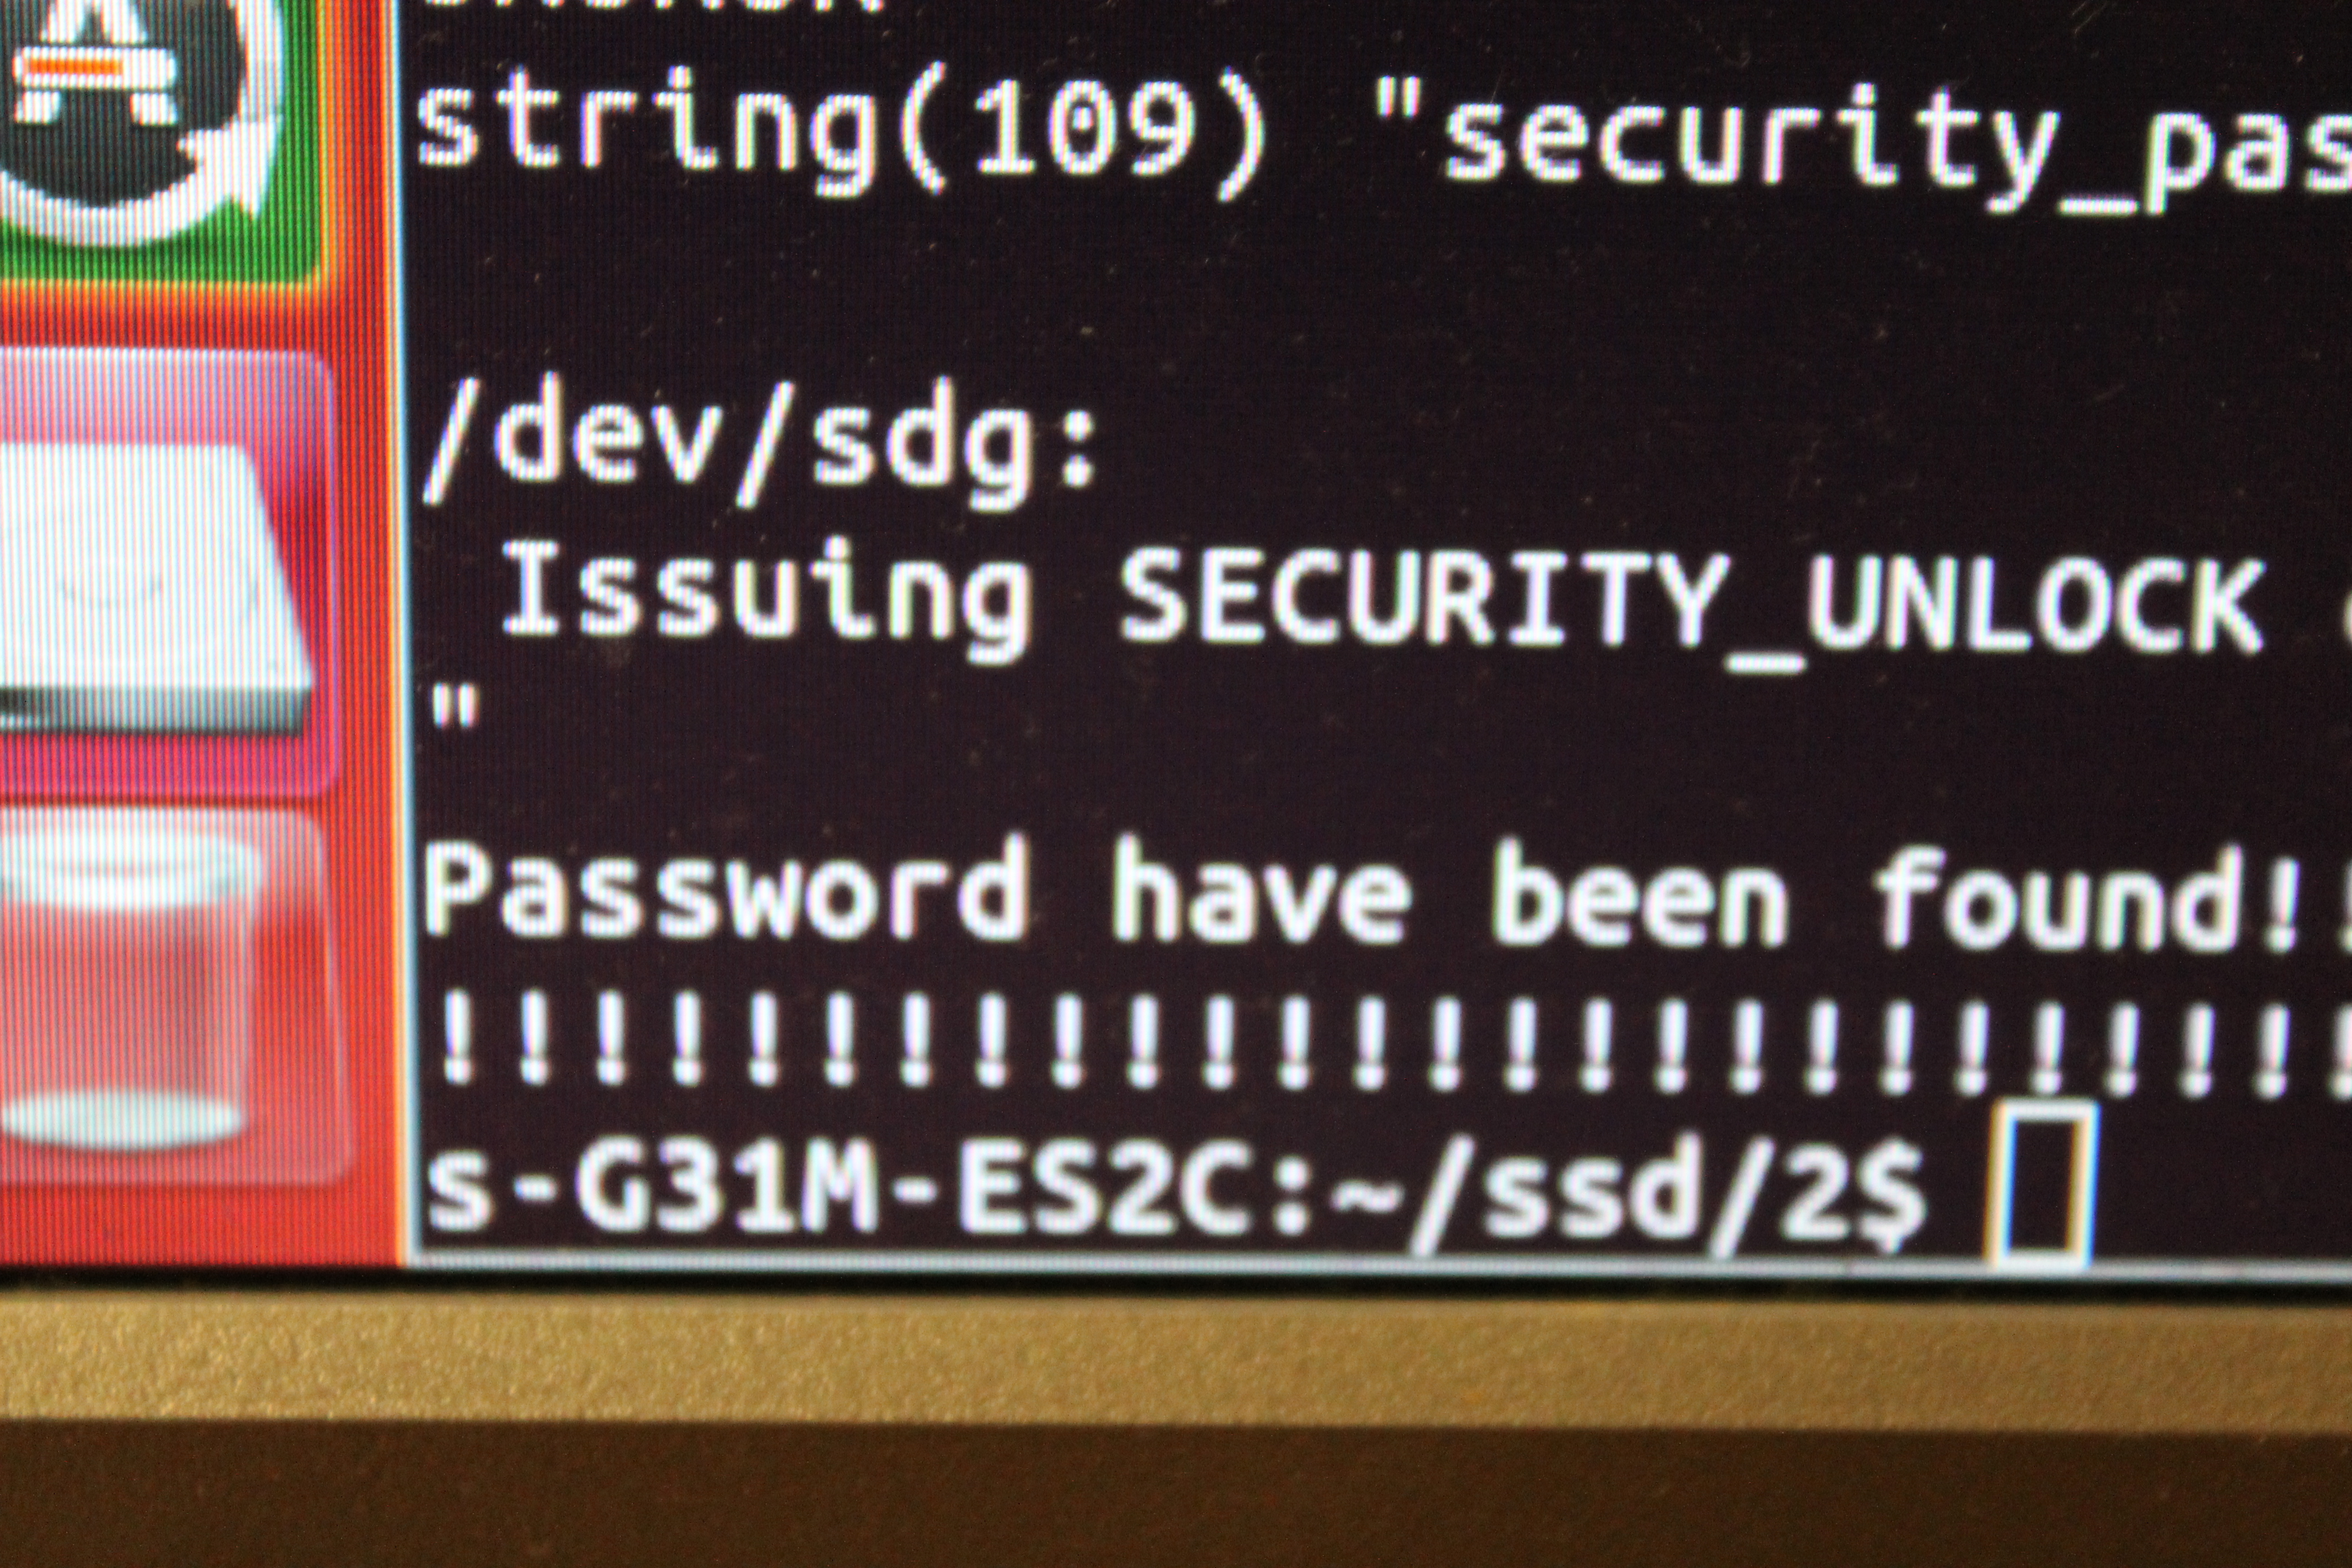
/dev/sdg:
Issuing SECURITY_UNLOCK command, password="my password", user=user
SECURITY_UNLOCK: Input/output error
The password is wrong and the output is SECURITY_UNLOCK: Input/output error
If the password is rejected, there also a probability that it's encoded additionally. Some computer vendors encode passwords at the BIOS level. I couldn’t find any information about my BIOS, therefore I did a small test.
I inserted another 1TB WD HDD and set a password,
to check if I could unlock it with hdparm on another PC.
I was lucky - the BIOS of my notebook uses raw passwords.
The next step is to bypass the power cycle barrier. I tried to power down the device from linux:
echo 1 | sudo tee -a /sys/block/sdg/device/delete
And then to manually trigger scan of all SCSI devices:
echo "- - -" | tee /sys/class/scsi_host/host*/scan
It didn’t have any effect. But it’s not the same as doing a power cycle. Some of the controllers inside the SSD drive are still operating. And they are responsible for the five-attempts limit.
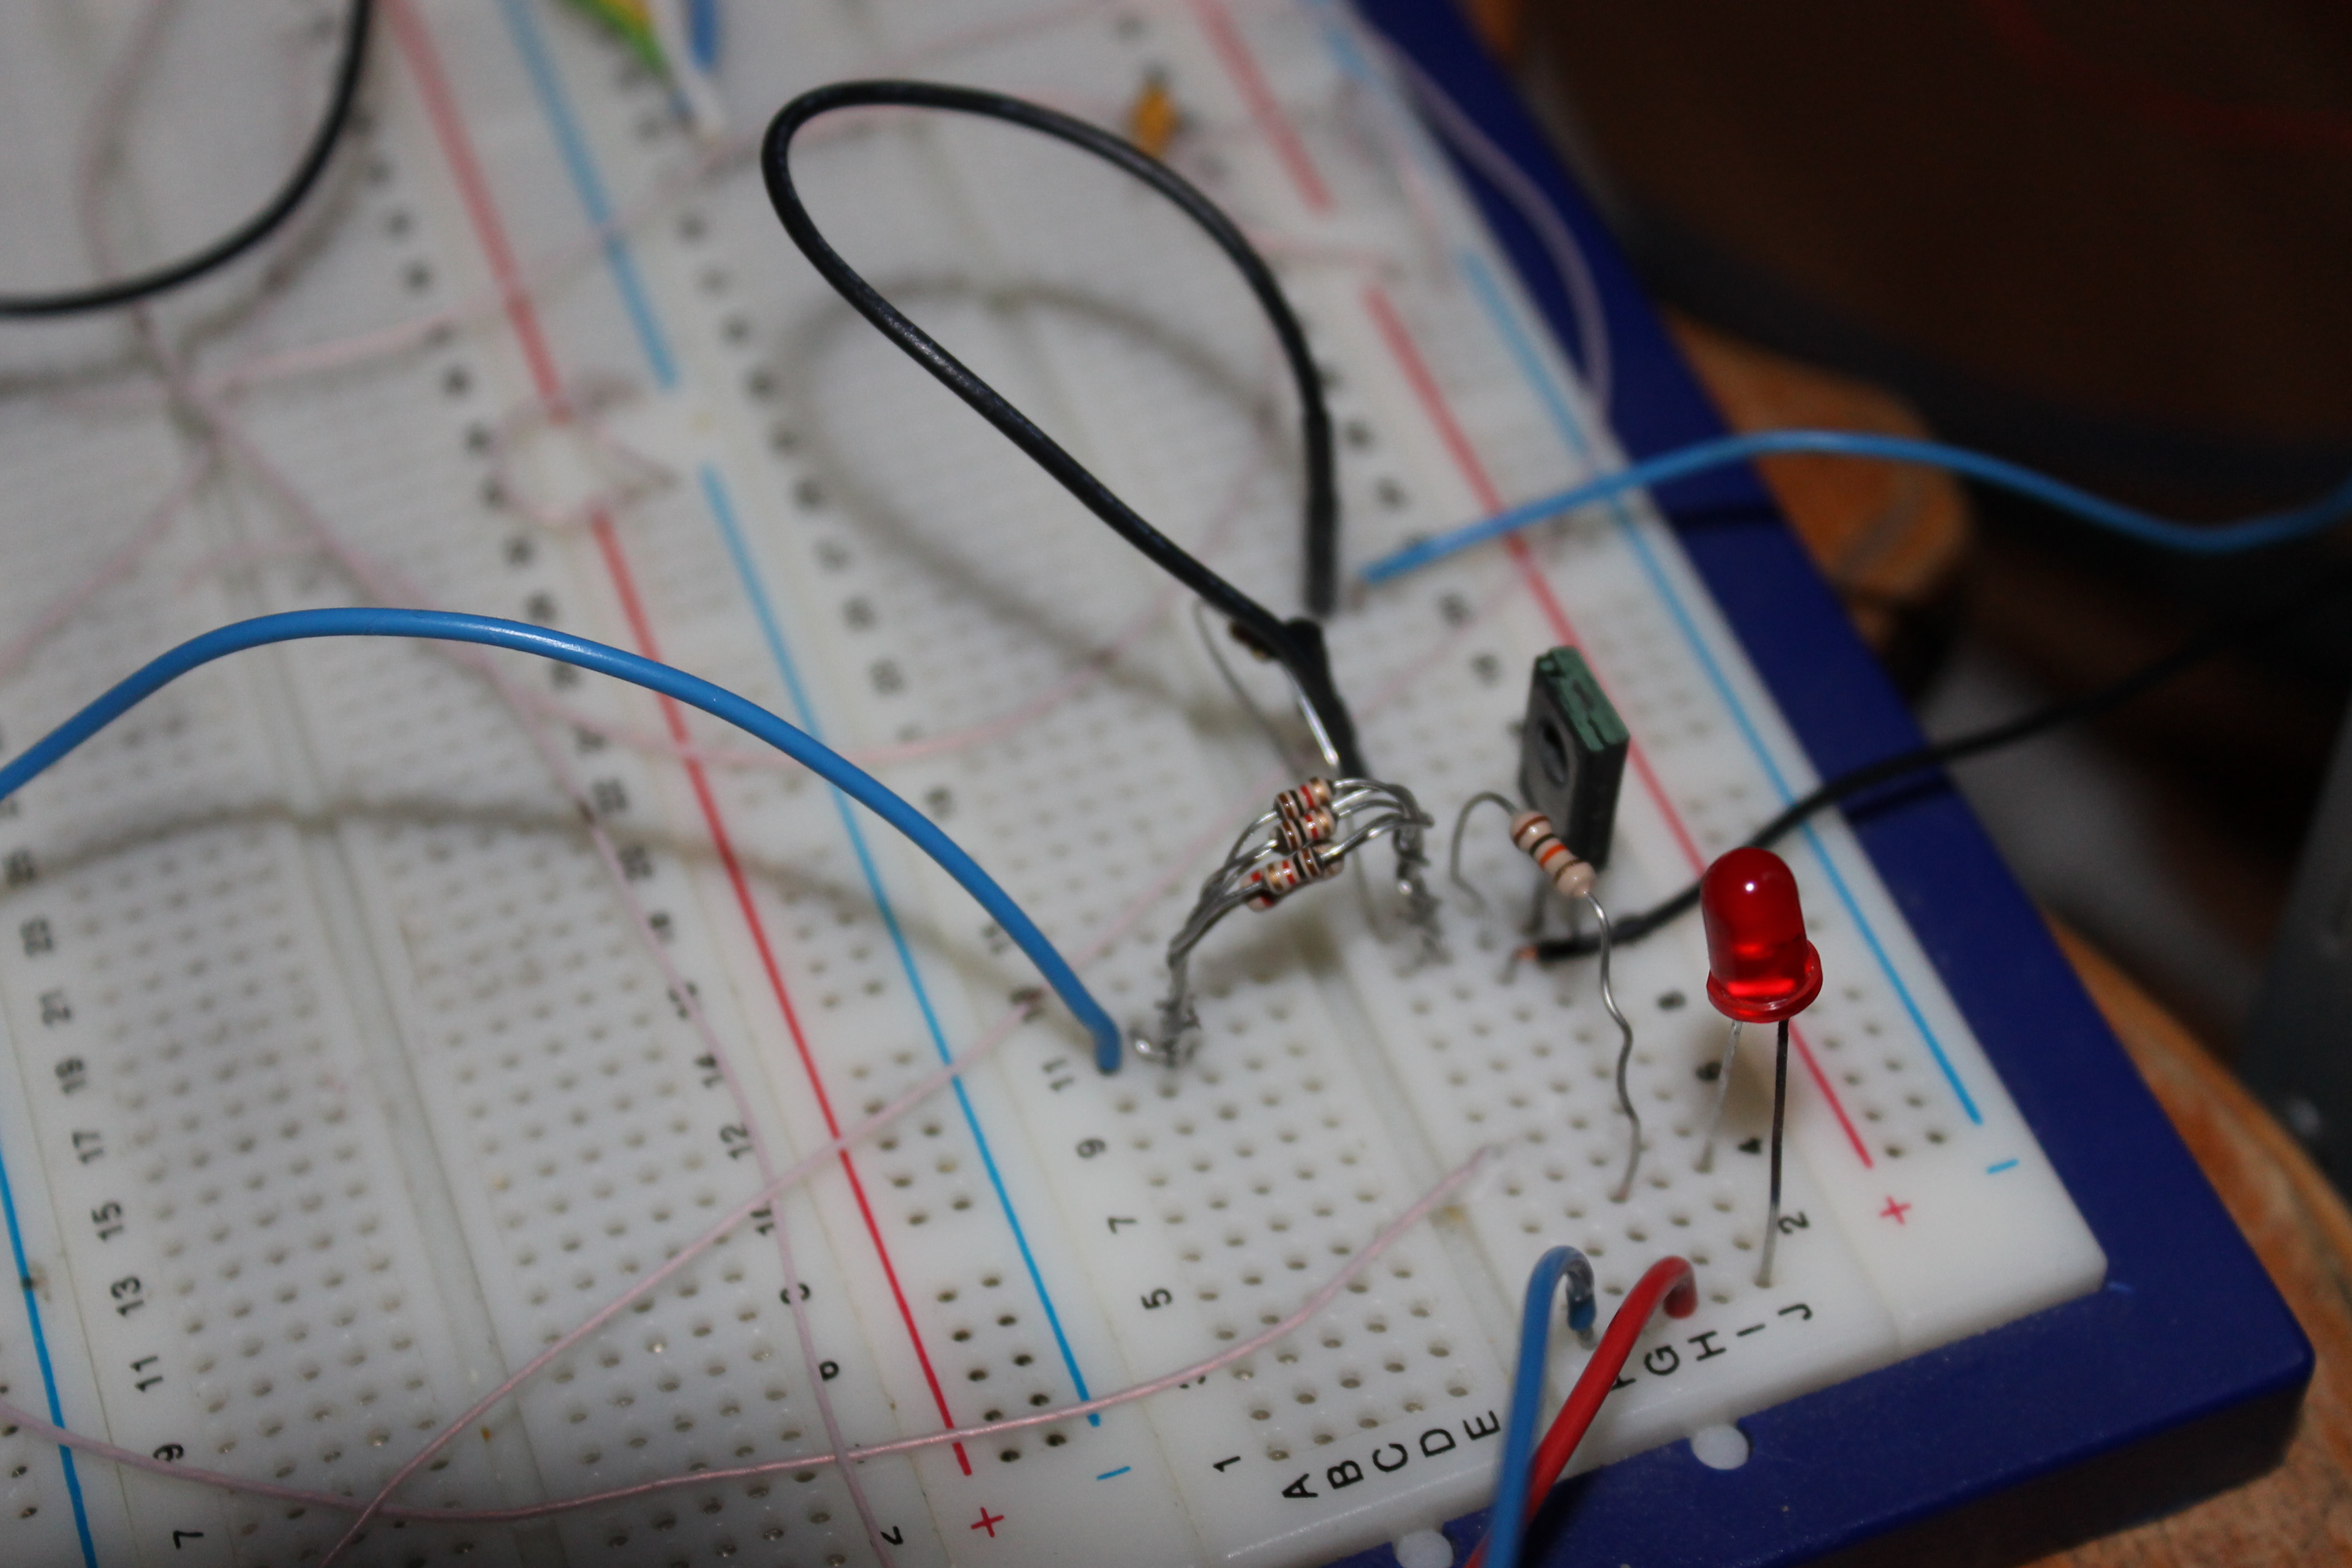
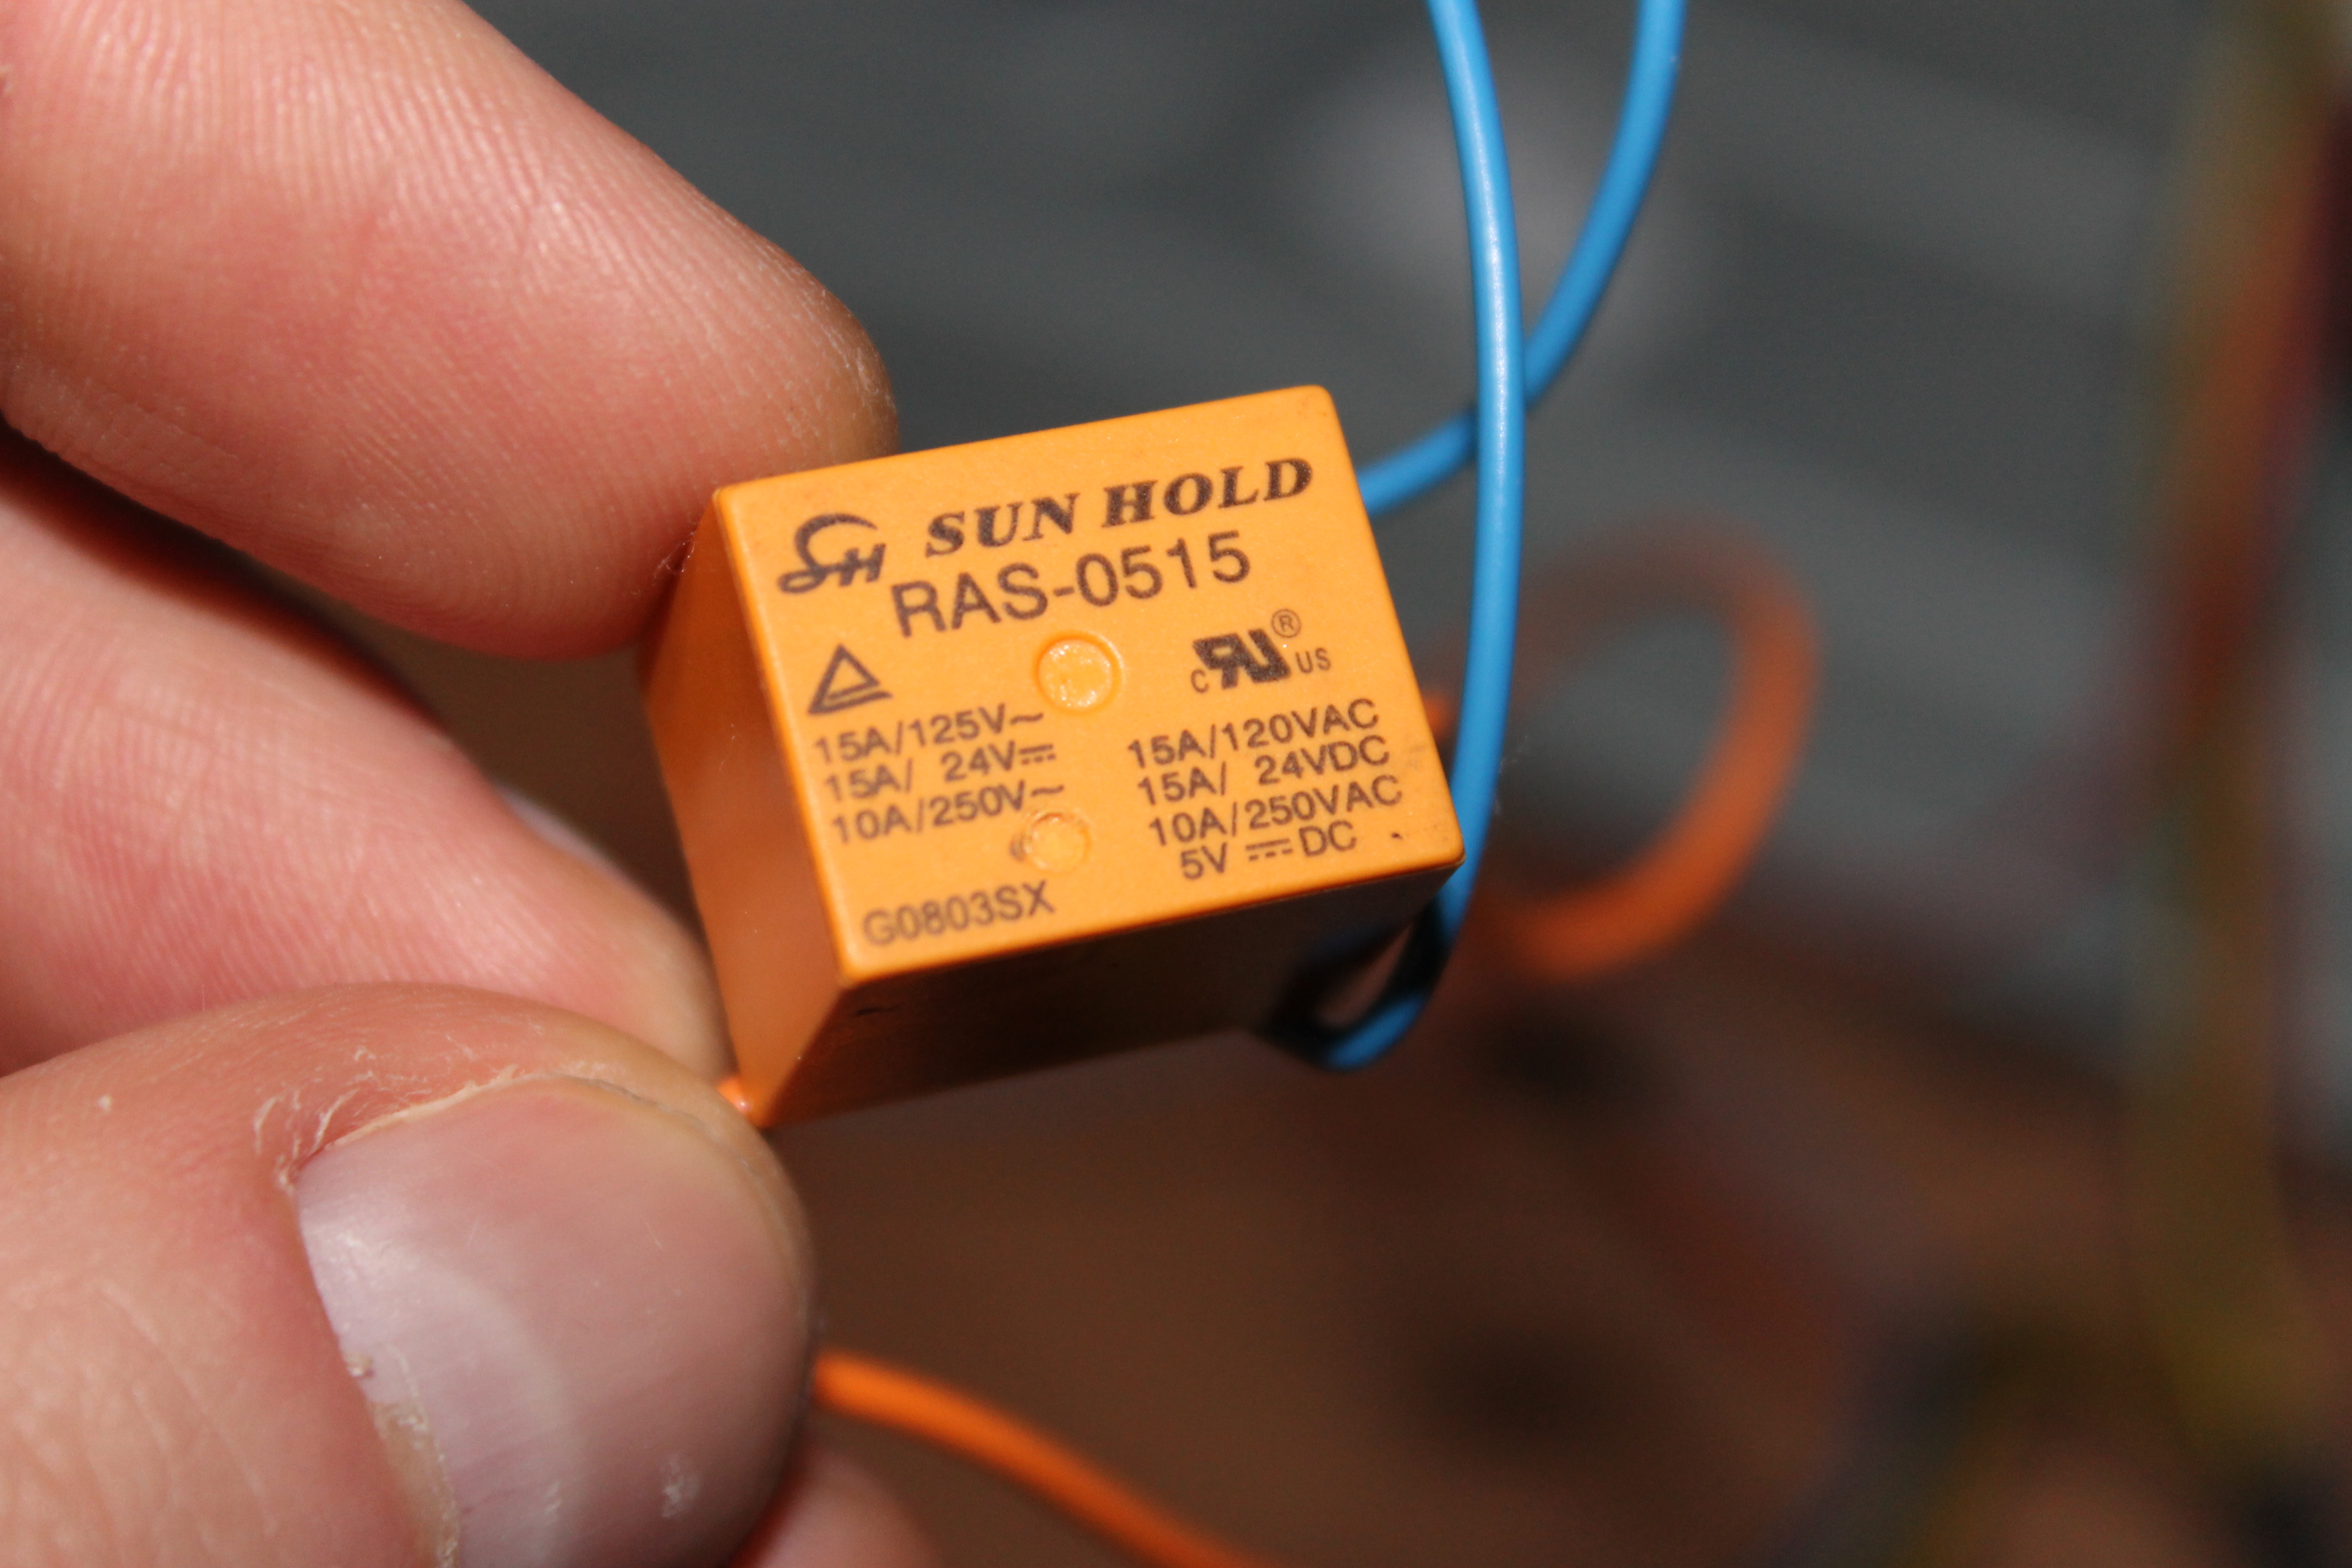
I made a simple system that disconnects the power source from the SSD and is controlled through the RS-232 port by a simple program written in C. When the program is executed, it sends a short impulse to the relay and interrupts the power supply for the SSD.
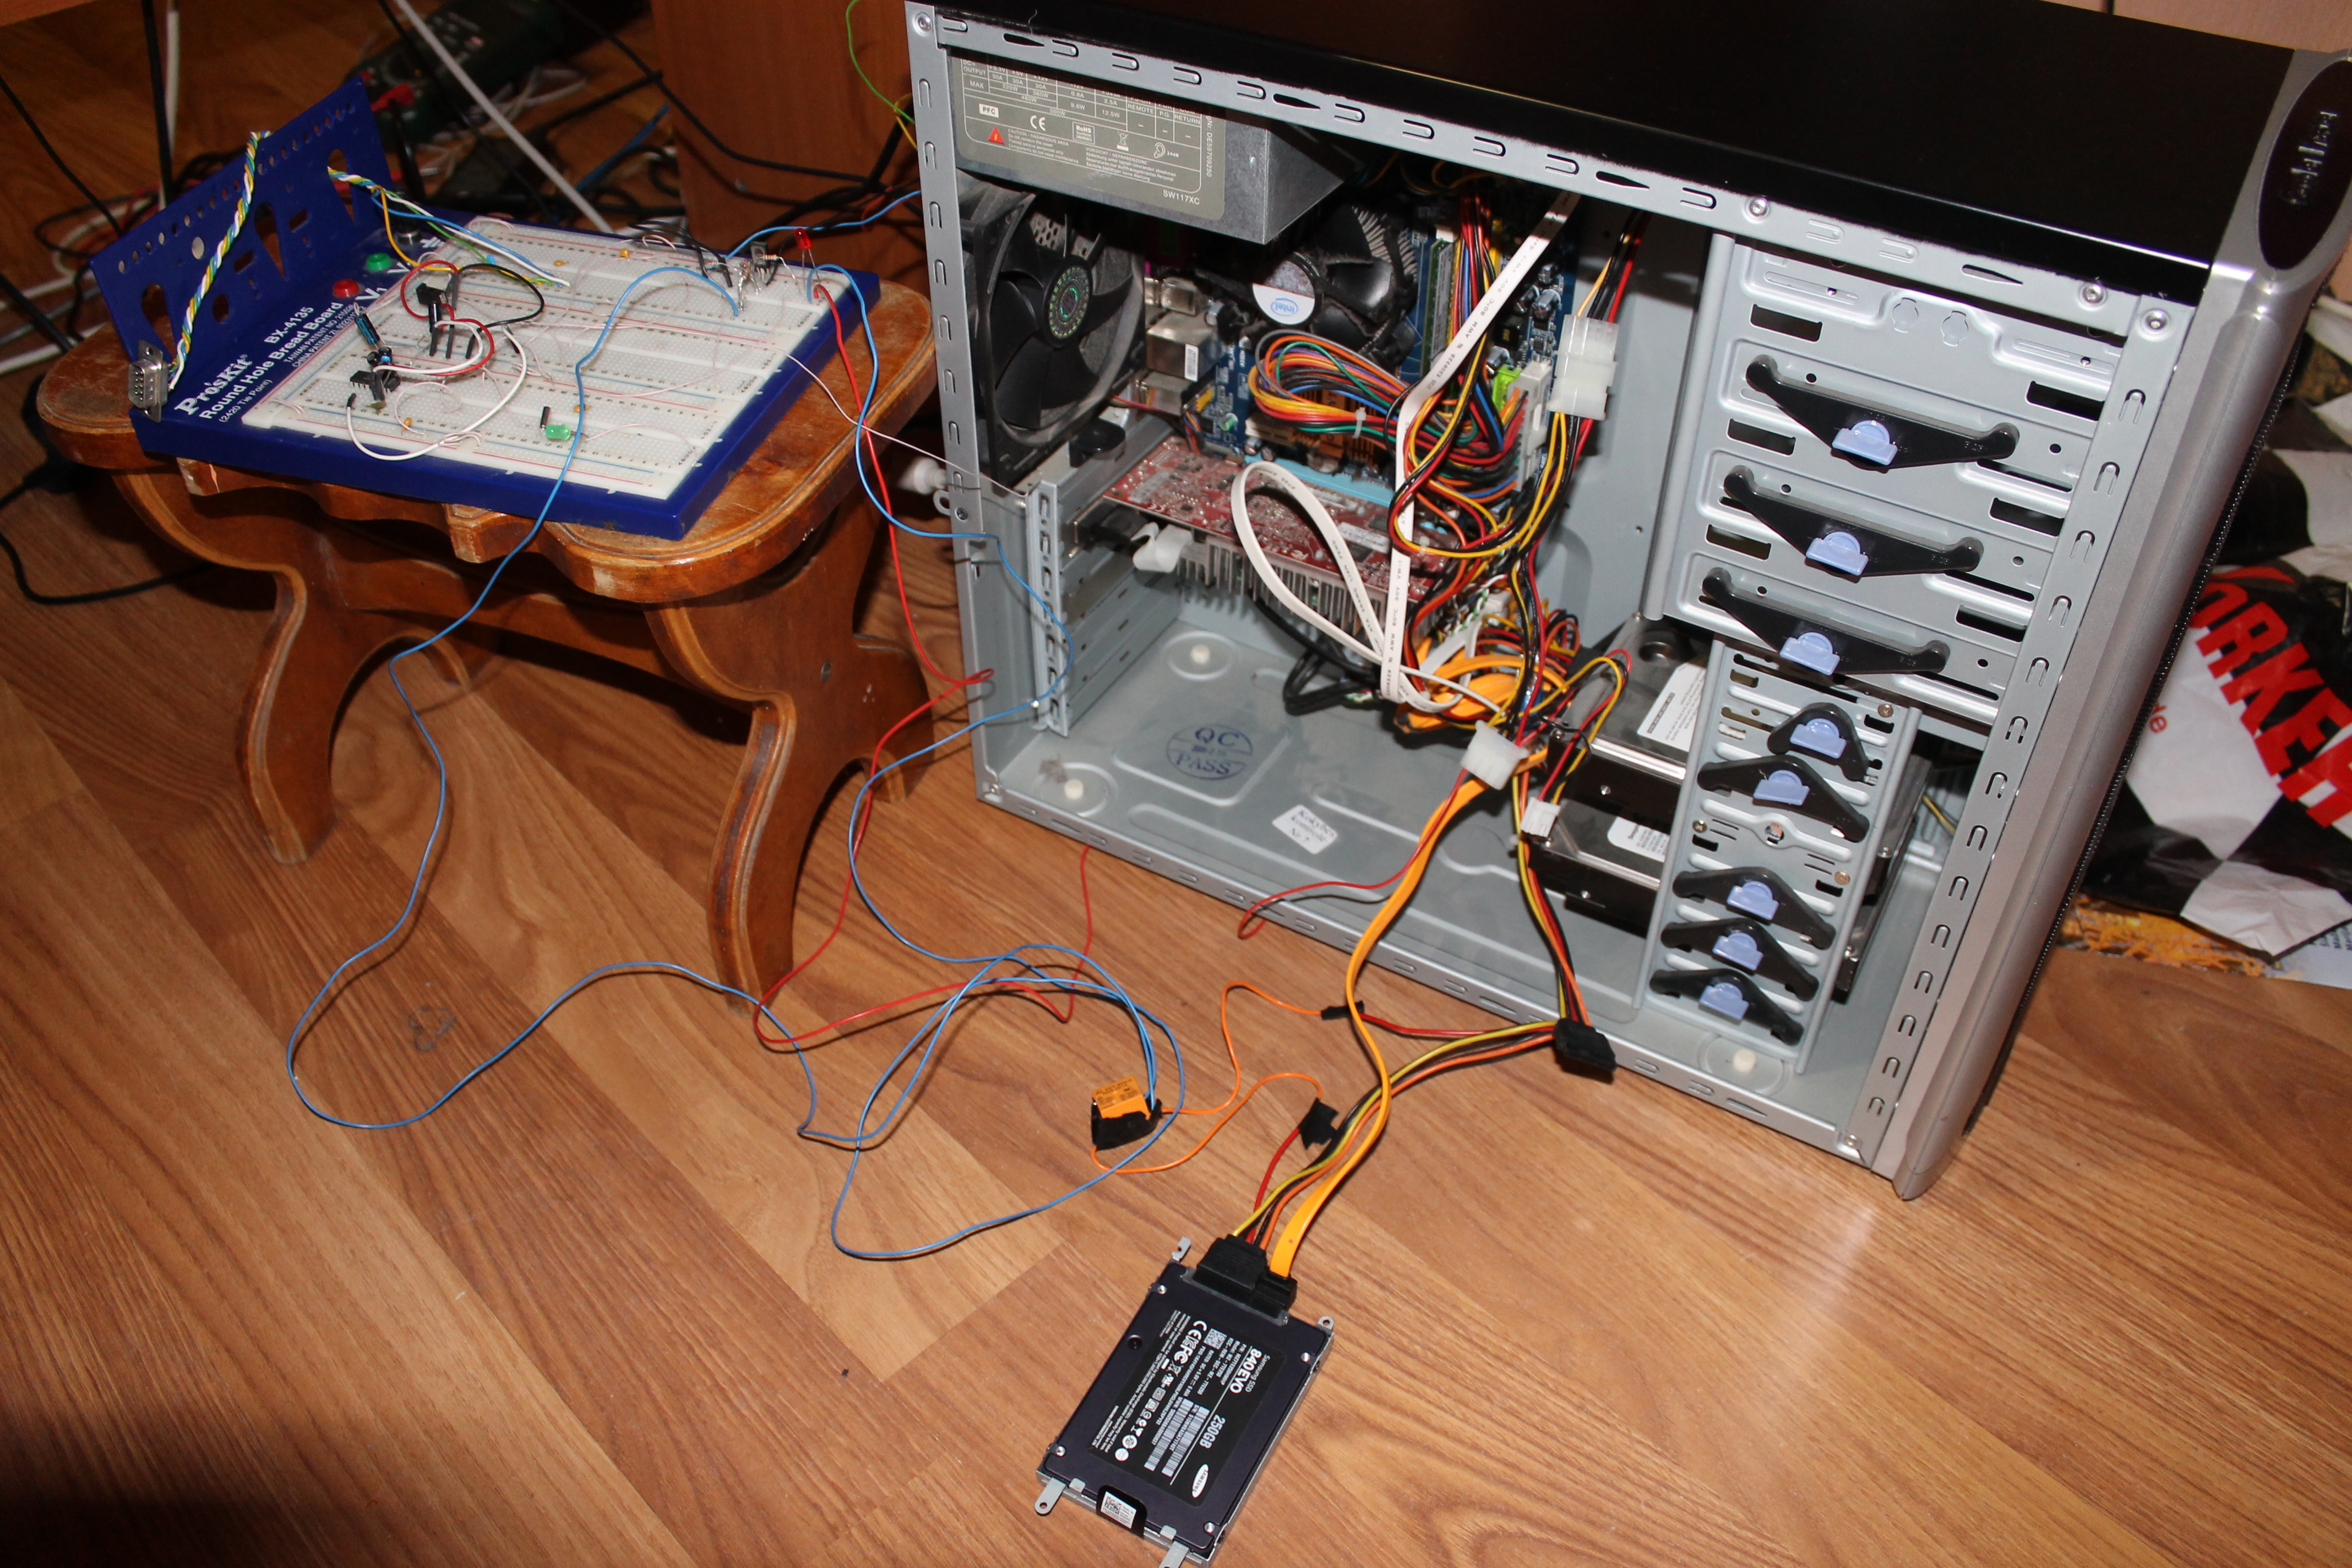
The circuit on the bread board consists of:
- 1 x relay
- 1 x transistor
- 3 x resistors
- 1 x led indicator
- 1 x RS-232 port adapter
Count that bunch of resistors as one - I used what I had. And I had only a pack of 2kOm, so connected in parallel :)
The relay switch.
And this is a C source code for a small unix program making one short impulse when executed.
#include <stdio.h>
#include <stdlib.h>
#include <termios.h>
#include <unistd.h>
#include <sys/ioctl.h>
#include <sys/types.h>
#include <sys/stat.h>
#include <fcntl.h>

static struct termios oldterminfo;

void closeserial(int fd) {
   tcsetattr(fd, TCSANOW, &oldterminfo);
   if (close(fd) < 0)
      perror("closeserial()");
}

int openserial(char *devicename) {
   int fd;
   struct termios attr;

   if ((fd = open(devicename, O_RDWR)) == -1) {
      perror("openserial(): open()");
      return 0;
   }
   if (tcgetattr(fd, &oldterminfo) == -1) {
      perror("openserial(): tcgetattr()");
      return 0;
   }
   attr = oldterminfo;
   attr.c_cflag |= CRTSCTS | CLOCAL;
   attr.c_oflag = 0;
   if (tcflush(fd, TCIOFLUSH) == -1) {
      perror("openserial(): tcflush()");
      return 0;
   }
   if (tcsetattr(fd, TCSANOW, &attr) == -1) {
      perror("initserial(): tcsetattr()");
      return 0;
   }
   return fd;
}

int setRTS(int fd, int level) {
   int status;

   if (ioctl(fd, TIOCMGET, &status) == -1) {
      perror("setRTS(): TIOCMGET");
      return 0;
   }
   if (level)
      status |= TIOCM_RTS;
   else
      status &= ~TIOCM_RTS;
   if (ioctl(fd, TIOCMSET, &status) == -1) {
      perror("setRTS(): TIOCMSET");
      return 0;
   }
   return 1;
}

int main() {
   int i;
   int fd;
   char *serialdev = "/dev/ttyS0";

   fd = openserial(serialdev);
   if (!fd) {
      fprintf(stderr, "Error while initializing %s.\n", serialdev);
      return 1;
   }

   setRTS(fd, 1);
   usleep(50000);
   setRTS(fd, 0);

   closeserial(fd);
   return 0;
}
gcc -Wall -pedantic -O2 -o impulse impulse.c
./impulse
It just creates 50ms impulse to RTS pin on RS-232 port and then exits. Although the impulse is only 50ms, the whole power cycle process takes about 100ms on my system, because SSD needs time to startup and Linux needs time to initialize it.
The result is ten passwords per second. User passwords! And the process is totally automatic.
Yes, ten passwords per second isn’t much, but it’s ok if you know “something” about the password.
The next step is to generate a password list. It's also important to be able to easily change password generation algorithm anytime, and also eliminate the already checked passwords.
A simple PHP script to generate the password list.
<?php

$words = array(
    'red',
    'fox',
    'walking',
    'on',
    'the',
    'street',
);

$passwords = array();
array_rand_combine($words, "", ' ', $passwords, 6);
$passwords = implode("\n", $passwords);
file_put_contents('passwords.txt', $passwords);

function array_rand_combine($arr, $temp_string, $connector = '', &$collect, $maxDepth, $deep = 0) {
   $deep++;
   if ($deep > $maxDepth)
      return;
   if ($temp_string != "")
      $collect[] = $temp_string;

   for ($i = 0; $i < sizeof($arr); $i++) {
      $arrcopy = $arr;
      $elem = array_splice($arrcopy, $i, 1);
      if (sizeof($arrcopy) > 0) {

         array_rand_combine($arrcopy, $temp_string . $connector . $elem[0], $connector, $collect, $maxDepth, $deep);
      } else {
         $collect[] = $temp_string . $connector . $elem[0];
      }
   }
}

?>
It’s a different and more general version of the script I used. Password generation script depends on what is known about the password:
- words it possibly contains
- digits at the end of password
- does it start from upper case letter
- etc.
This is what the actual password guessing script does:
- Reads passwords generated above.
- Executes
hdparmto test each password. - Checks the output of
hdparmto validate if the password matches. - Executes
impulseto power cycle the device if the password limit is exceeded.
<?php

$tryNr = 0;

$handle = fopen("passwords.txt", "r");
if ($handle) {
   while (($line = fgets($handle)) !== false) {
      // process the line read.
      start:
      $r = tryPassword(str_replace(' ', '', $line));
      if ($r == 0)
         goto start;
      else
      if ($r == 1)
         echo "Wrong password" . PHP_EOL;
      else
      if ($r == 5)
         die("Password have been found!!!!!!!!!!!!!!!!!!!!!!!!!!!!!!!!!!!!!!!!!!!!!!!!!!!!!!!!!!!!!!!!!!!!!!!!!!!!!!!!!!!!!!!!!!!!!!!!!!!!!!!!!!!!!!!!!!!!!!!!");

      $tryNr++;
      echo $tryNr . PHP_EOL;
   }
} else {
   // error opening the file.
}

function tryPassword($password) {

   echo "Trying password \"$password\"" . PHP_EOL;
   $output = shell_exec("hdparm -I /dev/sdg");

   //$output=implode("\n",$output);
   //echo $output;

   if (strstr($op, "expired: security count")) {

      if (strstr($op, "not	expired: security count")) {
         echo "OKOKOK" . PHP_EOL;
      } else {
         exec('./impulse');
         return 0;
      }
   } else {
      return 0;
   }

   $op = shell_exec("hdparm --user-master u --security-unlock " . escapeshellarg($password) . " /dev/sdg 2>&1");
   //var_dump($op);

   if (strstr($op, "PASSWD too long (must be 32 chars max)")) {
      return 1;
   }

   if (!strstr($op, "SECURITY_UNLOCK: Input/output error")) {
      return 5;
   }

   if (!strstr($op, "Issuing SECURITY_UNLOCK command, password")) {
      return 0;
   }

   return 1;
}

?>It took about two days to crack the password :)
The code samples are almost ready to use. The real circuit of the power-cycler is very simple and depends on which electronic components are at hand.