In this article example how you could deploy a java web application with Kubernetes. This is helpful when your system architecture needs to be high-availability, fault tolerance, easily scalable, portable and platform independent.
In this setup, I have used KOps to deploy the k8s cluster on AWS. However, you can provision your k8s cluster other options like AWS EKS a managed service on AWS. I wrote a simple script to provision k8s cluster on AWS EkS using the eksctl tool.
The web application deployed in this tutorial uses docker images. I have containerized the java application as well as the database and are publicly available on my docker registry. I have also used official docker images for RabbitMQ (as the message broker) and Memcached( to speed up the database by reducing the amount of reads on the database.) and finally used AWS route53 as DNS.
Click below list to view the docker images
Prerequisites
- AWSCLIv2 installed and configured
- Have k8s Cluster Setup
- AWS account
- Understanding docker or containers
- Basic understanding of K8s objects
Let's Begin!!!
You should skip this step if you are using another cluster setup.
Create cluster
kops create cluster --name=kube.oayanda.com --state=s3://oayanda-kops-state --zones=us-east-1a,us-east-1b --node-count=2 --node-size=t3.small --master-size=t3.medium --dns-zone=kube.oayanda.com
Update cluster
kops update cluster --name kube.oayanda.com --state=s3://oayanda-kops-state --yes --admin
Validate cluster
kops validate cluster --state=s3://oayanda-kops-state
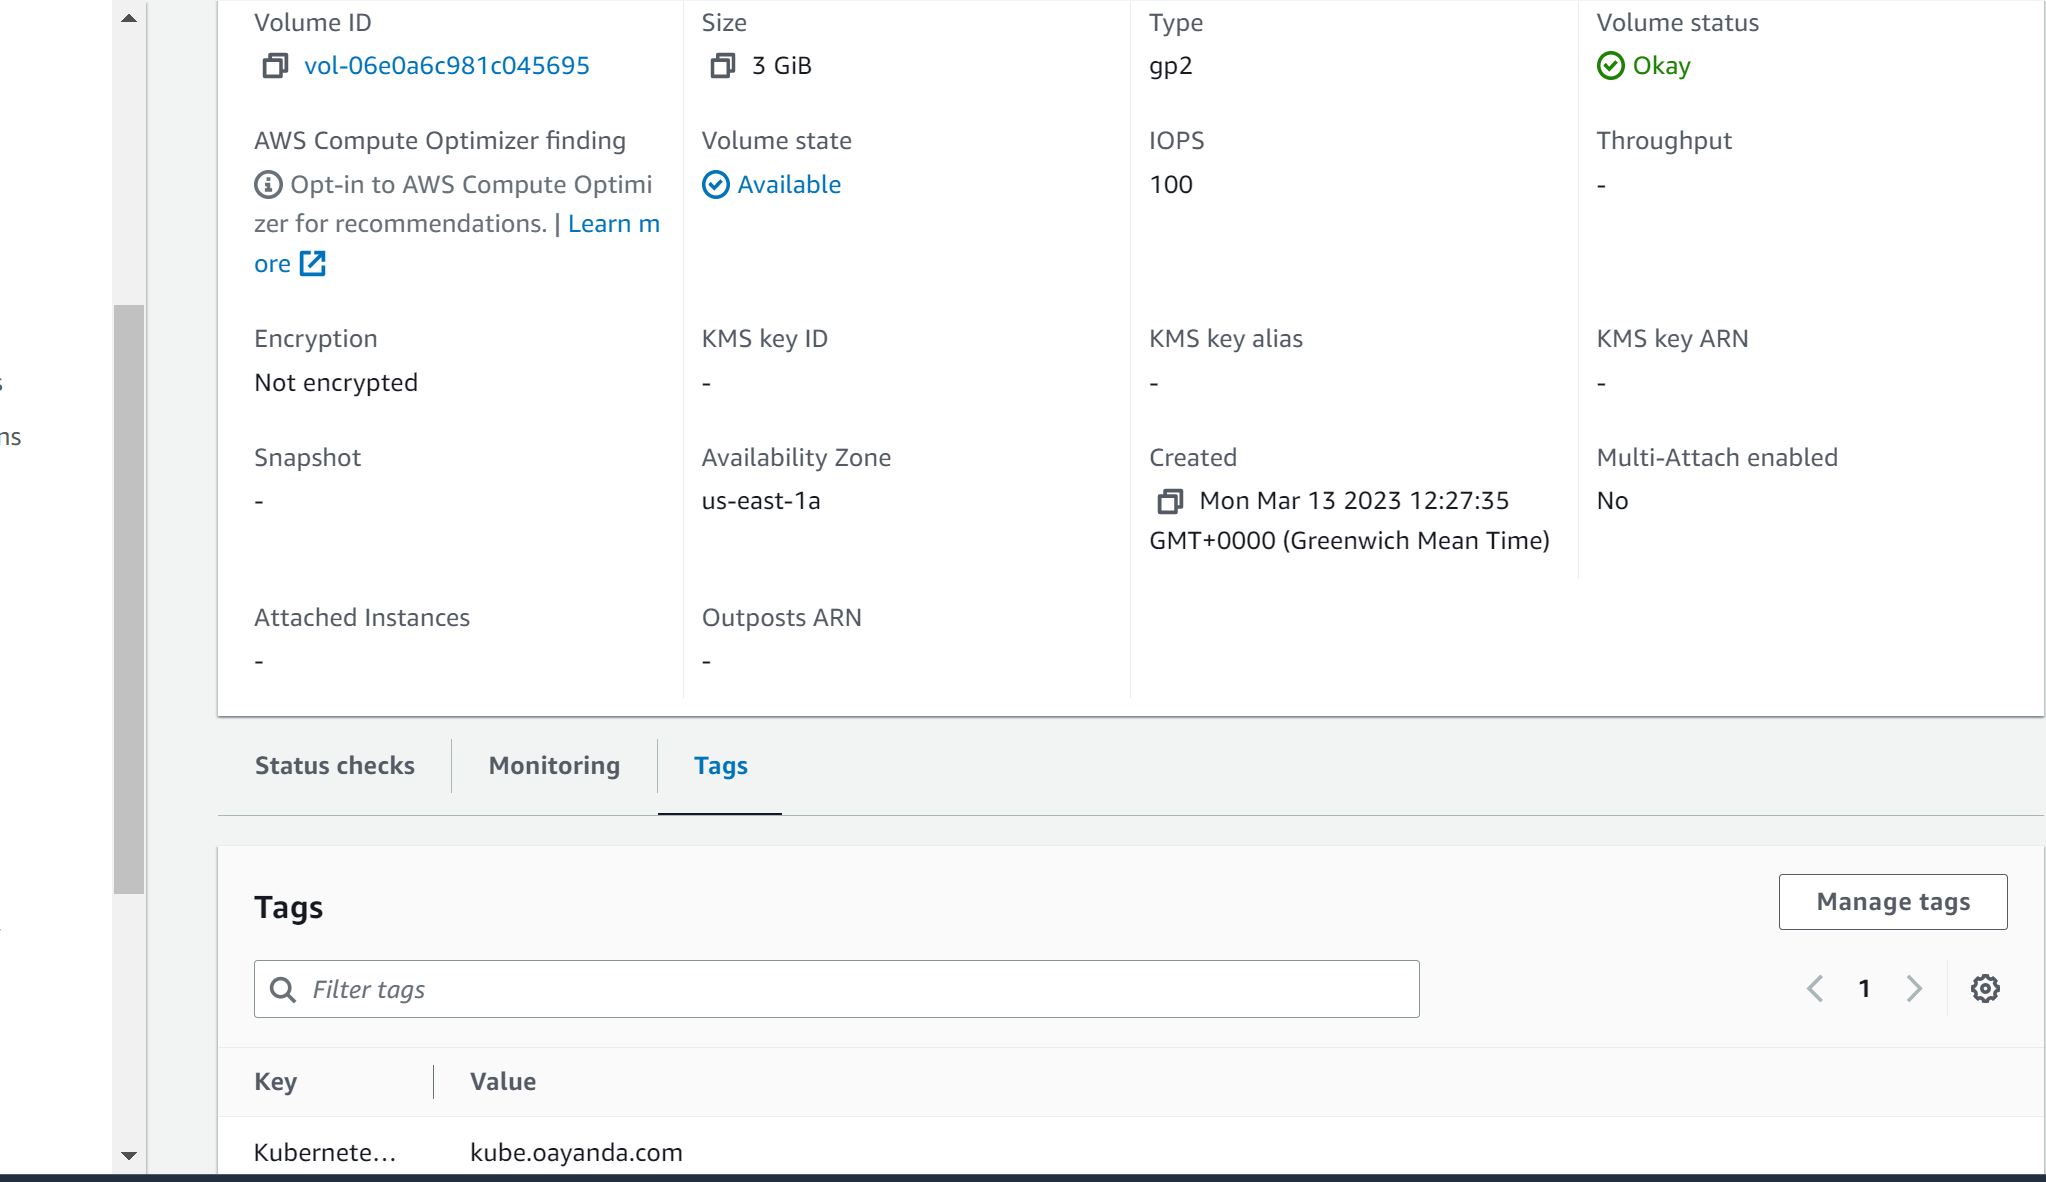
Create Persistent EBS volume for DB pod. Copy the volume ID for later use. vol-023c6c76a8a8b98ce and the AZ us-east-1a.
Copy the following code snippet into your terminal.
aws ec2 create-volume --availability-zone=us-east-1a --size=5 --volume-type=gp2 --tag-specifications 'ResourceType=volume,Tags=[{Key=KubernetesCluster,Value=kube.oayanda.com}]'Note: For volume mapping, make sure the value of the tag is the same as your kubernetes cluster.

Verify from AWS console
Verify which node is located in us-east-1a, which is where the volume was created.
# Get available Nodes
k get nodes

# Get more details about a node using the name
k describe node <name>
Note: You can create an alias for kubectl in your terminal.
alias k=kubectl

Create custom labels for nodes
# Create label for node
k label nodes i-033bf8399b48c258e zone=us-east-1a

# Verify label creation
k get node i-033bf8399b48c258e --show-labels
Secret definition File The secret object help to keep sensitive data like password. However, by default, stored unencrypted in the API server's underlying data store (etcd). Anyone with API access can retrieve or modify a Secret, and so can anyone with access to etcd. Read more from official documentation
Encode for the application and RabbitMQ passwords with base64.
echo -n "<password>" | base64
Create a file app-secret.yaml
apiVersion: v1
kind: Secret
metadata:
  name: app-secret
type: Opaque
data:
  db-pass: cGFzcw==
  rmq-pass: Z3Vlc3Q=
# create secret object
k create -f app-secret.yaml
# Show secret
k get secretNote: for production, the secret definition file should not be public because it might be decoded.

Database definition File For this file, you need the volume ID you created earlier and the zone the volume was created.
apiVersion: apps/v1
kind: Deployment
metadata:
  name: vprodb
  labels:
    app: vprodb
spec:
  selector:
    matchLabels:
      app: vprodb
  replicas: 1
  template:
    metadata:
      labels:
        app: vprodb
    spec:
      containers:
        - name: vprodb
          image: oayanda/vprofiledb:v1
          args:
            - "--ignore-db-dir=lost+found"
          volumeMounts:
            - mountPath: /var/lib/mysql
              name: vpro-db-data
          ports:
            - name: vprodb-port
              containerPort: 3306
          env:
            - name: MYSQL_ROOT_PASSWORD
              valueFrom:
                secretKeyRef:
                  name: app-secret
                  key: db-pass
      nodeSelector:
        zone: us-east-1a
      volumes:
        - name: vpro-db-data
          awsElasticBlockStore:
            volumeID: vol-023c6c76a8a8b98ce
            fsType: ext4
Create DB deployment
k create -f vprodbdep.yaml
k get pod 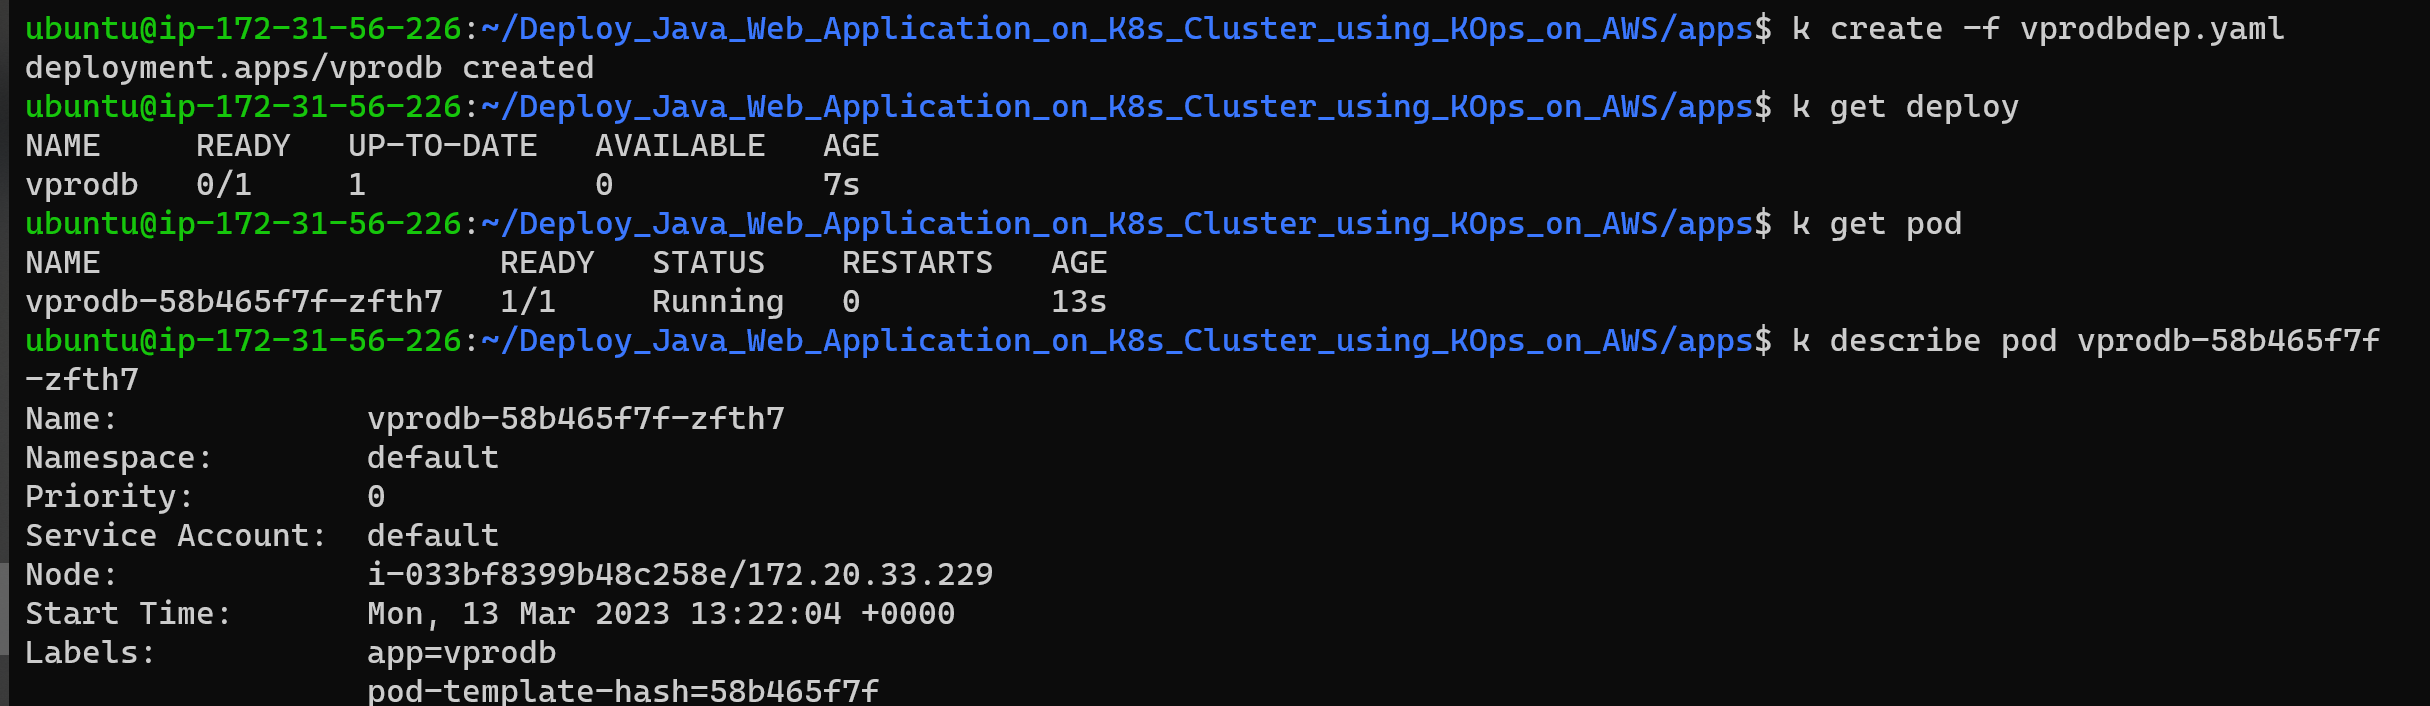
Verify volume is attached to pod
k describe pod pod vprodb-58b465f7f-zfth7
DB Service Definition
This will only be exposed internally to application and not to the public.
Create definition file db-cip.yaml
apiVersion: v1
kind: Service
metadata:
  name: vprodb
spec:
  ports:
    - port: 3306
      targetPort: vprodb-port
      protocol: TCP
  selector:
    app: vprodb
  type: ClusterI
Memcached deployment Definition
This will use the official docker image from docker hub.
Create definition file mcdep.yaml
apiVersion: apps/v1
kind: Deployment
metadata:
  name: vpromc
  labels:
    app: vpromc
spec:
  selector:
    matchLabels:
      app: vpromc
  replicas: 1
  template:
    metadata:
      labels:
        app: vpromc
    spec:
      containers:
        - name: vpromc
          image: memcached
          ports:
            - name: vpromc-port
              containerPort: 11211
Memcached Service Definition
This will only be exposed internally to application and not to the public as well.
Create definition file mc-cip.yaml
apiVersion: v1
kind: Service
metadata:
  name: vprocache01
spec:
  ports:
    - port: 11211
      targetPort: vpromc-port
      protocol: TCP
  selector:
    app: vpromc
  type: ClusterIP
RabbitMQ Deployment Definition
This will also use the official docker image from docker hub.
Create definition file mcdep.yaml
apiVersion: apps/v1
kind: Deployment
metadata:
  name: vpromq01
  labels:
    app: vpromq01
spec:
  selector:
    matchLabels:
      app: vpromq01
  replicas: 1
  template:
    metadata:
      labels:
        app: vpromq01
    spec:
      containers:
        - name: vpromq01
          image: rabbitmq
          ports:
            - name: vpromq01-port
              containerPort: 15672
          env:
            - name: RABBIT_DEFAULT_PASS
              valueFrom:
                secretKeyRef:
                  name: app-secret
                  key: rmq-pass
            - name: RABBIT_DEFAULT_USER
              value: "guest"
Rabbitmq Service Definition
This will only be exposed internally to application using the Cluster IP type.
Create definition file mc-cip.yaml
apiVersion: v1
kind: Service
metadata:
  name: vprormq01
spec:
  ports:
    - port: 15672
      targetPort: vpromq01-port
      protocol: TCP
  selector:
    app: vpromq01
  type: ClusterIP
Java Application Deployment I have used two inicontainers which are temporary containers which are dependencies for the Java application. Their job is to make sure the database and memcache container service are ready before the Java application container starts.
apiVersion: apps/v1
kind: Deployment
metadata:
  name: vproapp
  labels:
    app: vproapp
spec:
  selector:
    matchLabels:
      app: vproapp
  replicas: 1
  template:
    metadata:
      labels:
        app: vproapp
    spec:
      containers:
        - name: vproapp
          image: oayanda/vprofileapp:v1
          ports:
            - name: vproapp-port
              containerPort: 8080
      initContainers:
        - name: init-mydb
          image: busybox:1.28
          command: ['sh', '-c','until nslookup vprodb; do echo waiting for mydb; sleep 2; done;']
        - name: init-memcache
          image: busybox:1.28
          command: ['sh', '-c','until nslookup vprocache01; do echo waiting for memcache ; sleep 2; done;']
Create Service Load balancer for Java application
apiVersion: v1
kind: Service
metadata:
  name: vproapp-service
spec:
  ports:
    - port: 80
      targetPort: vproapp-port
      protocol: TCP
  selector:
    app: vproapp
  type: LoadBalancer
Now, let's deploy all the other definition files
k apply -f .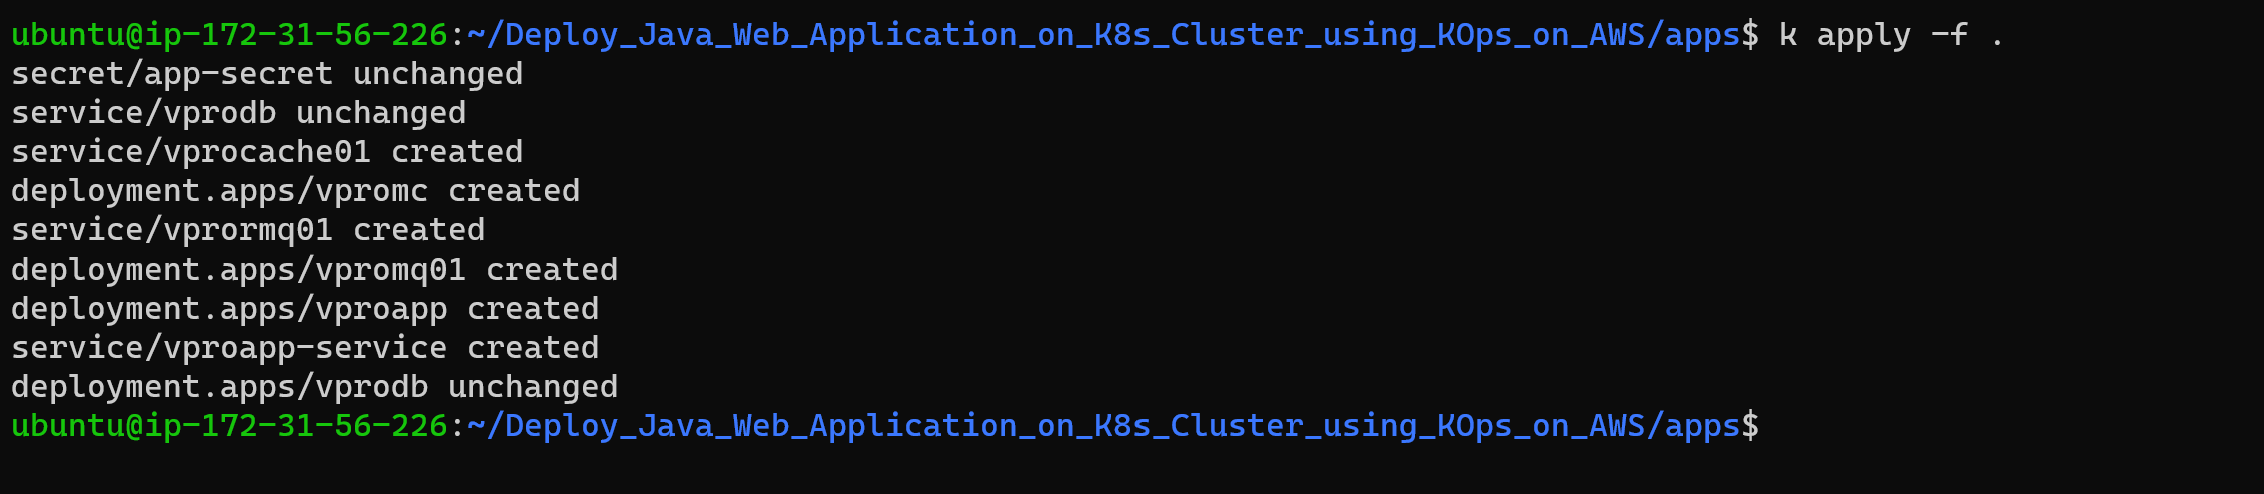
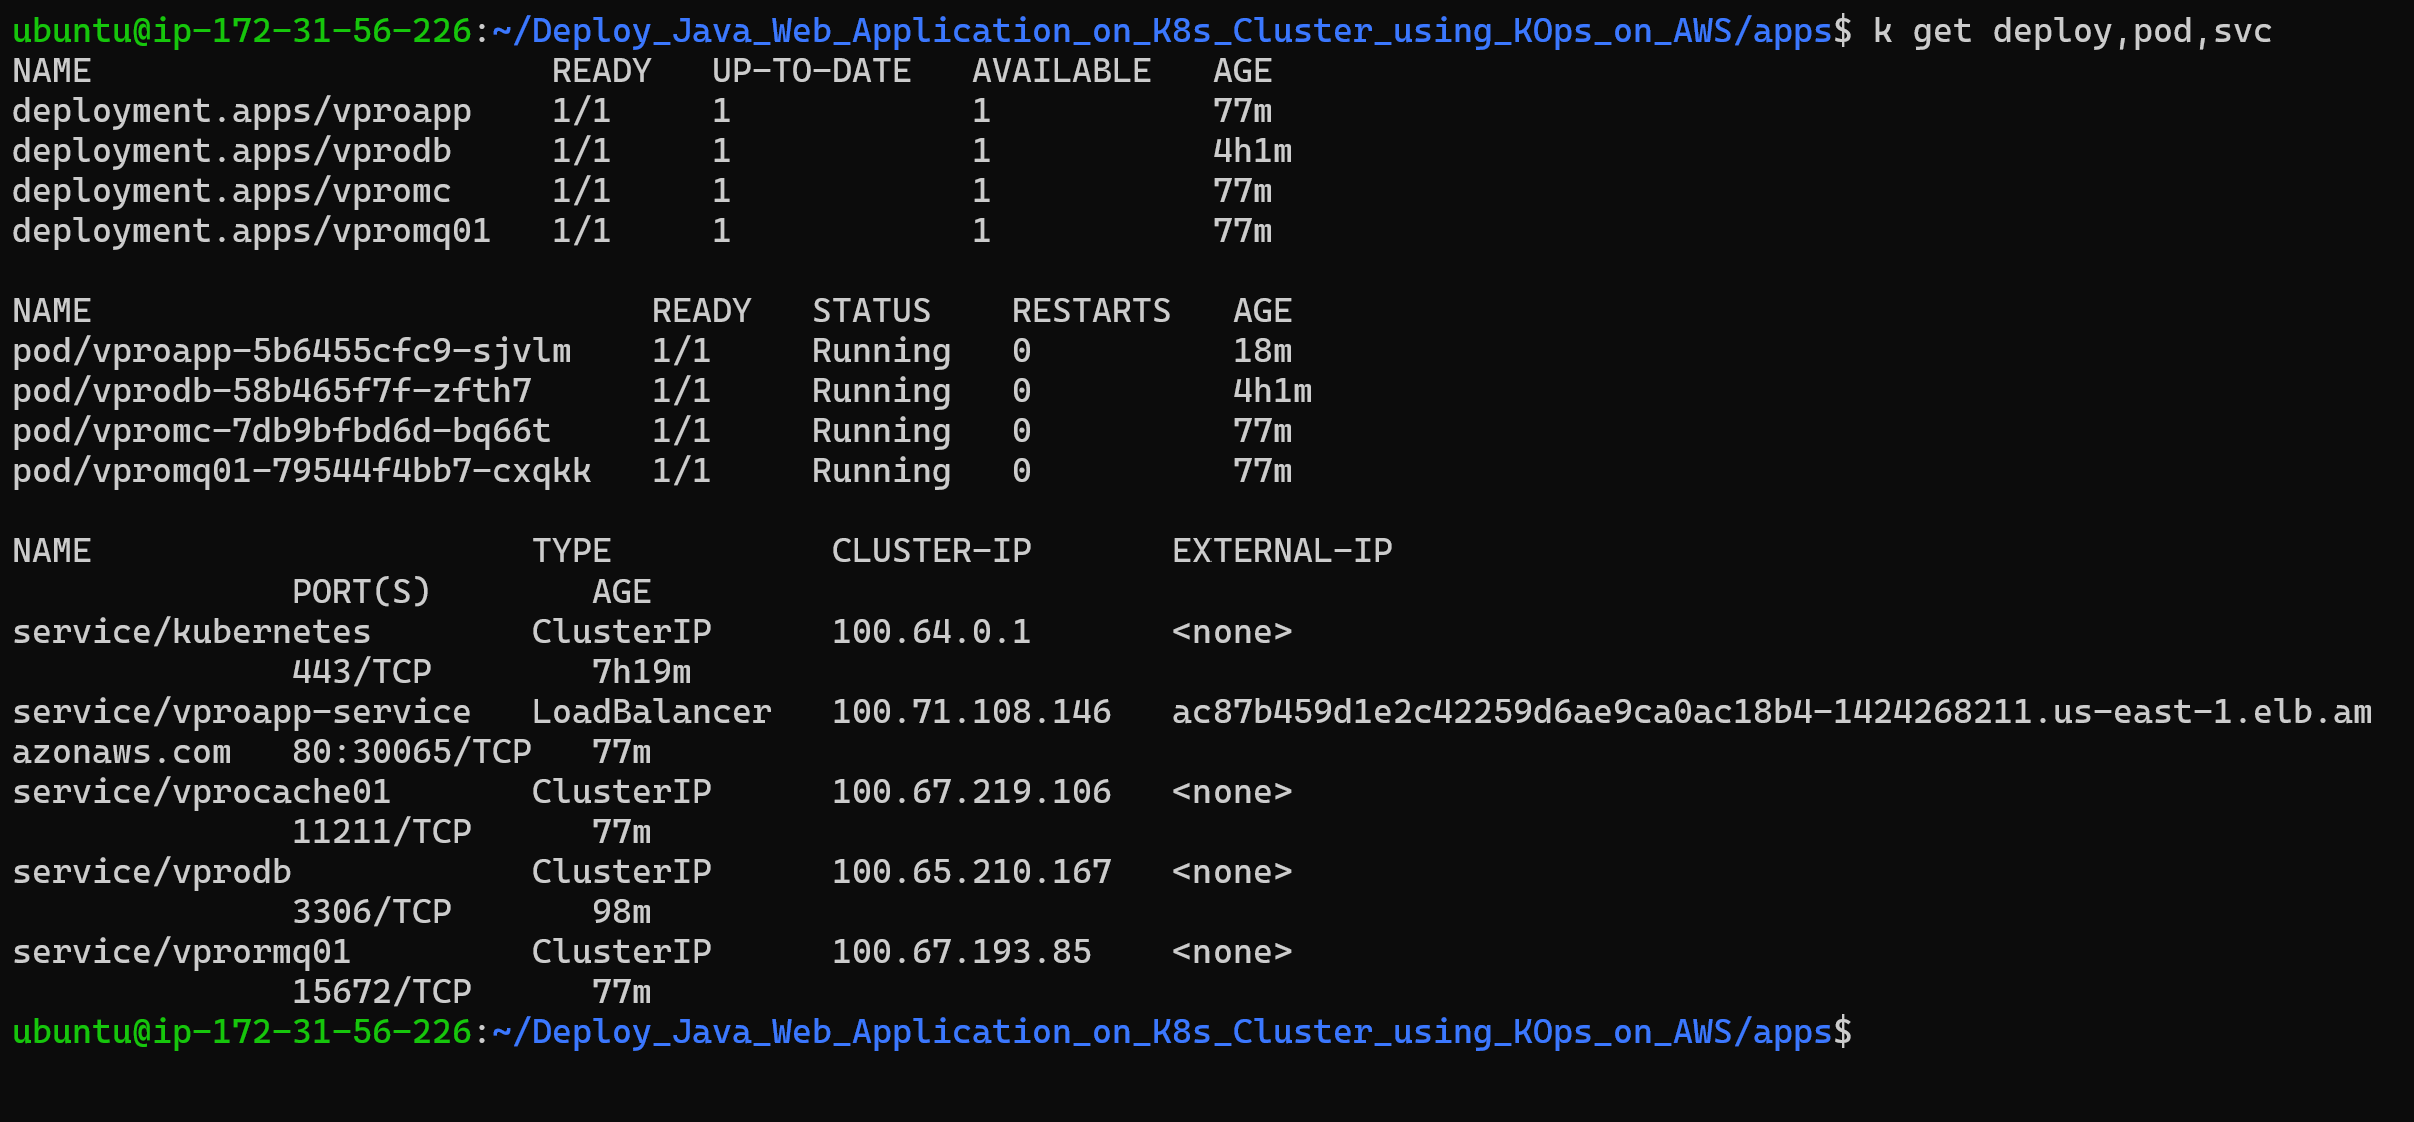
Verify deployment and service are created and working
k get deploy,pod,svcNote: It might sometime for all objects to created including the Load balancer.
Copy the Load balancer URL and view in browser

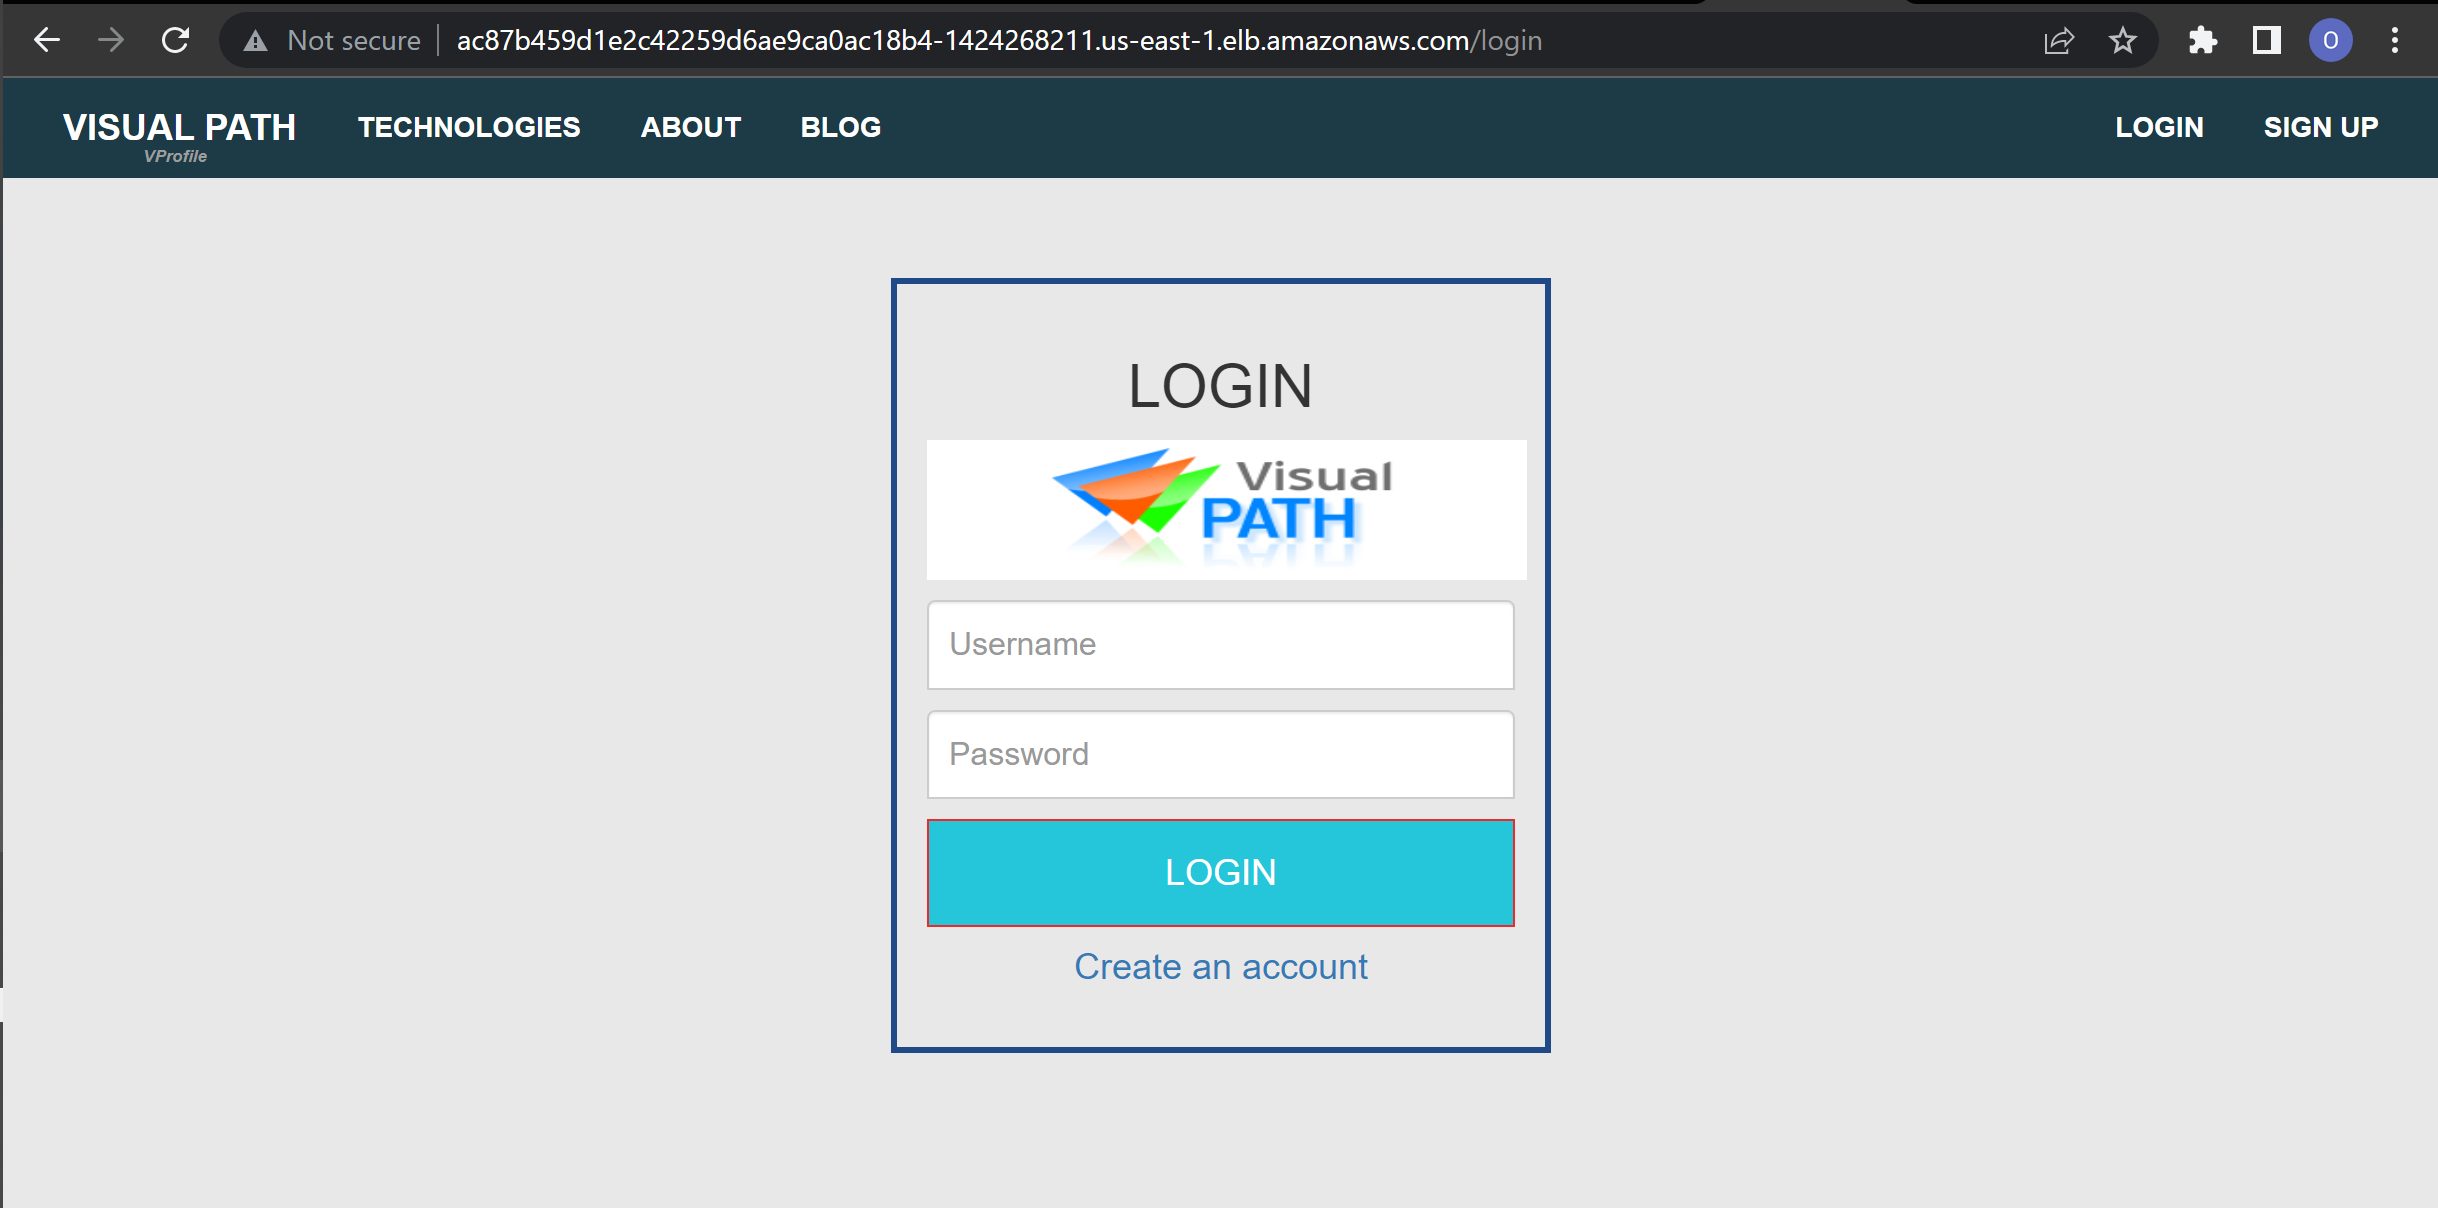
Login with the default name: admin_vp and password: admin_vp

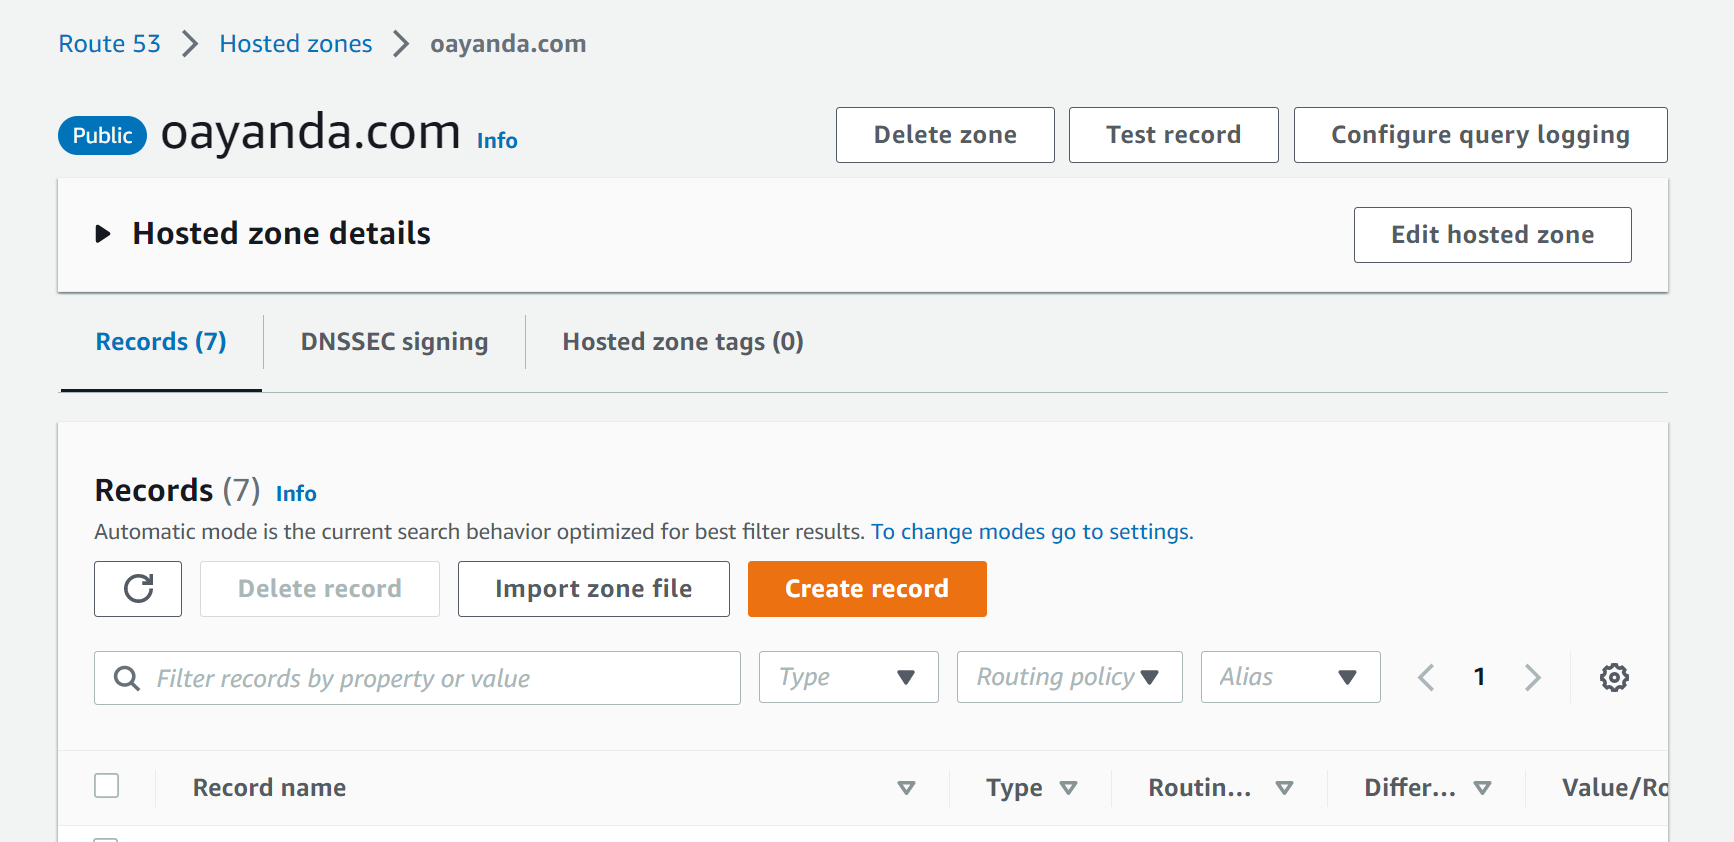
Host on Rout53 Step 1 If you are using an external registrar (for example, GoDaddy).
- Create a Hosted Zone in Route53
- Copy the NS records and update it on your external registrar. Step 2
In the Hosted zone on Rout53 Click create record
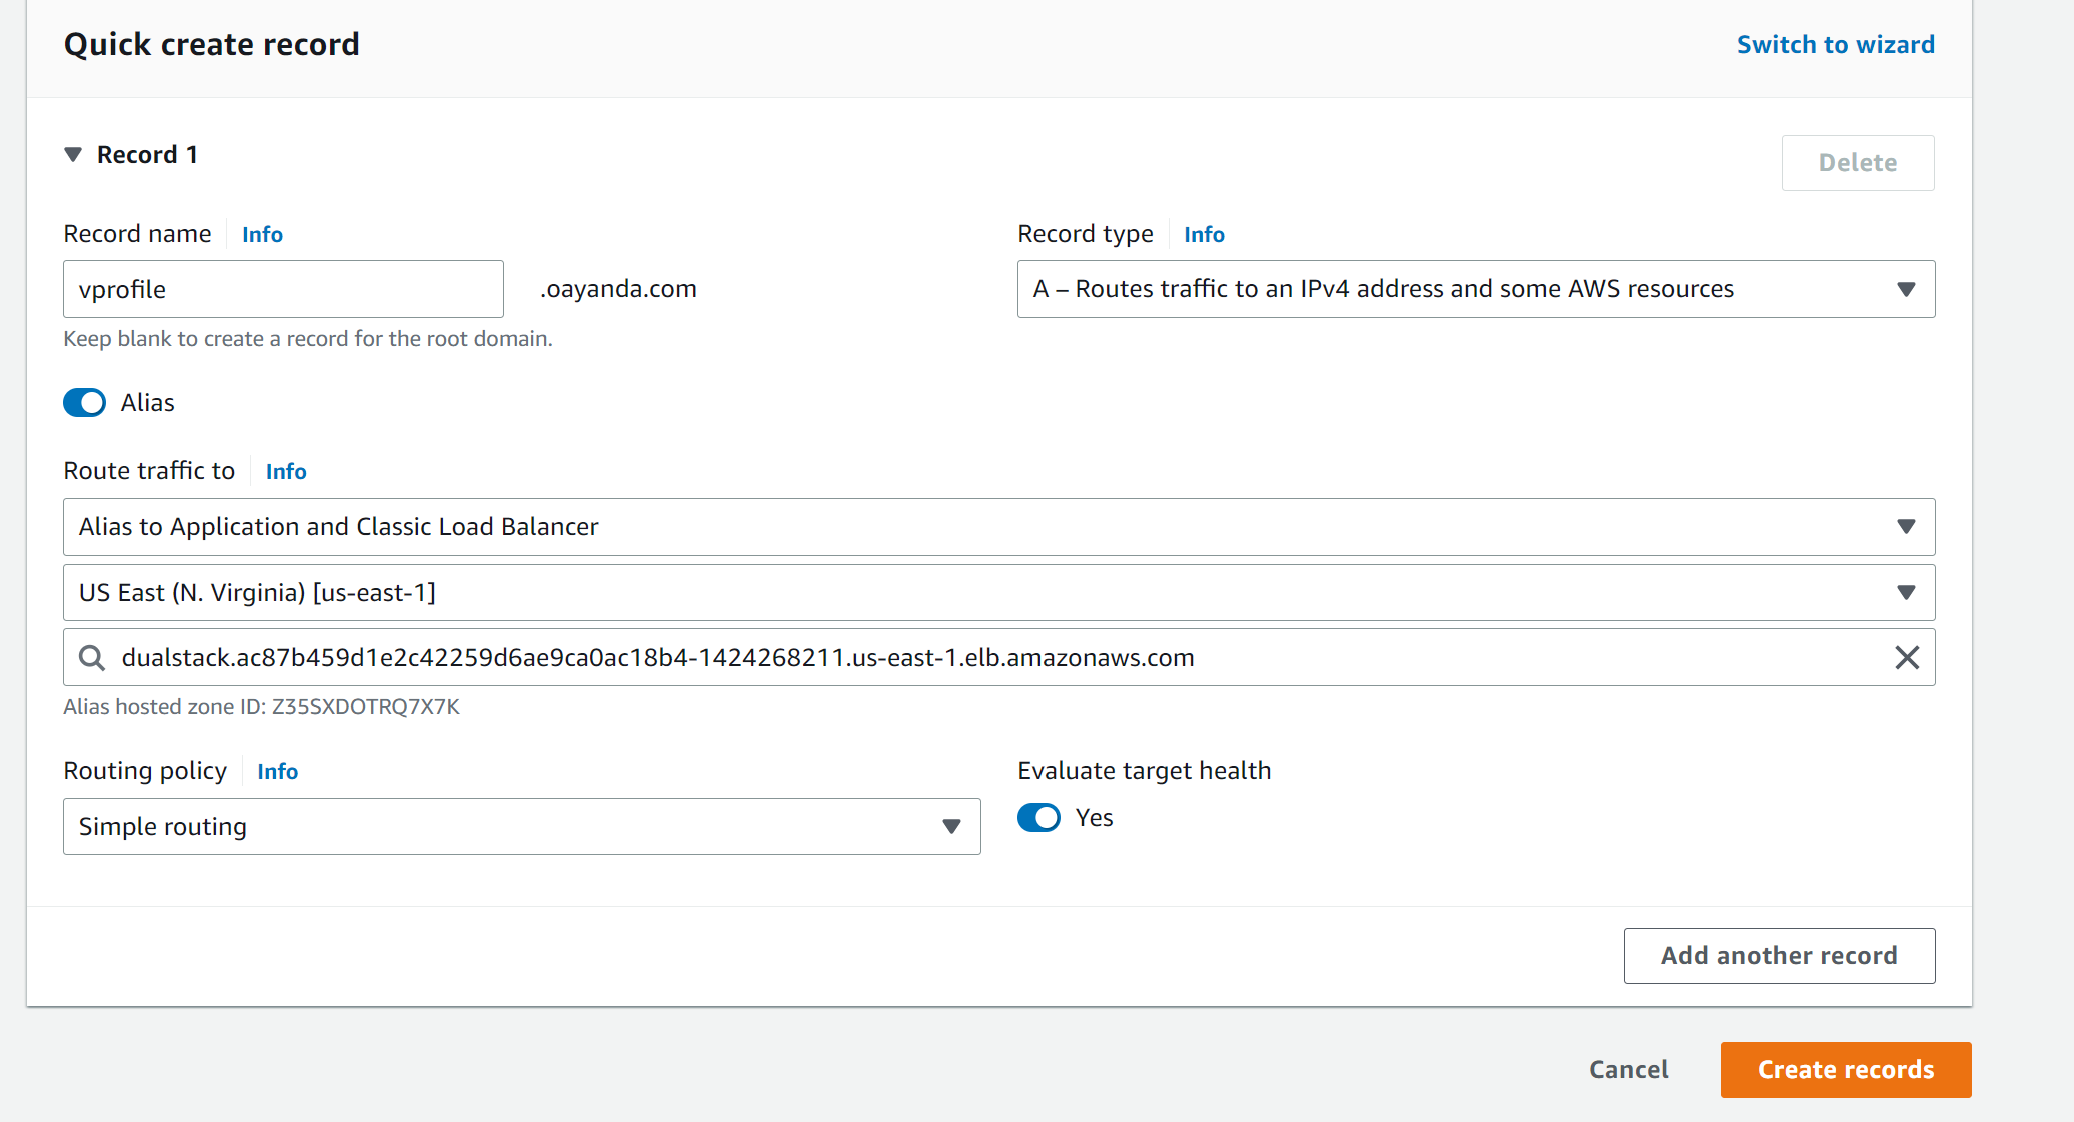
- Enter a name for your application
- Click on the Alias radio button
- Under the Route traffic to, select Alias to Application and Classic load balancer
- Select the region your application is deployed
- Select the Load balancer
- Click Create records
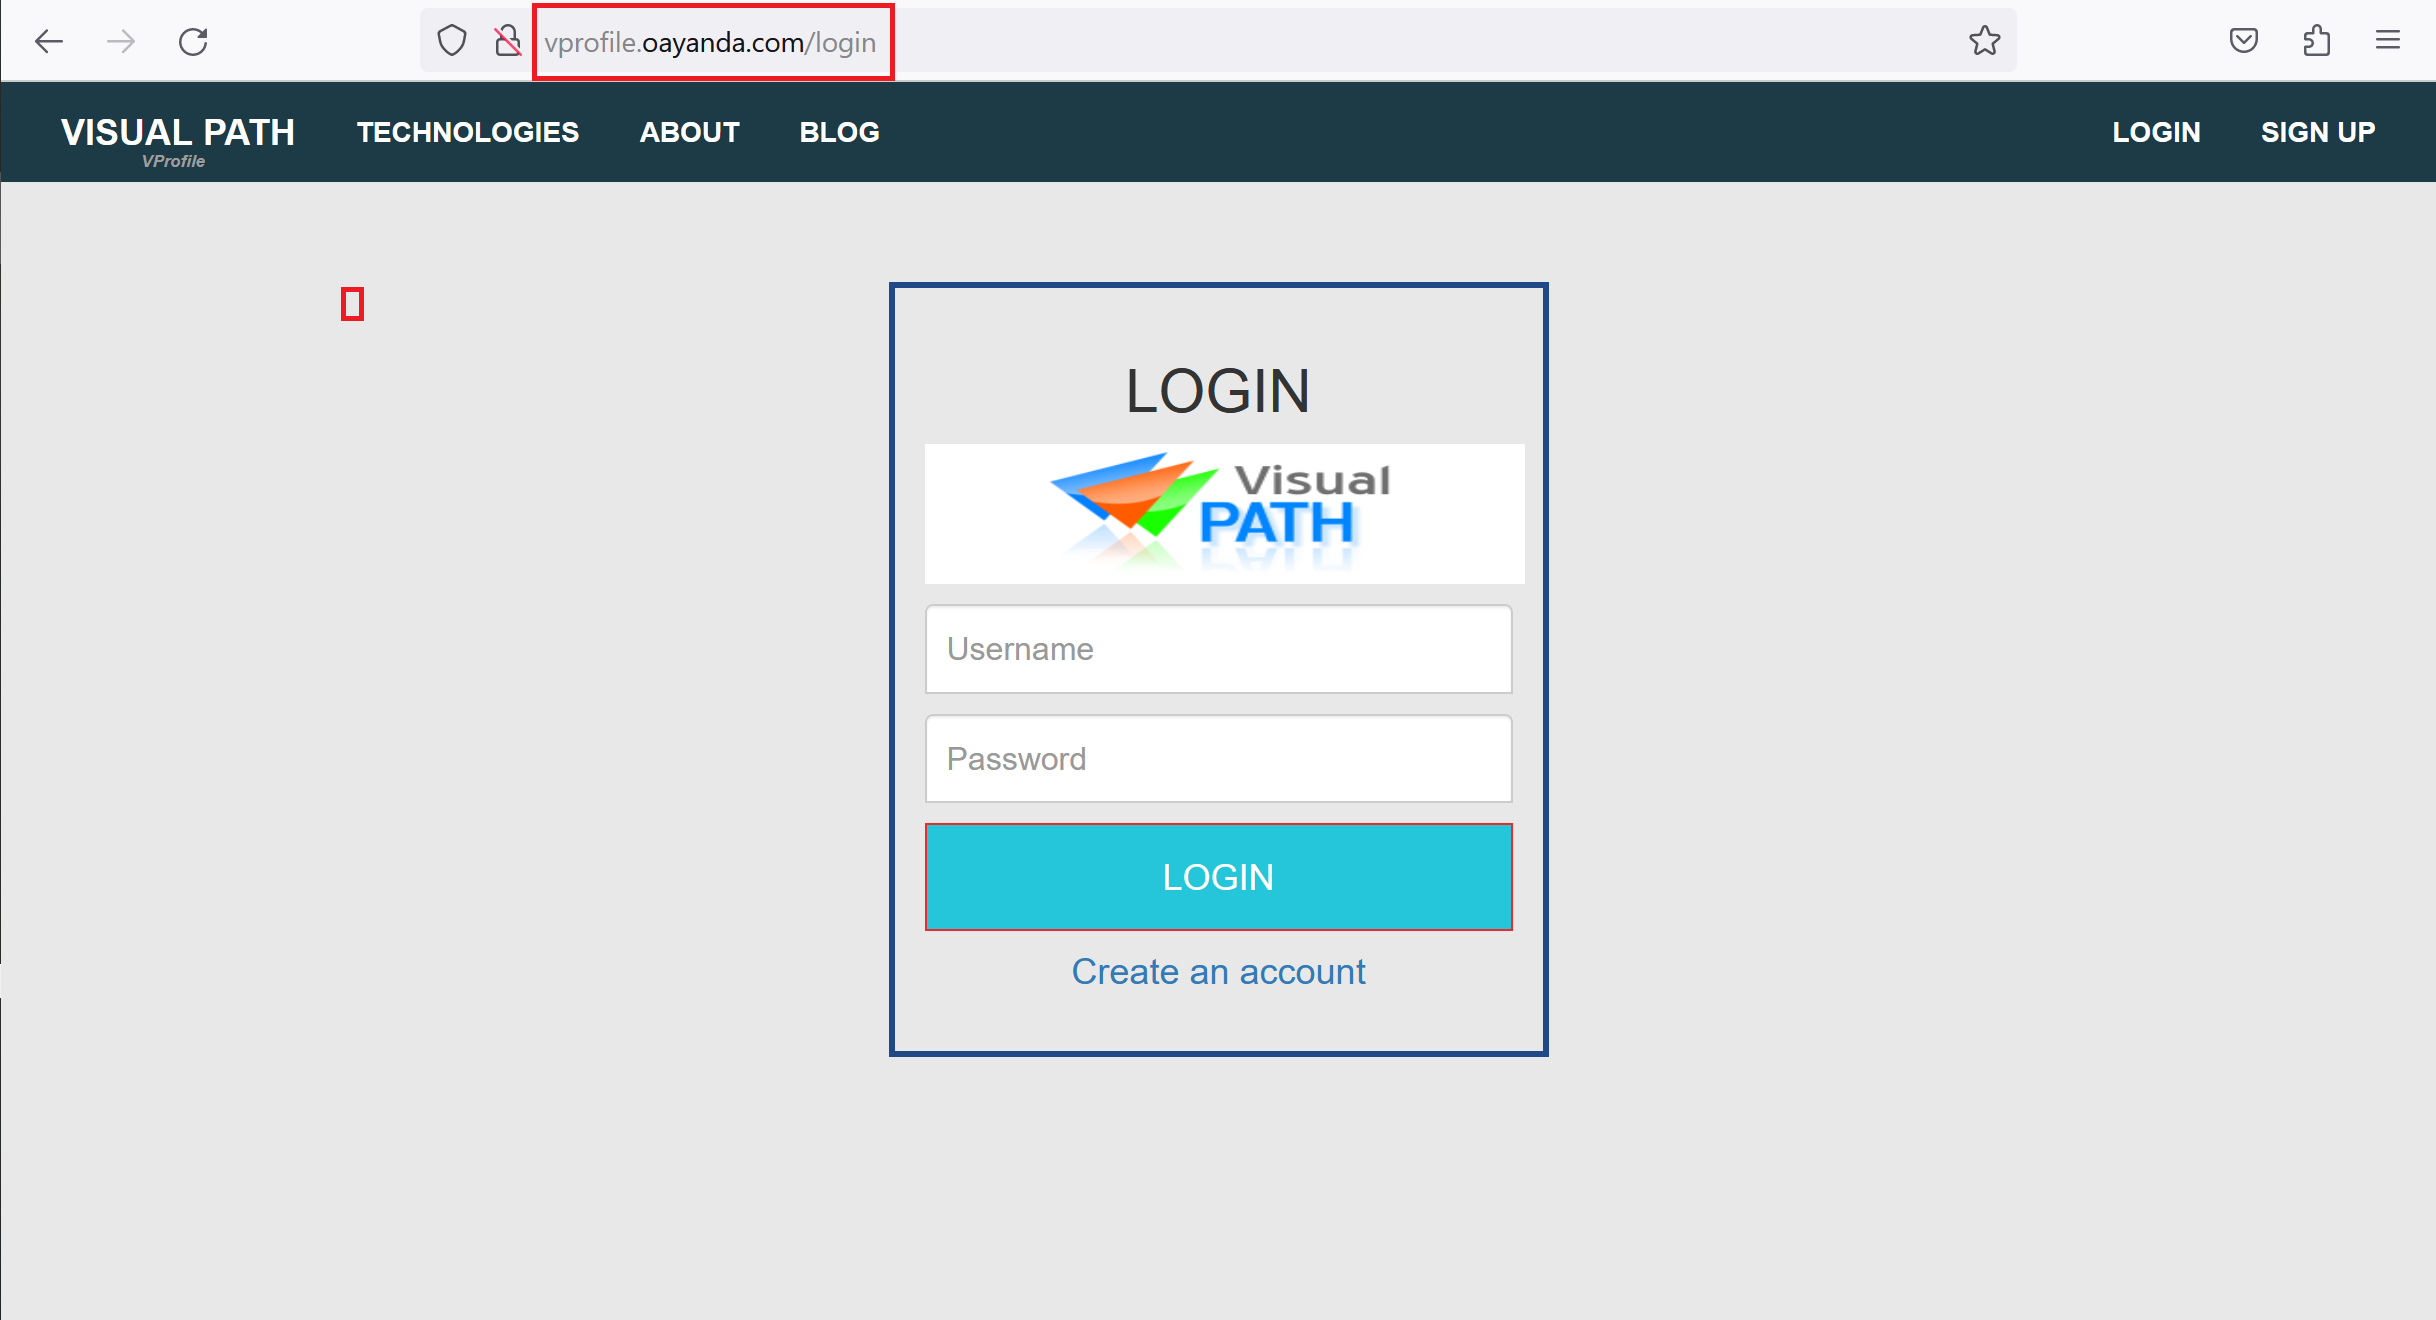
This will take some seconds for propagation.
View in the browser
Clean Up
# Delete all objects
k delete -f .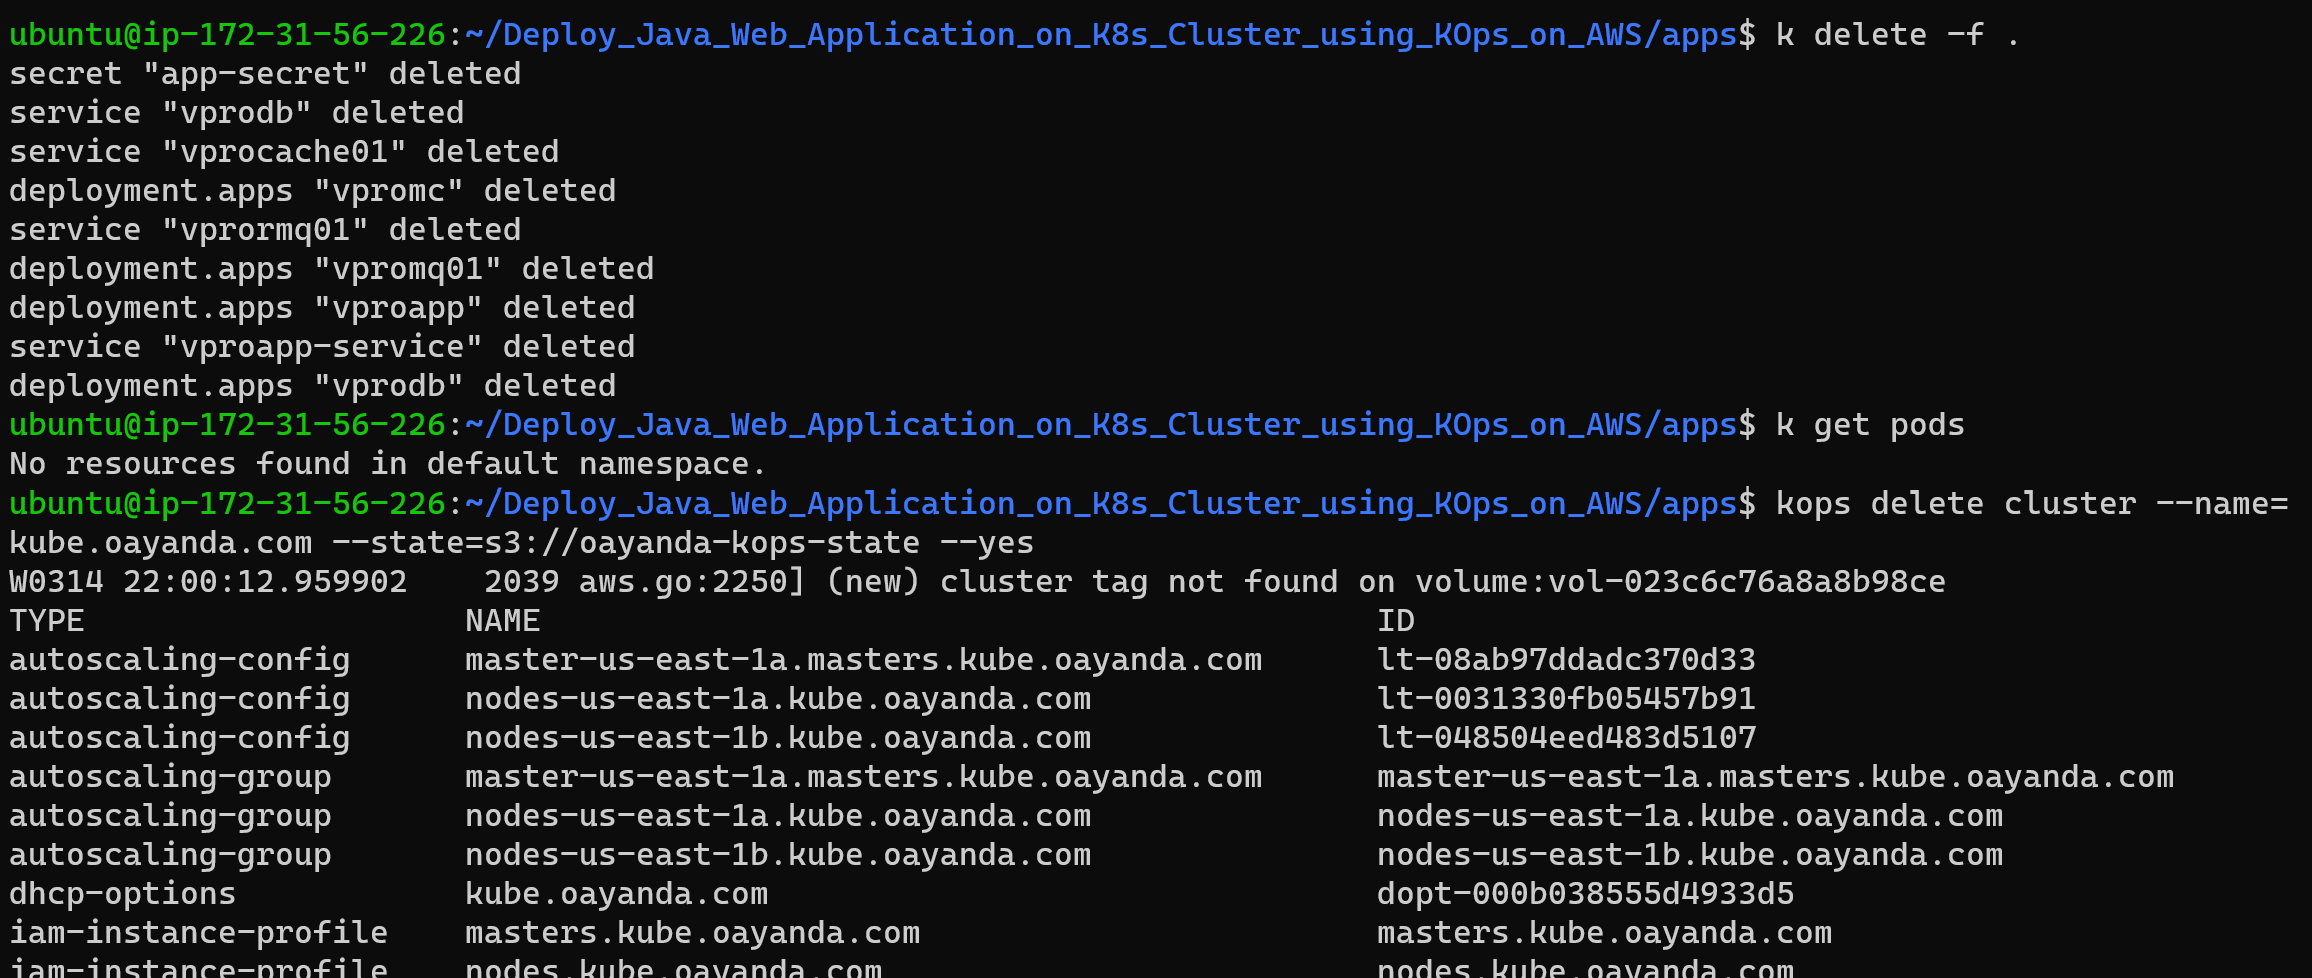
Congratulations! you have successfully deploy an application on Kubernetes Cluster.