myPlanet is the Android port of the Planet web application. It will work with Planet community / nation.


On your Android device, go to Releases and download the latest version of the APK of the Application. Click on the downloaded APK and choose install.
Virtual Interns who will be working on the project should start out by setting up the repository on their own device in Android Studio. The steps are very similar to the process followed for cloning the open-learning-exchange repository. The only difference is that you do not need to fork the myPlanet repository as you are now a part of the team.
Open the myPlanet repository on Android Studio. Click on Build to sync and build the project. If you face any issues in syncing or compiling the project, use the mobile gitter channel or the Mobile Hacking Hangout to discuss and solve your difficulties with the team.
We also encourage you add the solutions to any syncing or compiling issues to this README document in the Troubleshooting section as a guidance to the future virtual interns.
As the myPlanet App will mostly be used on 10-inch OLE Tablets, the best way to run and test the application will be on the 10-inch tablet emulator (unless you have an actual 10-inch tablet):
- If you have completed the First Steps, then you have already enabled virtualization on your device.
- After opening the myPlanet project in Android Studio, sync it by going to
file/sync project with gradle files.

- Once syncing is over, click on
Run. - At the bottom of the dialog, click on
Add New Virtual Device. - Choose
Tabletand then choose the10.1" WXGA Tablet(1280 x 800 mdpi). - Choose API level according to the latest release (25 or greater) and continue.
- Verify the configuration and click finish.
Your device should configure and the application will run on the virtual device.
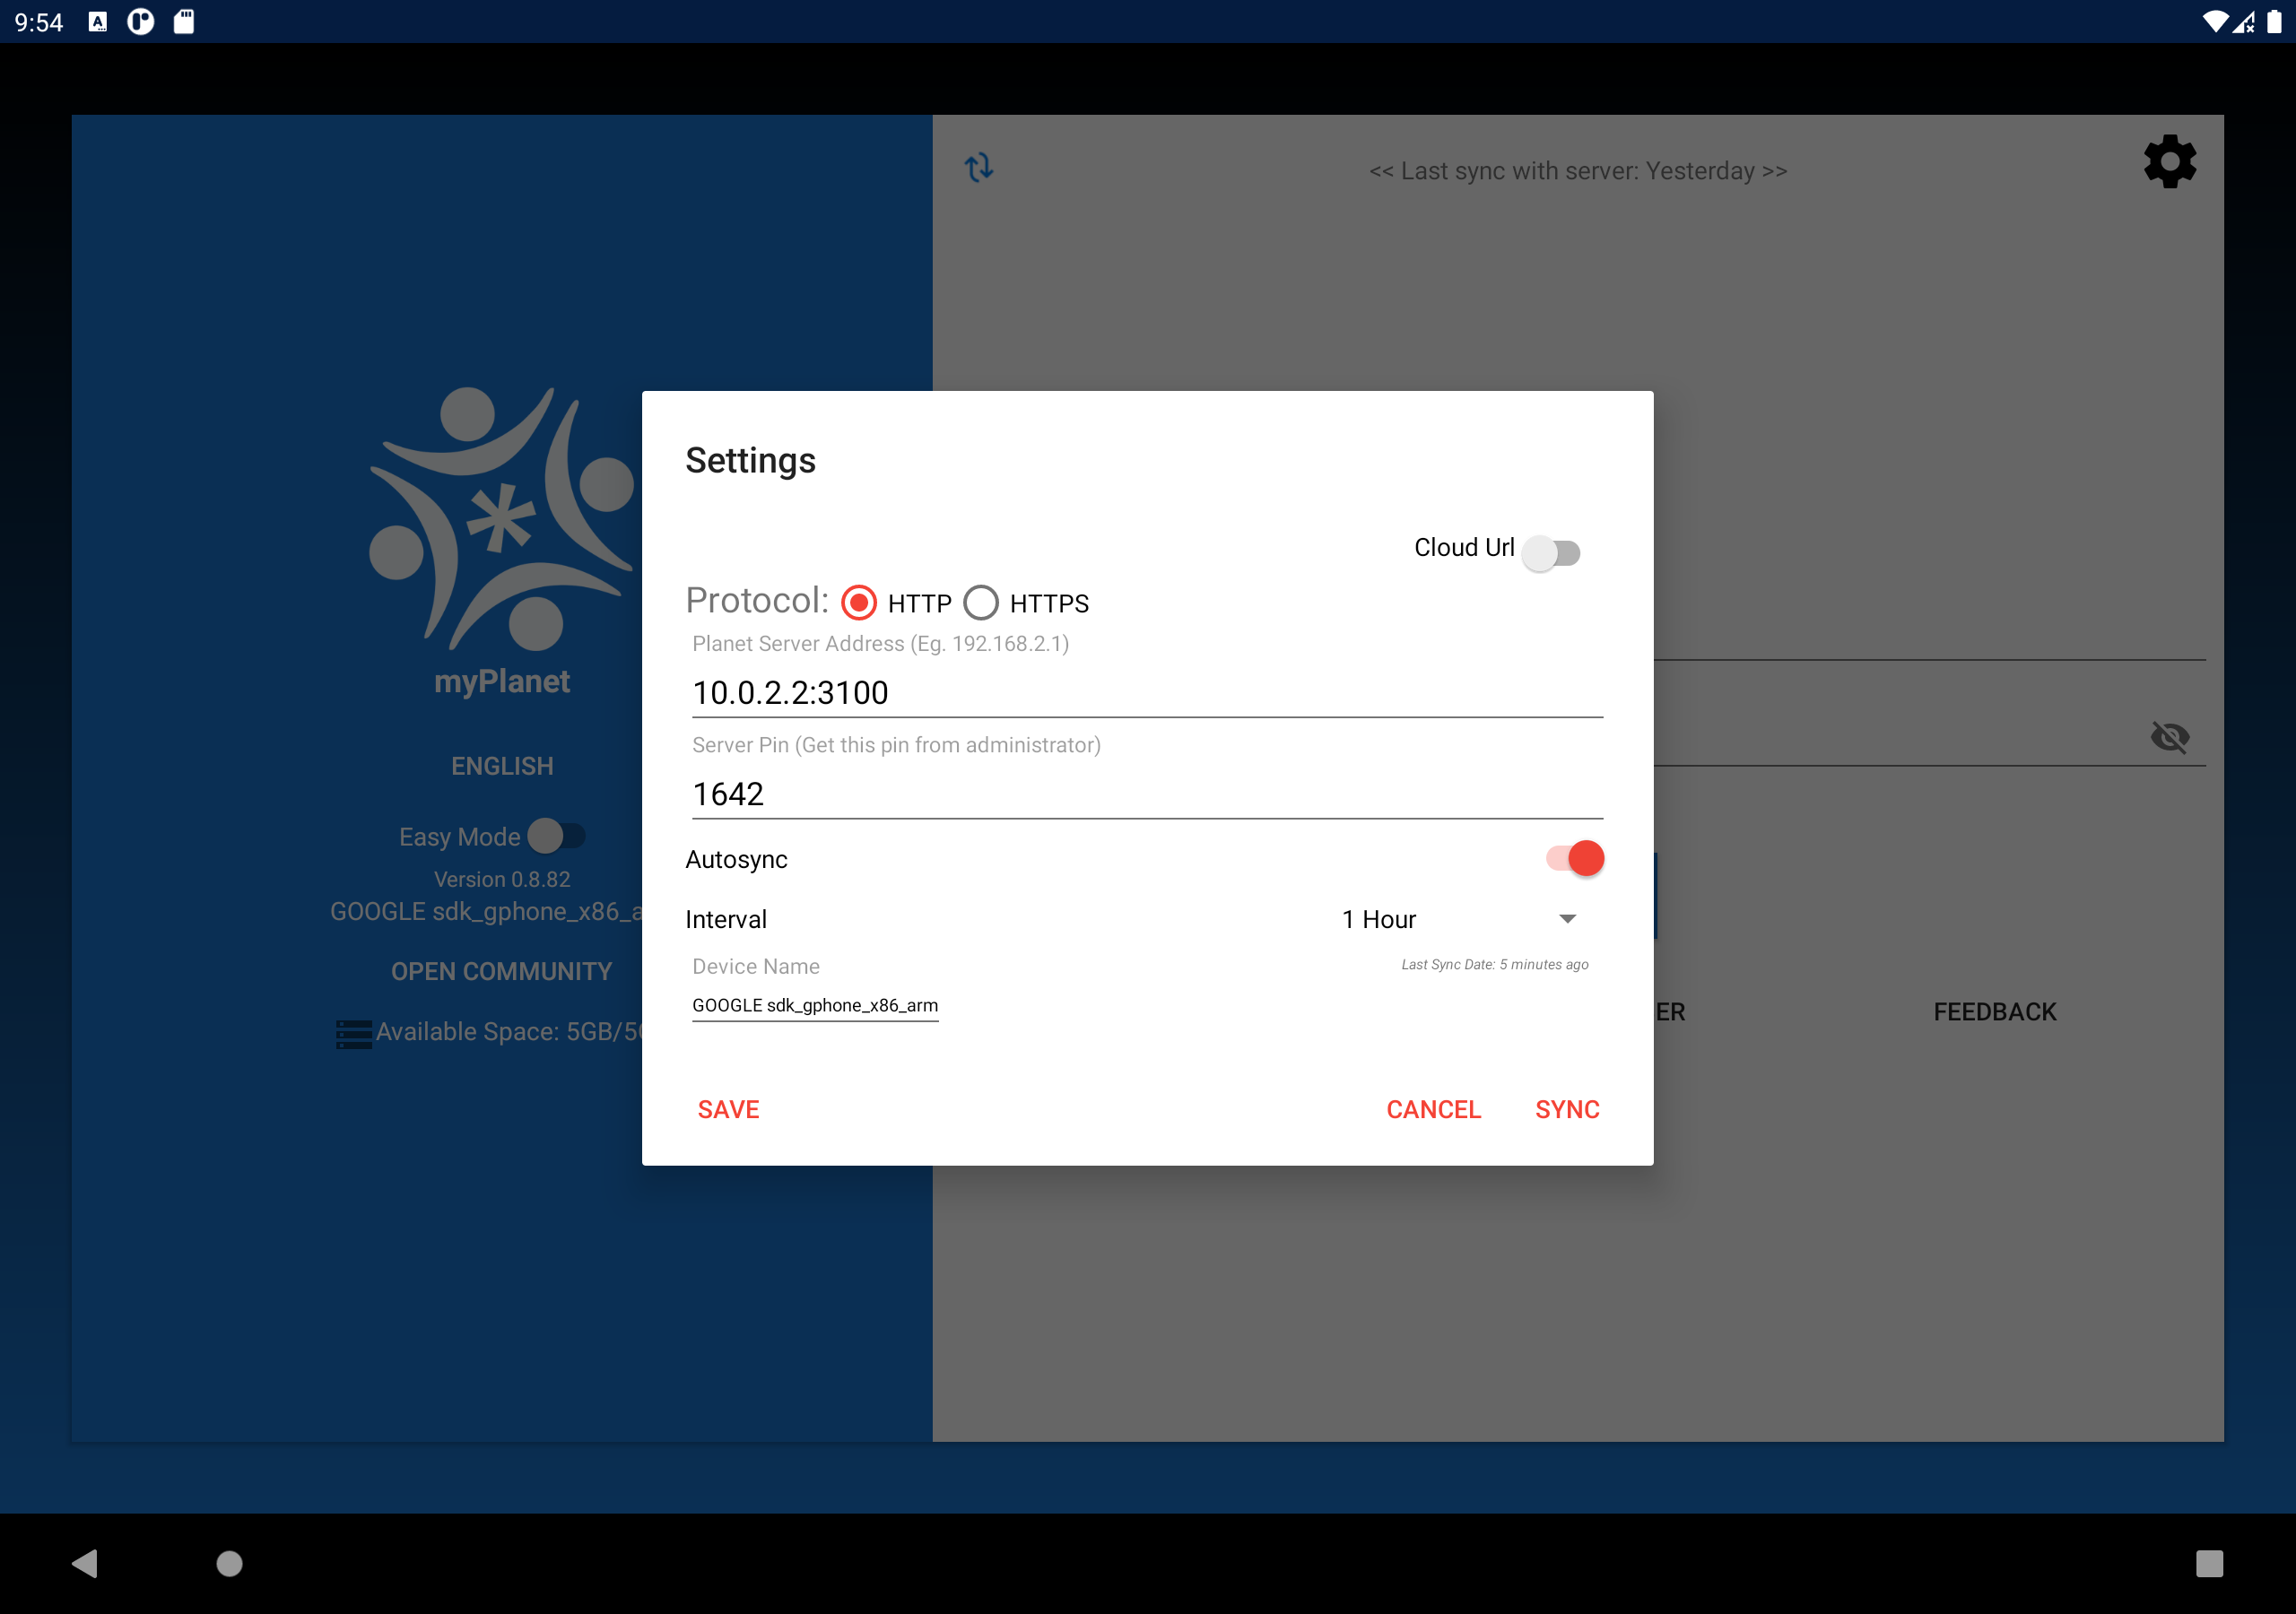
Now the app needs to sync with the server to be able to log in. Click on the settings icon on the top right and fill in the following.
-
Planet Server Address: If you are on an emulator and running planet on your machine your planet server address will most probably be 10.0.2.2:3100. If your instance of planet is running on a raspberry pi your server address would be raspberry-pi-ip-address:3100. The planet instance might not always run on port 3100, so double check the ip address and port your instance of planet is running on.
-
Server Pin: Login to Planet with the admin account(the one that was created in the first steps), go to manager settings on the top right and find table pin/server pin there.

Enter the details and press sync.
Finally you need to create a new account for development and testing either on the myPlanet app or on Planet after connecting to the server since at this moment admin login is not supported.
Along with the 10-inch tablet, you can also use an actual device to run and test the application - it is always good to know how the App functions on different screen-sizes and densities.
Vysor is software that helps display your Android screen into your computer. It helps you explain the issue more in detail. Plus, everybody in the team can see what is happening on your screen, therefore we can help each other in debugging.
The process for creating issues and pull requests is very similar to First Steps. Remember to branch off of the master branch before working on and creating a new pull request.
If you catch a bug, have a feature request or just see something that could be improved, create a new issue and let others know about it so that it can be reviewed. If its apporved you can assign yourself to the issue and start working on it. You don't have to work on every issue you create so feel free to open issues on things you do not understand yet.
Before you start working on any issue make sure that the issue is valid and approved by the members of the team and always assign yourself to the issue so that nobody else works on the same issue.
Since you are just staring out it is important to get some understanding of the codebase and it's structure. A good way to understand the codebase while contributing is to start with simple issues like changing color of a button or fixing the spacing of some element. If you feel more confident you can work on more challenging issues.
Another excellent way to contribute is by adding comments. While going through the codebase if you don't understand a piece of code or feel like a comment could help make the purpose of the code clearer add a comment so that interns that join after you have an easier time understanding the codebase.
Finally don't hesitate to ask for help. You are encouraged to find a solution yourself but if you unable to find one or need a second opinion feel free to reach out.
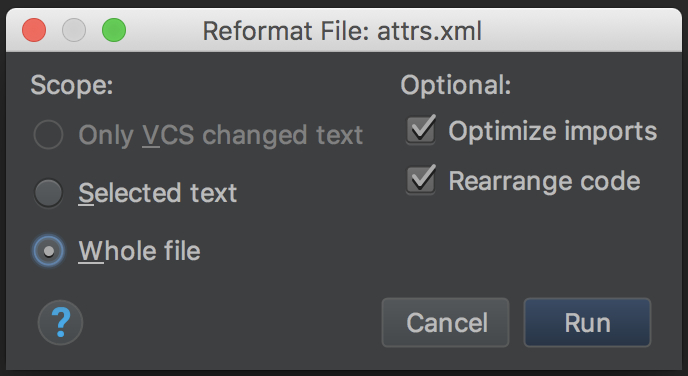
To maintain uniform formatting of the code, use the following keys combinations in .java, .xml, or any other project files you have changed in Android Studio before committing and pushing the code to the myPlanet repository:
For Windows, use ctrl + alt + L to format few lines and shift + ctrl + alt + L to format an entire file.
For Linux use ctrl + alt + super + L. (super is the Windows icon key next to the alt key)
For Mac: ctrl + command + shift + L.
Remember, this is an important step to remember so that we are able to maintain a high standard of code.
Some of the issues that you can come across may be related to the obsolete commands, gradle building, the version of Android Studio your are using, etc. Add your problem and the solution to your problem in this section to help future interns.