Nikobus Binding
Documentation of the Nikobus binding Bundle
This binding allows openHAB to interact with the nikobus home automation system.
More specifically, it allows openHAB to:
- send (simulated) button presses to the nikobus
- react to button presses which occur on the nikobus
- change the status of switch channels on a nikobus switch module
- request the status of switch channels on a nikobus switch module
- change the status of dimmer channels on a nikobus dimmer module
- request the status of dimmer channels on a nikobus dimmer module
- send commands to the nikobus roller shutter module
This binding has been tested with the following hardware:
- Push buttons (05-060-01, 05-064-01), RF Transmitter (05-314), PIR Sensor (430-00500)
- 12 channel switch module (05-000-02)
- PC-link module (05-200)
To install, place the nikobus binding bundle in the folder ${openhab_home}/addons.
In the logback_debug.xml file, add an entry to enable DEBUG logging for the nikobus binding:
<logger name="org.openhab.binding.nikobus" level="DEBUG" />
In the openHAB.cfg file, define which serial port is connected to your PC-Link module, e.g:
nikobus:serial.port=/dev/ttyUSB0
The next step is to configure buttons and switch modules in the binding. For this, you should start openHAB in debug mode. This will allow you to capture address values from the nikobus in the OSGI console.
The configuration of a button uses the following format:
Switch myItem {nikobus="<address>:<pressType>"}
| Parameter | Description |
| address | Address of the button. |
| pressType | Optional. Indication for a SHORT (<1 sec) or LONG (>1 sec) button press. Defaults to SHORT. |
Once an openHAB item has been configured as a nikobus button, it will receive a status update to ON when the physical button is pressed.
Button press type detection intentionally works different from the standard niko behaviour. A button which is configured as LONG, will NOT be triggered by any SHORT presses of that button. Vice versa, a button which is configured as SHORT will NOT be triggered by any LONG button presses.
Examples of Button Configurations:
Switch Office_Top_Left_S "Office Light On/Off Short Press" {nikobus="#N003334:SHORT"}
Switch Office_Top_Left_L "Office Light On/Off Long Press" {nikobus="#N003334:LONG"}
Switch Kitchen "Kitchen Light On/Off" {nikobus="#N003333"}
When an item receives the ON command from openHAB, it will send a simulated button press to the nikobus. This means you could also define a virtual buttons in openHAB with non-existing addresses e.g. #N000001 and use those in the programmation of your nikobus.
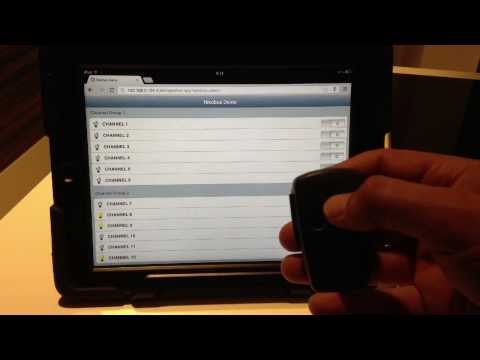
The binding supports both the 4 channel switch module (05-002-02) and the 12 channel switch module (05-000-02).
The large module contains 2 channel groups, where the first group controls channels 1-6 and the second one controls channels 7-12. The small module contains only a single channel group controlling all 4 channels.
All commands send to/received from the nikobus switch module are for a single channel group.
In order to be able to read the status of a nikobus switch module channel or to switch a channel directly on the switch module without mimicking a button press, you will need to configure items for each channel on the switch modules.
The configuration of a switch channel has the following format:
Switch myChannel {nikobus="<moduleAddress>:<channel>"}
Where <moduleAddress> is the address of the switch module and <channel> is a number in the range 1-12 indicating the switch channel.
To find out the address of your switch module, press and hold the yellow 'mode' button on the switch module until you here a beep. This will trigger the module to send out it's identification on the bus. When you check the openHAB log, you should see an entry similar to:
12:55:55.332 DEBUG [Nikobus Receiver] o.o.b.n.i.c.NikobusCommandReceiver[:177] - Received NikobusCommand [command=$18C96400100167FF78607E, repeats=1]
The 4 characters following $18 are the switch module address. In the example above, that's C964. With this address, you can now define the different channels in your item configuration, e.g:
Switch light_office {nikobus="C964:1"}
Switch light_hallway {nikobus="C964:2"}
Switch light_living {nikobus="C964:3"}
Switch light_kitchen {nikobus="C964:4"}
Switch light_diningroom {nikobus="C964:5"}
Switch light_toilet {nikobus="C964:6"}
Once the channels are defined, you can switch them ON or OFF using regular openHAB commands, e.g. :
openhab send light_office ON
Changing the status of the switch module channels is always done for a complete channel group. So sending the command above, sets the status for channels 1-6: channel 1 will be set to ON and channel 2 to 6 will be set to whatever the last state was that openHAB has for those channels.
Since all the channels in the entire channel group are switched to their new state, it's important openHAB knows the current state of all the channels in that group. Otherwise a channel which was switched on by a button, may be switched off again by the command.
In order to keep an up to date state of the channels in openHAB, button configurations can be extended to include detail on which channel groups the button press affects.
When configured, the status of the channel groups to which the button is linked, will be queried every time the button is pressed. Every status query takes between 300-600 ms, so to get the best performance, only add the affected channel groups in the configuration, which has the following format:
Switch myButton {nikobus="<button>[<moduleAddress>-<channelGroup>, <moduleAddress>-<channelGroup>, ...]"}
Where <button> represents the standard button configuration as explained in the previous section; <moduleAddress> represents the address of the switch module; <channelGroup> represents the first or second channel group in the module.
Example configurations may look like:
Switch Office_Top_Left_S "Office Light On/Off Short Press" {nikobus="#N003334:SHORT[C964-1]"}
Switch Office_Top_Left "Office and Kitchen Light On/Off" {nikobus="#N006884[C964-1,C964-2]"}
In addition to the status requests triggered by button presses, there is also a scheduled status update interval which you can specify in the openhab.cfg file:
# Perform a module status query every x seconds.
# Optional. Defaults to 600 (10 minutes).
nikobus:refresh=601
When a value > 0 is specified, the binding will perform a status query for a channel group every x seconds. In order to not flood the bus with too many status requests (if you have many modules), the refresh only requests the status of a single channel group. After the next interval, the status of the following channel group is requested and so on...