In this tutorial we'll use Wordpress to quickly get a site up and running and make this beautiful website
If you prefer watching a video tutorial for making your website you can click the image below:

The first thing we need to do is sign up for hosting so that other people can access our website. For this tutorial we'll be using Hostwinds because they are affordable and give you a free domain name as well
From there you'll want to click on shared hosting and select your plan

- Basic plan - Good if you just want to make 1 website
- Ultimate plan - If you have ideas for multiple websites this is the best value, you can host an unlimited number of domains on the same plan. The only limitation here is that eventually if one of your websites gets too much traffic you will eventually have to transfer it. A good problem to have!
Once you've selected your hosting plan you'll need to fill out your billing information, select your free domain, pick your payment period, and then confirm your order
Our next step is to go to our cPanel and use Softaculous to easily install wordpress on our new server

Click the tab that says "Login to cPanel" and then type "softaculous" into the form at the top of your screen

Click on the "softaculous apps installer" and then click the install button you should see for wordpress at the top of your screen

Now you need to change protocol to http:// , select the domain name you want to use, and change the "In Directory" tab to empty rather than "wp" so that Wordpress is installed in the root directory for your domain

Choose the title and description for your website, create your username and password that you will use to log in to your new website, and then click install. This may take a few minutes, once it's complete you can click the URL to see your new website!

If everything worked correctly you should see the default Wordpress installation like below:

Now you will want to visit "yourdomainname.com/wp-admin" and type in the username and password you created earlier to login to your website
Now that your site is live we have to customize it so it looks good. There are many themes and plugins for Wordpress but for this tutorial we will be using Divi Theme from Elegant Themes. You can get it here:
There are free themes available but I think it's worth it to invest in yourself and your business with Divi. The most valuable thing we have is our time and Divi pays for itself many times over by saving you tons of time when you're making websites.
Once you've signed up for Elegant Themes you'll want to go to the members area and download divi so we can upload it to your site. You'll also want to go to the "Account" tab and grab your API key so you can update Divi:

Now it's time to upload and activate divi. Got to your website dashboard and hover over the appearance tab, then click on "Themes" and then "Upload Theme". Choose the Divi zip file you downloaded and click install now

Once Divi has been uploaded make sure you click "activate". If you go to your homepage you should see that it has changed and the Divi Logo now shows in the header.
Now we have to create the pages for our website. Click on the Pages tab on your dashboard. First you want to delete the privacy policy and sample pages by click "Trash".
Next you'll want to click "Add New" and add Home, About, Contact, and Privacy Policy pages.
For each page enter the title, then click the Publish button twice

Next we need to create a custom header and footer. To do that go to the Appearance tab and click Menus. The process for making a menu is:
- click in the "menu name" form and type in "custom"
- click Create Menu button
- add Home, About, and Contact pages from the pages tab
- Check the primary menu button
- Click save

For the footer we'll create another menu but title it "footer" and then:
- click on Custom Links
- go to the Privacy Policy page we created and get the URL
- Insert that URL into the URL form
- Type "Privacy Policy" into the Link Text form
- Check the "Footer Menu" box
- Click save

Now we want to use the theme customizer to remove the credits from our footer. To do this go to your homepage and then hover over the tab in the top left corner of your screen. You should see a dropdown, click Theme Customizer

Once the customizer has loaded you'll want to click on footer, then bottom bar and check "disable footer credits". Next you want to go to Footer Elements and disable "show social icons". Finally, you need to go to the header, then Header Elements and disable the search icon.

Now we'll take advantage of Divi themes import ability to give you a base to start with for your pages. Go back to your dashboard and hover over the Divi tab, then click on "Divi Library". From there you'll want to download this file:
Now click on "Import and Export" click the Import tab, the select the file you just downloaded and upload it to your website. If you did everything correctly you should see the new layouts available:

Now we will use those layouts with the pages we created earlier. Here's what we need to do:
- Go to the URL of each page
- Activate the Visual Builder
- Click "Choose a Premade Layout"
- Click on "Your Saved Layouts"
- Select the appropriate layout for each page
- Click Save in the bottom right corner

Then repeat the process for each page. Once that's done you have a successfully got a live website and a good base to start with! Congratulations! We just have one thing left to do
You may have noticed that "yourdomain.com" still shows the default page. To make it show the new homepage we made, you need to go to your dashboard and create a new dummy page called "blog posts" or really anything you want, it doesn't matter.
Next you need to go to the settings tab and click on the Reading tab. Click "A static page" for the "Your homepage displays" section and select home and the dummy page you just made, then click save changes

If you have any questions or are stuck on some step feel free to go to the Youtube video and ask for help.
If you want to track traffic on your new wordpress website you'll want to make sure to install some sort of analytics tracking code. The most popular and free analytics software is Google analytics, this video below will show you how to install Google Analytics on your website in 5 minutes

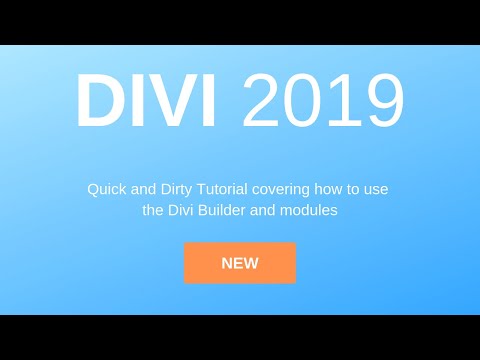
This worpress tutorial really only went over how to create your website as quickly as possible. For a more in-depth look at how to use customize your new website with the Divi theme from Elegant Themes you can look at the video below. The video covers how to structure pages with the Divi visual builder, as well as how to use some of the most commonly used modules that are built in to the Divi theme
Site speed and performance is very important for ranking your new wordpress website. The video below covers some topics that are very important to making your site perform better. Those topics include how to install a caching plugin for wordpress, using Cloudflare CDN with your wordpress website, and how your hosting provider impacts the speed and traffic handling capability of your website. In this video I show you how you to take a site that can handle only 2 requests per second before crashing to handling dozens of requests per second.

One of the biggest benefits of using wordpress for your website is the plugin ecosystem. Plugins provide additional functionality for your website that doesn't come built-in with wordpress. This video will go over some of the best plugins to use with wordpress regardless of what type of website you are making. These plugins will cover things like security, SEO, performance, and social sharing

Below I will go over some common tasks you may want to perform for new websites
You may want to change how the URLs appear for blog posts on your website. For example, you may want the title of the blog post in the URL along with the date. To change the formatting of your URLs you just need to go to the settings tab in your wordpress dashboard and then click on the Permalinks tag on the dropdown menu. From there you can use preset options for permalink layout or create a custom format
You will also want to change the tagline of your the wordpress website you made so that it's not still set as the generic default that comes with wordpress.
To change this you will need to go to the Wordpress dashboard and click on the general tab in the settings dropdown menu. From there you just need to change the top 2 options labeled 'Site Title' and 'Tagline' and save the changes.
To disable comments on specific blog posts you simply need to click on "screen options" when you are editing a blog post and then make sure the checkbox for "allow comments" is unchecked. If you want to disable comments on all posts by default you can again go to the wordpress dashboard and click on the "discussions" tab under settings and uncheck "allow people to post comments on new articles".
The sidebar is a crucial part of wordpress that allows a lot of different functionality. With the Divi theme you can create various different headers and footers and then use them with those modules using the visual page builder.
To adjust what widgets you are using just go to "appearance" and then click "widgets". From here you can drag and drop the various available widgets on the left side of the screen to the right side of the screen. You can also create custom widgets using the "HTML" widget.
To install new plugins you can go to the plugins tab and click the "add new" button. From there you can either look at the Wordpress plugin marketplace or upload a plugin from a file on your computer.
“Plugins” are extensions that are built to expand WordPress’ capabilities, adding features and functions to your site that don’t come as built-in.
They’re shortcuts to getting your site to do what you want to, without having to build the features from scratch.
You can use plugins to do everything from adding photo galleries and submission forms to optimizing your website and creating an online store.