Stratox.js is a user-friendly JavaScript framework that simplifies web application development. By focusing on core JavaScript and HTML, it empowers even beginners to efficiently build engaging projects. Its template engine and form builder follow HTML semantics, ensuring straightforward and accessible development. Stratox.js delivers optimal performance, swift response times, and seamless functionality across all devices, making it ideal for developing versatile web applications.
You can find the full Startox documentation here
- Why Stratox?
- Installation
- Directory overview
- Getting started
- Navigation
- Controllers
- Dynamic event
- Form builder
- Ajax Integration
- ...
You can find the full Startox documentation here
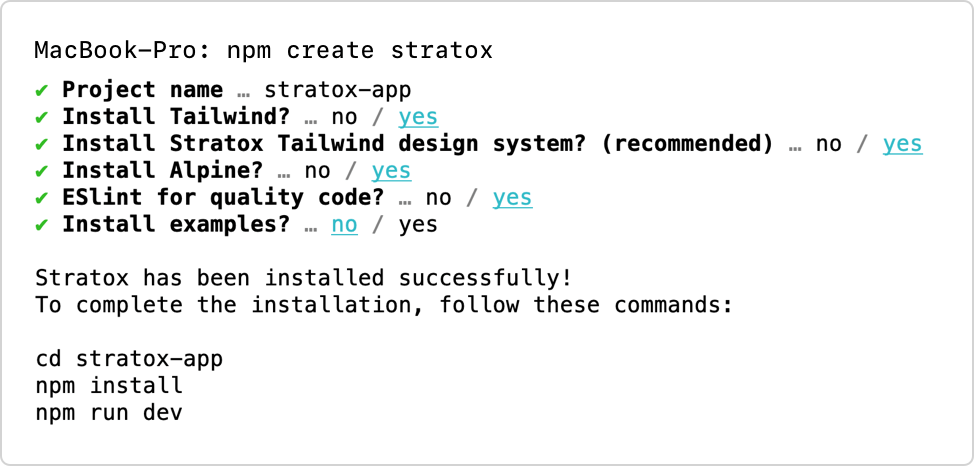
To install Stratox, simply execute the following command:
npm create stratox@latest
Next, follow the prompted instructions to complete the installation process. If you're a first-time user, I highly recommend reading through the entire guide.
The installation prompt will also offer to install examples. While you can choose to install them, the step-by-step guide will build something similar to the examples. It is better to install the examples alongside your current setup to switch between them and receive helpful hints.
To update Stratox, use the following command:
npm update
This command will ensure that you have the latest version of the framework installed.
Below you can se a quick preview how to use the framework.
Let's begin by creating a dynamic template view file named src/templates/views/text.js. and add the following content to it.
export function text(data, container, helper, builder) {
	return `
	<article class="relative card-1 border-bottom ingress">
		<div class="wrapper md">
		    <h1 class="headline-1">${data.headline}</h1>
		    <p>${data.content}</p>
		</div>
	</article>
	`;
}Let's create a controller file named src/templates/Pages.js and add the following code to it. Incorporate your view into the controller and pass in template data such as headline and content.
import { text } from "@/templates/views/text";
export class Pages {
start(request, container, helper, builder) {
this.view(text, {
headline: "Hello world!",
content: "Lorem ipsum dolor",
});
return this;
}
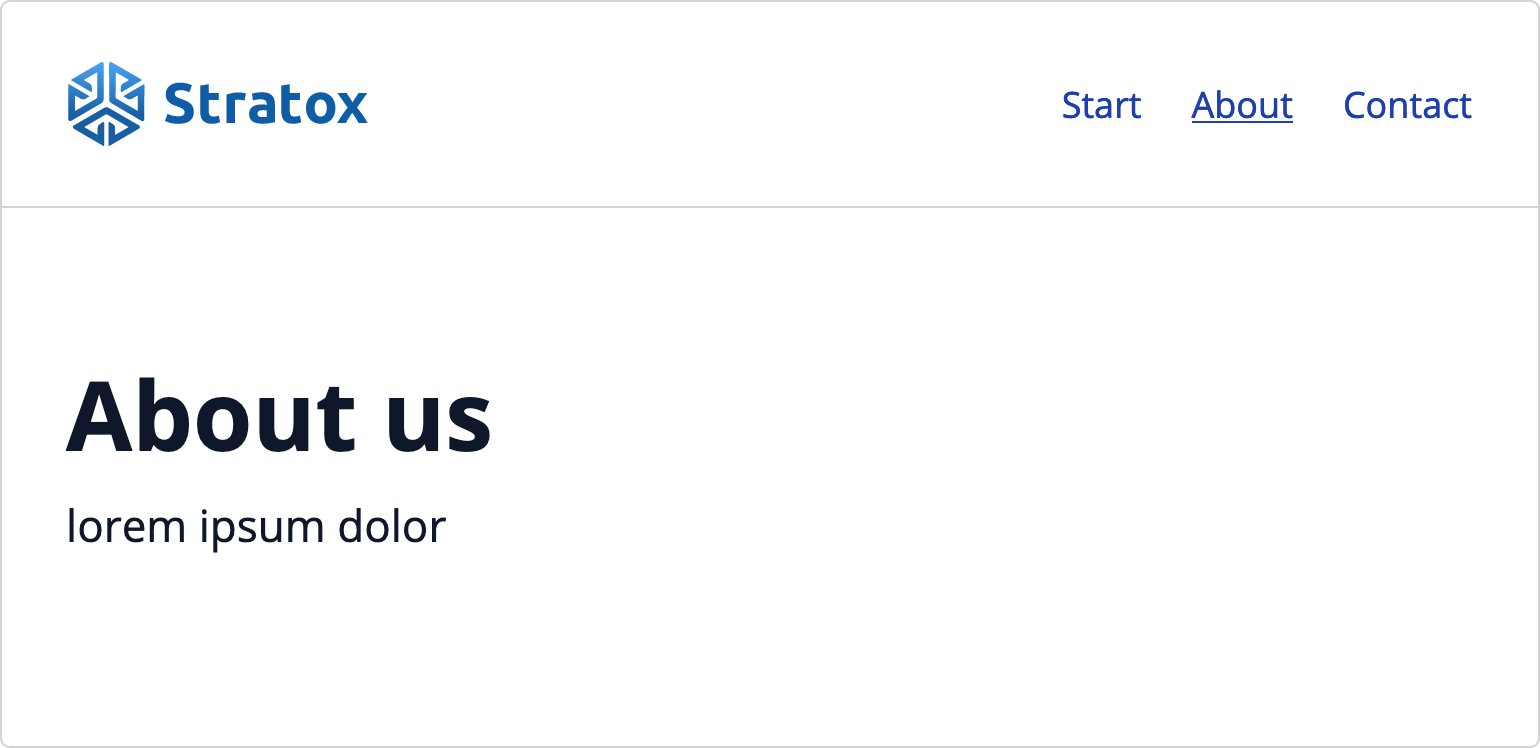
about(request, container, helper, builder) {
this.view(text, {
headline: "About us",
content: "Lorem ipsum dolor",
});
return this;
}
}Now that we have created the controller, we need to establish a connection between it and the router. Let's open up the router example again and make the following changes:
First, add the import statement for the Pages controller at the top of the router file src/routes/app.js:
import { Pages } from '@/controllers/Pages';Then, update the router routes for the start and about pages as follows, connecting your controller to each route:
router.get('/', [Pages, "start"]);
router.get('/about', [Pages, "about"]);