The goal of this project is to create a self-sufficient time-lapse camera that can survive for over a year, exposed to the elements in climate zone 3C. The camera will take periodic snapshots from its vantage point and upload them over a cellular connection via SFTP. These images can later be combined into a time-lapse video by the administrator.
In order to follow along with this build, you would need to have the following components and tools available to you:
-
The type of camera you choose its subsequent resolution impacts the amount of bandwidth you will consume in a given 30 day period. Make sure that you plan for upload accordingly.
sentinel-uploadwill only transfer content every 5 minutes to reduce bandwidth. With a 1920x1080 resolution captures will be around 150kb - 200kb in size, which is roughly 1.08GB in transfer every 30 days. -
This setup targets the daylight hours, and does not take pictures at night, even though my camera has IR for night imaging. This is purely to reduce bandwidth for my particular use-case.
-
Working with a 5 minute cadence should yield roughly 180 images per day (assuming 15 hours of capture operaton), which should yield one day passing in 7 seconds of video, assuming 1080p @ 24fps. By contrast, a year worth of content would yield around 45 minutes of video if all frames are usable (which they won't be during the winter due to contracted periods of daylight).
- 12v 12amp/hr battery
- PWM solar controller
- 35W solar panel
- Electrical Enclosure
- USB Camera
- 12v to 5v buck converter
- Raspberry Pi; i'm using v3B
- LTE shield
- Waterproof grommets sufficient large for your cabling
- Low profile 4.6dBi antenna
- Waterproof SMA to u.FL RF Adaptor
- 14AWG stranded cabling for power
- 14AWG female spade connectors
- 2x DC inline fuses
- Multi-meter and knowledge about how to use it
- Drill and bits large enough for the penetrations for your grommets
- Install the LTE shield using the Sixfab instructions
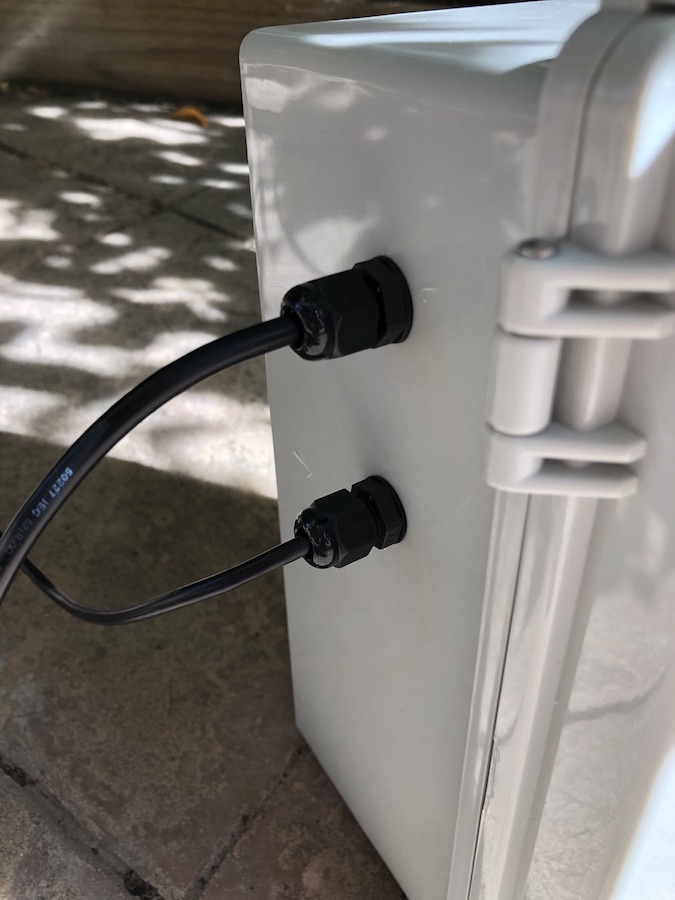
Given we need to get power to our Pi, and the solar controller, and allow for the antenna to get signal, we have to carefully make penetrations in the mounting box. This is done by drilling holes in the box that match the diameter of your grommets. You'll want to drill pilot holds and progressively make the hole bigger and bigger, instead of drilling one big hole to avoid breaking the box wall. Here are some pictures of the finished penetrations with wires run through:
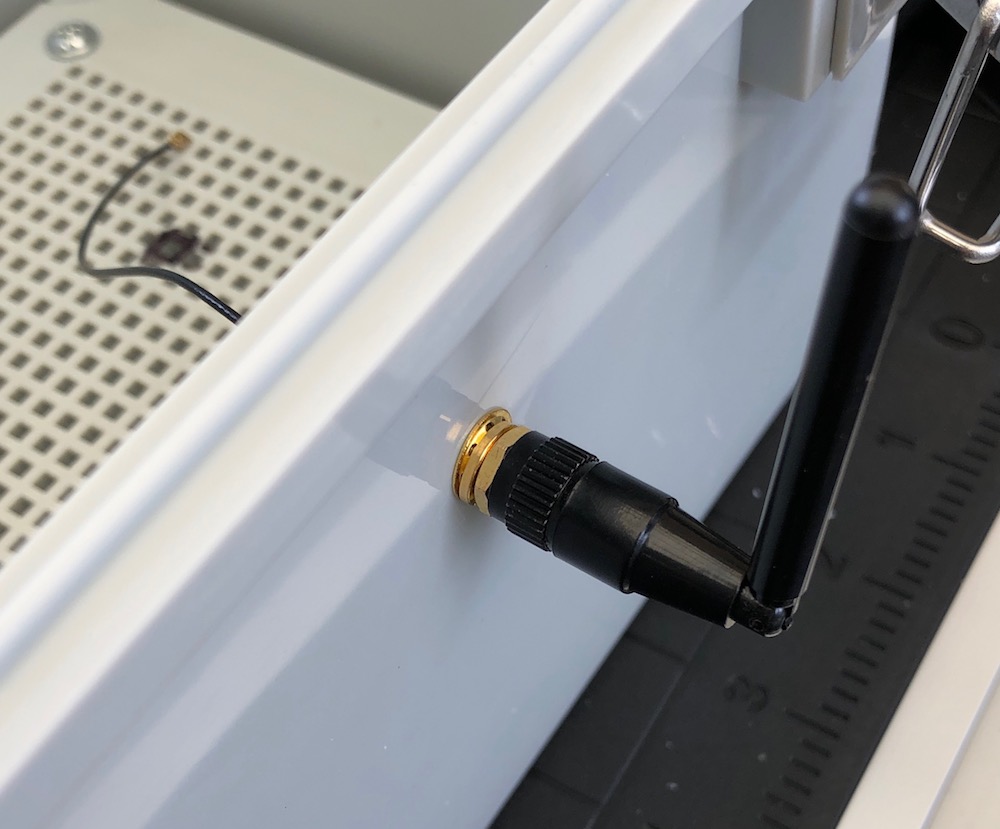
The antenna is a big of a special case: it comes with a rubberized gasket integrated onto the SMA socket so you can carefully drill a whole that is the right size for the socket and then screw it back together. I decided to go with a low-profile antenna, you may need something different if you're in an area with poor signal.
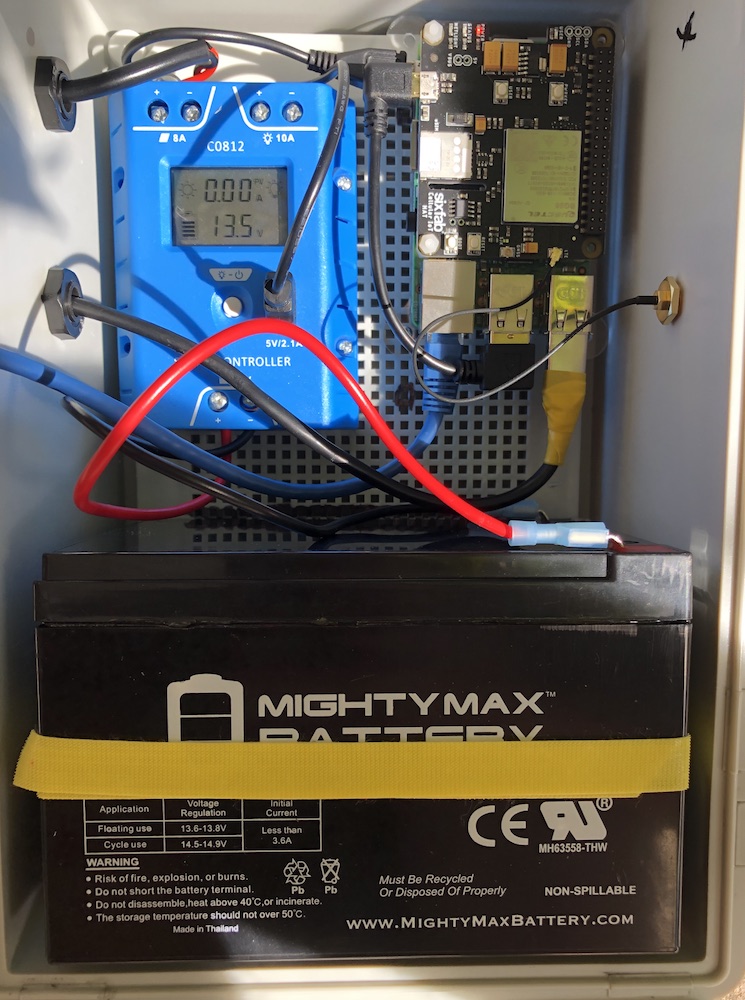
Internally, the box I was using had a hand bread board style mounting plate which allowed me to secure the various pieces in a fairly orderly fashion. In the end, my box internals looked like this:
I had a nightmare of a time with the USB cable for the camera and just couldn't fit it through the grommet so I ended up carefully cutting off the casing for the USB plug so that it could fit. I then used electrical tape to seal up the area that was previosuly cased on the cable as a precaution.
There is a set of initial setup that must be done manually to get the Pi's accessible remotely (and available for automatic provisioning). I used the following steps to get the nodes going:
# set a new root password
$ sudo passwd root
<enter new password>

# set your the password for the `pi` user
$ sudo passwd pi
<enter new password>

$ sudo reboot

# update the system, disable avahi and bluetooth
$ sudo systemctl enable ssh && \
  sudo systemctl start ssh

# optionally install a few useful utilities
$ sudo apt-get install -y htop
Once you've bootstrapped your pi and you can SSH with your key, then one can simply run the ansible site plays, and let it install all the nessicary gubbins for sentinel.
./site.yml
Sentinel is implemented as a script (found here) and a pair of system units to trigger execution. The script has a few handy switches (see all options using --help):
--disable-sftpDisable uploading to the SFP server; this can be especially useful if you are debugging the setup with your camera and do not care about uploading.--disable-throttlingDisables the upload on 5 minutely windows; with the systemd units implemented as is here, this will result in uploading every minute. This can be helpful for debuging or if you simply want closer to real-time imaging.
As these are regular systemd units, you can inspect their output using journalctl -u sentinel.service -e for the sentinel unit itself, or systemctl list-timers --all if you want to checkout the last/next execution of the timer.