Mahalangur is a small Python data science project that demonstrates how to design Scikit Learn models with a replicable project structure and how to create a simple web API and visualization in Flask. The project structure is largely based on the Cookiecutter Data Science template and is outlined in the Project Organization section below.
A demo of the web interface for Mahalangur is hosted on PythonAnywhere:
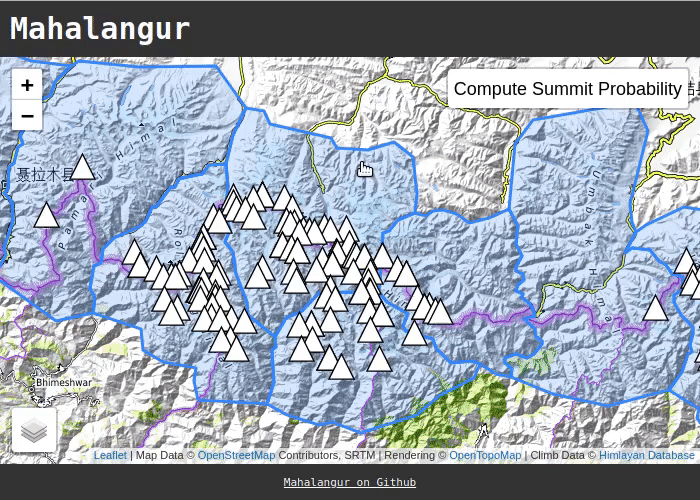
This project is named after the Mahalangur Himal, a section of the Himalayas that contains four of the six tallest mountains - including Mount Everest. The expedition data is sourced from the Himalayan Database.
This project is ISC licensed. However, the climb data is sourced from the Himalayan Database - please reach out to them if you wish to use their data for anything other than personal use.
The repository is a Python project using the following folder structure:
Mahalangur
├── LICENSE
├── README.md          <- The top-level README for developers using this project
├── Makefile           <- Makefile with commands like `make install_requirements`
│
├── mahalangur
│   ├── assets         <- Serialized models that are to be distributed with the
│   │                     package
│   │
│   ├── data           <- Code for downloading or generating raw data
│   │   ├── metadata   <- Static metadata such as code tables
│   │   └── sql        <- Database definitions for SQLite datastore
│   │
│   ├── feat           <- Code to turn raw data into features for modelling
│   ├── web            <- Flask API and web visualization code
│   └── rfmodel.py     <- Code for training the model
│
├── notebooks          <- Jupyter notebooks used for exploring/analysing the data and
│                         for prototyping models
│
└── references         <- Data dictionaries, manuals and other explanatory materials
Clone Mahalangur to a folder of your choice:
git clone https://github.com/trthatcher/Mahalangur.git
cd Mahalangur
Next, create the mahalangur conda environment and install the requirements:
make environment
conda activate mahalangur
make install_requirements
This will install the package and its dependencies.
By default, this package will download training data to a .mahalangur directory in your home directory. You can override this by setting a MAHALANGUR_HOME environment variable to the directory of your choosing. The Mahalangur data directory is laid out in the following way:
.mahalangur
│
├── data
│   ├── raw            <- Raw data is downloaded to this directory
│   ├── processed      <- Processed data is stored in this directory
│   └── mahalangur.db  <- This database is created to store the processed data
│
├── metadata           <- Processed metadata is output here
│
└── models             <- Serialized models are output here
To download the latest version of the Himalayan Database, run the following command in the terminal:
make datasetThis will populate the .mahalangur/data directory with updated extracts and transfer them into the mahalangur.db SQLite database. An updated model can be created by running:
make model_rfThe model will be stored in the .mahalangur/models directory. Note that if you would like to update the model used by the package, you will need to transfer it to the assets directory in the package.
Once the package has been cloned and installed, you can run the web visualization locally with the following command:
make api