How to mint on Basilisk
Besides the ability to mint (collections of) NFTs and place them for sale with very low minting fees, there are some additional unique features.
- Cross-chain features - this will be more visible in the upcoming weeks
- Royalties - allows artists to set a fee (as a percentage of the selling price) which they'll receive from every following trade generated by the NFT
- Making Offers- make an offer on NFT you like (even those that are not listed)
- Other features - AI minter on Basilisk - where you create an NFT directly to your wallet. We are also planning to add auctions and other news in the near future.
Of course, you need to have a wallet first. Our favorite is Talisman, but you can use other supported wallets (Subwallet, Nova wallet, Polkadot.jsEnkrypt, and CLV wallet).
For Talisman: Download the app, create a wallet, and add your funds (Kusama — KSM)
We have a separate tutorial for this step.
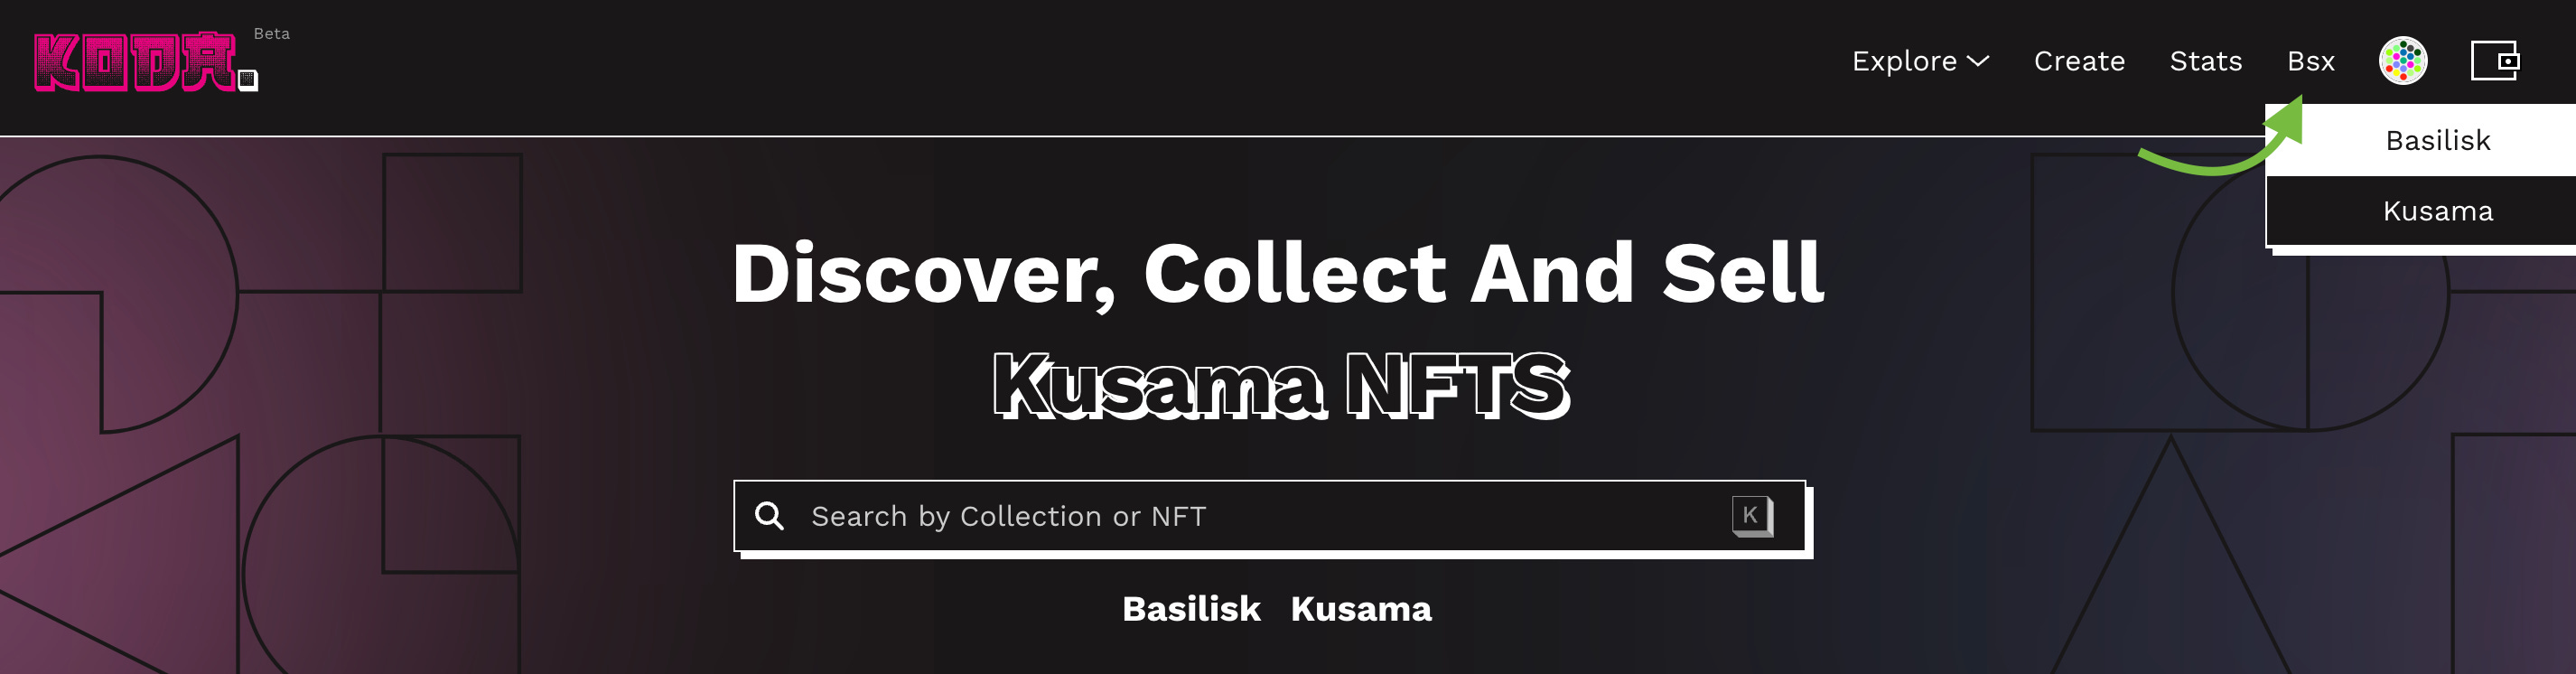
Go to KodaDot. First, you need to connect your wallet, choose the Basilisk network, and you can start. Cross-chain capabilities are coming soon. This step will not be needed anymore in the future.
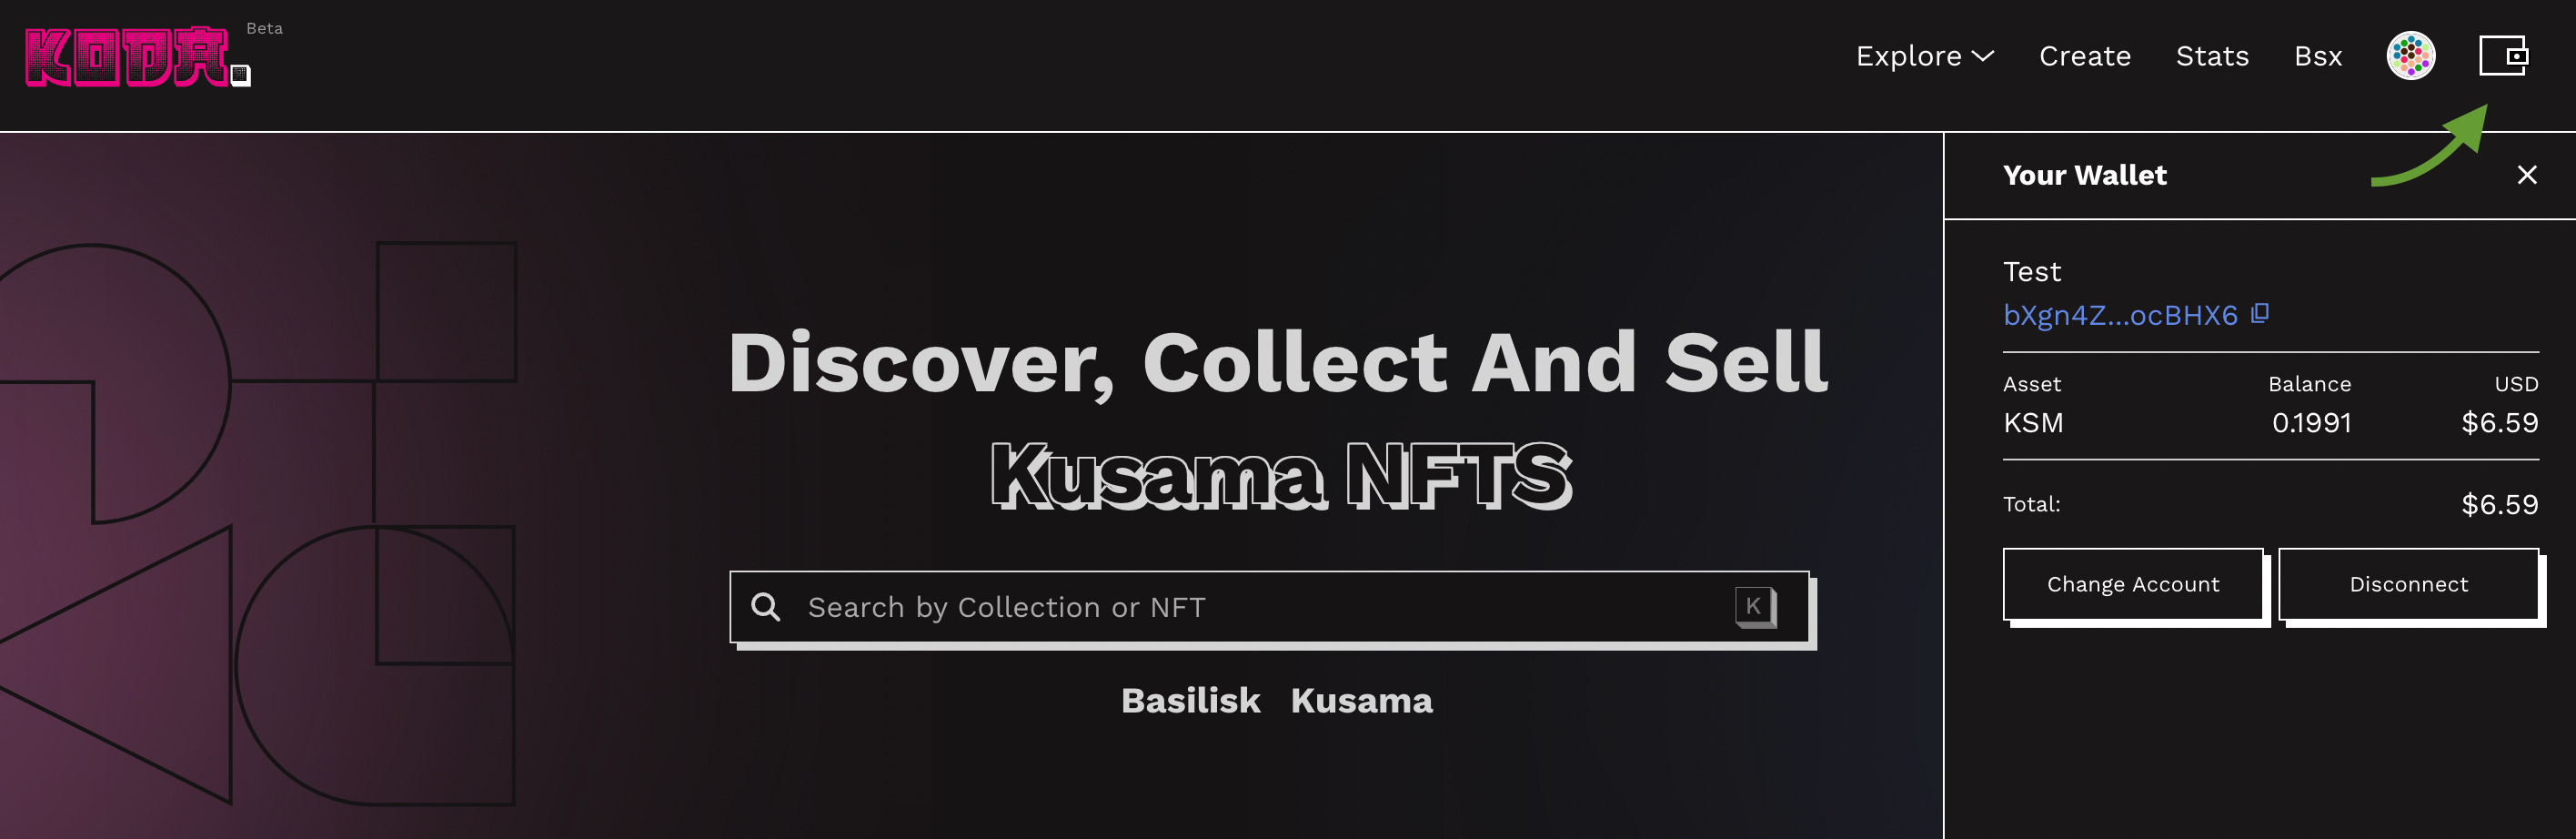
At this point, you should be able to see your bridged KSM in your wallet. Don’t panic if you don’t see the rest of your KSM (non-bridged). Here you can see only assets that are on the Basilisk chain (BSX tokens and bridged KSM).
Open Assets in your profile and choose your minting fees. If you have bridged KSM, you should select KSM as your fee. If you have BSX tokens and not KSM, set BSX as your minting fee. Confirm transaction.

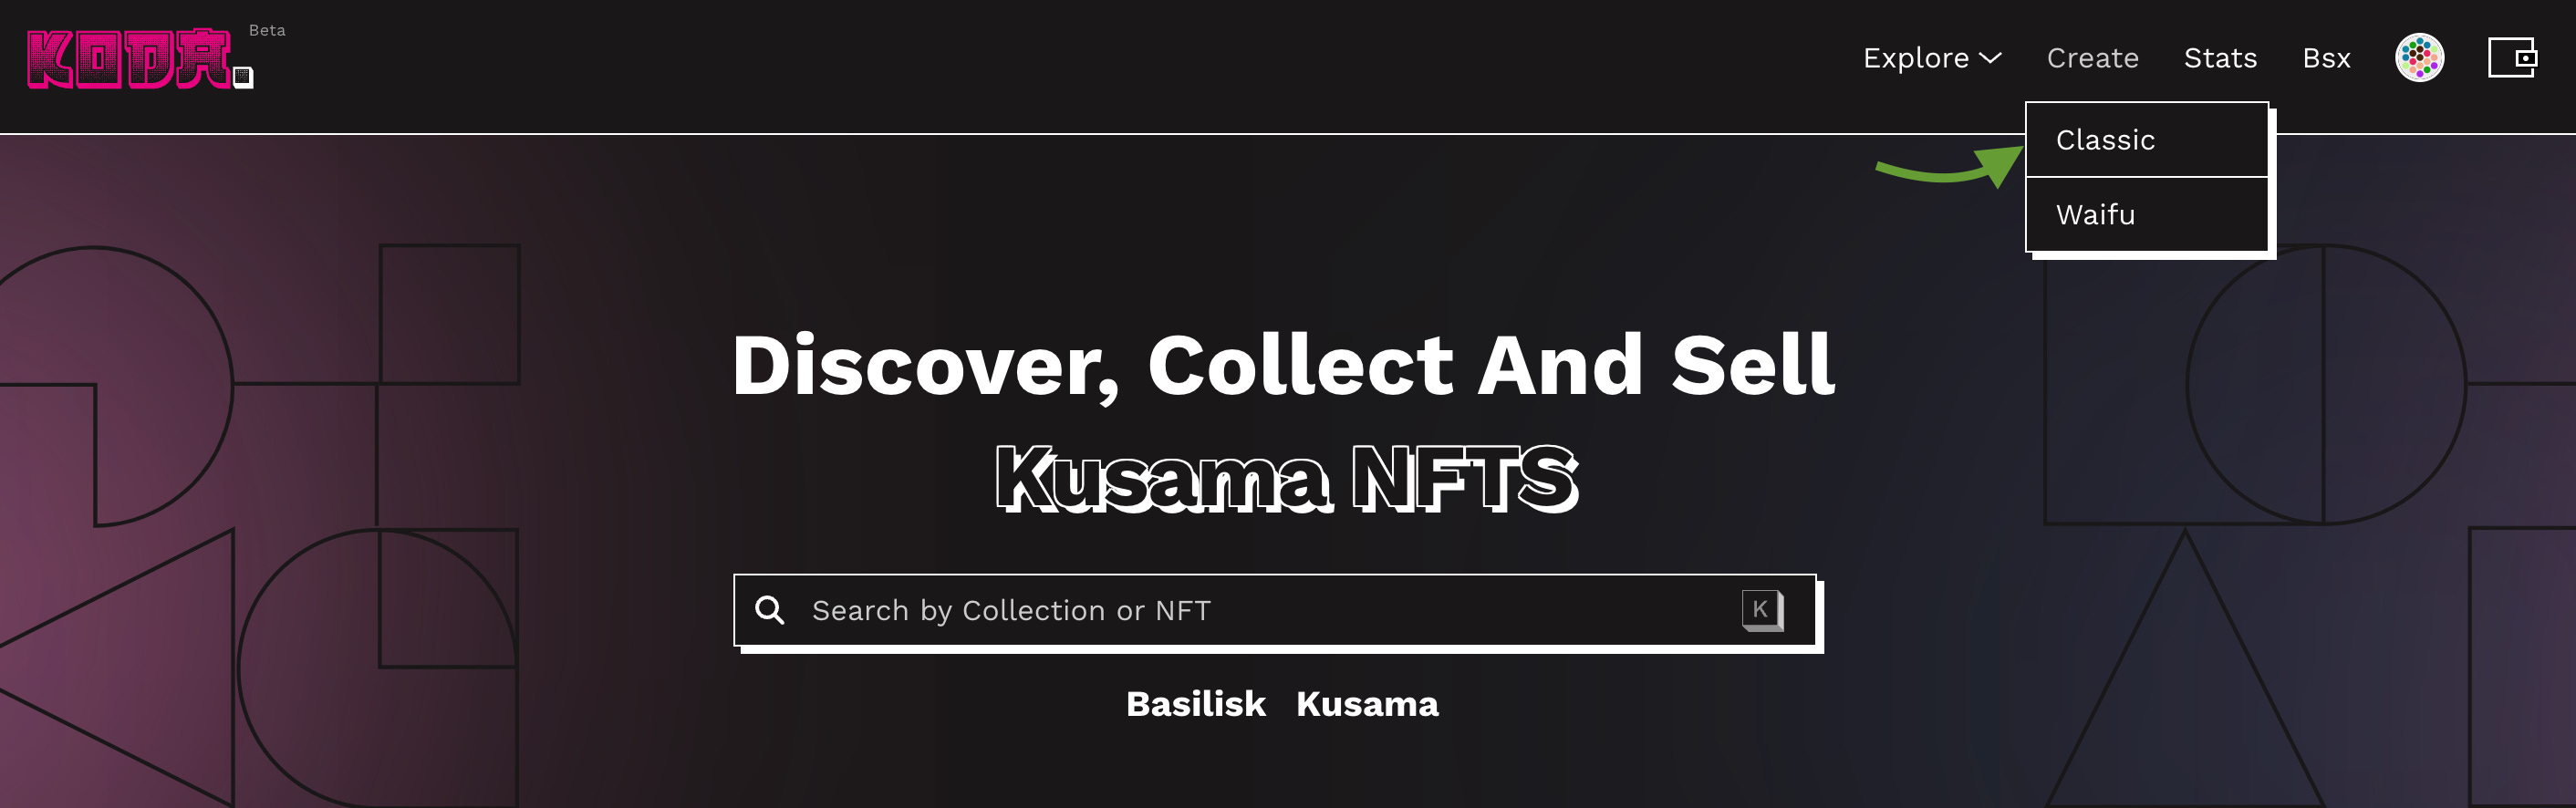
Go to Create - Classic and start creating your NFT
On the top, you can switch between Collection and NFT. To add NFTs to your existing collection. Click on NFT.

To create your collection upload a picture that will be your title picture for the collection. Add a name and description.

Click on Create Collection, confirm your transaction, and wait a moment.
You will be redirected to add NFT to your collection. Click on Collection to choose the one you want to add NFTs into. If you cannot see your freshly created collection, wait a minute and refresh your page!

Upload your NFT and fill out all details as name, description, and other:
- Explicit content: is your NFT not safe for work?
- List NFT for sale: if you want to set the price later, leave this off. If you want to put it for sale, toggle on this option and select price.
- Add KodaForest attribute to NFT: you will pay an extra fee of 1 USD that will go to RMTerra to help fulfill our carbon-neutral goals.
- On-chain attributes: You can add any off-chain attributes to your NFTs. You create your
- Royalty: A percentage of all sales will go to you as a creator (or other selected) wallet.

Sign the transaction and congratulations! You just added a new NFT to your collection! 🎉