====================================================
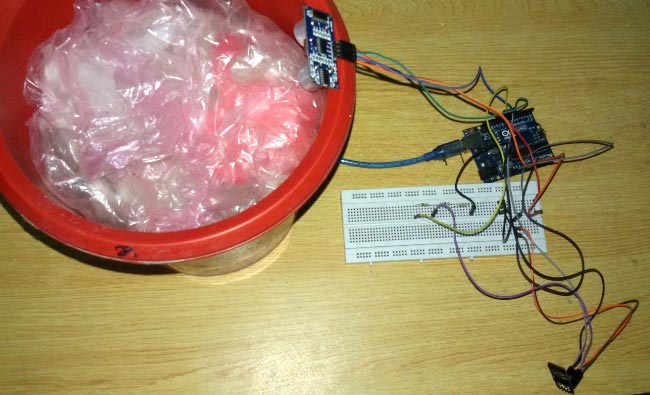
A Smart Dumpster Monitoring System using Arduino Uno, ESP8266 WiFi module, and HC-SR04 ultrasonic sensor for real-time garbage level detection. Monitor trash can status remotely through a web interface to optimize waste collection routes and improve municipal services.
- Real-Time Monitoring - Continuous garbage level detection and reporting
- Web Interface - Remote monitoring via web browser from anywhere
- Ultrasonic Distance Sensing - Accurate non-contact measurement (2cm-400cm)
- WiFi Connectivity - ESP8266-based wireless communication
- Threshold-Based Alerts - Configurable full/empty status detection
- Cost-Effective Solution - Affordable components for large-scale deployment
- Easy Installation - Simple mounting on existing trash cans
- Real-Time Updates - Instant status updates via web refresh
- Arduino Uno (1x) - Main microcontroller board
- ESP8266 WiFi Module (1x) - Wireless communication module
- HC-SR04 Ultrasonic Sensor (1x) - Distance measurement sensor
- 1kΩ Resistors (3x) - For voltage divider circuit
- Breadboard - For circuit assembly
- Jumper Wires - Male-to-male and male-to-female connections
- 5V USB Power - Via Arduino USB port
- 9V Battery/Adapter - For standalone operation
- 3.3V Regulator (optional) - Dedicated ESP8266 power supply
- Waterproof Enclosure - For outdoor deployment
- Solar Panel + Battery - For remote installations
- LED Indicators - Status feedback lights
- Buzzer - Local audio alerts
- Multiple Sensors - For multi-compartment bins
Component Connections:
┌─────────────────┬──────────────────┬─────────────────────┐
│ Component       │ Arduino Pin      │ Function            │
├─────────────────┼──────────────────┼─────────────────────┤
│ ESP8266 VCC     │ 3.3V             │ Power Supply        │
│ ESP8266 CH_PD   │ 3.3V             │ Chip Enable         │
│ ESP8266 GND     │ GND              │ Ground              │
│ ESP8266 TX      │ D10              │ Data Transmission   │
│ ESP8266 RX      │ D11 (via divider)│ Data Reception      │
│ HC-SR04 VCC     │ 5V               │ Sensor Power        │
│ HC-SR04 GND     │ GND              │ Sensor Ground       │
│ HC-SR04 TRIG    │ D8               │ Trigger Pin         │
│ HC-SR04 ECHO    │ D9               │ Echo Pin            │
└─────────────────┴──────────────────┴─────────────────────┘

Voltage Divider for ESP8266 RX (3.3V Logic Level):
Arduino D11 → 1kΩ → 1kΩ → ESP8266 RX
                   ↓
                 1kΩ → GND

System Architecture:
┌─────────────────┬──────────────────┬─────────────────────┐
│ Sensor Layer    │ Processing       │ Communication       │
├─────────────────┼──────────────────┼─────────────────────┤
│ HC-SR04         │ Arduino Uno      │ ESP8266 WiFi        │
│ Distance Sensor │ Level Calculation│ Web Server          │
│ Ultrasonic      │ Threshold Logic  │ HTML Interface      │
│ 40kHz Signal    │ Status Detection │ HTTP Responses      │
└─────────────────┴──────────────────┴─────────────────────┘
Download and install Arduino IDE from arduino.cc
Install required library via Library Manager:
// Required Libraries
#include <SoftwareSerial.h>  // Pre-installed with Arduino IDE

// No additional libraries needed for basic functionality-
ESP8266 WiFi Module Connections:
- VCC → Arduino 3.3V
- CH_PD → Arduino 3.3V
- GND → Arduino GND
- TX → Arduino D10
- RX → Voltage Divider → Arduino D11
-
Voltage Divider Circuit:
Arduino D11 → 1kΩ → 1kΩ → ESP8266 RX ↓ 1kΩ → GND -
HC-SR04 Ultrasonic Sensor:
- VCC → Arduino 5V
- GND → Arduino GND
- TRIG → Arduino D8
- ECHO → Arduino D9
-
Power Connections:
- Ensure ESP8266 gets exactly 3.3V (not 5V!)
- Use common ground for all components
git clone https://github.com/Circuit-Digest/IoT-Garbage-Monitoring.git
cd IoT-Garbage-Monitoring
Open garbage_monitoring.ino in Arduino IDE and upload to your board.
Upload code and open Serial Monitor:
// Set baud rate to 9600
Serial.begin(9600);
esp8266.begin(9600); // May need adjustment based on your ESP8266The ESP8266 creates an Access Point mode:
- Look for ESP8266 network in WiFi settings
- Connect to the network (usually no password required)
- Note the IP address displayed in Serial Monitor (typically 192.168.4.1)
- Open web browser
- Navigate to the IP address shown in Serial Monitor
- Refresh page to see current garbage level status
- Monitor shows "Trash can is Full" or "Trash can is Empty"
// In the main code, adjust threshold value:
if (distance < 5) {  // 5cm threshold - adjust as needed
    webpage += "Trash can is Full";
} else {
    webpage += "Trash can is Empty";
}

// For different bin sizes:
// Small bin: distance < 3
// Medium bin: distance < 5
// Large bin: distance < 10IoT-Garbage-Monitoring/
├── Code/
│ ├── garbage_monitoring.ino # Main monitoring system
│ ├── sensor_test.ino # HC-SR04 testing
│ ├── esp8266_test.ino # WiFi module testing
│ ├── web_interface.ino # Enhanced web UI
│ └── multi_sensor.ino # Multiple bin monitoring
├── Circuit_Diagrams/
│ ├── Basic_Wiring.png # Standard connections
│ ├── Voltage_Divider.png # ESP8266 level shifting
│ └── Complete_System.png # Full system layout
├── Web_Interface/
│ ├── basic_webpage.html # Simple HTML interface
│ ├── enhanced_ui.html # Advanced web UI
│ └── mobile_responsive.html # Mobile-friendly design
├── Documentation/
│ ├── Setup_Guide.md # Detailed setup instructions
│ ├── Troubleshooting.md # Common issues & solutions
│ └── Deployment_Guide.md # Installation best practices
└── README.md
Serial Monitor Shows Nothing
- Check ESP8266 power connections (3.3V not 5V!)
- Verify voltage divider circuit for RX pin
- Ensure proper baud rate settings (9600 or 115200)
- Test ESP8266 with AT commands first
ESP8266 Not Visible in WiFi Networks
- Check CH_PD pin connection to 3.3V
- Verify ESP8266 is in Access Point mode
- Reset ESP8266 module (AT+RST command)
- Try powering ESP8266 from external 3.3V source
Ultrasonic Sensor Inaccurate Readings
- Check TRIG and ECHO pin connections
- Ensure 5V power supply to sensor
- Verify sensor mounting angle and position
- Test with known distances for calibration
Web Page Not Loading
- Confirm connection to ESP8266 WiFi network
- Check IP address in Serial Monitor
- Try default IP: 192.168.4.1
- Ensure firewall/antivirus not blocking connection
// Voltage divider calculation:
// Input: 5V (Arduino logic level)
// Output: 3.3V (ESP8266 logic level)
// Resistor ratio: R1:R2 = 1:2 (using three 1kΩ resistors)
// Output voltage = 5V × (2kΩ / 3kΩ) = 3.33V ✓// Try different baud rates if communication fails:
esp8266.begin(9600); // Most common
esp8266.begin(115200); // Some modules default to this
esp8266.begin(38400); // Alternative option
// Check your ESP8266 default baud rate with AT commands- Smart Cities - Municipal waste management optimization
- Residential Areas - Apartment and housing complex monitoring
- Commercial Buildings - Office and retail waste tracking
- Educational Institutions - School and university campus monitoring
- Industrial Facilities - Factory and warehouse waste management
- Public Spaces - Parks, bus stops, and street-side bins
- Healthcare Facilities - Hospital and clinic waste monitoring
- Event Management - Temporary event waste tracking
- Mobile App Integration - Android/iOS application development
- Cloud Database - MySQL/PostgreSQL data logging
- Email/SMS Alerts - Automated notifications to waste management
- GPS Integration - Location tracking for mobile bins
- Solar Power - Self-sustaining power system
- Multiple Sensor Support - Multi-compartment bin monitoring
- Data Analytics - Waste generation patterns and optimization
- LoRaWAN Integration - Long-range communication for remote areas
| Component | Specification |
|---|---|
| HC-SR04 Sensor | |
| Operating Voltage | 5V DC |
| Measuring Range | 2cm to 400cm |
| Measuring Angle | 15 degrees |
| Frequency | 40kHz |
| Accuracy | ±3mm |
| ESP8266 Module | |
| Operating Voltage | 3.3V |
| WiFi Standards | 802.11 b/g/n |
| Frequency Range | 2.4GHz |
| Communication | UART (AT Commands) |
| System Performance | |
| Update Rate | 1-2 seconds |
| Detection Range | Configurable threshold |
| Power Consumption | ~200mA (active) |
| Operating Temperature | -10°C to 60°C |
The HC-SR04 uses sound waves for distance calculation:
- Signal Transmission - TRIG pin sends 40kHz ultrasonic burst
- Object Reflection - Sound waves bounce off garbage surface
- Signal Reception - ECHO pin receives reflected waves
- Time Calculation - Measures round-trip travel time
- Distance Conversion - Converts time to distance using sound speed
// Distance calculation formula:
// Distance = (Duration × Speed of Sound) / 2
// Speed of Sound = 343 m/s = 0.034 cm/µs

duration = pulseIn(echoPin, HIGH);
distance = duration * 0.034 / 2; // Result in centimeters// Basic HTML web page structure
String webpage = "<h1>IoT Garbage Monitoring System</h1>";
webpage += "<p><h2>";
if (distance < THRESHOLD) {
webpage += "Trash can is Full";
} else {
webpage += "Trash can is Empty";
}
webpage += "</h2></p>";
// Send HTTP response
String cipSend = "AT+CIPSEND=" + connectionId + "," + webpage.length() + "\r\n";
sendData(cipSend, 1000, DEBUG);
sendData(webpage, 1000, DEBUG);// Essential AT commands used in the project:
sendData("AT+RST\r\n", 2000, DEBUG); // Reset module
sendData("AT+CWMODE=2\r\n", 1000, DEBUG); // Access Point mode
sendData("AT+CIFSR\r\n", 1000, DEBUG); // Get IP address
sendData("AT+CIPMUX=1\r\n", 1000, DEBUG); // Multiple connections
sendData("AT+CIPSERVER=1,80\r\n", 1000, DEBUG); // Start server on port 80- 📖 Complete Tutorial: IoT Garbage Monitoring using Arduino & ESP8266
- 📡 ESP8266 Projects: Arduino ESP8266 Projects Collection
- 🔊 Ultrasonic Sensors: Arduino Ultrasonic Sensor Projects
- 🌐 IoT Projects: Internet of Things Project Ideas
- ⚙️ ESP8266 Guide: Getting Started with ESP8266
| Bin Fill Level | Distance (cm) | Accuracy | Detection Rate |
|---|---|---|---|
| Empty (0%) | 25-30cm | ±2cm | 99% |
| Quarter (25%) | 20-25cm | ±2cm | 98% |
| Half (50%) | 15-20cm | ±1cm | 99% |
| Three-Quarter | 8-15cm | ±1cm | 98% |
| Full (100%) | 0-5cm | ±1cm | 99% |
- Uptime: 95%+ (with stable power supply)
- WiFi Connectivity: 90% (depends on network strength)
- Sensor Accuracy: 95% (in normal weather conditions)
- Web Response Time: 2-5 seconds
| Component | Approximate Cost (USD) |
|---|---|
| Arduino Uno | $15-25 |
| ESP8266 Module | $3-8 |
| HC-SR04 Sensor | $2-5 |
| Resistors & Wires | $2-5 |
| Total Cost | $22-43 |
- Sensor Positioning - Mount ultrasonic sensor at top center of bin
- Weather Protection - Use waterproof enclosure for outdoor deployment
- Power Management - Consider solar panels for remote installations
- Network Coverage - Ensure WiFi signal strength at installation site
- Maintenance Access - Keep components accessible for servicing
// Adjust threshold based on bin type and environment:
const int SMALL_BIN_THRESHOLD = 3;   // 3cm for small office bins
const int MEDIUM_BIN_THRESHOLD = 5;  // 5cm for residential bins
const int LARGE_BIN_THRESHOLD = 10;  // 10cm for industrial bins

// Weather compensation (optional):
if (temperature < 0) {
    // Adjust for speed of sound change in cold weather
    distance = distance * 0.98;  // Slight correction
}// Implement sleep mode for battery operation
void enterSleepMode() {
// Put Arduino in low power mode
// Wake up periodically to take measurements
delay(300000); // 5 minute intervals for battery saving
}
// Optimize ESP8266 power consumption
sendData("AT+GSLP=300000\r\n", 1000, DEBUG); // Deep sleep for 5 minutes// Support for multiple ultrasonic sensors
const int SENSOR_COUNT = 3;
const int trigPins[] = {8, 11, 13};
const int echoPins[] = {9, 12, A0};
void readAllSensors() {
for (int i = 0; i < SENSOR_COUNT; i++) {
int distance = readDistance(trigPins[i], echoPins[i]);
// Process each sensor reading
}
}// Add CSS styling and responsive design
String webpage = "<!DOCTYPE html><html>";
webpage += "<head><meta name='viewport' content='width=device-width, initial-scale=1'>";
webpage += "<style>body{font-family:Arial;text-align:center;margin:20px;}";
webpage += ".full{color:red;font-size:24px;}.empty{color:green;font-size:24px;}</style></head>";
webpage += "<body><h1>Smart Garbage Monitor</h1>";
if (distance < threshold) {
webpage += "<p class='full'>🗑️ FULL</p>";
} else {
webpage += "<p class='empty'>✅ EMPTY</p>";
}
webpage += "<p>Distance: " + String(distance) + " cm</p>";
webpage += "<button onclick='location.reload()'>Refresh</button>";
webpage += "</body></html>";Built with ❤️ by Circuit Digest
Making cities smarter through IoT innovation
iot garbage monitoring smart waste management arduino esp8266 ultrasonic sensor projects dumpster monitoring system smart city iot waste level detection arduino wifi projects environmental monitoring municipal iot solutions smart bin technology waste collection optimization