You can get new more accurate and faster Yolo v2 Windows by the link: https://github.com/AlexeyAB/darknet
Here is a Yolo v1 windows version (for object detection)
Contributtors: https://github.com/pjreddie/darknet/graphs/contributors
This repository is forked from: https://github.com/frischzenger/yolo-windows Which is forked from Linux-version: https://github.com/pjreddie/darknet
More details: http://pjreddie.com/darknet/yolov1/
- MS Visual Studio 2013 (v120)
- CUDA 7.5 for Windows x64: https://developer.nvidia.com/cuda-75-downloads-archive
- OpenCV 2.4.9: https://sourceforge.net/projects/opencvlibrary/files/opencv-win/2.4.9/opencv-2.4.9.exe/download
- To compile without OpenCV - remove define OPENCV from: Visual Studio->Project->Properties->C/C++->Preprocessor
- To compile with different OpenCV version - change in file yolo_kernels.cu each string #pragma comment(lib, "opencv_core249.lib") from 249 to required version.
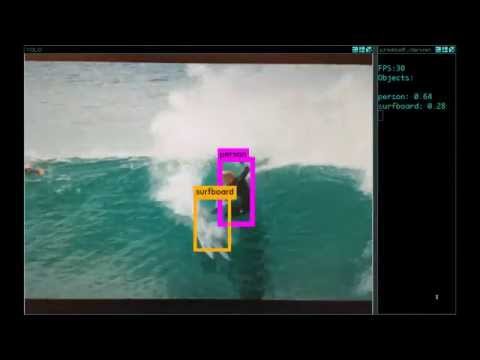
- With OpenCV will show image or video detection in window and store result to test_dnn_out.avi
Pre-trained models for different cfg-files can be downloaded from (smaller -> faster & lower quality):
yolo.cfg(1 GB) - require 4 GB GPU-RAM: https://drive.google.com/open?id=0BwRgzHpNbsWBLU04Znc4U1BMZ0kyolo-small.cfg(359 MB) - require 2 GB GPU-RAM: https://drive.google.com/open?id=0BwRgzHpNbsWBQzlHeVpZRnhlY2Myolo-tiny.cfg(172 MB) - require 1 GB GPU-RAM: https://drive.google.com/open?id=0BwRgzHpNbsWBQlMxcXNBMWtkaFk
Others: https://www.youtube.com/channel/UC7ev3hNVkx4DzZ3LO19oebg
darknet.cmd- initialization with 1 GB model yolo.weights & yolo.cfg and get command prompt: enter the jpg-image-filenamedarknet_demo.cmd- initialization with 1 GB model yolo.weights & yolo.cfg and play your video file which you must rename to: test.mp4darknet_demo_small.cmd- initialization with 359 MB small model yolo-small.weights & yolo-small.cfg and play your video file which you must rename to: test.mp4darknet_net_cam.cmd- initialization with 1 GB model, play video from network video-camera mjpeg-stream and store result to: test_dnn_out.avi
- Download for Android phone mjpeg-stream soft: IP Webcam / Smart WebCam
Smart WebCam - preferably: https://play.google.com/store/apps/details?id=com.acontech.android.SmartWebCam IP Webcam: https://play.google.com/store/apps/details?id=com.pas.webcam
- Connect your Android phone to computer by WiFi (through a WiFi-router) or USB
- Start Smart WebCam on your phone
- Replace the address below, on shown in the phone application (Smart WebCam) and launch:
darknet.exe yolo demo yolo.cfg yolo.weights http://192.168.0.80:8080/video?dummy=param.mjpg -i 0
Windows (Visual Studio) Support Now yolo supports windows with Visual Studio. Just change the include directories / library directories to your own ones, and compile the codes with X64 Release mode. You may need pthread-windows while compiling and linking
To training for your 20 objects download pre-trained convolutional layers:
- darknet.conv.weights: https://drive.google.com/open?id=0BwRgzHpNbsWBUXdmdXdaa1dDU2s
- extraction.conv.weights: https://drive.google.com/open?id=0BwRgzHpNbsWBaHR1NjZ2T3FKT1E
Then use the following command lines:
- For tiny-model:
darknet yolo train yolo-tiny.cfg darknet.conv.weights - For small-model:
darknet yolo train yolo-small.cfg extraction.conv.weights - For full-model:
darknet yolo train yolo.cfg extraction.conv.weights
To train for a different number of objects (not 20) or for different number of sides (not 7), you should change your .cfg-file 3 lines:
output= (5 x 2 + C) x S x Sclasses= Cside= S
Where:
- C = number of objects (by default 20)
- S = number of sides (by default 7)
More details: http://pjreddie.com/darknet/yolov1/
-
If you have CUDA 7.5, OpenCV 2.4.9 (C:\opencv_2.4.9) and MSVS 2013 (or 2015) then start MSVS, open
yolo-windows\build\darknet\darknet.slnand do the: Build -> Build darknet -
If you have other version of CUDA (not 7.5) then open
yolo-windows\build\darknet\darknet\darknet.vcxprojby using Notepad, find 2 places with "CUDA 7.5" and change it to your CUDA-version, then do step 1 -
If you have other version of OpenCV 2.4.x (not 2.4.9) then you should change pathes after
\darknet.slnis opened
3.1 (right click on project) -> properties -> C/C++ -> General -> Additional Include Directories
3.2 (right click on project) -> properties -> Linker -> General -> Additional Library Directories
- If you have other version of OpenCV 3.x (not 2.4.x) then you should change many places in code by yourself.
Also, you can to create your own darknet.sln & darknet.vcxproj, this example for CUDA 7.5 and OpenCV 2.4.9
Then add to your created project:
- (right click on project) -> properties -> C/C++ -> General -> Additional Include Directories, put here:
C:\opencv_2.4.9\opencv\build\include;..\..\..\3rdparty\include;%(AdditionalIncludeDirectories);$(CudaToolkitIncludeDir)
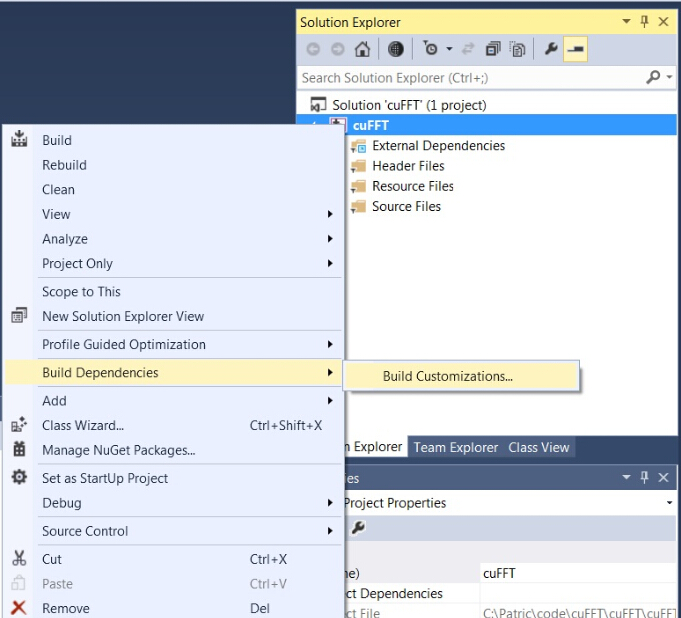
- right click on project -> Build dependecies -> Build Customizations -> set check on CUDA 7.5 or what version you have - for example as here: http://devblogs.nvidia.com/parallelforall/wp-content/uploads/2015/01/VS2013-R-5.jpg
- add to project all .c & .cu files from yolo-windows\src
- (right click on project) -> properties -> Linker -> General -> Additional Library Directories, put here:
C:\opencv_2.4.9\opencv\build\x64\vc12\lib;$(CUDA_PATH)lib\$(PlatformName);%(AdditionalLibraryDirectories)
- (right click on project) -> properties -> Linker -> Input -> Additional dependecies, put here:
..\..\..\3rdparty\lib\x64\pthreadVC2.lib;cublas.lib;curand.lib;cudart.lib;%(AdditionalDependencies)
- (right click on project) -> properties -> C/C++ -> Preprocessor -> Preprocessor Definitions
OPENCV;_CRT_SECURE_NO_WARNINGS;GPU;WIN32;NDEBUG;_CONSOLE;_LIB;%(PreprocessorDefinitions)
- compile to .exe (X64 & Release) and put .dll`s near with .exe:
pthreadVC2.dll, pthreadGC2.dll from yolo-windows\3rdparty\dll\x64
cusolver64_75.dll, curand64_75.dll, cudart64_75.dll, cublas64_75.dll - 75 for CUDA 7.5 or your version, from C:\Program Files\NVIDIA GPU Computing Toolkit\CUDA\v7.5\bin