Home
- This is a basic tutorial for how to use DasiyRec
- It includes two parts, i.e., hyper-parameter tuning and test
- Let's take NeuMF running on ML-1M as an example
Make sure you can open the GUI Command Generator
Step 1: Open TUNE tab
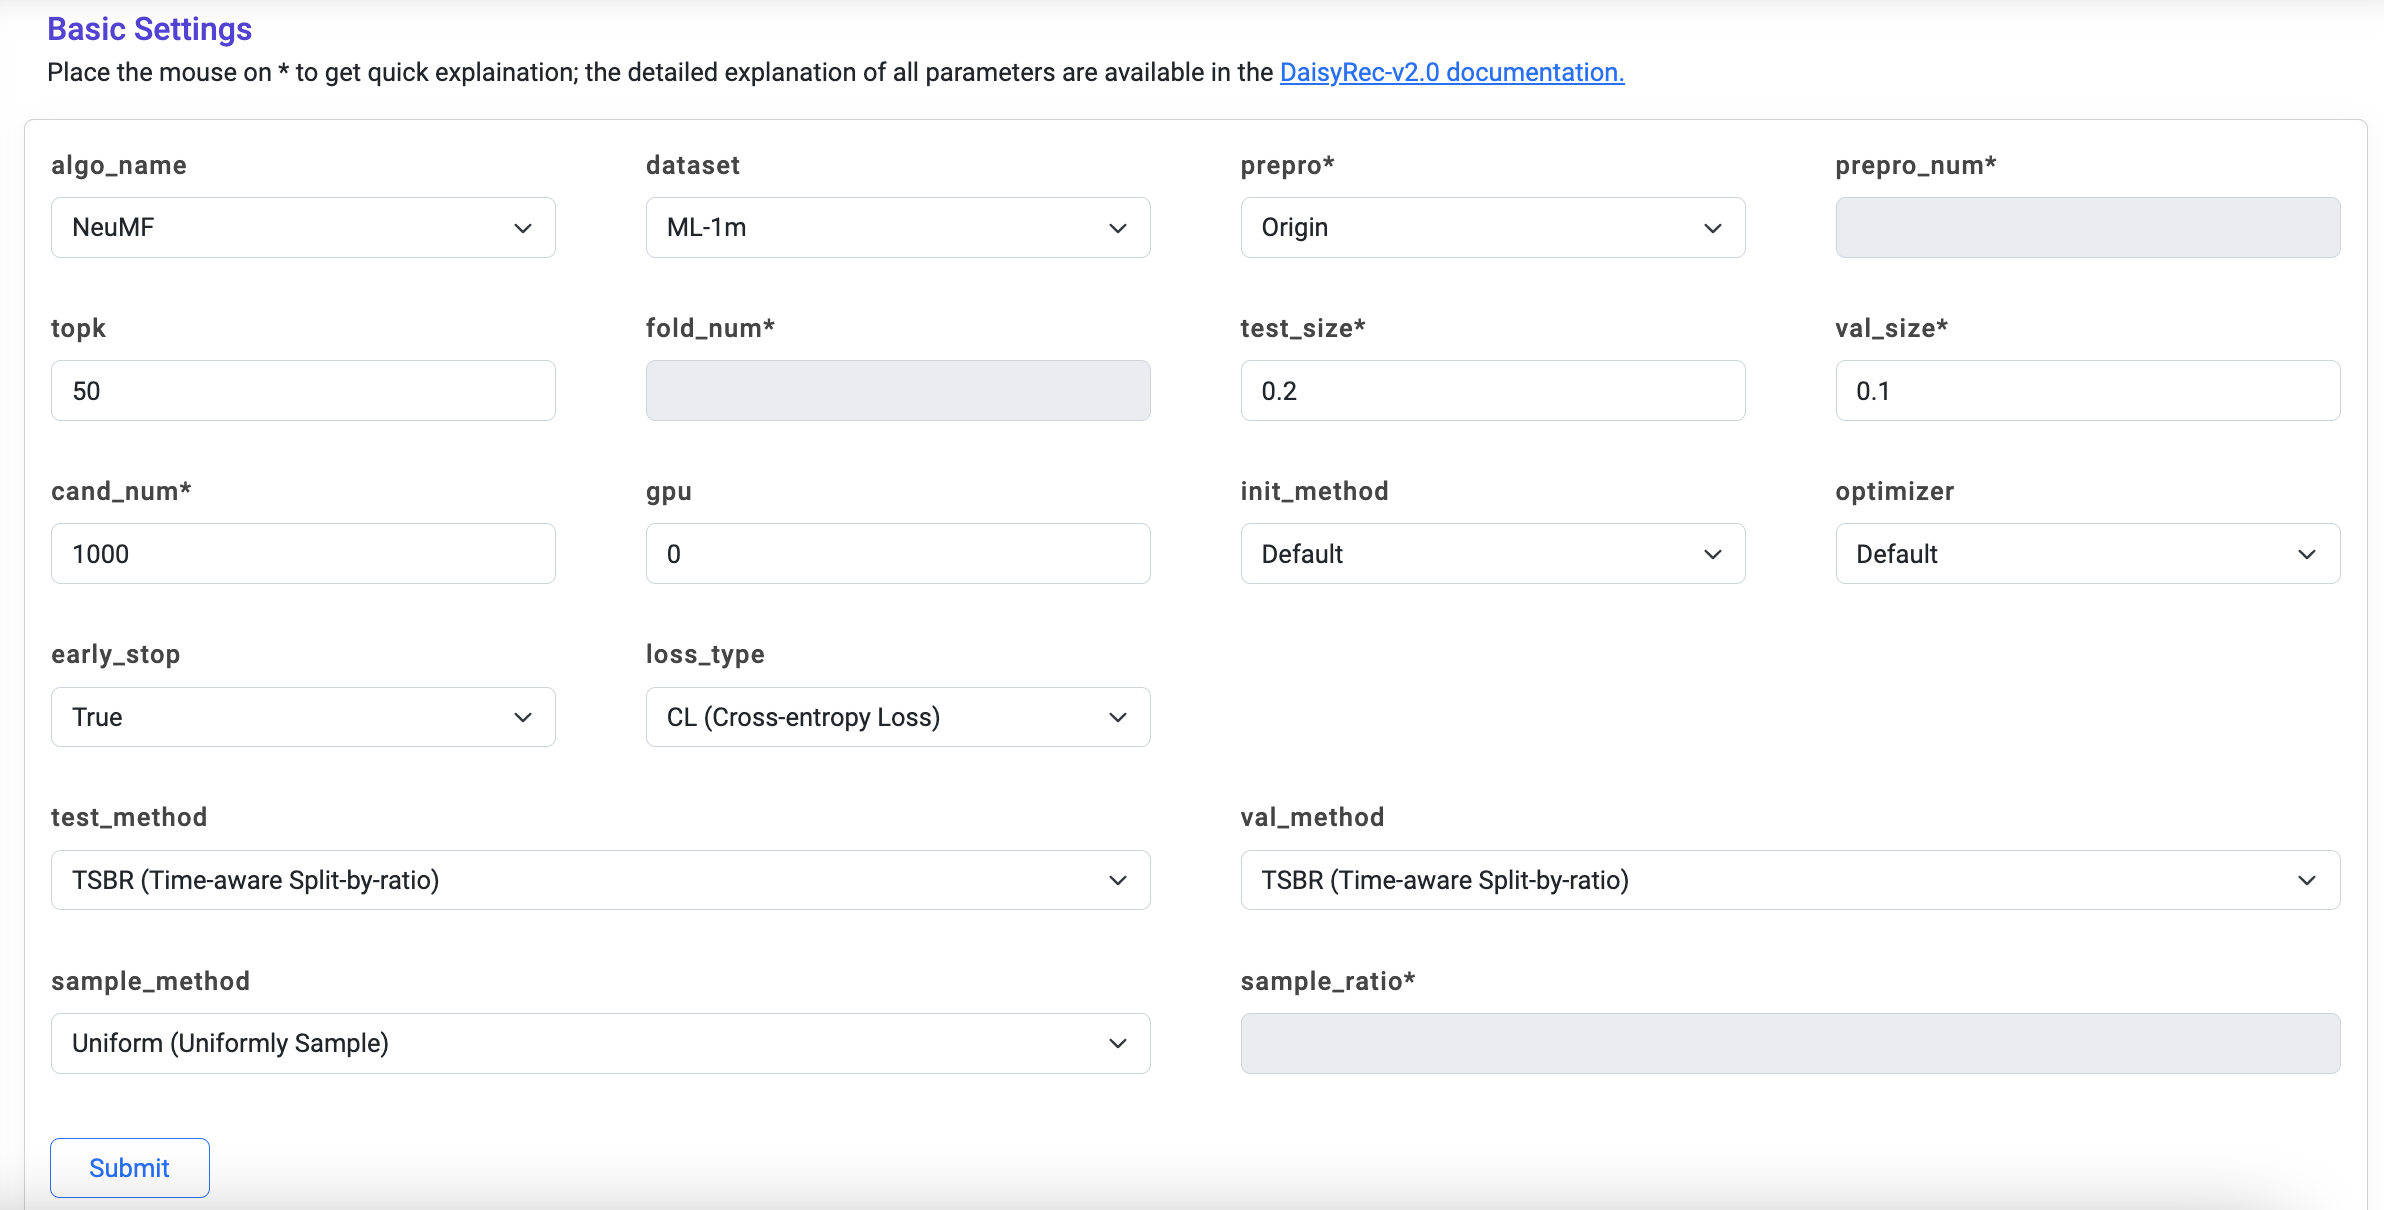
Step 2: Fill in Basic Settings and click the Submit Button
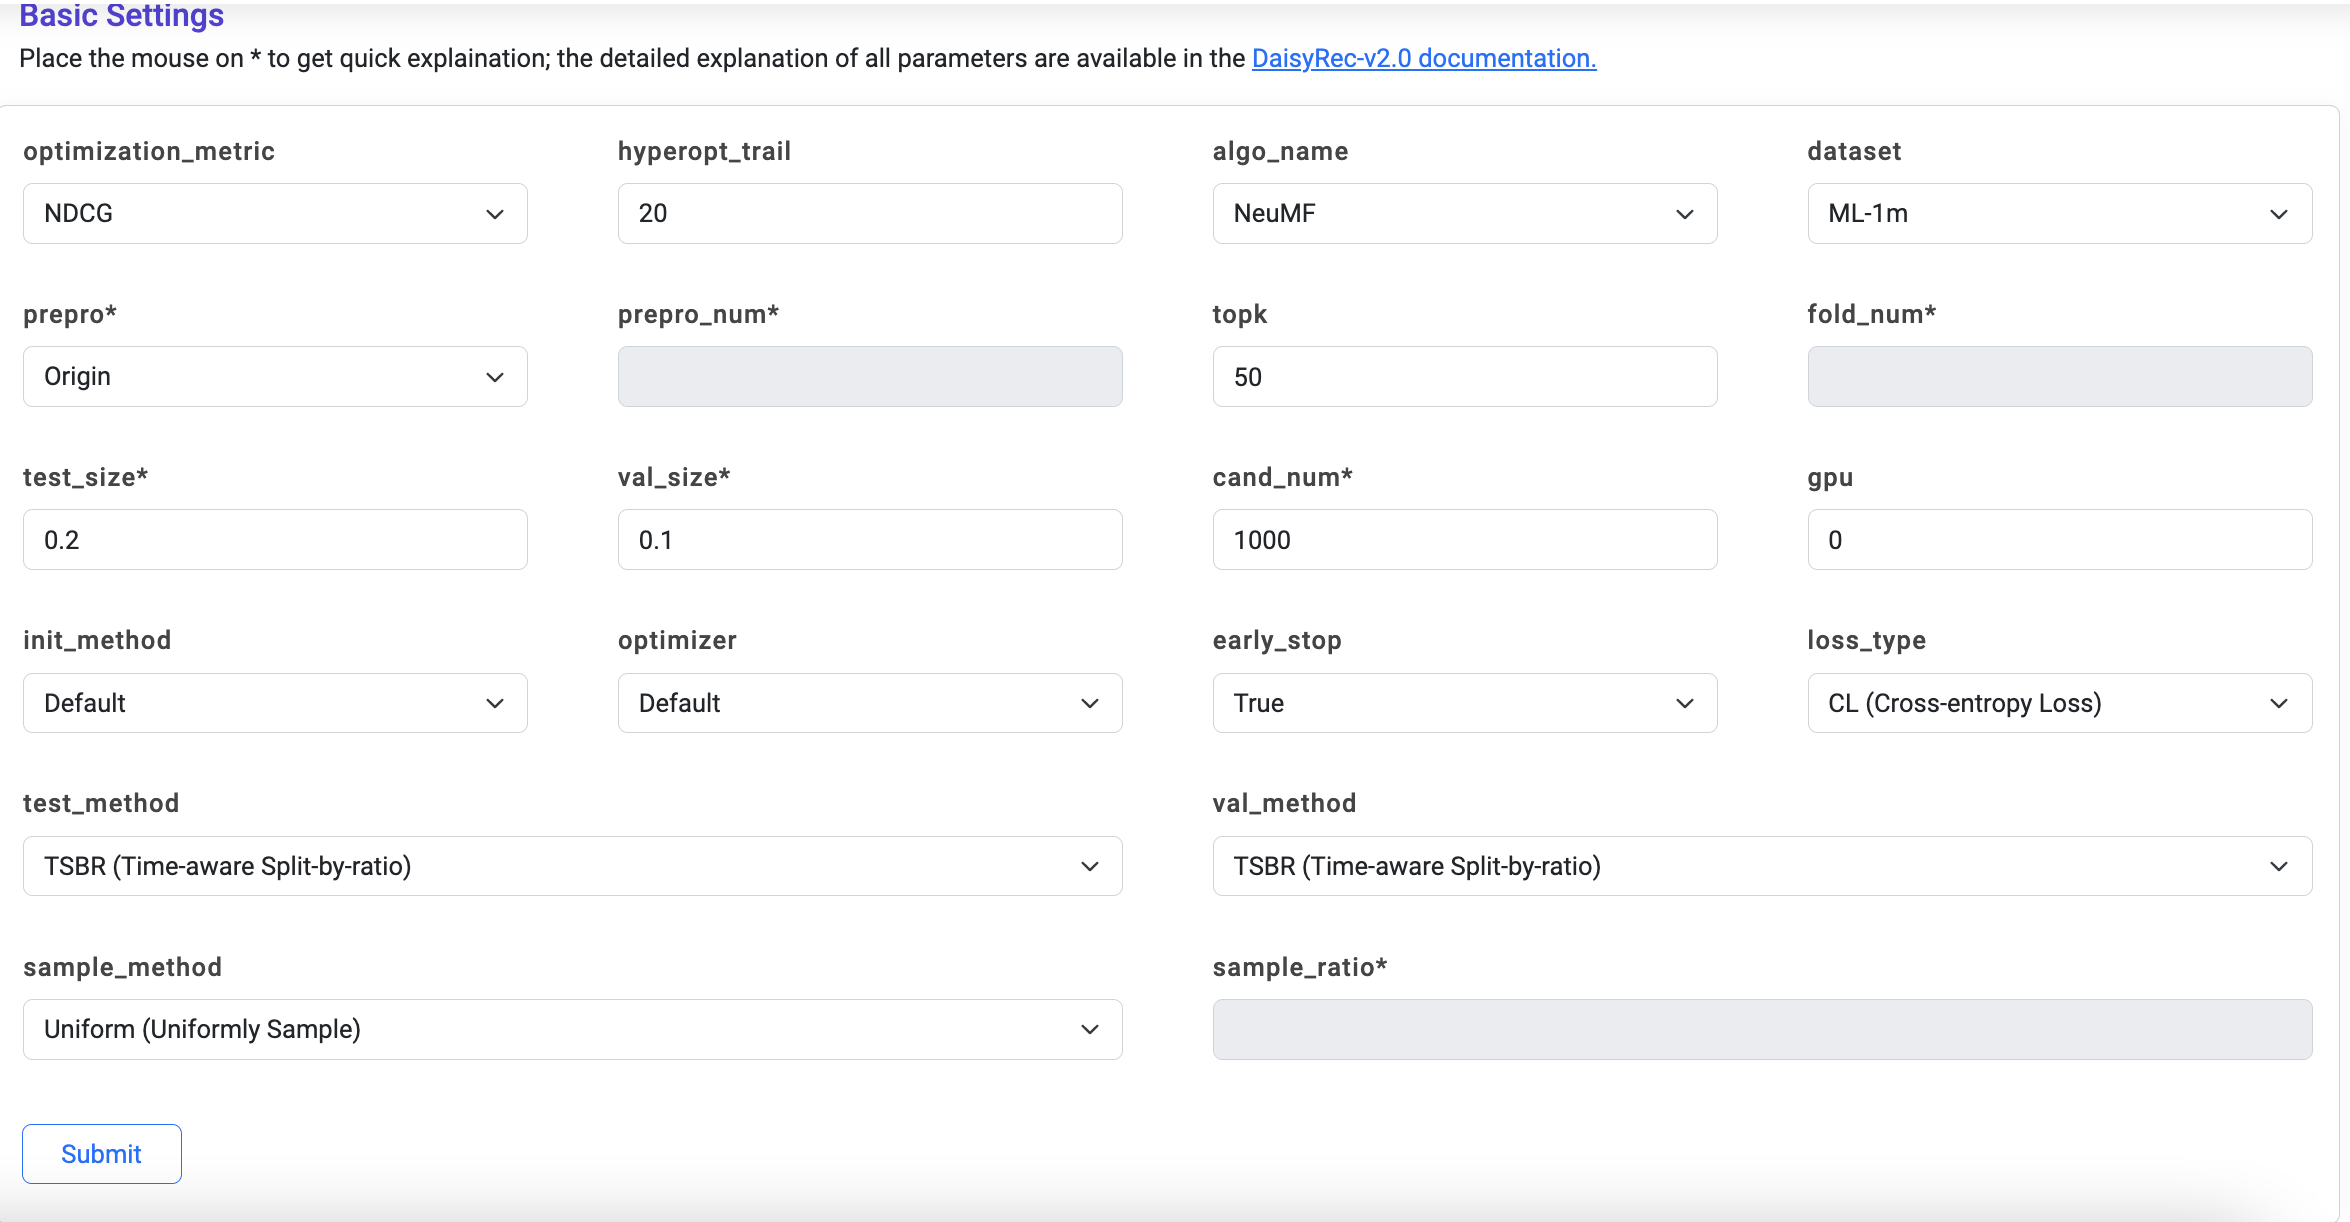
The useless form will be automatically disabled according to the algorithm and processing methods you choose.
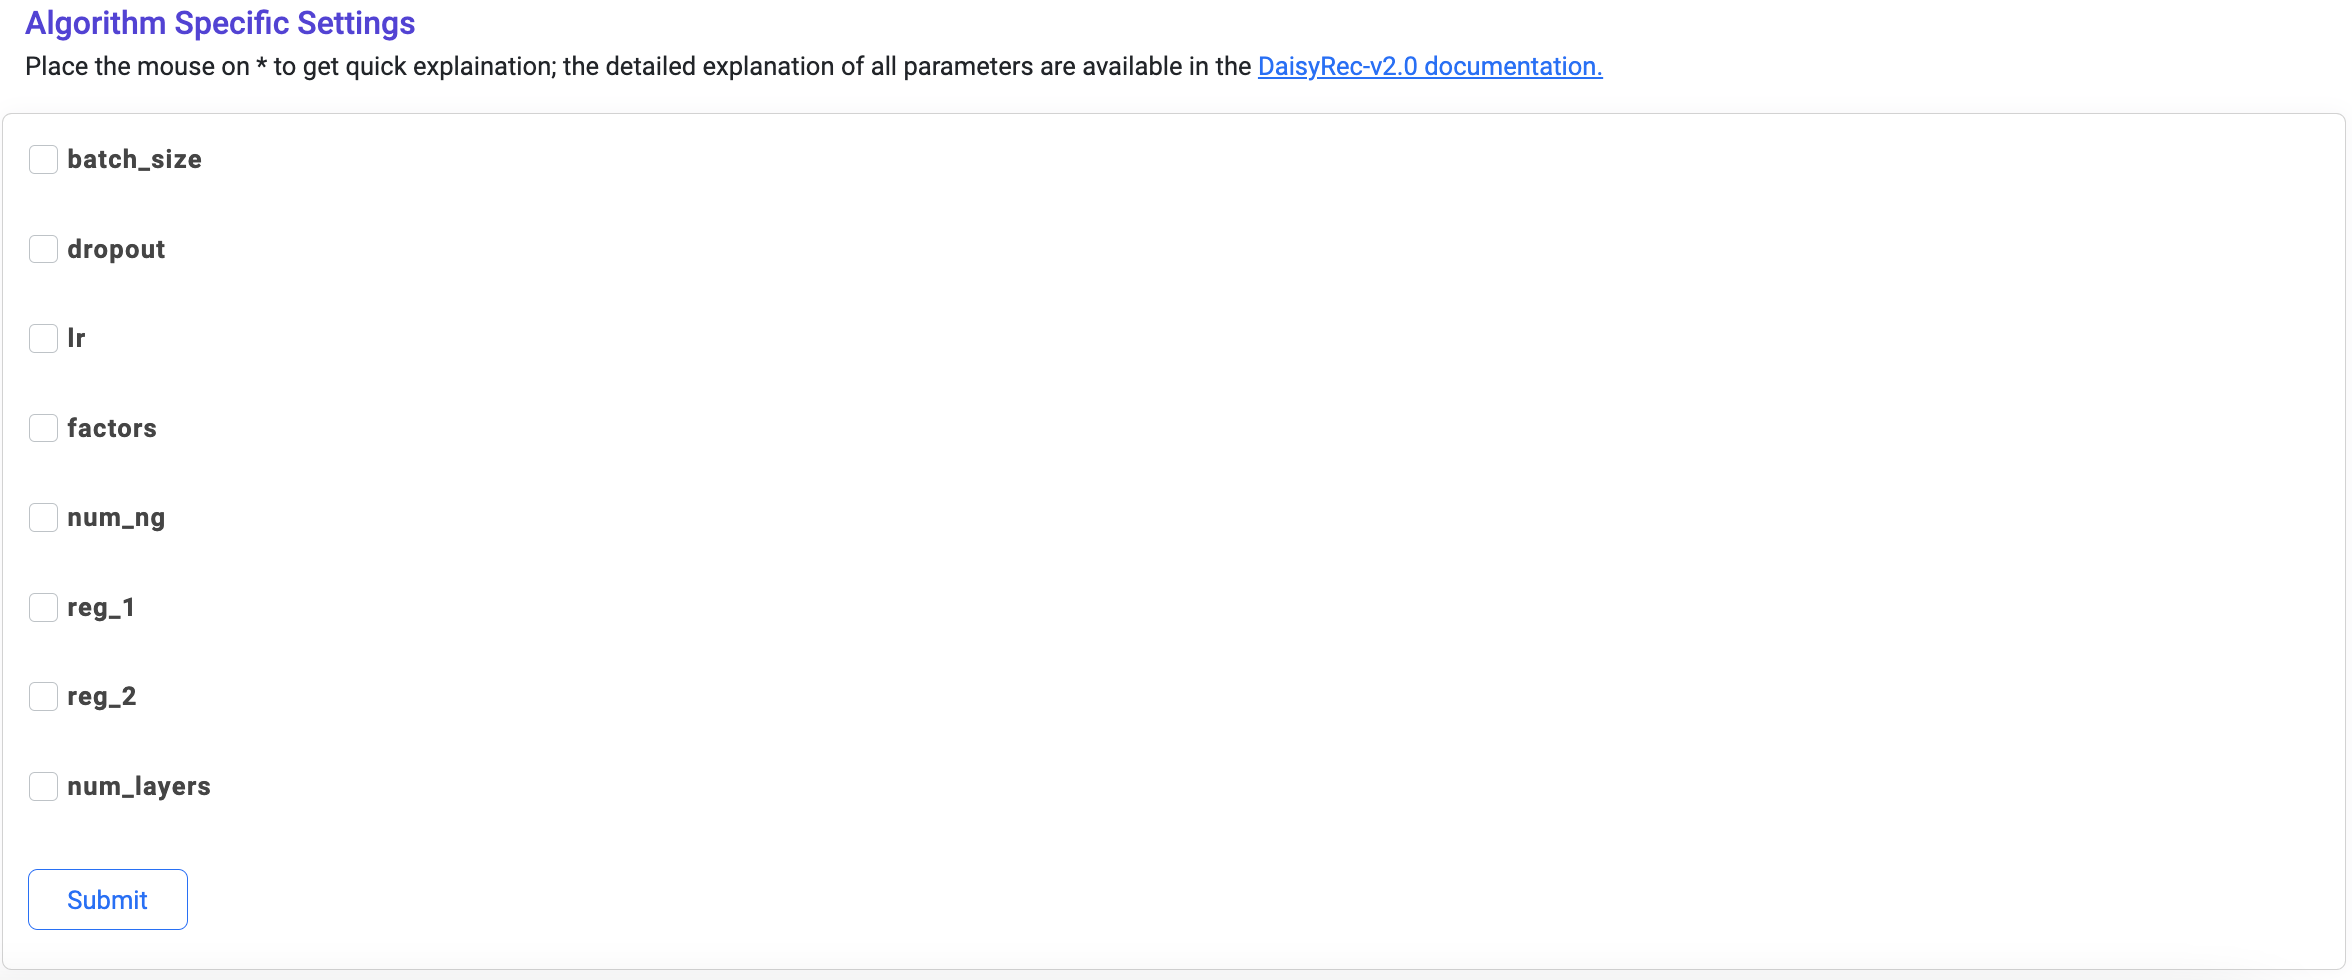
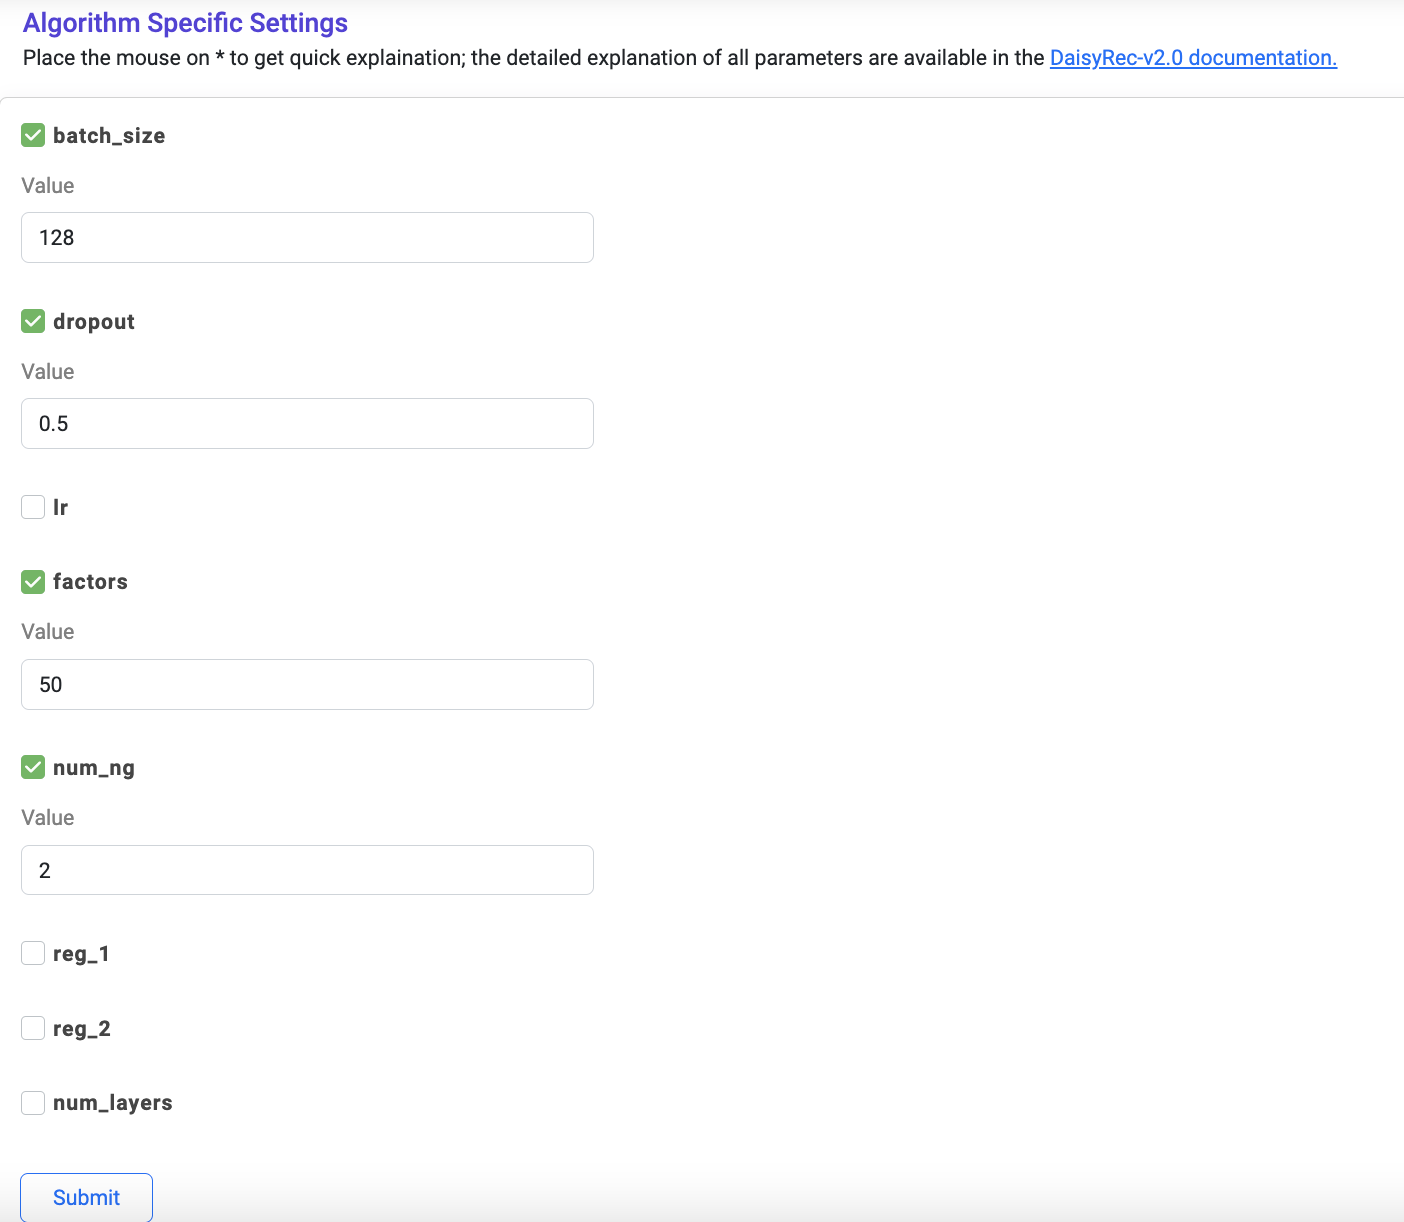
Step 3: Tick 'Algorithm-Specific Settings' and click 'Submit' Button
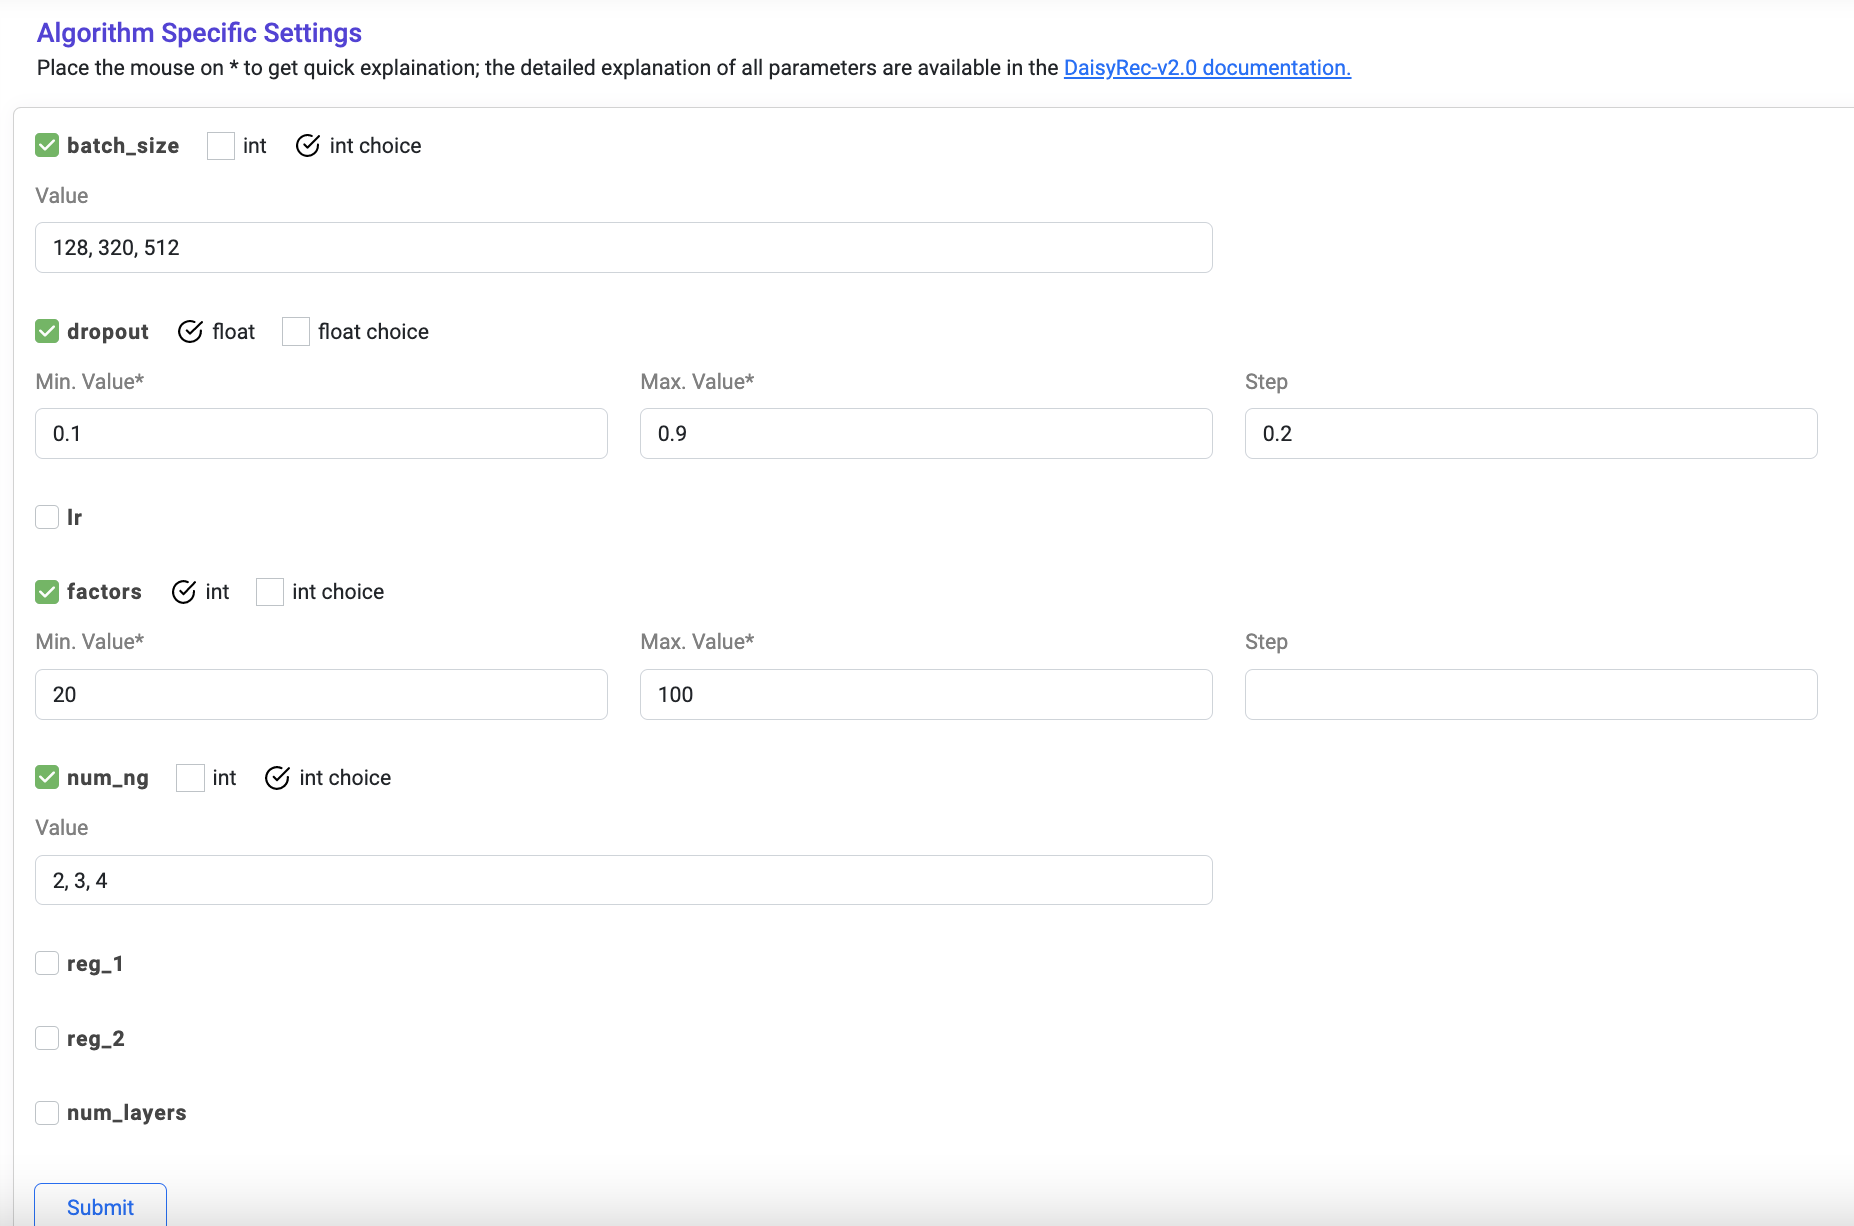
Step 4: Set the hyper-parameter searching space and click 'Submit' Button
- For int/float, simply set ['Min. Value', 'Max. Value', 'step size']
- For int/float choice, directly set ['Value'], separated by
,as default
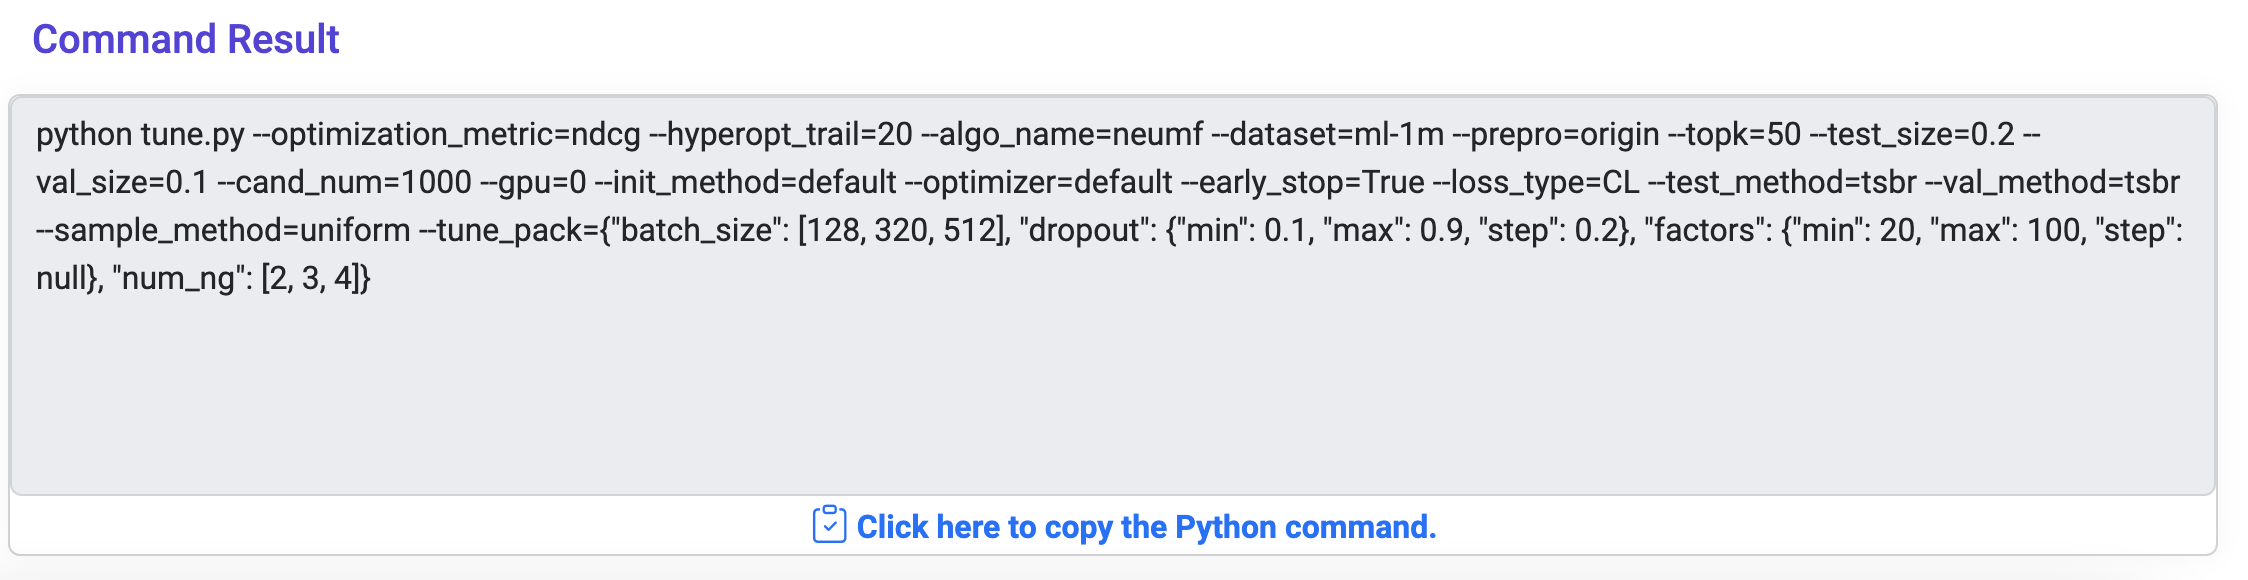
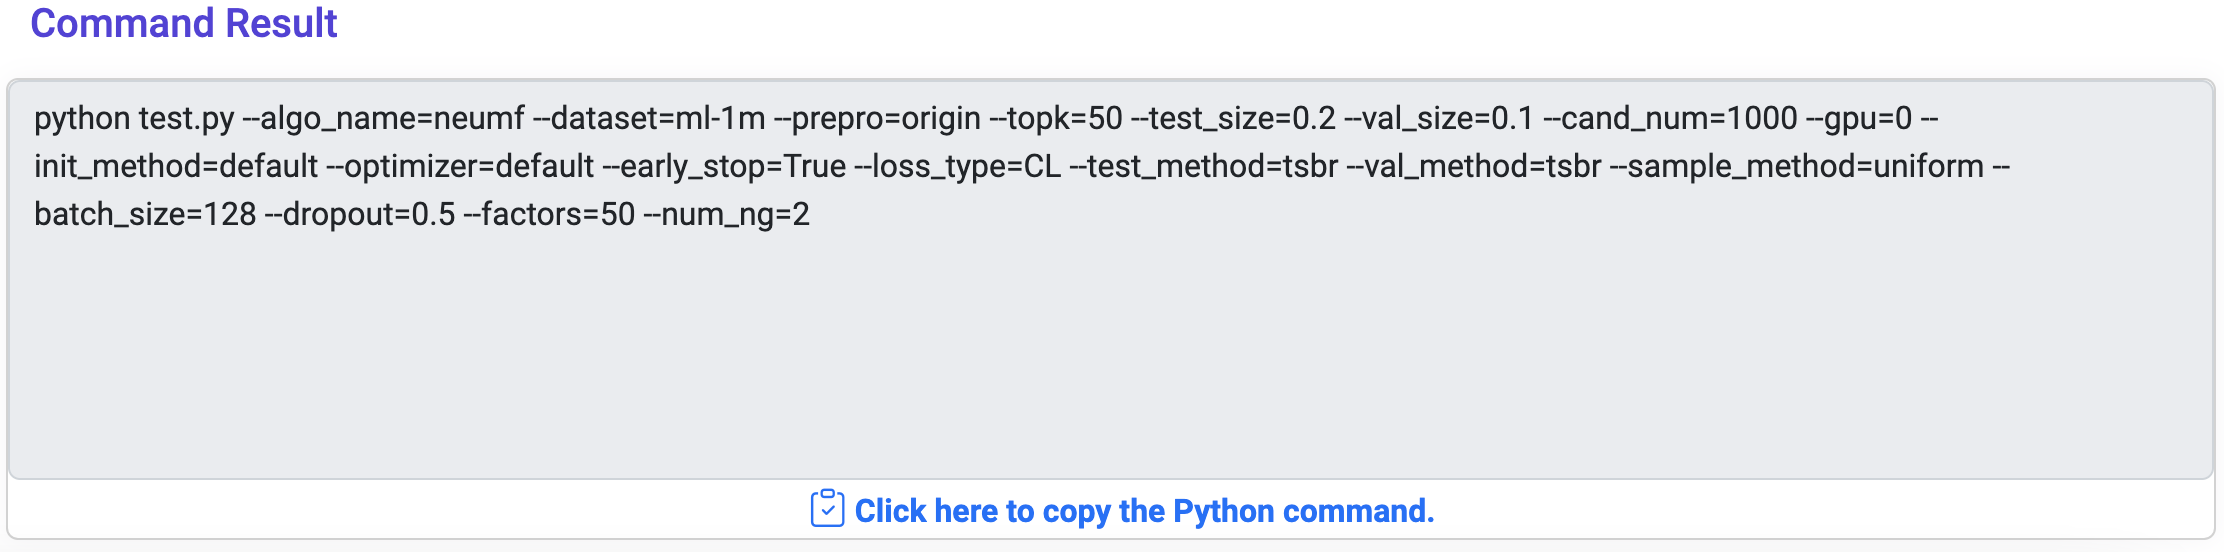
Step 5: Paste the generated command into the terminal to start tune parameter with Optuna
Step 6: After tuning, the results are automatically saved under './tune_log/CL_neumf_ml-1m_origin_tloo.csv'
Step 7: Results on the validation set of 30 rounds are available, and select the parameter settings with the best NDCG@50. Note that topk is set as 10, then NDCG@10 will be the optimization metric for the hyper-parameter optimization via Optuna.
Step 1: OpenTEST in the GUI Command Generator
Step 2: Fill in 'Basic Settings' (same as tune) and click 'Submit' Button
Step 3: Fill in 'Algorithm Specific Settings' with the best parameter settings and click 'Submit' Button
Step 4: Paste the generated test command into the terminal to start test
Step 5: After testing, the results are saved under './res/ml-1m/origin/tloo/CL_point_neumf.csv'