An exploration into CSS Grids and their amazing capabilities, along with the cuteness of furry lil' puppies.
Here's a live demo: https://amruthpillai.github.io/CSSGrid-Pawtography/
Recently, I've been getting a bit tired of using flexbox everywhere. It is my go to strategy when I need to create any kind of layout, simple or complex. It just worked, and even though it left a lot of boilerplate divs on the DOM it would do the job well.
All of this, until today. I stumbled upon this video of Morten Rand-Hendriksen at Wordcamp Europe 2017, and like the video says, it really did change everything. Morten explains why CSS Grids are the need of the hour, and showcases a quick example on how to get started on them, along with some best practices to pick up. It's definitely worth the watch.
https://www.youtube.com/watch?v=txZq7Laz7_4
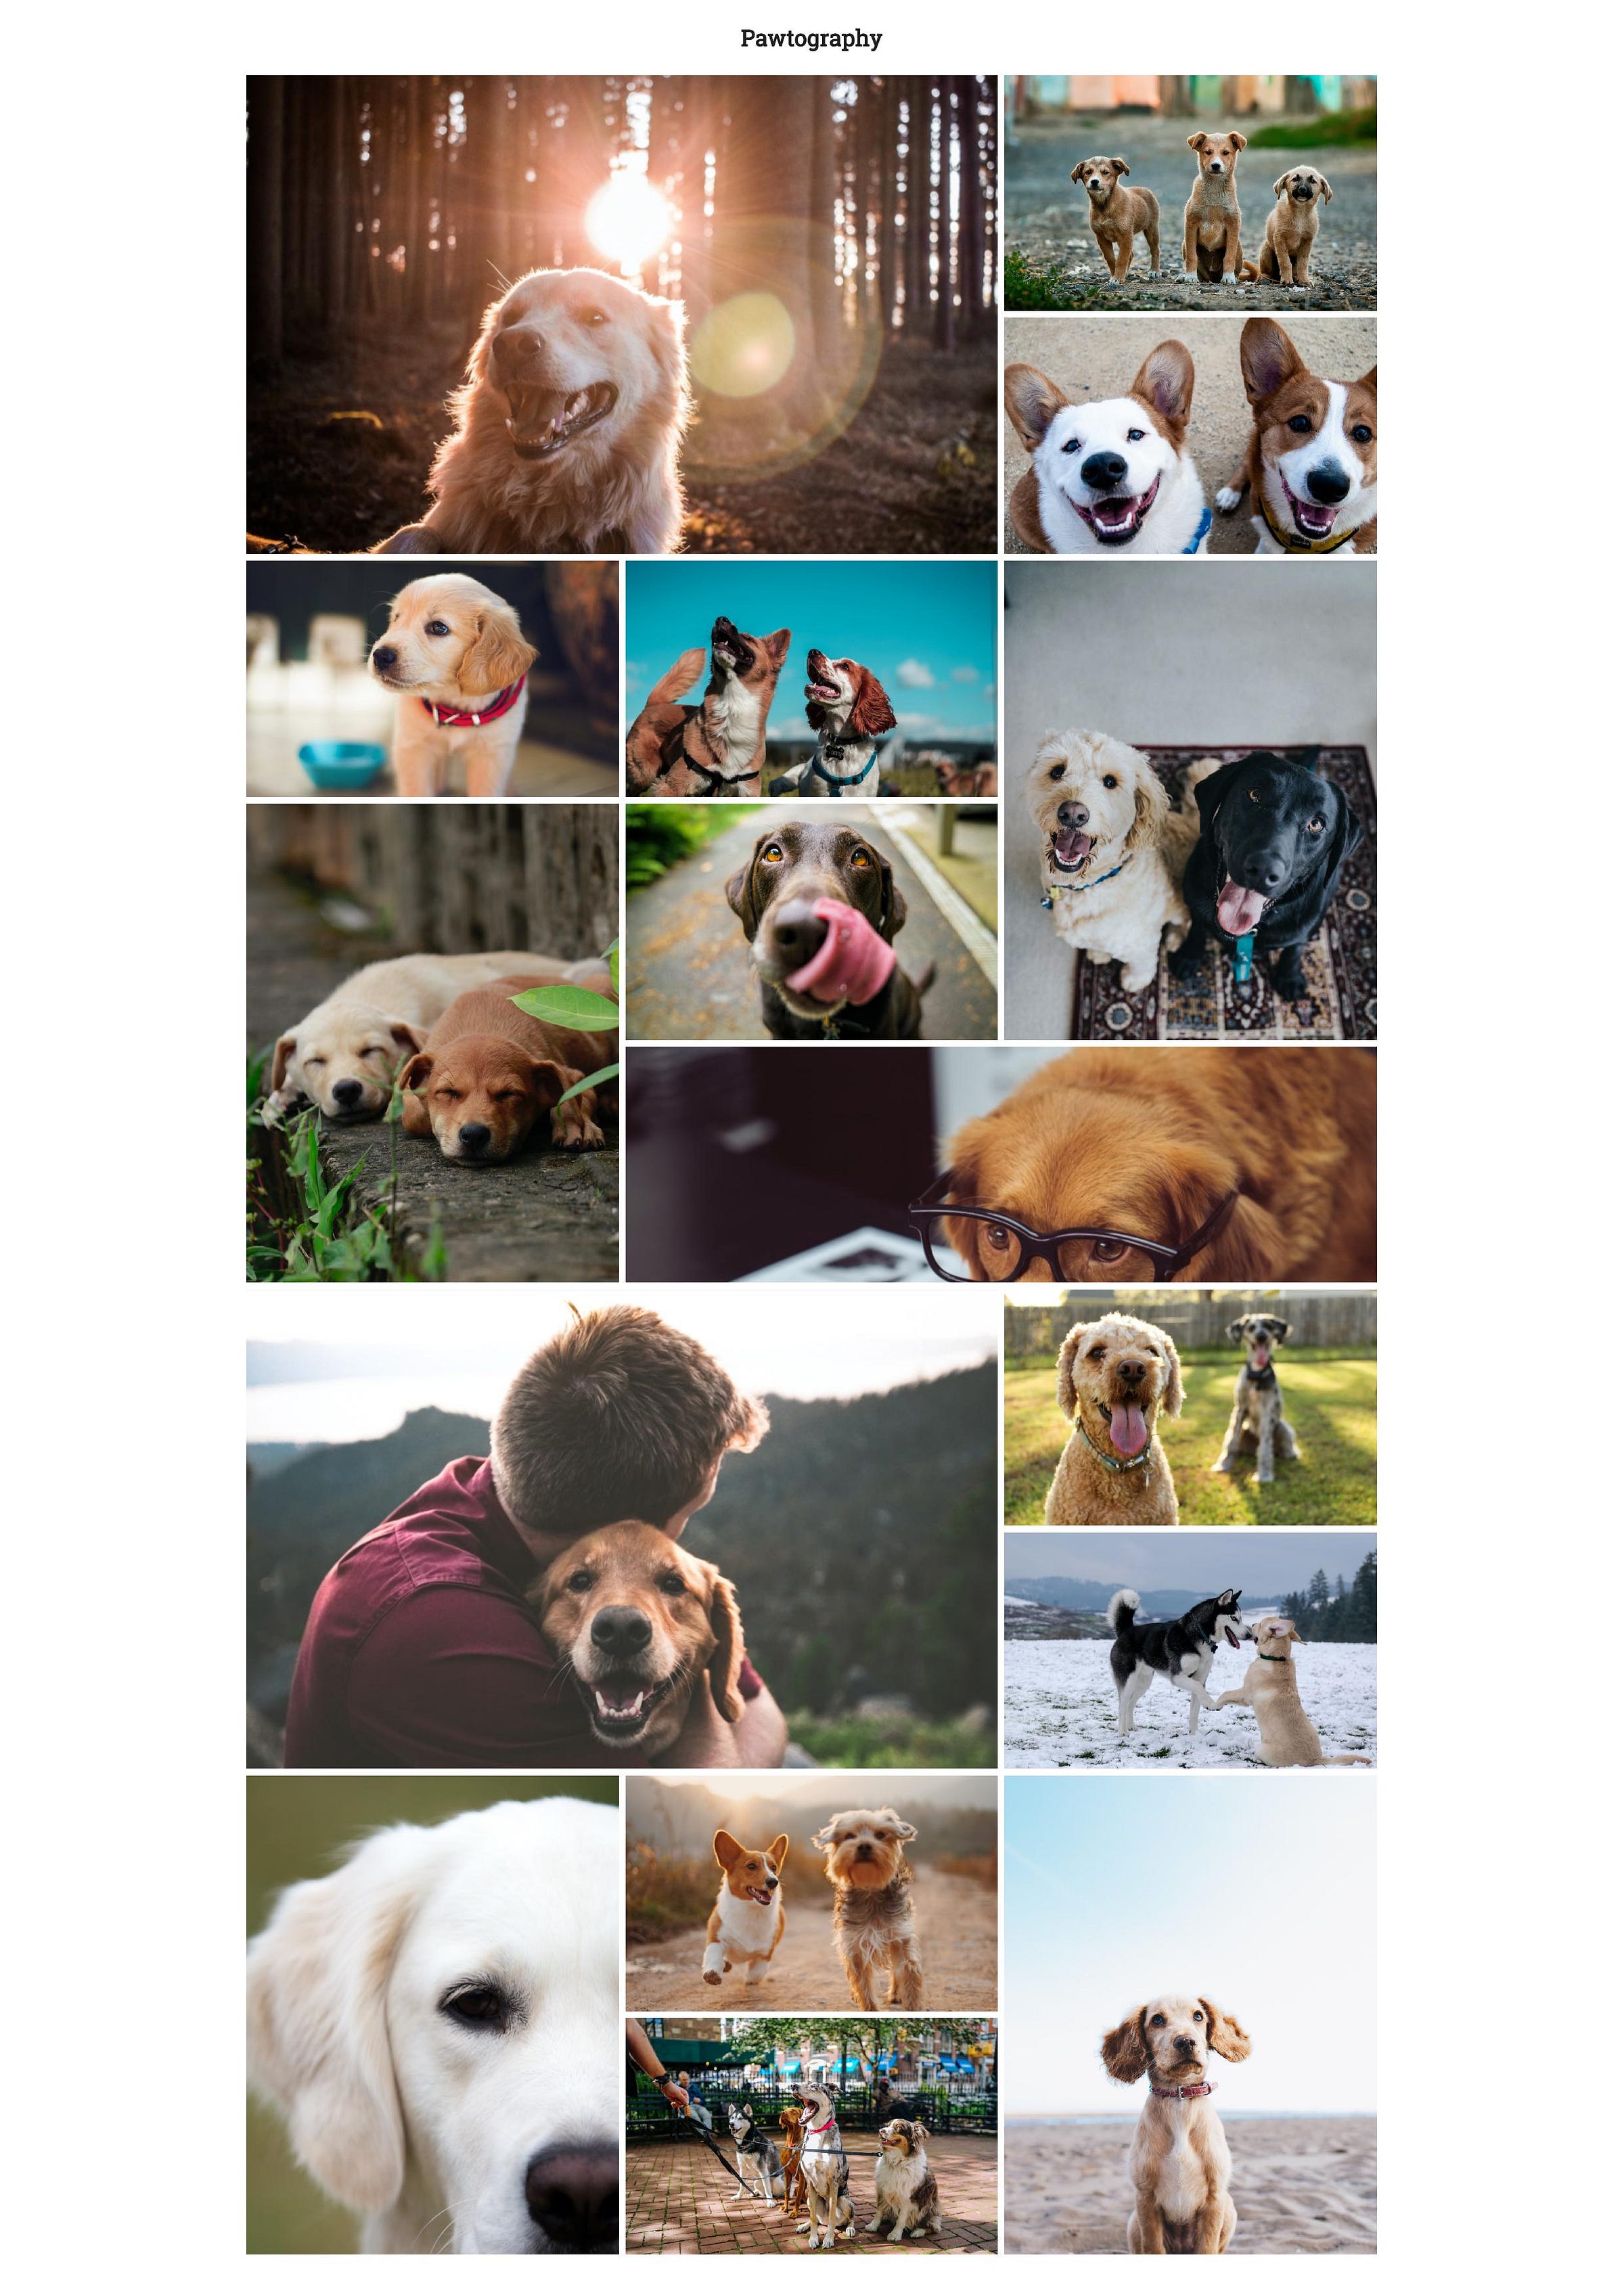
After watching the video, I went through a few more to see some examples of how one can use CSS Grids. I felt inspired and wanted to try a complex layout of my own, and hence this Medium blog article was born.
I drew up a quick sketch of the layout with the help of Google Sheets. Turns out, it's a great tool when you're working with CSS Grid Layouts.

Now that looks pretty cool, but it'll look even cooler when we've designed it live using just HTML and CSS. The markup I have on the HTML is just this: plain, simple and most importantly, readable.
Along with this, I've collected a bunch of images of dogs thanks to the various photographers on Unsplash. You can download all the images from the GitHub repository here.
This is all that's required from the CSS point of view.
.grid {
  display: grid;
  grid-auto-rows: 250px;
  grid-template-columns: 1fr 1fr 1fr;
}
After that, we just need to add specific fractions to certain cells, which we can figure out using the row/column numbers against our Google Spreadsheet.
.cell__1 {
  background-image: url('../images/1.jpg');
  grid-column: 1 / 3;
  grid-row: 1 / 3;
}
.cell__2 {
  background-image: url('../images/2.jpg');
}
.cell__3 {
  background-image: url('../images/3.jpg');
}
.cell__4 {
  background-image: url('../images/4.jpg');
}
.cell__5 {
  background-image: url('../images/5.jpg');
}
.cell__6 {
  background-image: url('../images/6.jpg');
  grid-column: 3 / 4;
  grid-row: 3 / 5;
}
.cell__7 {
  background-image: url('../images/7.jpg');
  grid-column: 1 / 2;
  grid-row: 4 / 6;
}
.cell__8 {
  background-image: url('../images/8.jpg');
}
.cell__9 {
  background-image: url('../images/9.jpg');
  grid-column: 2 / 4;
  grid-row: 5 / 6;
}
.cell__10 {
  background-image: url('../images/10.jpg');
  grid-column: 1 / 3;
  grid-row: 6 / 8;
}
.cell__11 {
  background-image: url('../images/11.jpg');
}
.cell__12 {
  background-image: url('../images/12.jpg');
}
.cell__13 {
  background-image: url('../images/13.jpg');
  grid-column: 1 / 2;
  grid-row: 8 / 10;
}
.cell__14 {
  background-image: url('../images/14.jpg');
}
.cell__15 {
  background-image: url('../images/15.jpg');
}
.cell__16 {
  background-image: url('../images/16.jpg');
  grid-column: 3 / 4;
  grid-row: 8 / 10;
}
The cells in bold are the ones that are made to fit in specific areas. The rest simply find the closest available space and cozy up in there.
Lo and behold, we now have this: