NOTE! This program is deprecated. Please use the Refreshed Version


This program lets you measure latency of your system given that you have Arduino. Now in C#!
Are you Interested in measuring the latency of your system, but can't afford 750$ monitor? Well in that case you are not alone! This program lets you even measure the latency of single component like mouse latency, system latency, or just overall latency.
- Arduino (I used UNO, but I think it will work with other too)
- Some jumper wires.
- A photoresistor.
- Like a 500Ω resistor (Not required. I think you can use built-in pullup resistor).
- A button.
- Windows 10 and basic knowledge of using it.
- Make sure you are in a possession of Arduino.
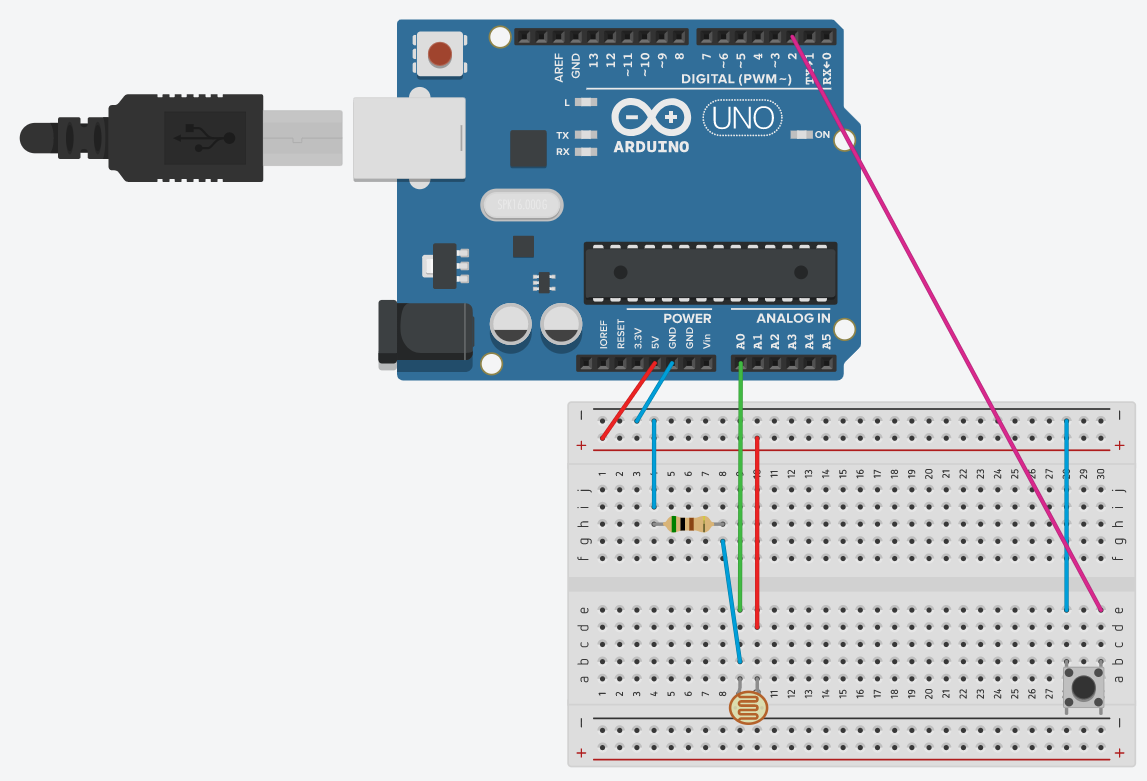
- Connect the Arduino to the other elements as follows:
Light_Sensor - A0,
Button - 2
I would recommend putting a 500Ω resistor in series with the light sensor. The button is configured to use a arduino UNO built-in "pullup resistor" (button, INPUT_PULLUP).
Remainder! button is reversed, I mean the code detects press of a button normally, but the state is different (if(buttonState == LOW)). All it means is that you plug it to Digital Pin 2 and Ground.
For the ease of use I would suggest connecting photoresistor not on the same board as the button, even better just don't use a board for it! Because you will need to place it in the correct place of your monitor.
- Connect the Arduino to the PC via USB.
- Upload the Code onto the board.
- Download the latest release of the program.
- Connect the Arduino the the PC via USB.
- Open the program and set the correct serial port of the Arduino.
- Press Start. If everything goes right program should not close and you should see no errors.
- Move the photoresistor so that it looks at the black rectangle of the program.
- Press the Button connected to the PIN 2 of the Arduino.
- The measurements should appear on the screen!
- You can now Save them, Export them and if that's not your first time using the program you can even Import the Saves you Exported earlier!
If you have any kind of question or issue to report. DM me through Discord: IsPossible#8212, or on GitHub
Feel free to fork the project. Tweak, fix and add to the code. I tried to add as many useful comments to the code as it's possible, so code should be easy to read. I'll be fixing and adding to the code myself when I'll see a need to.
I'll be writing most of the code for the program from the ground up, because it was not clean and transparent enough.
Buy me a coffee if you think I earned it! Any amount means a lot for me, please consider donating if you can.