Rec-sy is a web-application based on Face Recognition System, built using OpenCV and Python.
This Project is the implementation of face recognition system which identifies top notch criminals and fraudsters in the world just by using an image. The face recognition and detection is done by a face recognition model integrated in the backend part. User has to upload an image of the person that he/she wants to identify and after simulations, it will return the name of the person identified in the image from the data stored in the database.
- The Face recognition and detection model is built using OpenCV library in Python Language. OpenCV is a huge open-source library for computer vision, machine learning, and image processing. It recieves path of the image as input from the server and after simulations returns the name of the recognised person back to the server.
- This Model is integrated with Flask server. Flask proves to be an excellent microframework for Web-Applications. After reciving output from the model, it redirects this output to the incorporated HTML page.
- The Frontend Part of this Project is made using HTML, CSS and JavaScript. HTML page uses Jinja Tags to display the names recieved from the server on the website.
- Firstly the user has to upload an image and submit it on the website. This user input is then passed to the Flask server and saved in a local folder. The integrated Face Recognition model access that image via tha folder and after simulations, returns the name of person in the image back to the server. This name is then displayed on the website. Amazing? Try it out then!
- Read about how the model works
- You will require libraries and dependencies as mentioned below
- python (Must be 64-bit version)
- cmake
- dlib
- face_recognition
- numpy
- opencv-python
- Flask
- wikipidea
- Tip: If you find difficulties in installing dlib, refer to the youtube video below, it helped me lot!!
- You can also refer to the requirements.txt file above in the repo
- app.py >> It is the Flask server and the file which you have to run. It integrates the face recognition model by importing it and interact with the frontend part. It takes input image from the user and send it to the face recognition model. After simulations, the model return an output to this server and the server again send it to the frontend part where it is displayed on the website.
- face_rec.py >> It contains the face recognition and detection model.
- faces folder >> It is basically the database for the face recognition model. It contains all the known faces.
- templates folder >> It contains all the HTML files of the Frontend Part.
- static folder >> It contains all the CSS, JavaScript files along with images which are used for the website. It also stores the image given by the user.
- requirements.txt >> It contains all the libraries that needs to be installed in the local machine in order to run the source code.
- Download code from above or clone this repository to your local machine.
- To run from command prompt or from VS Code
-
Make sure all the libraries dependencies are installed and satisfied in your local machine
-
Open command prompt/Terminal in VS code and navigate to directory where all the files are stored and run
python app.py (for windows) python3 app.py (for ubuntu) -
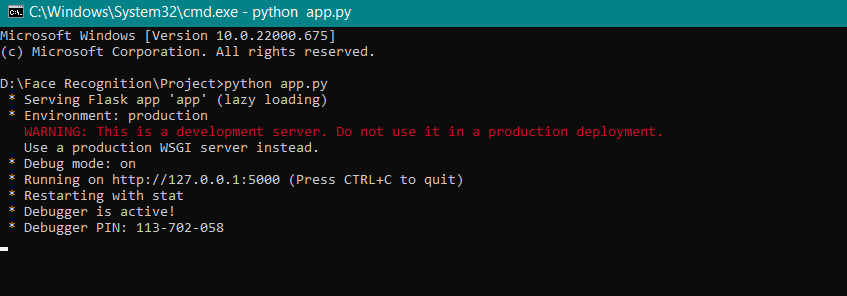
The command prompt/Terminal will look something like this
-
-
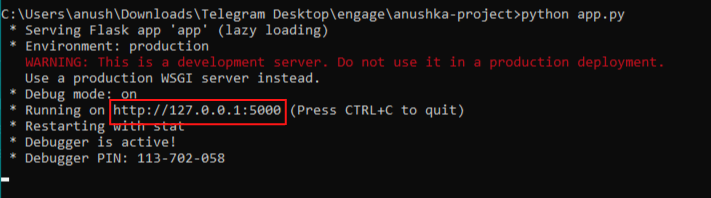
Copy the following URL and paste it in the URL section of the browser (Refer to the image below)
-
-
This link will redirect you to the main website of the project
-
-
After that you are redirected to the website as shown below -

-
Click on 'Test my project' button
-
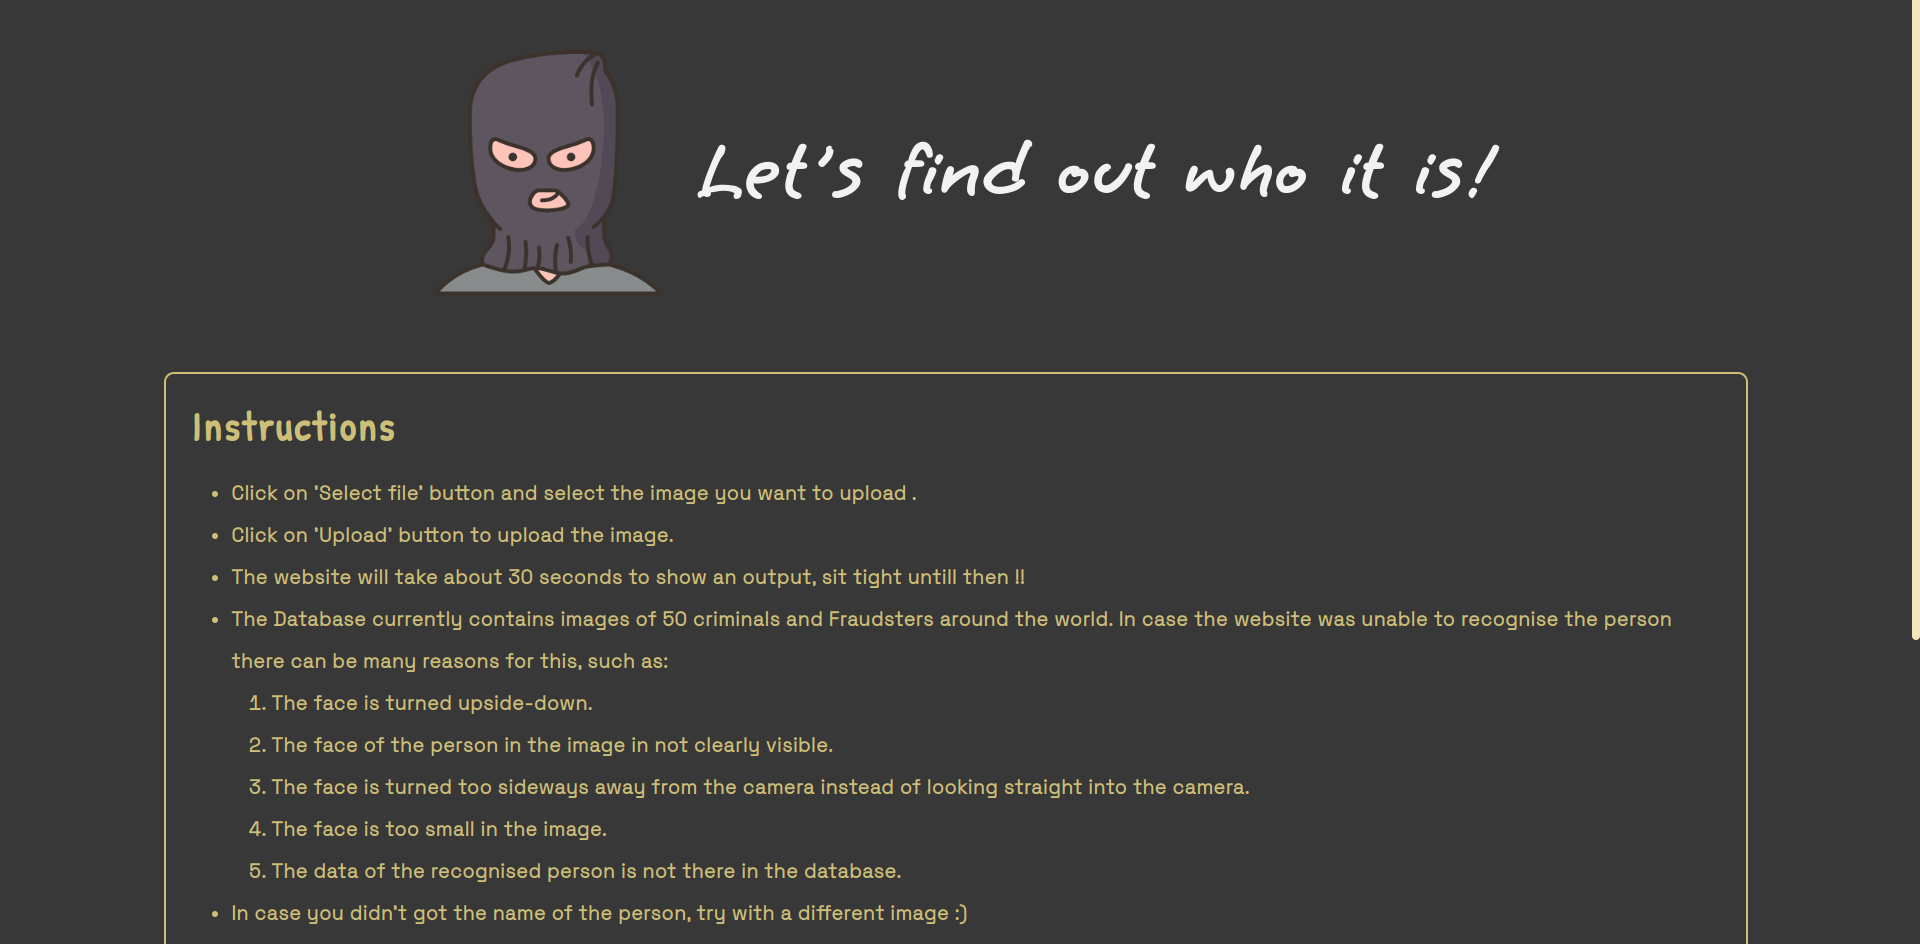
You will be redirected to a new page where you will upload an image of the criminal that you want to identify
-
Read the instructions properly and before uploading -
-
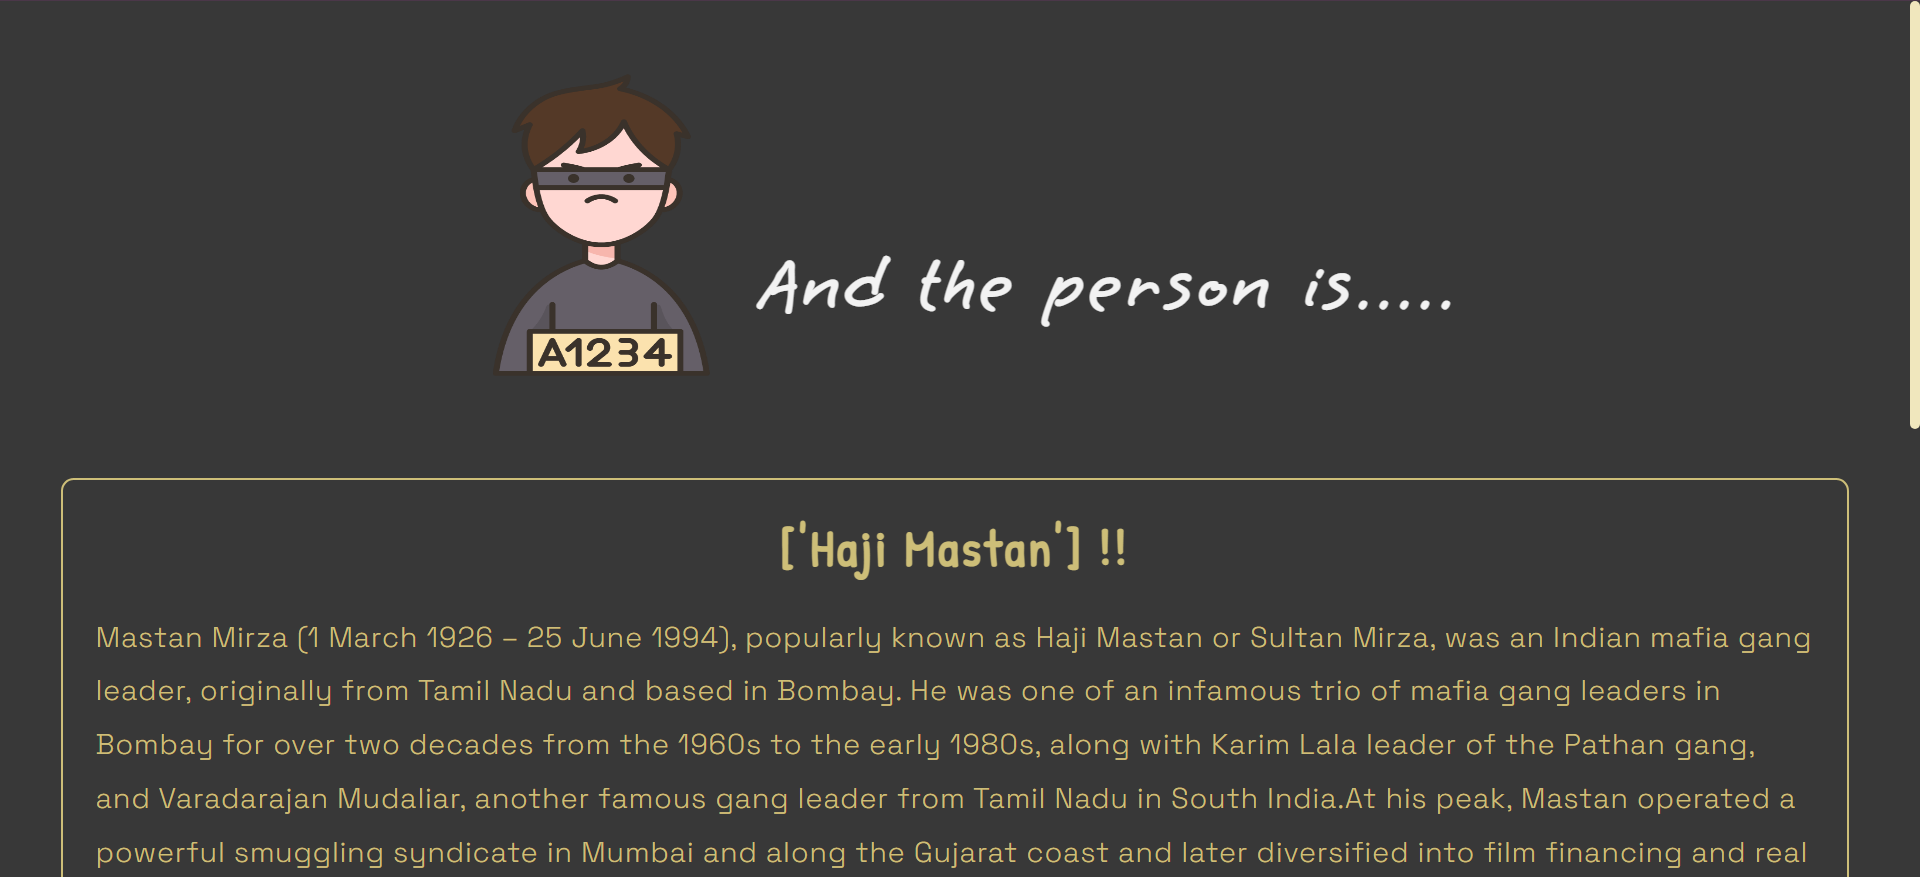
Wait for some time..
-
And voilà!! You will get the name of the criminal and about him (directly from wikipedia) as shown below -
- After downloading the code in your local machine, go to the 'faces' folder
- Add your photos and save the images with the name of the person in that image.
- After that you have added your own photos in the database ('faces' folder), run app.py and choose a different image of yours and upload it.
- Wait for some time...
- And voilà!
- The wikipedia content might be wrong if you are not a famous person. It will show about someone with a similar name as yours :).
- Takes image path as input from the server
- The Source code of this Model consists of 3 functions
- get_encoded_face():
- It looks through the faces folder and encodes all the faces in a language that the ML Model can under stand
- It returns dictionary of anme and image encoded
- unknown_image_encoded():
- It encodes a face in the given file name in a language that the ML Model can understand
- It returns the encoding
- classify_face():
- It will find all of the faces in a given image and label them if it knows what they are.
- It returns the name/names in the input image back to the server
- get_encoded_face():
- Creating a proper database like SQLite or MongoDB for storing the images of criminals
- Improving the Face Recognition model
- Adding features such as allowing the user to capture images via Web Cam and many more
- Taking Feedback from the user about accuracy of the result
- Deploying the whole project on Heroku server
I have made this project on Windows operating system. if you are in a different OS and getting some errors anywhere in the project please refer to Google.