- Turn the XMPP message forwarder on
- Display data on screen
- Any Linux computer (such as Raspberry Pi, a desktop/laptop will also work)
- Beechat Clip radio [LINK]
- an XMPP account
- Receive and view XMPP or Beechat text messages via the Web UI. (Only sending works right now)
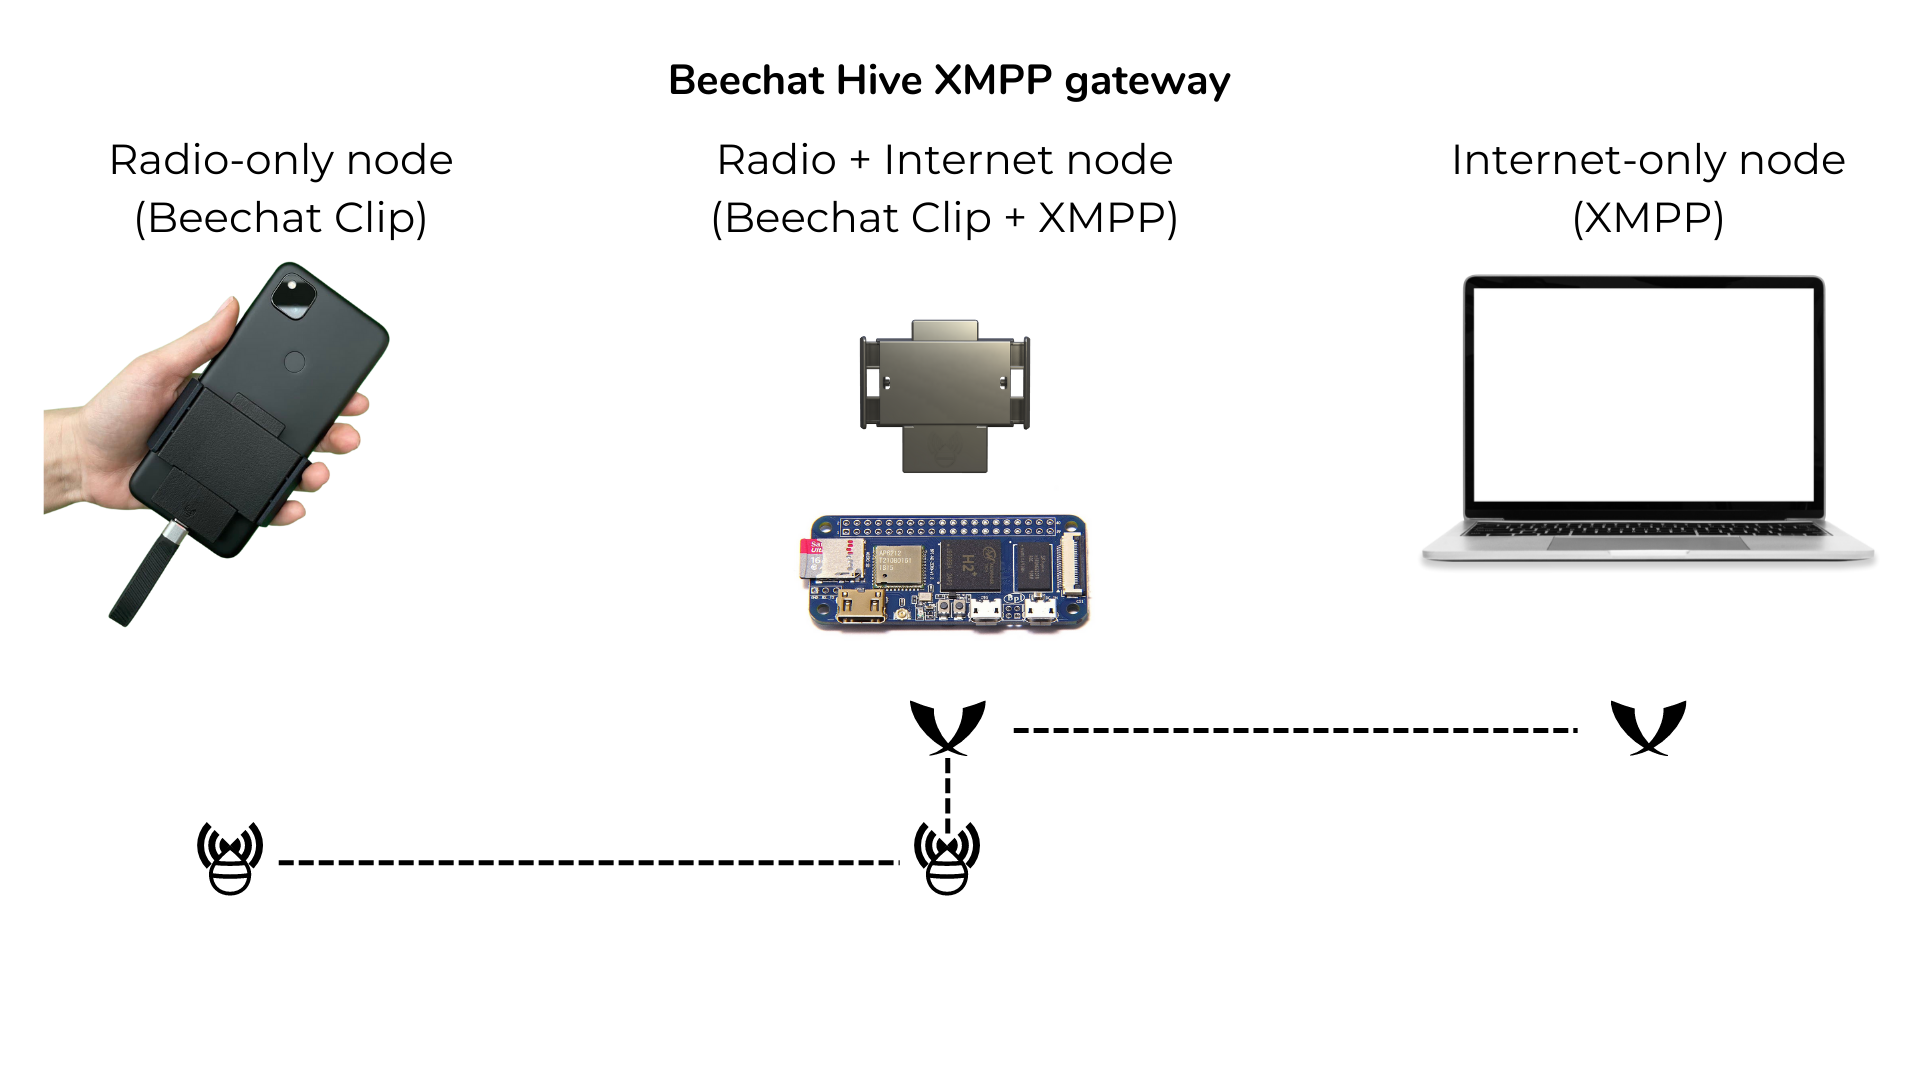
[RASPBERRY PI SETUP]
- Download the Raspbian Imager from here: https://www.raspberrypi.com/software/
- After executing Raspbian Imager, go to advanced options via the GUI and
(1) set SSH to enabled
(2) set the user to "beechat" or a username of your choice
(3) set hostname to something memorable such as "beechathive" (make sure you use a different host name for every Hive)
(4) configure a Wi-Fi network, the same one your computer is connected to. That way, on the first boot you can ssh into it with
ssh beechat@IP_OF_RPI_HERE. If you don't know the IP, you can use the hostname you set in step 3. So you would usessh beechat@beechathive - Once you've booted in, it is useful to make your Hive reachable from a .local network domain rather than an IP or hostname. So, instead of
ssh beechat@192.168.1.57you would usessh beechat@beechathive.local. If you wish to do this do the following (make sure you use a different host name for every Hive) :sudo apt-get install avahi-utilssudo nano /etc/avahi/avahi-daemon.conf- Uncomment the line starting with host-name= and add your domain such as "beechathive" (without quotes).
sudo service avahi-daemon restartservice avahi-daemon statusIf the last line says: "Server startup complete. Host name is..." then it was successful.
[MAIN STEPS]
(1) Download the Beechat Hive code and unzip to /home/beechat (or your user):
wget https://github.com/BeechatNetworkSystemsLtd/BeechatHive/archive/refs/heads/main.zipunzip main.zip
(2) Set your server's database password within the file:
~/BeechatHive-main/flask_auth_app/project/__ init__.py
(3) Set your XMPP credentials:
~/BeechatHive-main/flask_auth_app/xsend.txt
(4) Provide user with access permissions to the radio device (replace "beechat" for your username):
sudo usermod -a -G dialout beechat
(5) Install requirements (needed on first run only)
python3 -m pip install flask flask-sqlalchemy flask-login xmpppy digi-xbee
(6) Run the setup.py script located within flask_auth_app folder(needed on first run only)
python3 setup.py
(7) Create SSL keys for the web app (needed on first run only):
Within the flask_auth_app folder:
openssl req -x509 -newkey rsa:4096 -nodes -out cert.pem -keyout key.pem -days 365
(8) Run app
Use the included start.sh script within the flask_auth_app folder:
./start.sh
Great thanks to https://www.digitalocean.com/community/tutorials/how-to-add-authentication-to-your-app-with-flask-login
Want to contribute? Great, make a pull request!
GPLv2