I wanted to start Astrophotography and the HQ pi camera had just been marketed. Thus, I decided to create a website to manage this camera easily and let others access some pages as a Gallery. Hubble-Berry is my first contribution to the Open Source world, so do not hesitate to suggest any improvements on the code, the documentation or features.

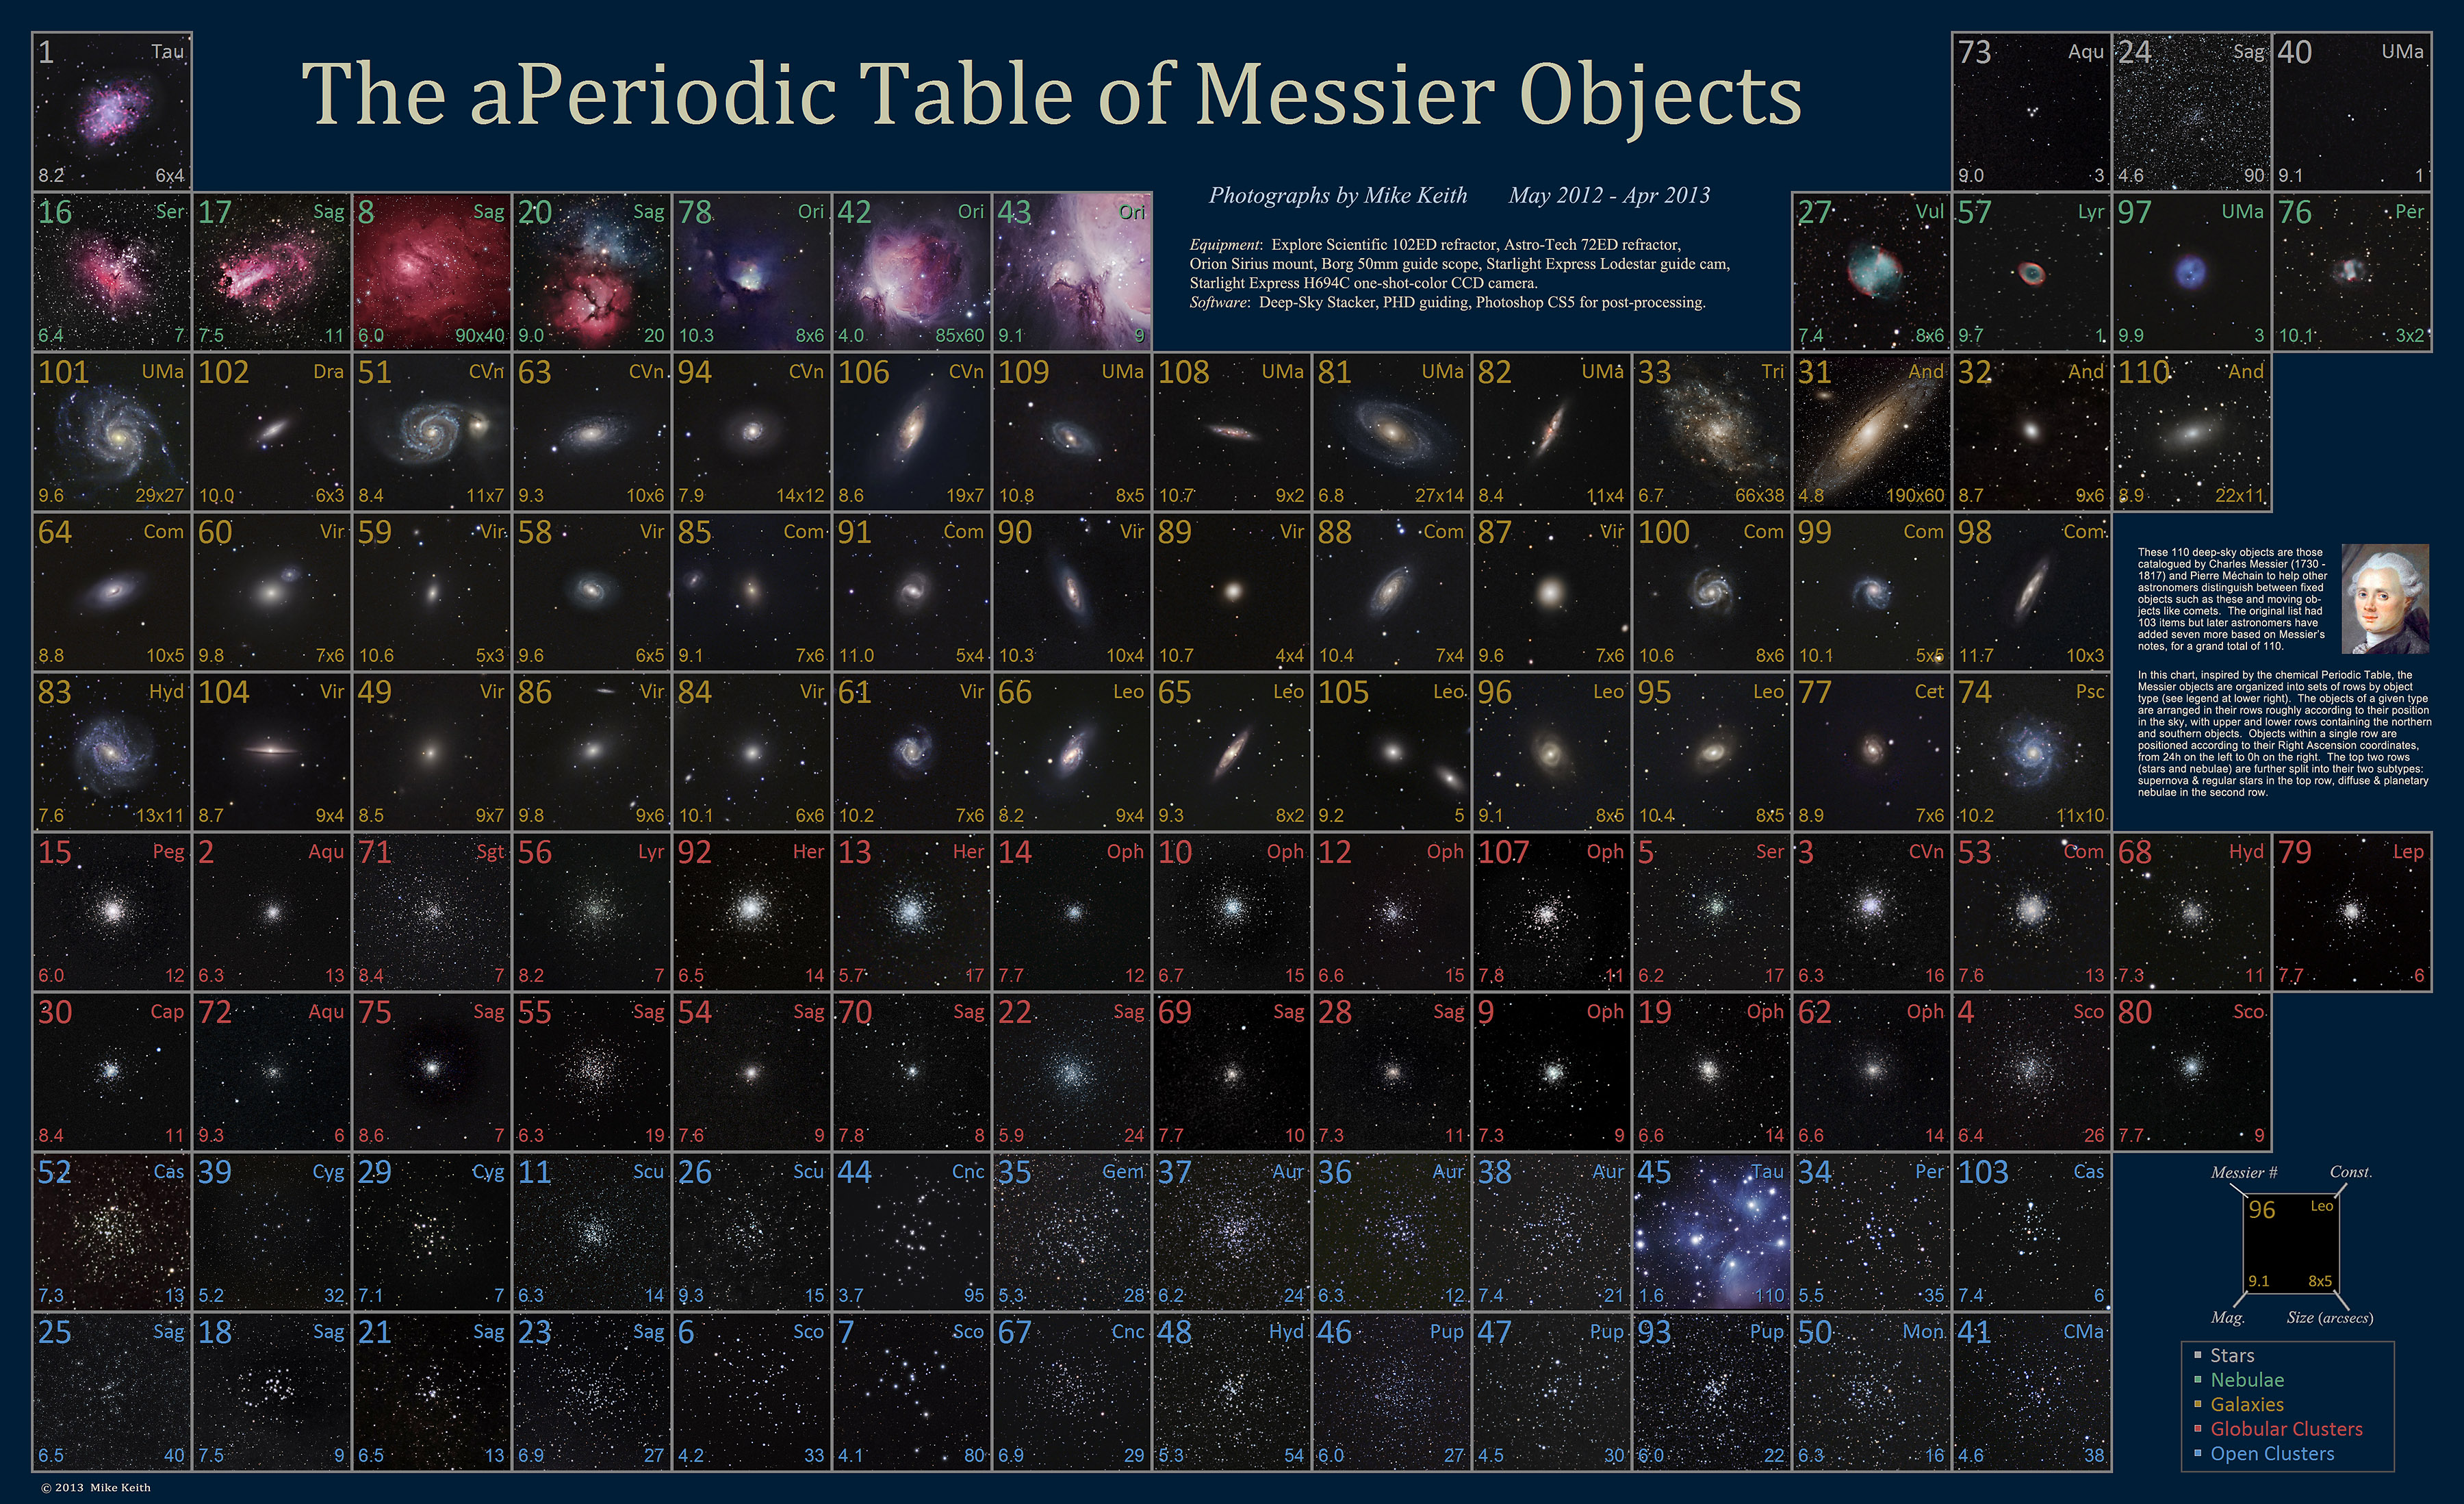
Here is an example of a photo taken thanks to Hubble-Berry. More examples in
./appFolder/static/camera
These instructions will get you a copy of the project up and running on your local machine (Raspberry Pi). For development and testing purposes, see commandLine_development.md. If you have any question, please feel free to ask by creating a new issue.
Here is what I used to make this project:
- Raspberry PI model 3B [1]
- Raspberry PI HQ Camera [2]
- RaspAp [3]: to create an access point
- Activate the camera module (required) and SSH (optionnal but it's easier to control) on your Raspberry PI
- USB key named 'HUBBLE_SAVE' and with the following organization (only if you want to save your files on a USB key. You can also use
./scripts/download.pyto download from another computer.):
.
├── camera
│   ├── pictures
│   ├── timelapse
│   ├── video
To set up a development environment, see the commandLine_development.md file.
Clone the repository.
git clone https://github.com/Bilou4/hubble-berry.git
cd hubble-berry
Initiate a virtual environment.
pip3 install virtualenv
virtualenv --python=/usr/local/bin/python3.7 hubble-berry-project # your python version must be greater than 3.6
. activate
./installation.sh
pip3 install picamera # not in installation.sh because it would not work on another computer than Raspberry Pi.
Set environment variable.
echo "export FLASK_APP=/path/to/hubble-berry/main.py" >> ~/.bashrc
source ~/.bashrc
. activate
flask --help # shows available commands
flask translate compile # To compile the language translations
The gunicorn package is a production web server for Python applications. The supervisor service is useful in ensuring the application is always up.
sudo apt-get install supervisor
pip3 install gunicorn
If everything went well, you can try by manually starting the server.
gunicorn -b :8000 -w 3 --threads 1 --timeout 86400 appFolder:appChange the Supervisor configuration file : /etc/supervisor/conf.d/hubble-berry.conf
[program:hubble-berry]
command=/path/to/hubble-berry/hubble-berry-project/bin/gunicorn -b :8000 -w 3 --threads 1 --timeout 86400 appFolder:app
directory=/path/to/hubble-berry
user=pi
stdout_logfile=/path/to/hubble-berry/supervisor_stdout.log
stderr_logfile=/path/to/hubble-berry/supervisor_stderr.log
autostart=true
autorestart=true
stopasgroup=true
killasgroup=true
After you write this configuration file, you have to reload the supervisor service for it to be imported:
sudo supervisorctl reloadAnd just like that, the gunicorn web server should be up and running and monitored!
You have the possibility to watch logs:
tail -f /path/to/hubble-berry/supervisor_stderr.log # or supervisor_stdout.logIf everything worked properly, you should be able to reach the first page.

There are 2 default users (username/password):
- admin/admin
- user/user
Doing an upgrade is in general more complicated than just restarting the server. You may need to apply database migrations, or compile new language translations, so in reality, the process to perform an upgrade involves a sequence of commands:
git pull                              # download the new version
sudo supervisorctl stop hubble-berry  # stop the current server
flask db upgrade                      # upgrade the database
flask translate compile               # upgrade the translations
sudo supervisorctl start hubble-berry # start a new serverFlask - The web framework used
picamera - A pure Python interface to the Raspberry Pi camera module
Please read CONTRIBUTING.md for details on the process to submit us pull requests.
Bilou4 - Initial work
| Task name | Description |
|---|---|
| Exposure time timelapse | Allow the user to anticipate a longer exposure time after a certain runtime (or number of photos - maybe easier) |
This project is licensed under the GPL License - see the COPYING file for details
- Miguel Grinberg - Flask Tutorial - https://blog.miguelgrinberg.com/post/the-flask-mega-tutorial-part-i-hello-world
- Miguel Grinberg - Stream Video with Flask - https://blog.miguelgrinberg.com/post/video-streaming-with-flask
- Galleria - create a Gallery page - https://galleriajs.github.io/
- Astrosurf - Messier catalog - http://www.astrosurf.com/luxorion/Images/messier-catalog-mike-keith.jpg
- Ligo Easter Egg - The Sound of Two Black Holes Colliding - https://www.ligo.caltech.edu/video/ligo20160211v2
- Python Logger - https://medium.com/@galea/python-logging-example-with-color-formatting-file-handlers-6ee21d363184
- RaspAp WebGUI - Hotspot wifi - https://github.com/billz/raspap-webgui
- USB key on Raspberry PI - Script to mount USB key - https://www.raspberrypi-spy.co.uk/2014/05/how-to-mount-a-usb-flash-disk-on-the-raspberry-pi/
- Picamera's documentation - https://picamera.readthedocs.io/en/release-1.13/
[1] https://www.raspberrypi.org/products/raspberry-pi-3-model-b/
[2] https://www.raspberrypi.org/products/raspberry-pi-high-quality-camera/