This tutorial provides step-by-step instructions for creating a new feature layer in ArcGIS Online using the key waypoints in Laura Secord's journey from Queenston to Thorold.
In preparation for this tutorial, you will need an ArcGIS Online Organizational account or your Brock University credentials. NOTE: you cannot create features with a public account using these steps.
Download the Laura Secord Images zip folder and extract all files.
- Go to arcgis.com and click Sign in.
- Click "Your ArcGIS Organization's URL".
- Enter the text 'brock' to complete the URL. Click Continue.
- Click Brock University. You will be taken to the Brock University authentication page where you will enter your Brock credentials and click Sign in.
- From the tabs across the top, click Content.
- Click + New Item.
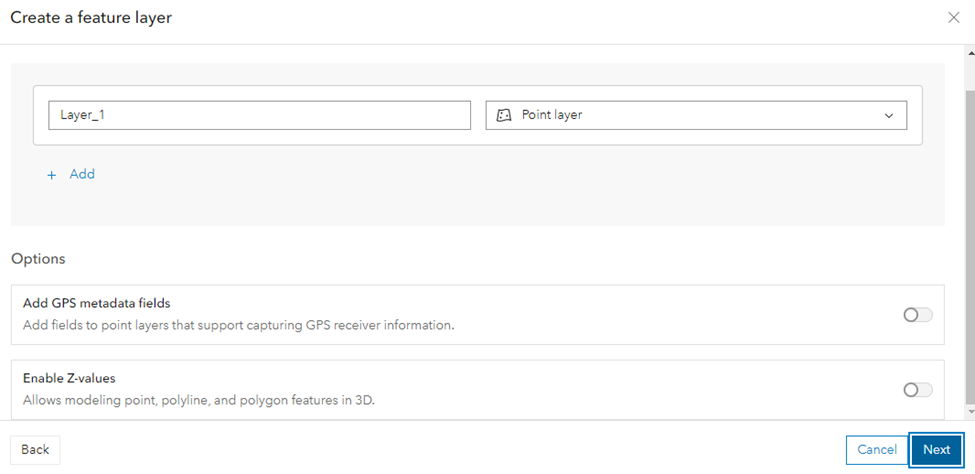
- Select Feature layer - define your own layer.
- Enter a layer name and select point, line or polygon. This example will create a point layer.
- Click Next.
- Enter a Title, folder, tags and summary for the new feature layer.
- Click Next.
- The Item Description page appears. Add a summary and details as required.
- Click Data, click Fields from the top right, click + Add.
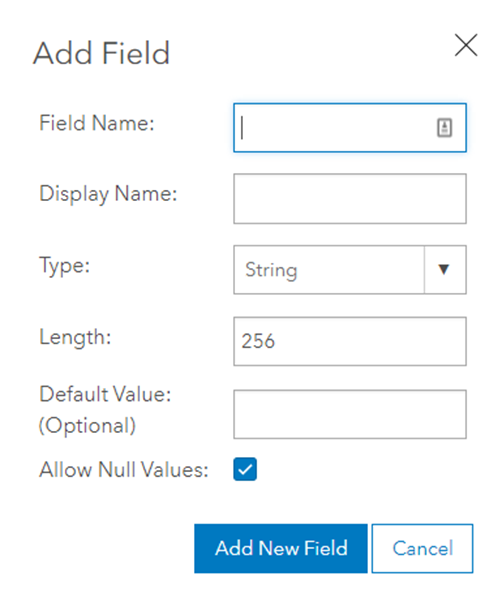
- Enter a Field Name (i.e. Label), Display Name (alias such as Label), Type (i.e. string), Length (for descriptions, increase the size to 2,000 or more. For labels, reduce the length to 30.)
- Click Add New Field and repeat for all the fields you wish to enter. For example, add a Description field to complete this exercise.
- Click the Overview tab.
- Click Open in Map Viewer.
- Click
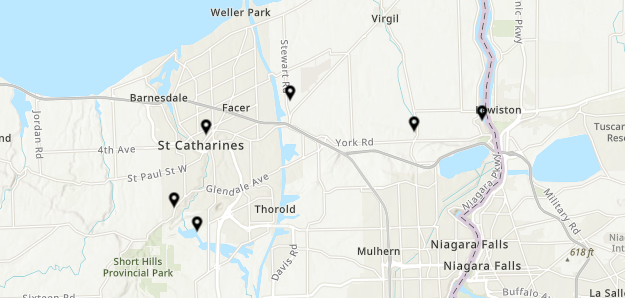
 and select Search to enter a placename (i.e. Queenston). Hit enter or click an option from the list.
 - Click the X to close the search results.
- To start an 'edit session', click
 from the lower right menu.
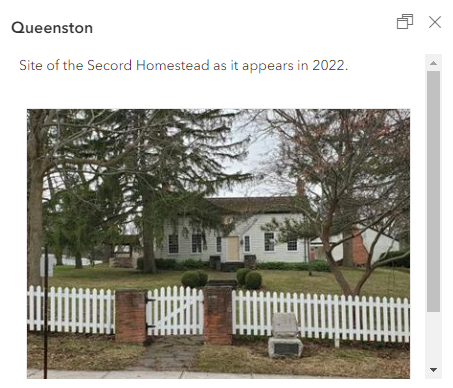
 - Click the New feature button then click the location on the map. NOTE: You can update the geometry any time during an edit session. You will be prompted to fill in the various fields of information (i.e. Label "Queenston", Description "Site of the Secord Homestead.").
- Click Create.
- Repeat for additional features. For example, zoom to St. Davids, add a feature labeled as such with the description "Laura's first stop was at her relatives' homestead in St. Davids".
- Additional feature stops for Laura's journey would include:
- Homer (Laura would've had to cross Ten Mile Creek at Homer.)
- Shipman's Corners (known as St. Catharines downtown today. Note the search tool doesn't recognize the historical name)
- Power Glen (Another crossing of the Twelve Mile Creek and uphill climb.)
- Decew House (Finally, Laura is escorted to Decew House by the natives to give her warning to Lt. Fitzgibbon.)
- When you are finished adding featuress, click the 3 dots beside the layer name and click Save.
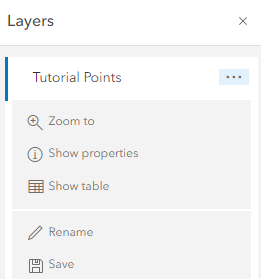
- Click the 3 dots beside the layer name and click Show Properties. The item's properties panel appears on the right.
- Click Information from the properties panel.
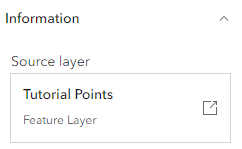
- Under Source Layer click Tutorial Points > Feature Layer. This will open a new window showing the feature layer item description.
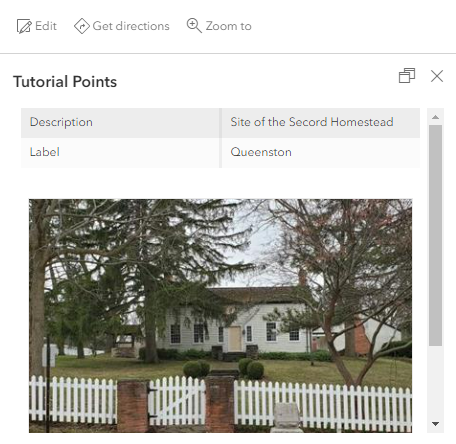
- Click Data. You will see the feature entries including the defined fields (Description, Label). Notice also the field titled Photos and Files.
- Under the Photos and Files field, click Add and upload the related image.
- Click Upload.
- Click Close.
- Repeat for the remaining images. NOTE: You can upload more than one image per record.
- To edit a field in the table, double-click the entry.
- Continuing from above, click the Overview tab then click Open in Map Viewer.
- Clicking a point on the map will result in the default pop-up.
-
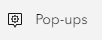
Click the configure pop-ups tool from the right
-
The pop-ups panel appears to the right of the map view.
-
Click Title and in the entry window, delete the default and type in the code {Label}. See below.
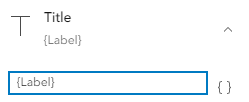
- This action defines the title for the pop-up from the entry in the table with the field name Label. Notice the pop-up updates on-the-fly.
- Next, click the 3 dots beside Fields list and click Delete.
- Then, click + Content and select Text.
- Enter the code {Description} to insert the Description field from the table. Click OK. The result shows the description BELOW the image.
- From the configure pop-up panel, drag and drop the description content above the attachment content.
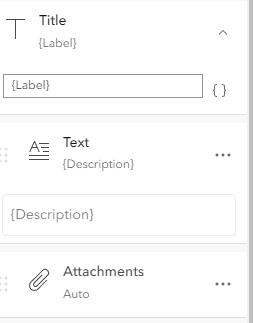
The results should reflect the new order of things.
- To save the configured pop-ups with the layer. Click the Tutorial Points layer menu (3 dots beside the layer name) and click Save.
- Continuing from above, click the Styles button
 from the top of the right menu.
 - From step 2, click Location (Single Symbol)

- Click Symbol Style > Current Symbol
- Select a Category such as Points of Interest. Scroll through the options and make a selection.
- Click Done and Save the layer (HINT: Click the 3 dots beside the layer name and click Save).
Introduction to ArcGIS StoryMaps
This tutorial is supported by the Brock University Research Lifecycle Department. If you have any questions or concerns regarding this tutorial, don't hesitate to contact the author, Sharon Janzen at sjanzen@Brocku.ca