5分钟集成自定义UI
- 到萝卜丝官网注册管理员账号,并登录管理后台。
- 到 客服管理->渠道管理 添加网站/App
- 到 客服管理->客服账号 有一列 ‘唯一 ID(uid)’ 会在指定客服接口中使用
- 到 客服管理->技能组 有一列 ‘唯一 ID(wId)’ 会在技能组会话中用到
- 获取管理员 uid, 登录后台->客服管理->客服账号->管理员账号(唯一 ID(uid))列
- 获取 appkey,登录后台->客服管理->渠道管理->添加应用->appkey
- 获取 subDomain,也即企业号:登录后台->客服管理->客服账号->企业号
第一步:拷贝 bdui 库到自己项目目录中,例如:
.
├─ bdui
│ └─ \*
├─ myui
├─ myuiTests
├─ Pods
├─ myui.xcodeproj
├─ myui.xcworkspace
├─ Podfile
└─ Podfile.lock
第二步:添加 pod 库
# 如果 pod 库原先没有添加 workspace 的话,需要添加,如:

platform :ios, '9.0'

# 注意: 'myui' 需要修改为自己项目真实的名称

workspace 'myui'
在需要引入在线客服的项目 pod 中添加
# 第三方依赖

pod 'FMDB'
pod 'WCDB'
pod 'MMKV'
pod 'MQTTClient'
pod 'AFNetworking'
pod 'QMUIKit'
pod 'M80AttributedLabel'
pod 'HCSStarRatingView'
pod 'CocoaLumberjack'

# 集成萝卜丝核心协议库 core

pod 'bytedesk-core', '2.5.4'
添加 bdui 相关 pod
target 'bytedesk-ui' do

# Comment this line if you're not using Swift and don't want to use dynamic frameworks

use_frameworks!

project 'bdui/bdui.xcodeproj'

# Pods for bdui

pod 'FMDB'
pod 'WCDB'
pod 'MMKV'
pod 'MQTTClient'
pod 'AFNetworking'
pod 'QMUIKit'
pod 'M80AttributedLabel'
pod 'HCSStarRatingView'
pod 'CocoaLumberjack'

# 集成核心协议库 core

pod 'bytedesk-core', '2.5.4'

target 'bduiTests' do
end

end
支持 bitcode
#bitcode enable
post_install do |installer|
installer.pods_project.targets.each do |target|
target.build_configurations.each do |config|
config.build_settings['ENABLE_BITCODE'] = 'YES'

      if config.name == 'Release'
        config.build_settings['BITCODE_GENERATION_MODE'] = 'bitcode'
        else
        config.build_settings['BITCODE_GENERATION_MODE'] = 'marker'
      end

      cflags = config.build_settings['OTHER_CFLAGS'] || ['$(inherited)']

      if config.name == 'Release'
        cflags << '-fembed-bitcode'
        else
        cflags << '-fembed-bitcode-marker'
      end

      config.build_settings['OTHER_CFLAGS'] = cflags
    end

end
end
添加完毕之后,关闭 Xcode,执行 pod install
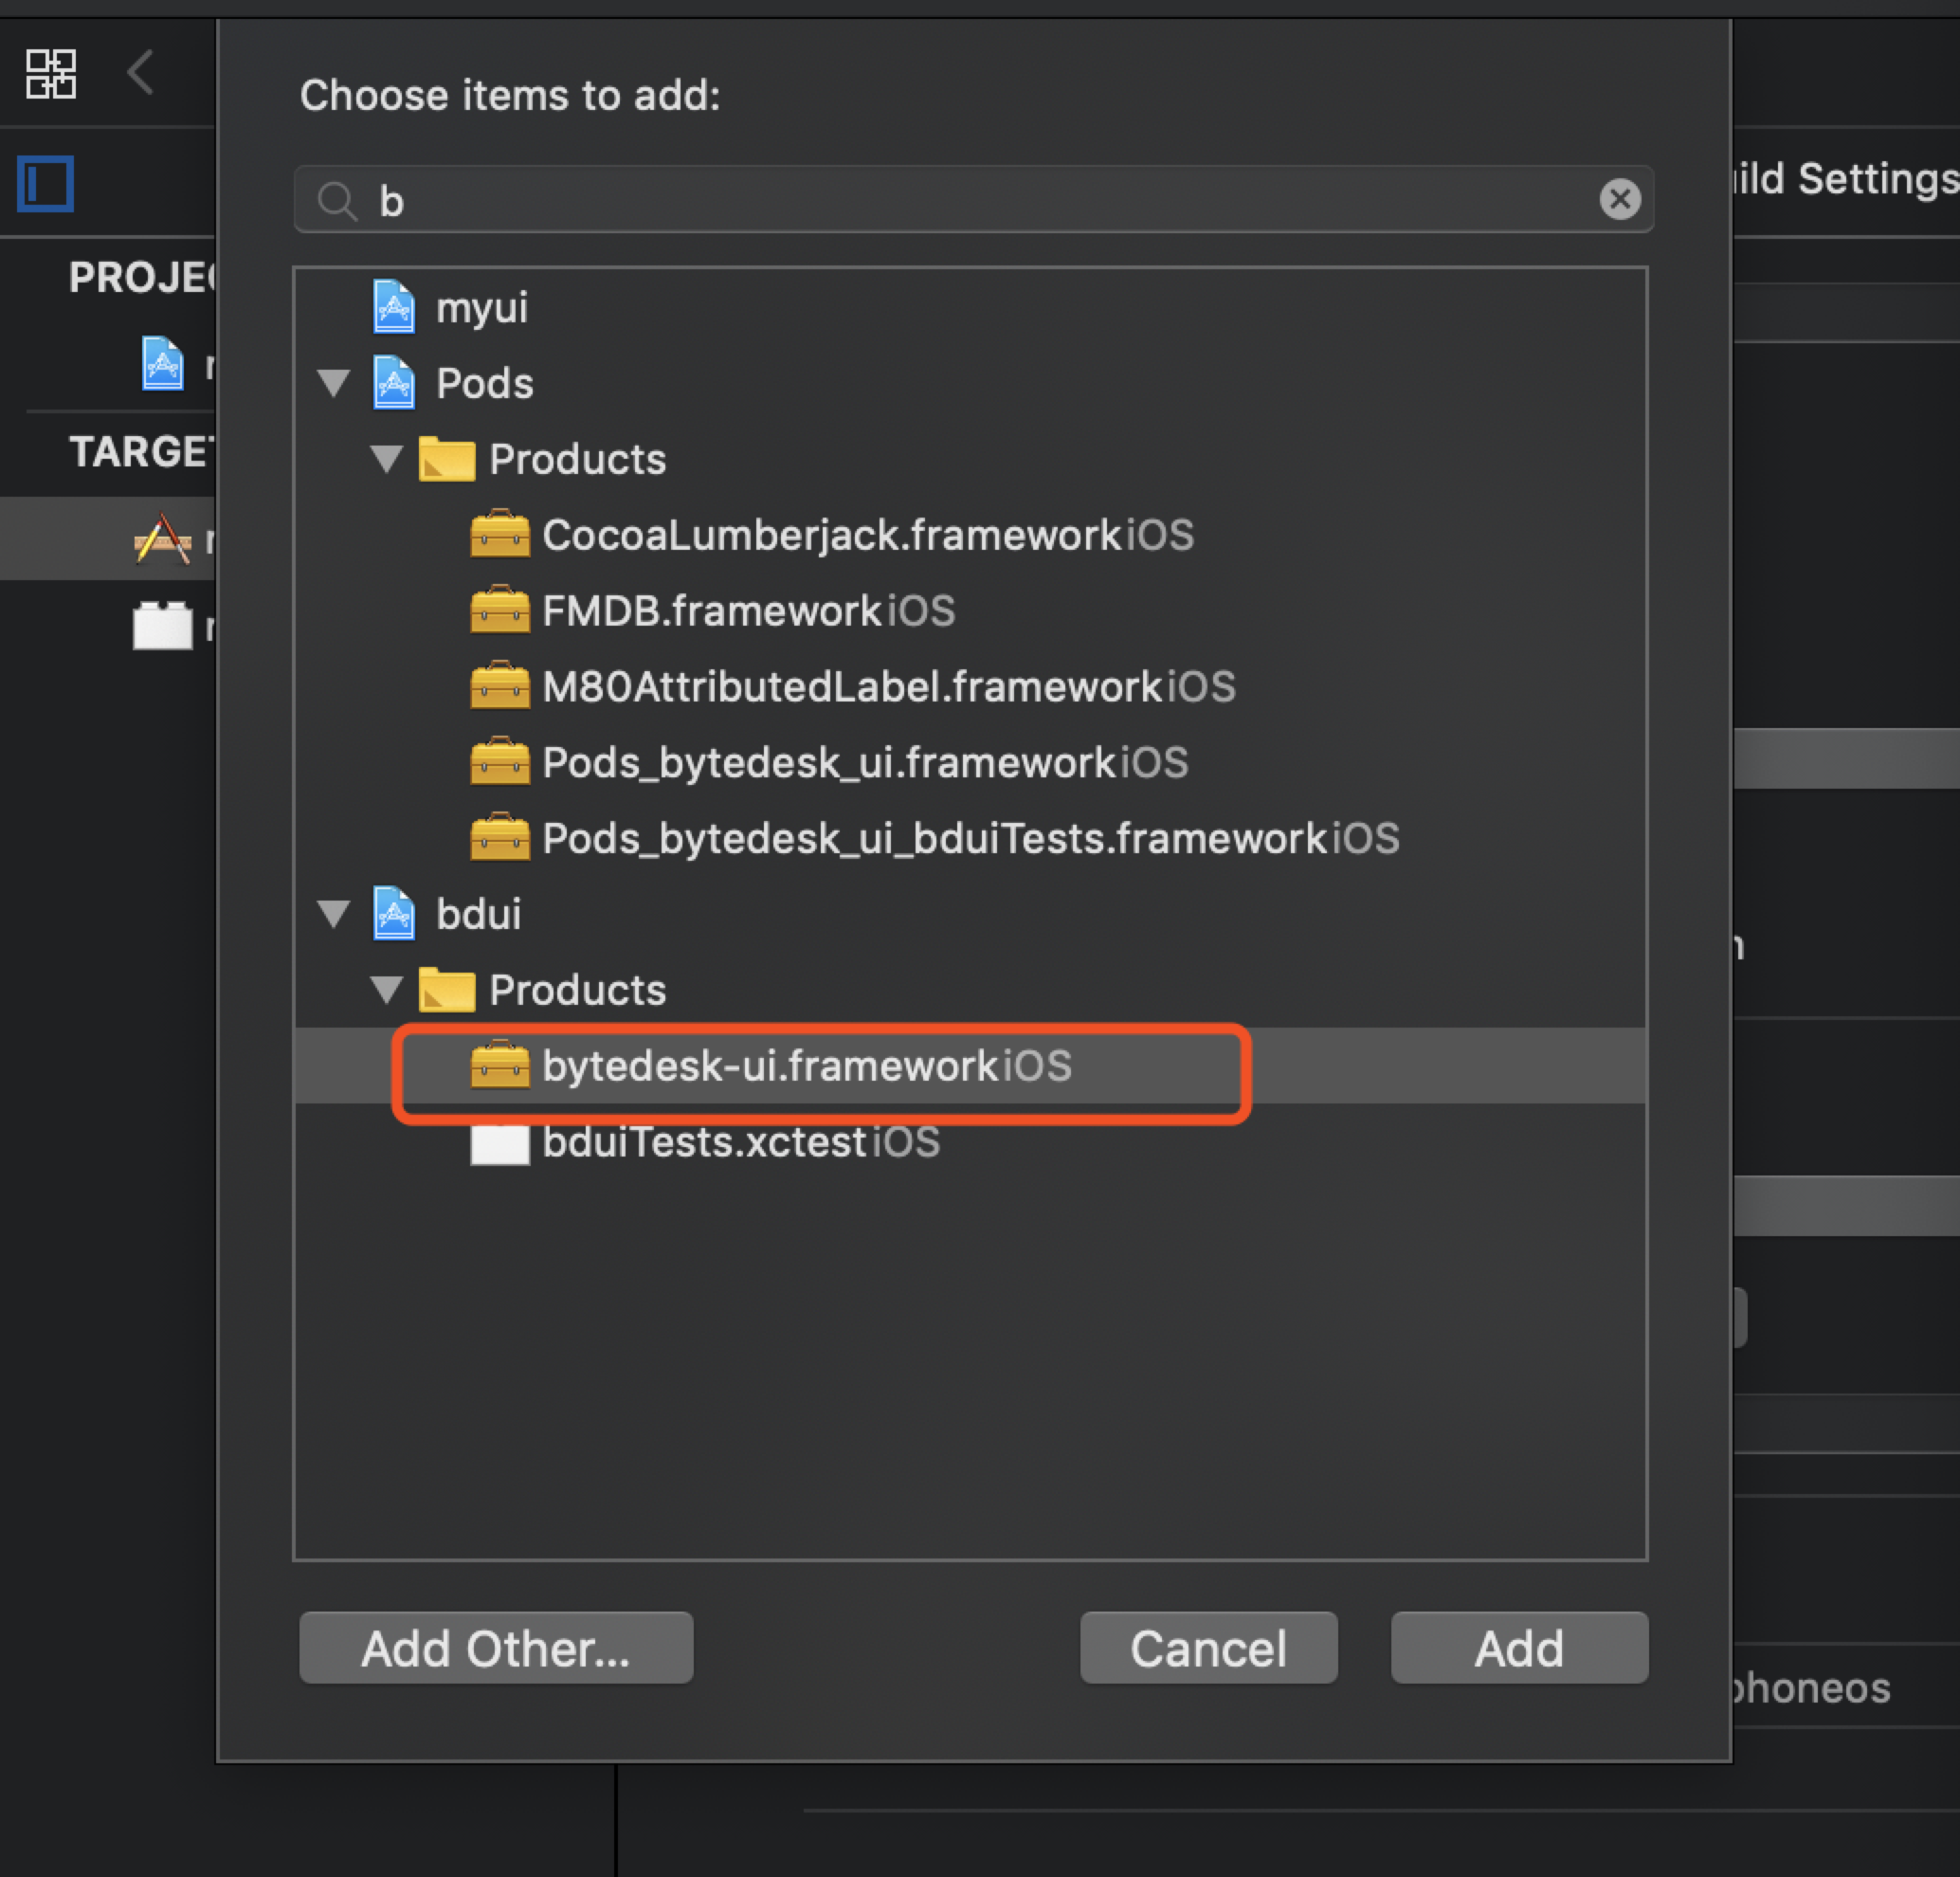
第三步:项目添加 bytedesk-ui.framework

第四步:在 AppDelegate.m 文件中添加头文件
#import <bytedesk-core/bdcore.h>第五步:在 AppDelegate.m 建立萝卜丝长连接
// 1. 在 - (BOOL)application:(UIApplication *)application didFinishLaunchingWithOptions:(NSDictionary *)launchOptions中添加
// 2. 在 - (void)applicationWillEnterForeground:(UIApplication *)application中添加
// anonymouseLogin函数代码请查看AppDelegate.m文件
[self anonymouseLogin];
第六步:在 ViewController.m 中添加头文件
#import <bytedesk-ui/bdui.h>第七步:在 ViewController.m 打开在线客服会话窗口
[BDUIApis pushWorkGroupChat:self.navigationController withWorkGroupWid:DEFAULT_TEST_WID withTitle:kDefaultTitle];第八步:在 Info.plist 添加 相册 + 拍照 权限,可参考 demo
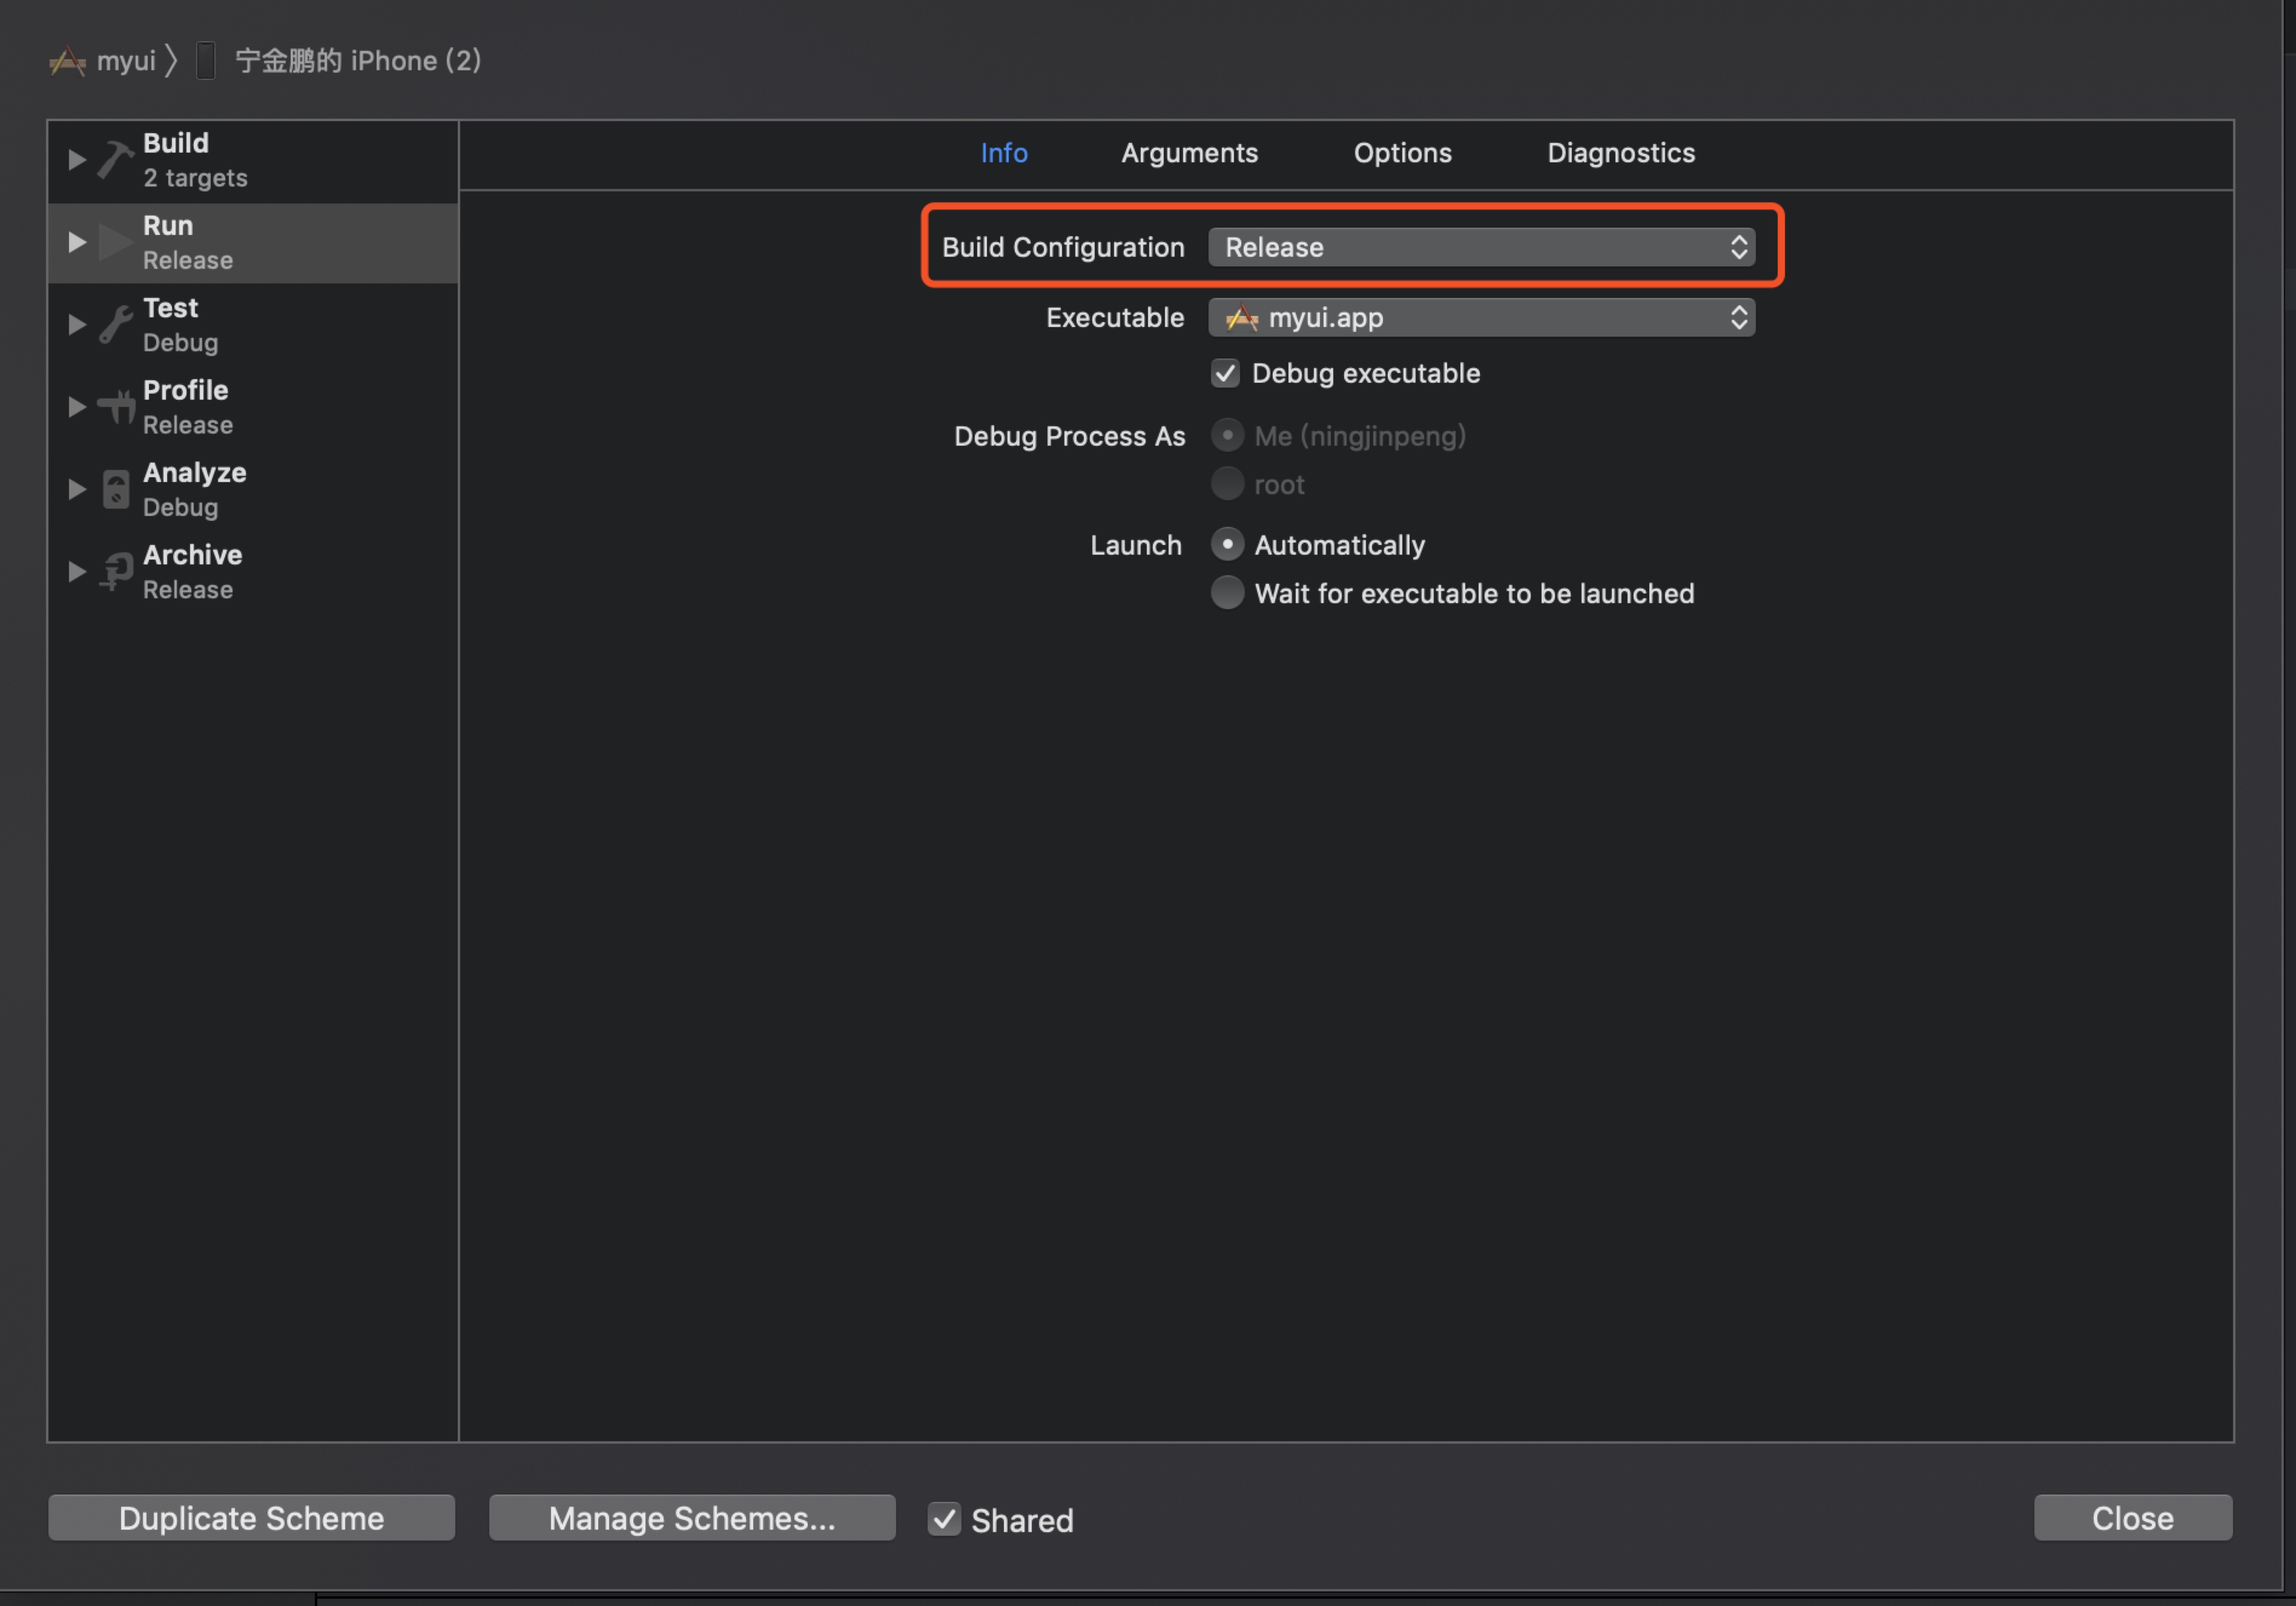
第九步:如果要在真机运行,需要修改项目 Scheme 为 Release