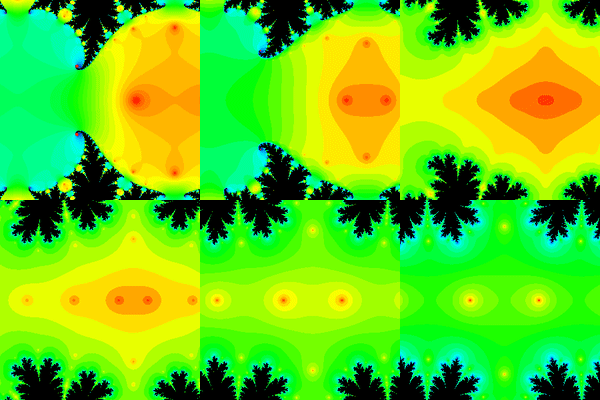
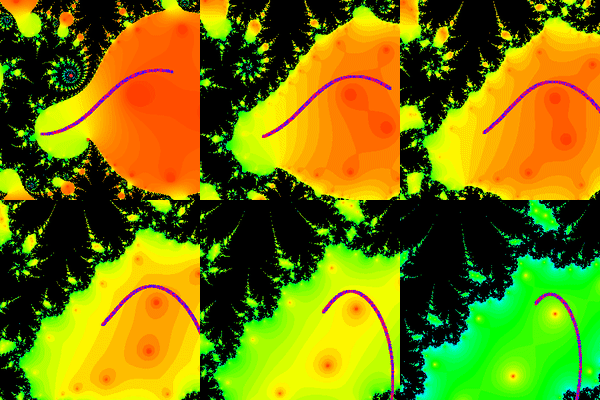
fpf is a program for displaying and animating fractals arising from iteration of complex-valued functions. Click here to view some examples.
Each pixel on the screen is assigned to a complex number based on the current viewport position and zoom. This number is then plugged
into a user-provided function, the output of which then becomes its new input, and so on -- the sequence of numbers
created this way is called the orbit of the starting point.
After calculating a point's orbit, the point is colored based on the properties of the orbit depending on the coloring mode used
-- for example in fixed mode the point is colored based on how long (that is, how many iterations) it takes for its orbit
to approach a single point. Points whose orbits don't seem to approach any given point are colored black.
In julia mode, on the other hand, we look at how many iterations it takes for a point's orbit to leave a circle of a given radius
around the origin, and points whose orbits don't leave the circle within the specified maximum number of iterations are colored black.
The coloring of the points is relative -- values close to the minimum of all values are colored red, whereas points close to the maximum are colored purple.
A maximum iteration count is always set and is interactively controllable by pressing / or * on the numpad.
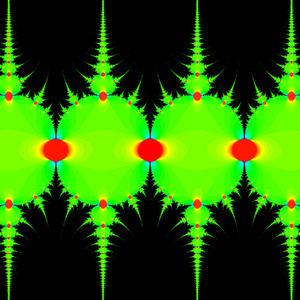 |
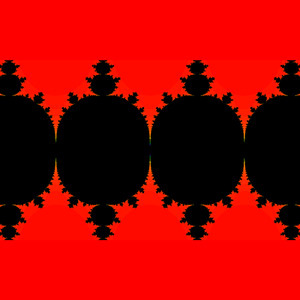 |
|---|---|
fpf fixed "sin(z)" --zoom 10 |
fpf julia "sin(z)" --zoom 10 |
fpf uses CUDA to calculate multiple orbits in parallel, therefore a CUDA-capable GPU and a valid CUDA installation are required.
You can download a prebuilt Windows version here, which requires CUDA version 11.1
If you'd like to build fpf yourself you will need the following software installed:
- A C++20 capable compiler
- A valid CUDA installation
- CMake 3.17 or newer
- GLFW 3.3 or newer
- Boost program_options and Boost serialization
- PowerShell if building on Windows
fpf [mode] "[expression]" [options]
or
fpf [filename] to load a saved configuration
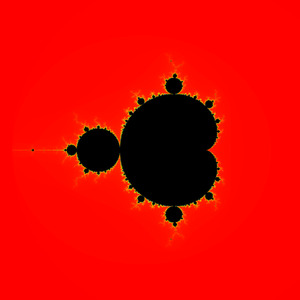
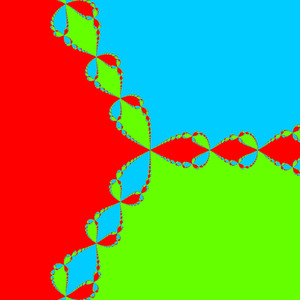
fixediterates the function until its orbit seems to approach a fixed point, that is, until two subsequent iterations are within the user-provided tolerance. It colors points based on how long it took them to reach a fixed point, or black if they diverge.juliaiterates the function until its value leaves the circle of user-provided size around the origin. Points whose orbits don't leave the circle within the maximum iteration count are colored black.fixed-captandjulia-captwork the same way as the above two, exceptzstarts from 0 andccontains the starting point (see example below)julia-completeworks likejulia, but it continues iterating after leaving the circle, and colors points whose orbits return inside the circle black. Slower than normaljuliamode and produces the same result in most cases -- use only if necessary.attractorcolors points based on what value their orbits approach, i.e. points whose orbits approach the same point are colored the samefixed-distcolors each point based on the Euclidean distance between it and the point its orbit approachesperiodiccolors points black if their orbits are apreiodic, or colors them based on their orbits' period otherwise. Due to memory limitations orbits with periods above 5 are colored black.displacementcolors points based on the distance between them the first iteration's valuedirectioncolors points based the direction the first iteration takes them
 |
 |
|---|---|
fpf julia-capt "zz+c" |
fpf attractor "z-(zzz+1)/(3zz)" |
The expression defines the function to be iterated. It may contain the following symbols:
zis the function's inputcalways contains the point from which the current orbit startedpis a parameter controlled with the WASD keys and the-poptioniis the imaginary unit
The following operations are supported:
- Addition
z+5i, subtractionz-5 - Multiplication
2*(z+1)*(p+3)or just2(z+1)(p+3) - Division
5/z - Exponentiation
z^5 - Trigonometric functions:
sin(z)cos(z+5)tan(2z) - Exponentiation and natural logarithm:
exp(z)ln(z+4) - Negation
-zorneg(z) - Complex conjugate
~zorconj(z) - Absolute value, argument, real and imaginary part:
abs(z)arg(z)Re(z)Im(z)
The expression should be wrapped in quotes (").
- Arrow keys to pan around the fractal
- Numpad
+and-(orPageUpandPageDown) to zoom Hometo reset the viewport to the starting zoom and position- Hold
Left Shiftto make all controls behave faster - Numpad
*and/(orMandN) to increase and decrease the maximal number of iterations respectively - Top row
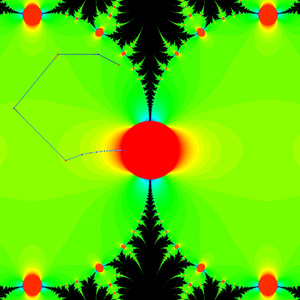
0and9(orKandJ) to increase and decrease the mode-specific argument (eg. tolerance infixedmodes, escape radius injuliamodes) WASDto change the value ofp(ADcontrols the real part,WScontrols the imaginary part)Zto toggle color cutoff, which specifies a maximum value above which all points will be colored the sameCandXto increase and decrease the color cutoff valueINSto save a picture (you will be prompted for the filename in the console)TABto save the current fractal and position (you will be prompted for the filename in the console)- Click anywhere to show the orbit of that point
Hto hide the current orbit/shape transformOto toggle whether or not points are connected in the orbit/shape transformTto start a shape transform (see below)Right ShiftandRight Ctrlto step forward or backward in a shape transformESCto quit
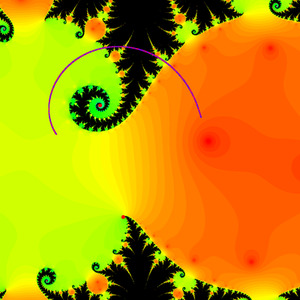
With shape transforms you can see what the image of a given shape looks like after each iteration.
To start a shape transform press T, then follow the instructions in the console. The shapes that can be drawn are:
- Lines
- Circles
- Vertices of polygons
 |
 |
|---|---|
| Trace of an orbit | Image of a line |
Complex numbers should be specified with the following syntax: (Re,Im) (eg. (1,-3)), with no spaces inside the parentheses.
--widthor-w: Sets the size of the window--refs-path: The path for the image references file -- if provided the program will write the properties of each image you save in this file, which can be handy later to figure out how you created a particular image-m: Sets the mode-specific argument (tolerance infixedmodes, escape radius injuliamodes)-p: Sets the initial value ofp. Defaults to 0--double: Enables double-precision mode, permitting much deeper zooms at the cost of a huge performance hit--center: Sets the initial center of the viewport. Defaults to 0--zoom: Sets the initial width of the viewport. Defaults to 4--max-itersor-i: Sets the initial maximal iteration count--color-cutoff: Enables color cutoff and sets the maximal value--no-vsync: Disables vsync--cuda-path: Manually sets the path to the CUDA installation--no-incremental-t: Disables incremental calculation of shape transforms. Only needed if you are using the value ofcin a mode other thanjulia-captorfixed-capt-A: Sets the number of frames to animate (see below)-o: Sets the output folder for animation frames-H: Animates without opening a window--anim-*-start,--anim-*-endsets the start and end point for a particular value when animating
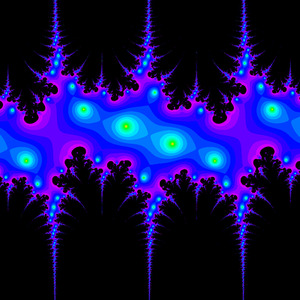 |
|---|
fpf fixed "sin(z+p)" -p (1.6,-0.5) --zoom 10 -i 24 |
To create an animation specify the number of frames you want with -A, specify the output directory with -o, and specify the start and end value of the properties you want to animate as described below.
To set the starting value use the options provided above; to set the ending value use the --anim-*-end options, substituting * with the property you want to set. Animations are exported frame-by-frame in PNG format -- this can result in a lot of data.
You can safely export multiple animations into the same folder -- the exported frames will be labelled by which animation they belong to and an animrefs.txt file will be created which describes the properties of each animation in the given folder.
To animate orbits use --anim-path-start and --anim-path-end to set the orbit's starting point at the start and the end of the animation.
To animate a shape transform use the following options:
anim-line-a-start,anim-line-a-endto specify the first endpoint of the lineanim-line-b-start,anim-line-b-endto specify the other endpoint of the lineanim-circle-center-start,anim-circle-center-endto specify the circle's centeranim-circle-r-start,anim-circle-r-endto specify the radius of the circleanim-shape-iters-start,anim-shape-iters-endto specify the number of iterations to be performed on the shape
If you want one of these values to stay constant over the animation supply only the starting value.
Note that you can only include one shape in an animation and that you cannot use shape transforms and orbits at the same time.
