


Download the latest stable release from here: https://github.com/Significant-Gravitas/Auto-GPT/releases/latest.
The master branch may often be in a broken state.
Auto-GPT is an experimental open-source application showcasing the capabilities of the GPT-4 language model. This program, driven by GPT-4, chains together LLM "thoughts", to autonomously achieve whatever goal you set. As one of the first examples of GPT-4 running fully autonomously, Auto-GPT pushes the boundaries of what is possible with AI.
AutoGPTDemo_Subs_WithoutFinalScreen.mp4
Demo made by Blake Werlinger
If you can spare a coffee, you can help to cover the costs of developing Auto-GPT and help push the boundaries of fully autonomous AI! Your support is greatly appreciated Development of this free, open-source project is made possible by all the contributors and sponsors. If you'd like to sponsor this project and have your avatar or company logo appear below click here.


- 🌐 Internet access for searches and information gathering
- 💾 Long-Term and Short-Term memory management
- 🧠 GPT-4 instances for text generation
- 🔗 Access to popular websites and platforms
- 🗃️ File storage and summarization with GPT-3.5
- Environment (pick one)
- VSCode + devcontainer: It has been configured in the .devcontainer folder and can be used directly
- Docker
- Python 3.10 or later (instructions: for Windows)
- OpenAI API key
- Memory backend (pick one)
- ElevenLabs Key (If you want the AI to speak)
Obtain your OpenAI API key from: https://platform.openai.com/account/api-keys.
To use OpenAI API key for Auto-GPT, you NEED to have billing set up (AKA paid account).
You can set up paid account at https://platform.openai.com/account/billing/overview.

To install Auto-GPT, follow these steps:
- Make sure you have all the requirements listed above, if not, install/get them
To execute the following commands, open a CMD, Bash, or Powershell window by navigating to a folder on your computer and typing CMD in the folder path at the top, then press enter.
-
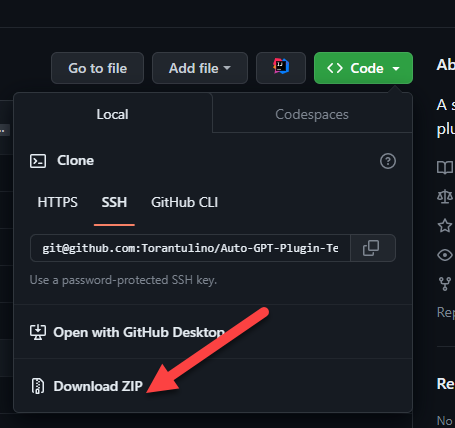
Clone the repository: For this step, you need Git installed. Alternatively, you can download the latest stable release (
Source code (zip), bottom of the page).git clone -b stable https://github.com/Significant-Gravitas/Auto-GPT.git
-
Navigate to the directory where the repository was downloaded
cd Auto-GPT -
Install the required dependencies
pip install -r requirements.txt
-
Configure Auto-GPT
- Locate the file named
.env.templatein the main/Auto-GPTfolder. - Create a copy of this file, called
.envby removing thetemplateextension. The easiest way is to do this in a command prompt/terminal windowcp .env.template .env. - Open the
.envfile in a text editor. Note: Files starting with a dot might be hidden by your Operating System. - Find the line that says
OPENAI_API_KEY=. - After the
"=", enter your unique OpenAI API Key (without any quotes or spaces). - Enter any other API keys or Tokens for services you would like to utilize.
- Save and close the
.envfile.
By completing these steps, you have properly configured the API Keys for your project.
- See OpenAI API Keys Configuration to obtain your OpenAI API key.
- Obtain your ElevenLabs API key from: https://elevenlabs.io. You can view your xi-api-key using the "Profile" tab on the website.
- If you want to use GPT on an Azure instance, set
USE_AZUREtoTrueand then follow these steps:- Rename
azure.yaml.templatetoazure.yamland provide the relevantazure_api_base,azure_api_versionand all the deployment IDs for the relevant models in theazure_model_mapsection:fast_llm_model_deployment_id- your gpt-3.5-turbo or gpt-4 deployment IDsmart_llm_model_deployment_id- your gpt-4 deployment IDembedding_model_deployment_id- your text-embedding-ada-002 v2 deployment ID
- Please specify all of these values as double-quoted strings
# Replace string in angled brackets (<>) to your own ID
azure_model_map:
  fast_llm_model_deployment_id: "<my-fast-llm-deployment-id>"
  ...
- Details can be found here: https://pypi.org/project/openai/ in the
Microsoft Azure Endpointssection and here: https://learn.microsoft.com/en-us/azure/cognitive-services/openai/tutorials/embeddings?tabs=command-line for the embedding model.
- Rename
- Locate the file named
-
Run
autogptPython module in your terminal.# On Linux of Mac: ./run.sh # On Windows: .\run.bat
Running with
--helpafter.\run.batlists all the possible command line arguments you can pass. -
After each action, choose from options to authorize command(s), exit the program, or provide feedback to the AI.
- Authorize a single command, enter
y - Authorize a series of N continuous commands, enter
y -N - Exit the program, enter
n
- Authorize a single command, enter
Activity and error logs are located in the ./output/logs
To print out debug logs:
python -m autogpt --debug
You can also build this into a docker image and run it:
docker build -t autogpt .
docker run -it --env-file=./.env -v $PWD/auto_gpt_workspace:/app/auto_gpt_workspace autogpt
Or if you have docker-compose:
docker-compose run --build --rm auto-gptYou can pass extra arguments, for instance, running with --gpt3only and --continuous mode:
docker run -it --env-file=./.env -v $PWD/auto_gpt_workspace:/app/auto_gpt_workspace autogpt --gpt3only --continuousdocker-compose run --build --rm auto-gpt --gpt3only --continuousHere are some common arguments you can use when running Auto-GPT:
Replace anything in angled brackets (<>) to a value you want to specify
- View all available command line arguments
python -m autogpt --help
- Run Auto-GPT with a different AI Settings file
python -m autogpt --ai-settings <filename>
- Specify a memory backend
python -m autogpt --use-memory <memory-backend>
NOTE: There are shorthands for some of these flags, for example
-mfor--use-memory. Usepython -m autogpt --helpfor more information
Use this to use TTS (Text-to-Speech) for Auto-GPT
python -m autogpt --speak- Rachel : 21m00Tcm4TlvDq8ikWAM
- Domi : AZnzlk1XvdvUeBnXmlld
- Bella : EXAVITQu4vr4xnSDxMaL
- Antoni : ErXwobaYiN019PkySvjV
- Elli : MF3mGyEYCl7XYWbV9V6O
- Josh : TxGEqnHWrfWFTfGW9XjX
- Arnold : VR6AewLTigWG4xSOukaG
- Adam : pNInz6obpgDQGcFmaJgB
- Sam : yoZ06aMxZJJ28mfd3POQ
This section is optional, use the official google api if you are having issues with error 429 when running a google search.
To use the google_official_search command, you need to set up your Google API keys in your environment variables.
- Go to the Google Cloud Console.
- If you don't already have an account, create one and log in.
- Create a new project by clicking on the "Select a Project" dropdown at the top of the page and clicking "New Project". Give it a name and click "Create".
- Go to the APIs & Services Dashboard and click "Enable APIs and Services". Search for "Custom Search API" and click on it, then click "Enable".
- Go to the Credentials page and click "Create Credentials". Choose "API Key".
- Copy the API key and set it as an environment variable named
GOOGLE_API_KEYon your machine. See setting up environment variables below. - Enable the Custom Search API on your project. (Might need to wait few minutes to propagate)
- Go to the Custom Search Engine page and click "Add".
- Set up your search engine by following the prompts. You can choose to search the entire web or specific sites.
- Once you've created your search engine, click on "Control Panel" and then "Basics". Copy the "Search engine ID" and set it as an environment variable named
CUSTOM_SEARCH_ENGINE_IDon your machine. See setting up environment variables below.
Remember that your free daily custom search quota allows only up to 100 searches. To increase this limit, you need to assign a billing account to the project to profit from up to 10K daily searches.
For Windows Users:
setx GOOGLE_API_KEY "YOUR_GOOGLE_API_KEY"
setx CUSTOM_SEARCH_ENGINE_ID "YOUR_CUSTOM_SEARCH_ENGINE_ID"
For macOS and Linux users:
export GOOGLE_API_KEY="YOUR_GOOGLE_API_KEY"
export CUSTOM_SEARCH_ENGINE_ID="YOUR_CUSTOM_SEARCH_ENGINE_ID"See https://github.com/Significant-Gravitas/Auto-GPT-Plugin-Template for the template of the plugins.
Drop the repo's zipfile in the plugins folder.
If you add the plugins class name to the ALLOWLISTED_PLUGINS in the .env you will not be prompted otherwise you'll be warned before loading the plugin:
ALLOWLISTED_PLUGINS=example-plugin1,example-plugin2,example-plugin3
By default, Auto-GPT is going to use LocalCache instead of redis or Pinecone.
To switch to either, change the MEMORY_BACKEND env variable to the value that you want:
local(default) uses a local JSON cache filepineconeuses the Pinecone.io account you configured in your ENV settingsrediswill use the redis cache that you configuredmilvuswill use the milvus cache that you configuredweaviatewill use the weaviate cache that you configured
CAUTION
This is not intended to be publicly accessible and lacks security measures. Therefore, avoid exposing Redis to the internet without a password or at all
-
Install docker (or Docker Desktop on Windows)
-
Launch Redis container
docker run -d --name redis-stack-server -p 6379:6379 redis/redis-stack-server:latest
See https://hub.docker.com/r/redis/redis-stack-server for setting a password and additional configuration.
-
Set the following settings in
.envReplace PASSWORD in angled brackets (<>)
MEMORY_BACKEND=redis
REDIS_HOST=localhost
REDIS_PORT=6379
REDIS_PASSWORD=<PASSWORD>
You can optionally set
WIPE_REDIS_ON_START=Falseto persist memory stored in Redis.
You can specify the memory index for redis using the following:
MEMORY_INDEX=<WHATEVER>Pinecone enables the storage of vast amounts of vector-based memory, allowing for only relevant memories to be loaded for the agent at any given time.
- Go to pinecone and make an account if you don't already have one.
- Choose the
Starterplan to avoid being charged. - Find your API key and region under the default project in the left sidebar.
In the .env file set:
PINECONE_API_KEYPINECONE_ENV(example: "us-east4-gcp")MEMORY_BACKEND=pinecone
Alternatively, you can set them from the command line (advanced):
For Windows Users:
setx PINECONE_API_KEY "<YOUR_PINECONE_API_KEY>"
setx PINECONE_ENV "<YOUR_PINECONE_REGION>" # e.g: "us-east4-gcp"
setx MEMORY_BACKEND "pinecone"
For macOS and Linux users:
export PINECONE_API_KEY="<YOUR_PINECONE_API_KEY>"
export PINECONE_ENV="<YOUR_PINECONE_REGION>" # e.g: "us-east4-gcp"
export MEMORY_BACKEND="pinecone"
Milvus is an open-source, highly scalable vector database to store huge amounts of vector-based memory and provide fast relevant search.
- setup milvus database, keep your pymilvus version and milvus version same to avoid compatible issues.
- setup by open source Install Milvus
- or setup by Zilliz Cloud
- set
MILVUS_ADDRin.envto your milvus addresshost:ip. - set
MEMORY_BACKENDin.envtomilvusto enable milvus as backend.
Optional:
- set
MILVUS_COLLECTIONin.envto change milvus collection name as you want,autogptis the default name.
Weaviate is an open-source vector database. It allows to store data objects and vector embeddings from ML-models and scales seamlessly to billion of data objects. An instance of Weaviate can be created locally (using Docker), on Kubernetes or using Weaviate Cloud Services.
Although still experimental, Embedded Weaviate is supported which allows the Auto-GPT process itself to start a Weaviate instance. To enable it, set USE_WEAVIATE_EMBEDDED to True and make sure you pip install "weaviate-client>=3.15.4".
Install the Weaviate client before usage.
$ pip install weaviate-client
In your .env file set the following:
MEMORY_BACKEND=weaviate
WEAVIATE_HOST="127.0.0.1" # the IP or domain of the running Weaviate instance
WEAVIATE_PORT="8080"
WEAVIATE_PROTOCOL="http"
WEAVIATE_USERNAME="your username"
WEAVIATE_PASSWORD="your password"
WEAVIATE_API_KEY="your weaviate API key if you have one"
WEAVIATE_EMBEDDED_PATH="/home/me/.local/share/weaviate" # this is optional and indicates where the data should be persisted when running an embedded instance
USE_WEAVIATE_EMBEDDED=False # set to True to run Embedded Weaviate
MEMORY_INDEX="Autogpt" # name of the index to create for the application
View memory usage by using the --debug flag :)
Memory pre-seeding allows you to ingest files into memory and pre-seed it before running Auto-GPT.
# python data_ingestion.py -h
usage: data_ingestion.py [-h] (--file FILE | --dir DIR) [--init] [--overlap OVERLAP] [--max_length MAX_LENGTH]

Ingest a file or a directory with multiple files into memory. Make sure to set your .env before running this script.

options:
  -h, --help               show this help message and exit
  --file FILE              The file to ingest.
  --dir DIR                The directory containing the files to ingest.
  --init                   Init the memory and wipe its content (default: False)
  --overlap OVERLAP        The overlap size between chunks when ingesting files (default: 200)
  --max_length MAX_LENGTH  The max_length of each chunk when ingesting files (default: 4000)

# python data_ingestion.py --dir DataFolder --init --overlap 100 --max_length 2000
In the example above, the script initializes the memory, ingests all files within the Auto-Gpt/autogpt/auto_gpt_workspace/DataFolder directory into memory with an overlap between chunks of 100 and a maximum length of each chunk of 2000.
Note that you can also use the --file argument to ingest a single file into memory and that data_ingestion.py will only ingest files within the /auto_gpt_workspace directory.
The DIR path is relative to the auto_gpt_workspace directory, so python data_ingestion.py --dir . --init will ingest everything in auto_gpt_workspace directory.
You can adjust the max_length and overlap parameters to fine-tune the way the docuents are presented to the AI when it "recall" that memory:
- Adjusting the overlap value allows the AI to access more contextual information from each chunk when recalling information, but will result in more chunks being created and therefore increase memory backend usage and OpenAI API requests.
- Reducing the
max_lengthvalue will create more chunks, which can save prompt tokens by allowing for more message history in the context, but will also increase the number of chunks. - Increasing the
max_lengthvalue will provide the AI with more contextual information from each chunk, reducing the number of chunks created and saving on OpenAI API requests. However, this may also use more prompt tokens and decrease the overall context available to the AI.
Memory pre-seeding is a technique for improving AI accuracy by ingesting relevant data into its memory. Chunks of data are split and added to memory, allowing the AI to access them quickly and generate more accurate responses. It's useful for large datasets or when specific information needs to be accessed quickly. Examples include ingesting API or GitHub documentation before running Auto-GPT.
WIPE_REDIS_ON_START=False in your .env file.
data_ingestion.py script anytime during an Auto-GPT run.
Memories will be available to the AI immediately as they are ingested, even if ingested while Auto-GPT is running.
Run the AI without user authorization, 100% automated. Continuous mode is NOT recommended. It is potentially dangerous and may cause your AI to run forever or carry out actions you would not usually authorize. Use at your own risk.
-
Run the
autogptpython module in your terminal:python -m autogpt --speak --continuous
-
To exit the program, press Ctrl + C
If you don't have access to the GPT4 api, this mode will allow you to use Auto-GPT!
python -m autogpt --speak --gpt3onlyIt is recommended to use a virtual machine for tasks that require high security measures to prevent any potential harm to the main computer's system and data.
By default, Auto-GPT uses DALL-e for image generation. To use Stable Diffusion, a Hugging Face API Token is required.
Once you have a token, set these variables in your .env:
IMAGE_PROVIDER=sd
HUGGINGFACE_API_TOKEN="YOUR_HUGGINGFACE_API_TOKEN"sudo Xvfb :10 -ac -screen 0 1024x768x24 & DISPLAY=:10 <YOUR_CLIENT>This experiment aims to showcase the potential of GPT-4 but comes with some limitations:
- Not a polished application or product, just an experiment
- May not perform well in complex, real-world business scenarios. In fact, if it actually does, please share your results!
- Quite expensive to run, so set and monitor your API key limits with OpenAI!
Disclaimer This project, Auto-GPT, is an experimental application and is provided "as-is" without any warranty, express or implied. By using this software, you agree to assume all risks associated with its use, including but not limited to data loss, system failure, or any other issues that may arise.
The developers and contributors of this project do not accept any responsibility or liability for any losses, damages, or other consequences that may occur as a result of using this software. You are solely responsible for any decisions and actions taken based on the information provided by Auto-GPT.
Please note that the use of the GPT-4 language model can be expensive due to its token usage. By utilizing this project, you acknowledge that you are responsible for monitoring and managing your own token usage and the associated costs. It is highly recommended to check your OpenAI API usage regularly and set up any necessary limits or alerts to prevent unexpected charges.
As an autonomous experiment, Auto-GPT may generate content or take actions that are not in line with real-world business practices or legal requirements. It is your responsibility to ensure that any actions or decisions made based on the output of this software comply with all applicable laws, regulations, and ethical standards. The developers and contributors of this project shall not be held responsible for any consequences arising from the use of this software.
By using Auto-GPT, you agree to indemnify, defend, and hold harmless the developers, contributors, and any affiliated parties from and against any and all claims, damages, losses, liabilities, costs, and expenses (including reasonable attorneys' fees) arising from your use of this software or your violation of these terms.
Stay up-to-date with the latest news, updates, and insights about Auto-GPT by following our Twitter accounts. Engage with the developer and the AI's own account for interesting discussions, project updates, and more.
- Developer: Follow @siggravitas for insights into the development process, project updates, and related topics from the creator of Entrepreneur-GPT.
- Entrepreneur-GPT: Join the conversation with the AI itself by following @En_GPT. Share your experiences, discuss the AI's outputs, and engage with the growing community of users.
We look forward to connecting with you and hearing your thoughts, ideas, and experiences with Auto-GPT. Join us on Twitter and let's explore the future of AI together!
To run all tests, run the following command:
pytest
To run just without integration tests:
pytest --without-integration
To run just without slow integration tests:
pytest --without-slow-integration
To run tests and see coverage, run the following command:
pytest --cov=autogpt --without-integration --without-slow-integrationThis project uses flake8 for linting. We currently use the following rules: E303,W293,W291,W292,E305,E231,E302. See the flake8 rules for more information.
To run the linter, run the following command:
flake8 autogpt/ tests/

# Or, if you want to run flake8 with the same configuration as the CI:
flake8 autogpt/ tests/ --select E303,W293,W291,W292,E305,E231,E302