Medusa
When running medusa, the first step is to select the device that you are going to use during your review. For this reason, medusa will display the currently detected devices and prompt you to choose one by entering the corresponding index number:

After this, medusa will display various info, regarding the device but also the currently active modules:

Make sure that a frida server is running on this device and you are good to go !
IMPORTANT: Medusa has an autocomplete functionality in order to indicate the available options. Simply said, you can always press the tab button to see your available options. For example, pressing the tab after the 'show' command, it yields

meaning that, after show you can either type: all, categories, mods or snippets
Medusa counts more than 90 modules, which are inactive until you add them to the stashed ones (we will see how). To navigate between these modules and find the right ones to stash, you can you the following commands:
The 'search' command can be used to search for the module that fit your needs based on a given keyword. For example, to search for HTTP communications related hooks, you can simply type:

The 'show' command, combined with an options can be used for the following tasks:
- Show all available modules:
show all
Modules are grouped according to their functionality, to see the available groups type:
- Display the available module categories:
show categories - Display the available modules for the selected category
show mods [category] - To list your stashed modules, type:
show mods
Let's say you found a super useful frida script and you want to save it, so you can use it later. You can add it under the /medusa/snippets directory and later import it using the import command:

While using medusa, to list those scripts, simply type: show snippets
Use the info [module-name] command to get details about a hook and its functionality:

To use the modules you first have to stash them, meaning that first you have to add them in a list of modules which later are going to be unified to a single script and run under a frida session.
To stash a module simply type: use followed by the module name. Here are some tips regarding this command:
- Pressing tab after the
usecommand will list all the available modules - Typing the initial letters of a module followed by a tab after the
usecommand will list all the modules starting with those letters:

- Typing
usefollowed by the initial letters of a module category will add all the modules of this category:

To un-stash a module, simply type rem followed by the module name. Furthermore, the same options with the use can be used (tab, initial letters etc.)
You can empty the stashed modules by typing reset. Keep in mind that this will also reset the unified script !
Some modules have to be stashed before others. For example the SSL unpinning modules have to be stashed always firsts. For this reason you can use swap to change the order of your stashed modules:

Finally, you can stash modules which have not been loaded from the standard modules directory using the following command:
add [full-path-to-module]
After stashing your modules, the next step is to compile them to a single script. This script is called agent.js and you can find it under the medusa/ directory, although most of the times you won't have to deal with it. That being said, in order to compile your script, simply type compile.
Sometimes you might need to add delay on loading your script (e.g. it may take time for libraries to be loaded so Frida won't be able to find them). To do so you can type: compile -t X where X is the delay time in milliseconds.
After you have selected, stashed and compiled your modules in to a unified script, the next step is to run the application. There are two main ways of doing that:
- Start or restart the app and attach to it, with:
run -f [package - name]orrun -n [package - number] - Attach to the application while it is running, with
run [package-name]
Regarding the first, you can simply type run -f followed by a tab, to get the installed packages. Alternatively, to start a session using a package number, type list and get the index number that corresponds to the app that you want to run from the output:


Regarding the second option, you can use the run followed by a tab in order to get the available packages and attach to the one you are interested about.
When a session starts Medusa prints various info regarding the Frida server (that runs in the device) and the running application:

While in session, you have the following set of commands available:

As it is depicted above, the in-session commands are pretty much self-explanatory. Regarding the (t)race and (r)e(s)et, they can be used to modify the scratchpad script on the fly (refer to the scratchpad section to get info about this module).
Each module intercepts a subset of Android APIs related to a specific functionality. For example the webviews/hook_webviews intercepts calls related to the Webview class, the intents/* to Intent and so on. To cover the gap of intercepting methods that belong to the app itself, Medusa provides a special module which is called scratchpad. That being said, it is possible to intercept Java or Native calls with a single command by using the hook command and its options.
The scratchpad can be stashed/un-stashed similarly to any module using the use scratchpad and rem scratchpad respectively. It is also added by default in case you issue a hook or pad command. The available options regarding this module are the following:
-
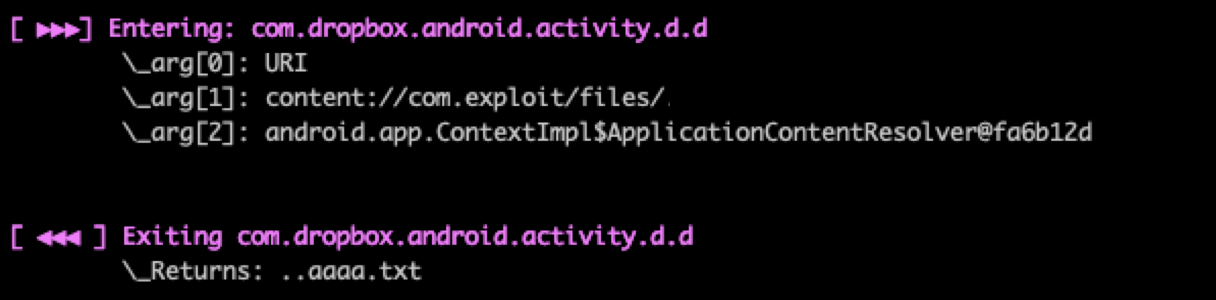
hook -a [class_name]Example:hook -a com.dropbox.android.activity.d. This option will add "hooks" to all the methods of the com.dropbox.android.activity.d and when a method will be invoked Medusa will log (if possible) its arguments and the value that it returns:
-
hook -fThis option can be used to intercept a single class method (including the constructor) and log its arguments, the returned value but also a stack trace of the methods that lead to this call. You can hook as many methods as you wish by entering a submenu and providing the requested information:

When one of the hooked methods gets called the output will be as follows:

You can also use the jtrace full_path_to_method to achieve the same result. Example: jtrace com.dropbox.android.activity.d.d
-
hook -nThis option can be used to intercept a single native method by giving its name or offset:

While most of the options are self-explanatory, the backtrace will print the call stack to the intercepted method, the 'memory read' will try to dump the method's arguments and returned values using a buffer size which is given in the subsequent input.
-
hook -rResets the current hooks and clears the scratchpad.
To further edit the scratchpad you can use the pad command which will open for edit it using vim:

The scratchpad can also be modified during a session, using the in-session menu's (t)race and (r)e(s)et options:


You can save your favourite Frida scripts under the medusa/snippets directory and import them to the scratchpad using the import command. For example, assuming that you want to import the example.js script, then:
- Remove the
Java.perform(function() { }keeping only the part highlighted below:
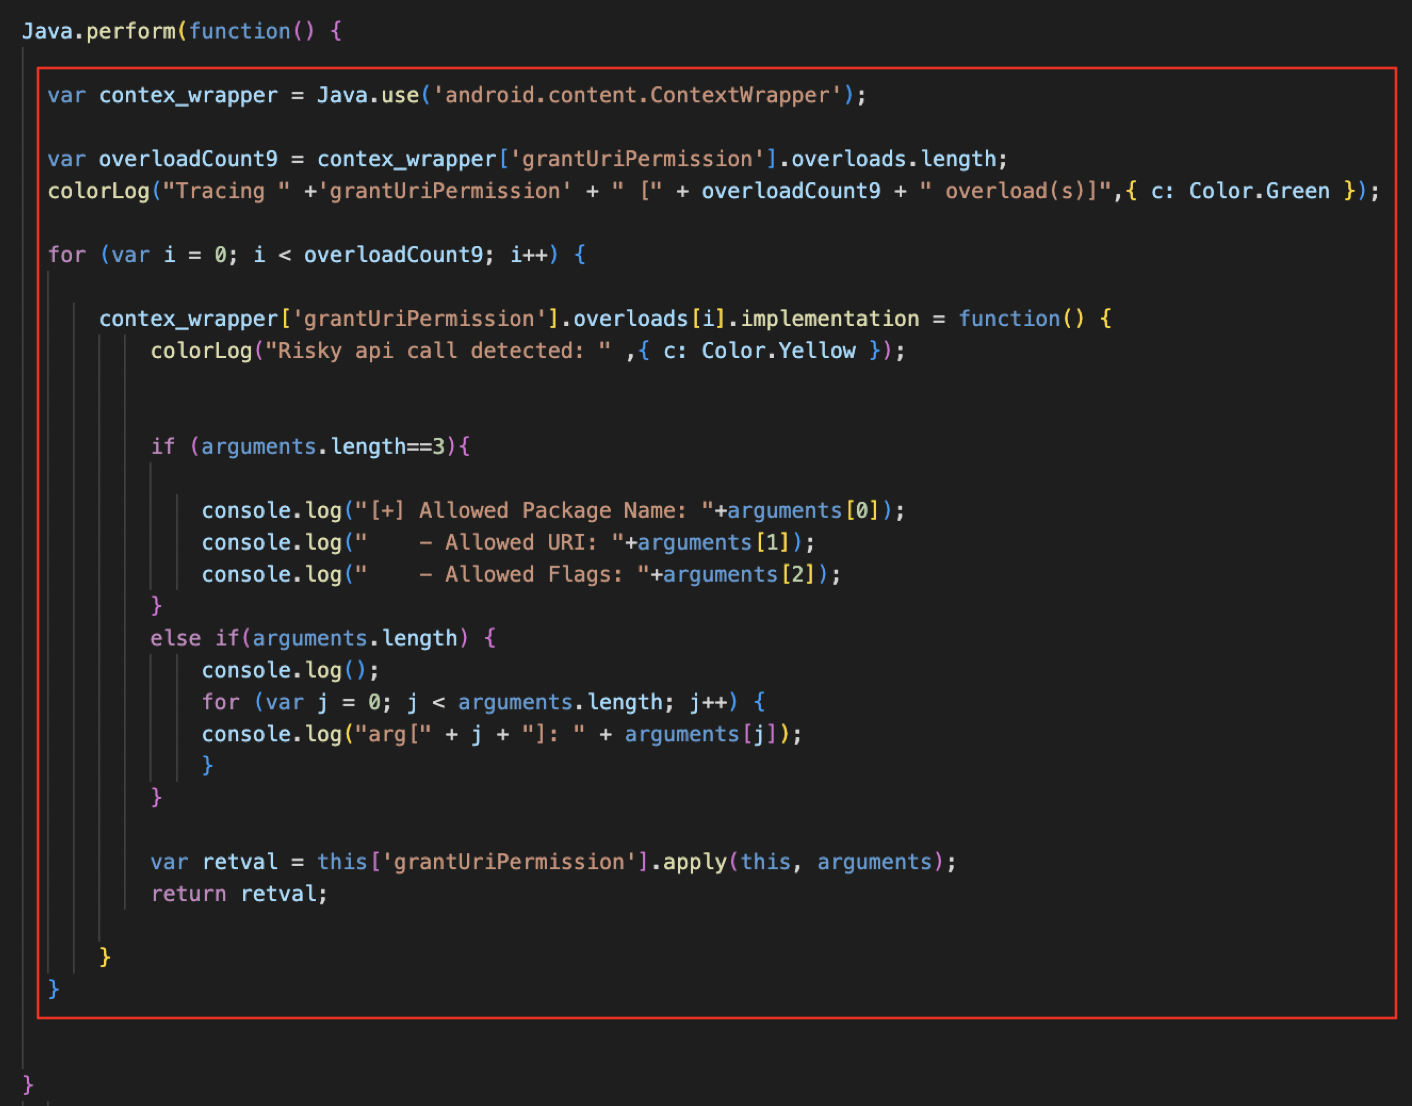
- Save it as /medusa/snippets/example.js
- Use the
import exampleto add it to the scratchpad
You can view the currently saved scripts by issuing the command snippet followed by a tab and then snippet [snippet_name] to view the script's code:

Medusa provides a wide variety of commands in order to simplify hooking of native methods. You can start by listing the loaded libraries of an application by issuing the libs command:

You can use the -a to list (a)ll the loaded native libraries, -s for the (s)ystem related ones and -j to list the application's native libraries.
The --attach option (which is usually better) will use an already running instance of the app and attach to it in order to list the libraries.
The next step is to enumerate the application's exported methods. Use the enumerate [package name] [libname] <--attach> to do that:

You can now hook any of these methods using the hook -n command as it was explained above.
Finally, you can force the application to load a native library by using the load package_name /full/path/to/library.so
You can view, search, write or dump the application's memory using the memops or memmap command. The former needs a library to be attached to while the later is more flexible as it can be used to view or dump any memory region of the app.
Important: The application must be running in order for both of these commands to work !
Type memops package_name libnative.so
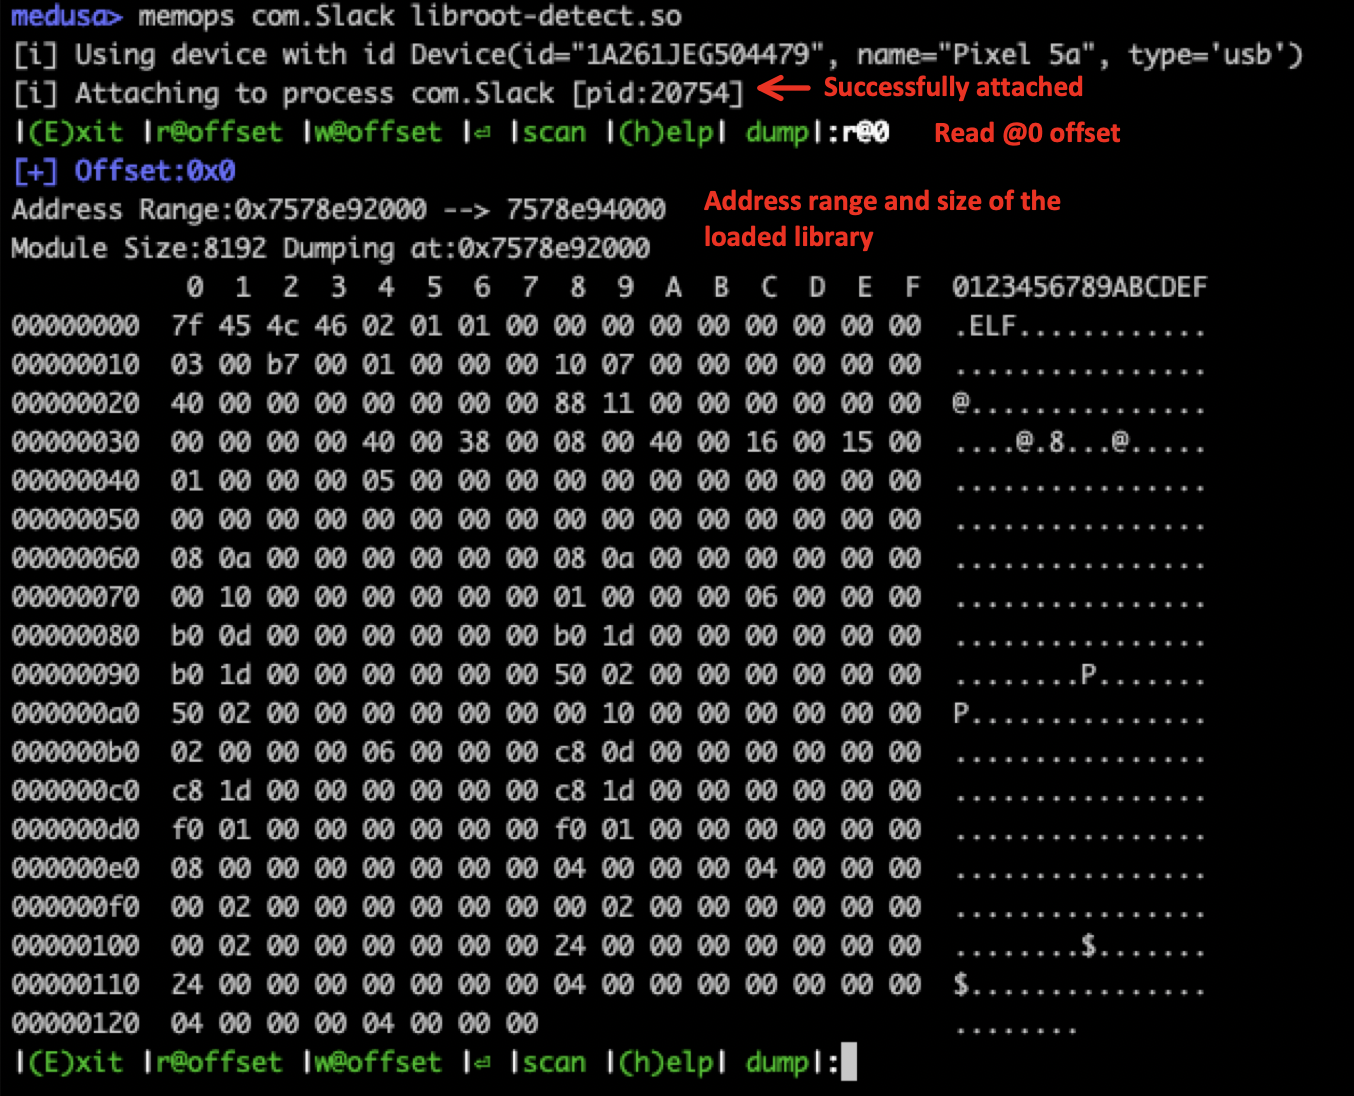
By the time that Medusa will be successfully attached to the app you can use the memops's submenu to operate:
`|(E)xit |r@offset |w@offset |⏎ |scan |(h)elp| dump|:``
-
Starting with the
roption, you can use it in order to read a memory region given a specific offset. For example, the r@100 will add the 0x64 to the base address of the library and dump a memory region starting from the new address up to 0x128 bytes. You can read continued memory regions by using the r@X (where X is an offset) and then pressing the enter key. -
The
wworks in a similar way, but it can be used in order to (w)rite instead of reading the content of a memory address. It can be useful to dynamically patch an instruction and modify the code flow. -
The
scancan be used to scan the memory region given a string or byte array
-
The
dumpcommand will dump the memory region starting from the base address up to the base address + module size. The result will be saved in the local directory as 'libname' followed by the 'dat' extension.
Similarly to memops, memmap can be used to explore the application's memory without "depending" on a specific module. That being said, first make sure that the android application is running and then type memmap package_name. Finally, choose a memory region from the presented submenu:

After selecting a memory region, the process is similar to memops:

Currently we support only read and dump, but other options will soon be available.
Regarding the dump: Medusa will dump the working memory region in chunks and save them under the [current dir]/dump/ folder
You can get details about a Java class of an Android application by running:
describe_java_class full.path.to.class.name
This will add code to the scratchpad that will log the details of a class during an active session:

You can get current the value of a Java object's field (assuming that there is an existing instance) by running:
get package_name full.path.to.class.field

Medusa provides additional commands that can be use automate boring processes. These commands include:
-
cexecutes a shell command. Example:

-
ccexecutes a shell command to the connected device:

-
shellopens an interactive shell. -
clearclears the screen. -
listlists the current device's installed packages. -
typesends a word to the android device

-
dexload /device/path/to/dexforces the android application to load a dex file from a given directory -
dump package_namedumps the dex files of a given package name -
statusprints the loaded device id, libraries, native functions of the last loaded package (assuming that you run the native libraries related commands before). -
strace package_namepseudo strace for Android apps -
listlists the connected device's package names -
list package_name pathprints path details of an installed application

-
loaddevicereloads the device (in case the device is gone) or loads another device.

-
reload [-r recipe_file]reloads the medusa modules. Use it, when you change a module and you want to instantly reload it. Add the "-r recipe_file" option to load a previous session (see saving a session).
You can save a session by typing export session-name-file
This command will save the current stashed modules and whatever is in the scratchpad to a file (given as an argument). This can give you the option to reload the modules and pad when:
- Starting medusa using the -r option. Example:
./medusa.py -r session-name-file - Using the
reloadcommand. Example:reload -r session-name-file
Tip: This option is also useful when you want to deploy your combination of scripts and scratchpad to other users.
Medusa simplifies the creation of complex Frida scripts using modules but this doesn't mean that you will be be missing any of the flexibility that Frida offers. In this section we will see how you can interfere to the script creation process more radically by creating your own modules, improving the final script and many more.
When you running the compile command in Medusa, the stashed modules and scratchpad code will be unified under a single script which can be found under the medusa/ directory. This file is called agent.js and consists of two main parts:
- A set of "common" JS methods which can be used by any module which will be stashed and compiled
- The JS code fetched from the stashed modules and contains the "hooks"
The set of JS methods in the compiled script are imported from the /medusa/libraries/utils.js which you can edit in order to add your own methods or remove the ones that don't find useful. By the time of writing this wiki, some of the most important methods are indexed below:
- enumerateModules : used to enumerate the application's loaded native libraries
- getApplicationContext : returns the application's context
- displayAppInfo : logs useful information about an application (is added by default in the compiled script)
- traceClass : used to trace the methods of a given class
- traceMethod : used to trace a given method
- describeJavaClass : used to log details about a given class
- getJNIFunctionAdress : returns the address of a JNI function
- dumpIntent : displays info about a given intent
- printBacktrace : displays the call trace up to a specific method
- _byteArraytoHexString : returns a hex string given a byte array
- hexToAscii : returns a string given a hex pattern which can consists of printable characters
- byteArrayToString : returns a string given a byte array of printable chars
- colorLog : see below
colorLog is method which you will see a lot of times within the modules as well as the compiled script. This method is used to color a text displayed by the compiled script's log. To call this method you simply type:
colorLog('THIS TEXT WILL BE YELLOW ', {c:Color.Yellow}) The currently supported colors are: Black, Blue, Cyan, Gray, Green, Purply, Red and Yellow
You can use any of these methods within your modules by adding a reference to them to the scratchpad or to a module (in case you are creating one).
The JS hooks that Frida agent will use can be found in the agent.js file under AGENT SCRIPT STARTS HERE comment:
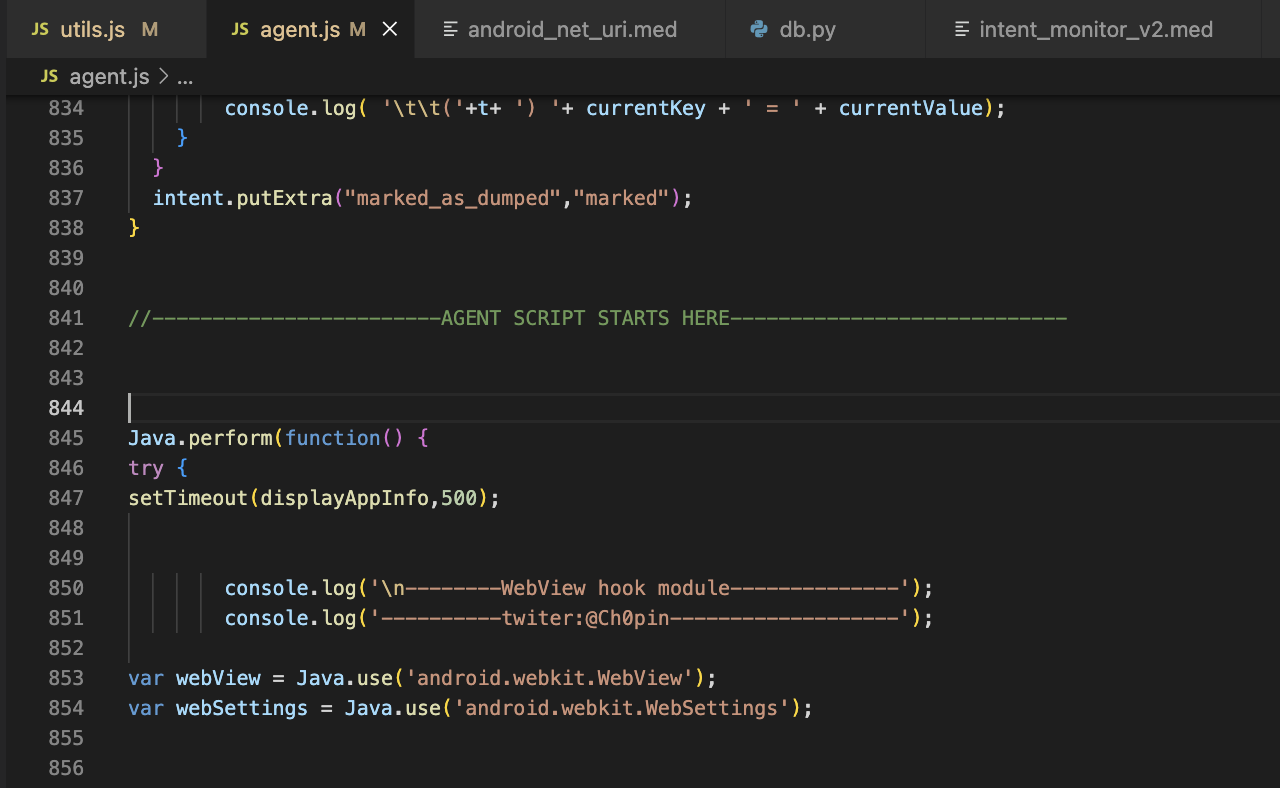
That being said you can view or edit the compiled script just like an ordinary Frida script and run it in your Medusa session. For example the following 'edit':
Will print the following:

Important: When you run "compile" in Medusa any changes in the agent.js will be lost and only the stashed module as well as the code under the scratchpad will be inserted.
The best way to interfere with the agent.js is the following:
- Stash your modules/scratchpad
- Compile the script
- Edit the agent.js and save it
- Start the session
This flow will include any changes made in the agent.js in the created session.
You can also do your changes during an active session:
- Edit the agent.js and save it
- Type the 'r' option in the 'in-session' menu:

(Credits @cryptax)
A Medusa module is essentially a Frida script on steroids combined with multiple ready-made javascript functions that may enhance the final output. Assume that you found a super cool frida script online or you have many of them that you want to save in a classified manner:
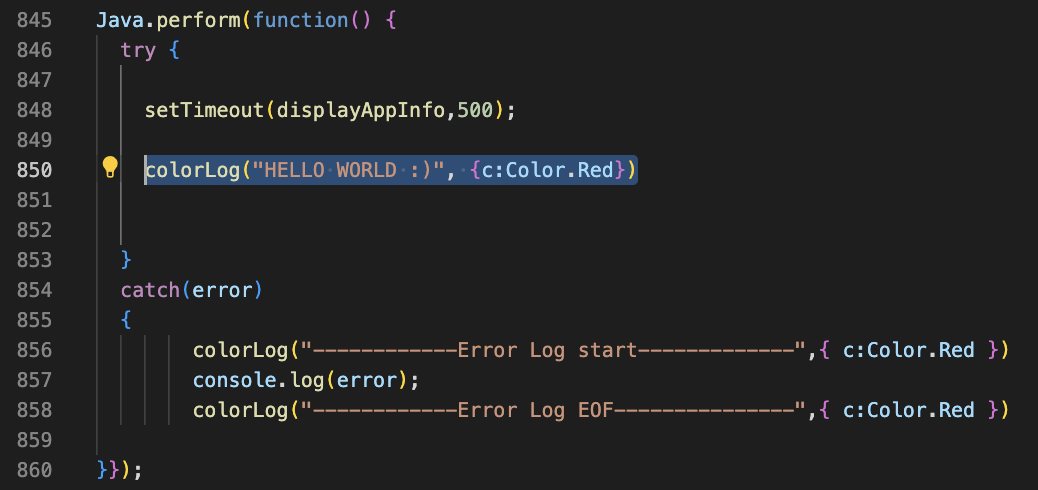
- Remove Frida script's prologue / epilogue by changing it
FROM:
	Java.perform(function() {

		var hook = Java.use("com.foo.bar");

		hook.function.implementation = function() {
			console.log("Info: entered target method");
               }

	});
TO:
		var hook = Java.use("com.foo.bar");

		hook.function.implementation = function() {
			console.log("Info: entered target method");
                 }
-
Insert the modified code in the "code" segment of the following json object:** Do not forget to escape all quotes (
\"):{ "Name": "foo_bar_dir/module_for_com_foo_bar", "Description": "What your module does ?", "Help": " How your module works ?", "Code": " var hook = Java.use(\"com.foo.bar\"); hook.function.implementation = function() { console.log(\"Info\\n: entered target method\"); } " } -
Save the result to the /medusa/modules directory
If you think that your module can be classified in one's of Medusa's categories (e.g. http_communications), save your module as .med under the corresponding folder:
/medusa/modules/foo_bar_dir/module_for_com_foo_bar.med
Or if you think your modulde can be classified to an already existing category, add it to the corresponding folder (e.g. /medusa/modules/http_communications)
That's all ... this module is now accessible via the medusa cli:
medusa> show all
medusa> use foo_bar_dir/module_for_com_foo_bar
- Contribute with a PR
If you think that your module can be helpful to other users, do a pull request