| Code | 說明 |
|---|---|
cd / |
將當前目錄切換至根目錄 |
cd ~ |
將目錄切換至家目錄 |
cd - |
切換至上一個目錄 |
cd /tmp |
進入目錄 /tmp |
sudo以root用戶執行命令
等待十五分鐘之後重新開機:
sudo shutdown -r +15 "quick reboot"
su 變更為root管理員
[user@centos7 ~]$ su
Password: password
[root@centos7 user]#
yum install gedit
[root@centos7 user]# gedit /etc/selinux/config
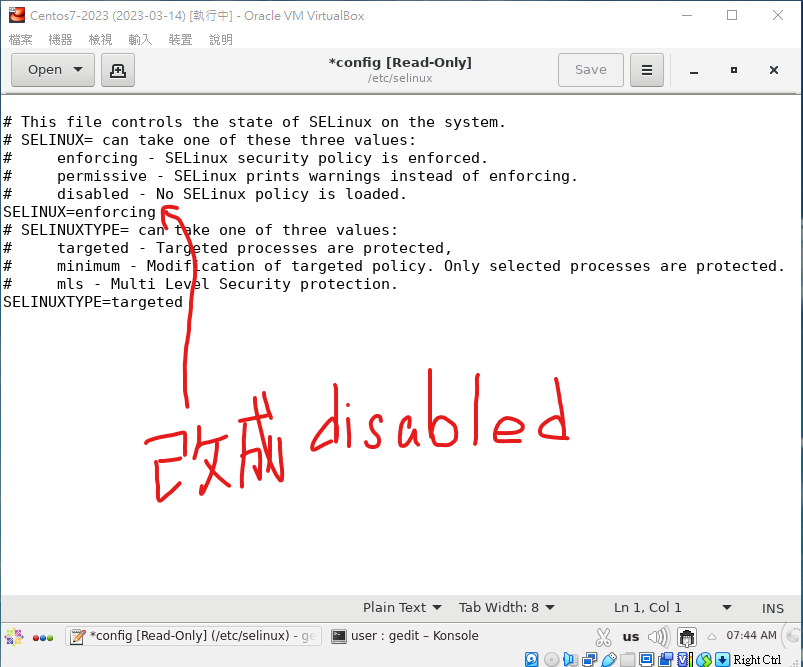
[root@centos7 user]# getenforce
disabled
[root@centos7 user]# systemctl status firewalld
● firewalld.service - firewalld - dynamic firewall daemon
   Loaded: loaded (/usr/lib/systemd/system/firewalld.service; enabled; vendor preset: enabled)
   Active: active (running) since Fri 2023-06-09 07:33:11 CST; 13min ago
     Docs: man:firewalld(1)
 Main PID: 2970 (firewalld)
   CGroup: /system.slice/firewalld.service
           └─2970 /usr/bin/python -Es /usr/sbin/firewalld --nofork --nopid

Jun 09 07:33:11 centos7 systemd[1]: Starting firewalld - dynamic firewall daemon...
Jun 09 07:33:11 centos7 systemd[1]: Started firewalld - dynamic firewall daemon.
[root@centos7 user]# systemctl stop firewalld
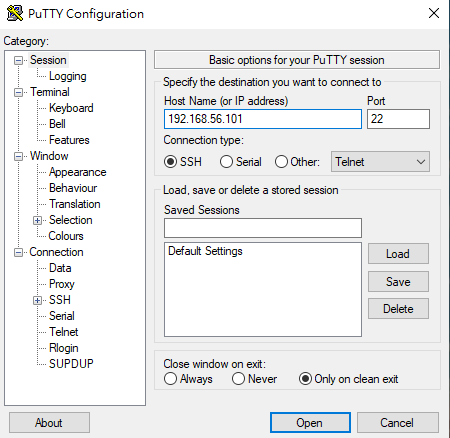
[root@centos7 user]# yum install -y openssh-server
[root@centos7 user]# systemctl start sshd
[root@centos7 user]# systemctl status sshd
● sshd.service - OpenSSH server daemon
   Loaded: loaded (/usr/lib/systemd/system/sshd.service; disabled; vendor preset: enabled)
   Active: active (running) since Fri 2023-06-09 07:37:43 CST; 17min ago
     Docs: man:sshd(8)
           man:sshd_config(5)
 Main PID: 4597 (sshd)
   CGroup: /system.slice/sshd.service
           └─4597 /usr/sbin/sshd -D

Jun 09 07:37:42 centos7 systemd[1]: Starting OpenSSH server daemon...
Jun 09 07:37:43 centos7 sshd[4597]: Server listening on 0.0.0.0 port 22.
Jun 09 07:37:43 centos7 sshd[4597]: Server listening on :: port 22.
Jun 09 07:37:43 centos7 systemd[1]: Started OpenSSH server daemon.
Jun 09 07:38:01 centos7 sshd[4604]: Accepted password for user from 192.168.56.1 port 51003 ssh2
Jun 09 07:42:04 centos7 sshd[4729]: Accepted password for user from 192.168.56.1 port 51074 ssh2
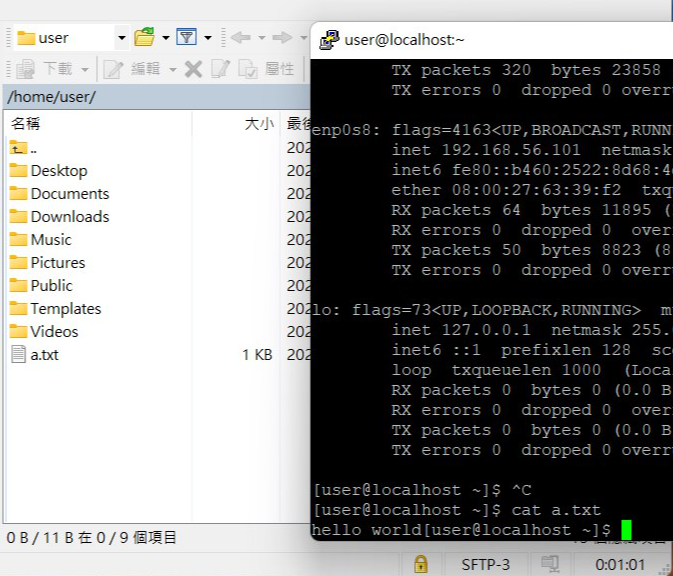
[root@centos7 user]# ifconfig
enp0s3: flags=4163<UP,BROADCAST,RUNNING,MULTICAST>  mtu 1500
        inet 10.0.2.15  netmask 255.255.255.0  broadcast 10.0.2.255
        inet6 fe80::d98d:640c:faf4:e46a  prefixlen 64  scopeid 0x20<link>
        ether 08:00:27:31:fc:d4  txqueuelen 1000  (Ethernet)
        RX packets 854  bytes 83566 (81.6 KiB)
        RX errors 0  dropped 0  overruns 0  frame 0
        TX packets 864  bytes 82617 (80.6 KiB)
        TX errors 0  dropped 0 overruns 0  carrier 0  collisions 0

enp0s8: flags=4163<UP,BROADCAST,RUNNING,MULTICAST>  mtu 1500
        inet 192.168.56.101  netmask 255.255.255.0  broadcast 192.168.56.255
        inet6 fe80::e079:fea9:748c:ccf1  prefixlen 64  scopeid 0x20<link>
        ether 08:00:27:f1:cc:bd  txqueuelen 1000  (Ethernet)
        RX packets 590  bytes 63156 (61.6 KiB)
        RX errors 0  dropped 0  overruns 0  frame 0
        TX packets 396  bytes 57529 (56.1 KiB)
        TX errors 0  dropped 0 overruns 0  carrier 0  collisions 0

lo: flags=73<UP,LOOPBACK,RUNNING>  mtu 65536
        inet 127.0.0.1  netmask 255.0.0.0
        inet6 ::1  prefixlen 128  scopeid 0x10<host>
        loop  txqueuelen 1000  (Local Loopback)
        RX packets 0  bytes 0 (0.0 B)
        RX errors 0  dropped 0  overruns 0  frame 0
        TX packets 0  bytes 0 (0.0 B)
        TX errors 0  dropped 0 overruns 0  carrier 0  collisions 0
[user@centos7 ~]$ cat a.txt
yum install httpd
[root@centos7 user]# systemctl start httpd
[root@centos7 user]# systemctl status httpd
● httpd.service - The Apache HTTP Server
   Loaded: loaded (/usr/lib/systemd/system/httpd.service; disabled; vendor preset: disabled)
   Active: active (running) since Fri 2023-06-09 08:06:25 CST; 4s ago
     Docs: man:httpd(8)
           man:apachectl(8)
 Main PID: 5365 (httpd)
   Status: "Processing requests..."
   CGroup: /system.slice/httpd.service
           ├─5365 /usr/sbin/httpd -DFOREGROUND
           ├─5366 /usr/sbin/httpd -DFOREGROUND
           ├─5367 /usr/sbin/httpd -DFOREGROUND
           ├─5368 /usr/sbin/httpd -DFOREGROUND
           ├─5369 /usr/sbin/httpd -DFOREGROUND
           └─5370 /usr/sbin/httpd -DFOREGROUND

Jun 09 08:06:25 centos7 systemd[1]: Starting The Apache HTTP Server...
Jun 09 08:06:25 centos7 httpd[5365]: AH00558: httpd: Could not reliably determine the server's fully qualified domain name, using fe80::d98d:640c:faf4:e46a. ...his message
Jun 09 08:06:25 centos7 systemd[1]: Started The Apache HTTP Server.
Hint: Some lines were ellipsized, use -l to show in full.
[root@centos7 user]# cd /var/www/html
[root@centos7 html]# echo "hi" > hi.htm
[root@centos7 html]# cat hi.htm
hi
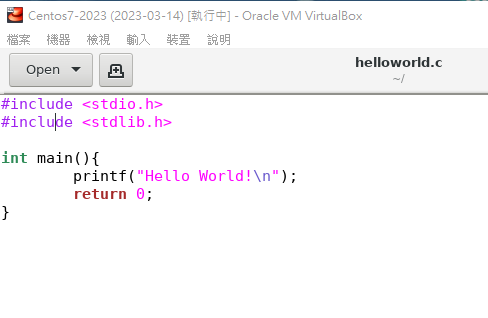
[user@centos7 ~]$ gedit helloworld.c
yum install gcc
[user@centos7 ~]$ gcc -o hello helloworld.c
[user@centos7 ~]$ ls
2        Desktop    helloworld.c                       Miniconda3-latest-Linux-x86_64.sh.1  Pictures   Videos
aaa      Documents  helloworld.py                      Miniconda3-latest-Linux-x86_64.sh.2  Public
aaa.abc  Downloads  miniconda3                         Miniconda3-latest-Linux-x86_64.sh.3  Templates
aaa.txt  hello      Miniconda3-latest-Linux-x86_64.sh  Music                                test
[user@centos7 ~]$ echo $?
0
[user@centos7 ~]$ ls aaaa
ls: cannot access aaaa: No such file or directory
[user@centos7 ~]$ echo $?
2
[user@centos7 ~]$ test
[user@centos7 ~]$ ./hello
Hello World!
yum install wget+
安裝軟體 yum install software_package
移除軟體 yum remove software_package
wget https://repo.anaconda.com/miniconda/Miniconda3-latest-Linux-x86_64.sh
bash Miniconda3-latest-Linux-x86_64.sh
激活 aconda 環境 conda init
建立 python3.10 的環境conda create -n mypython3.10 python=3.10
啟動我建立的環境conda activate mypython3.10
離開 aconda 環境conda deactivate
(base) [root@centos7 user]# gedit helloworld.py

(base) [root@centos7 user]# python helloworld.py
Hello World!
| 快捷鍵 | 功用 |
|---|---|
| Ctrl + a | 跳到最前 |
| Ctrl + e | 跳到最後 |
| Ctrl + z | 把目前工作暫停放到背景,之後要使用再用fg |
| Alt + d | 整行刪除 |
快捷鍵: https://blog.csdn.net/qq_45083975/article/details/105274397
產生一個空白檔案/更新事件戳記 touch
touch {a..d}{1..12} = 新增a, b, c, d 檔
linux 有分大小寫 副檔名參考 windows 沒有
echo "echo hi" > aaa.txt
chmod(change mode) chmod +x aaa.txt 更改檔案模式
第一支執行程式 systemd(new) init (old) pid = process id
pstree yum install pstree -y
GRUB 是Linux開機管理程式,可以選擇想要進入的系統 linux 模式 開機: 圖形化模式 文字化模式 單人模式(維護系統) - 忘記密碼進入單人模式修改 https://www.unixmen.com/reset-root-password-centos-7/
dmesg(dump message) |(pipe 管道) more
檢砸伺服器是否正常開啟 netstate -tunlp | grep 80(port) --httpd netstate -tunlp | grep 22(port) -- t TCP u udp(傳輸協定) n 不解析 l listen p process 0.0.0.0 代表任一介面
uname 系統名稱 uname -a 系統完整資訊 uname -r core資訊
cat /etc/redhat-release 抓取core版本
[user@localhost ~]$ hostnamectl set-hostname centos7
[user@localhost ~]$ bash
[user@centos7 ~]$
https://blog.gtwang.org/linux/how-to-make-a-fancy-and-useful-bash-prompt-in-linux-1/ man ls list指令 ls ls -a ls -a -l == ls -al == ls -la == ls -l -a
whoami 判斷現在身分別(user or root)
dev device 與設備相關的檔案(不管有形無形) bin binary 使用者的程式執行檔 sbin (super user) 系統管理者常用的程式 home 一般使用者的家目錄 usr (unix resource) 存放系統指令 var variable 常態性變動的檔案
lib 函示庫 .so 動態函式庫 .a 靜態函式庫
etc 放置所有系統設定檔,只有系統管理者能修改(需定期備份) => resolv.conf 管理系統 DNS 伺服器的檔案 boot Linux 核心及開機相關檔案 root 管理者家目錄 tmp 臨時的資料夾
mnt 掛載隨身碟 media DVD CDROM掛載 proc process
pwd print working directory 列出目前在哪個資料夾 ls list 目錄下的檔案清單(目前)
- -l long 長格式
- directory
- c 字元設備
- b block 塊狀設備
- -rw-r--r-- rw=owner r--=group r--=
重點虛擬機試一下
ls -l test ls -l -d testls = ls . 當前目錄 ls .. 上一層目錄 隱藏檔以 . 開頭 cd ../../tmp 相對路徑寫法 cd /home/user 絕對路徑寫法(根目錄開始)
-cp copy mv move mv aa(原) ab(新) 改檔名 rm remove rm -r(目錄) 刪除目錄一定要加 rm -i(inquery) 詢問是否刪除
tree test yum install tree
inode _ meta data file size 檔案大小 where 擁有者 group 群組 atime 存取時間 ctime block 區塊 loc
(0664/-rw-rw-r--) 420420400
su - tom 切換使用者
https://hackmd.io/@jenny126/CentOS7/%2FnXMggVOLR66DELcb2zgf4w https://t.me/nqucsie2023linux1/1016
du -h 當前目錄下包含子目錄,將所有檔案大小列出 du -h -s 當前目錄下包含子目錄,累加所有檔案大小 du -h -s /etc du -h --max-depth=1 /etc 第一層子資料夾的大小
ls aaa 2>err.txt 只有 1 可以省略, 2 不行
ls aaa hi.txt 1>a.txt 2>b.txt hi.txt(正確結果) 放入 a.txt ls aaa(錯誤結果) 放入 b.txt
ls aaa hi.txt > c.txt 2>&1 hi.txt(正確結果) 放入 c.txt ls aaa(錯誤結果) 也放入 c.txt
ls aaa hi.txt >/dev/null 2>&1 不管前面指令為何,都不會有東西出現在螢幕上 /dev/null 黑洞
mkfifo testfifo 創建有名管道 ls -l testfifo
find 指定檔名搜尋 find . -name a.txt find . -iname a.txt find /home -name a.txt https://blog.gtwang.org/linux/unix-linux-find-command-examples/
vim a.txt :wq 存檔離開 :q! 放棄剛打完的資料離開
groupadd 新增群組 groupdelect 刪除群組
新增使用者帳號 useradd mike 會建立一個mike群組將mike放入
root uid=0 user uid=1000~ 一般使用者帳號從1000開始
cluster 集群
sync 同步
ntpdate 網路校時
history => 列出所有指令
1.systemctl status 伺服器 查看狀態, 如果已經running,但還是無法連接
2.查看防火牆,selinux
3.檢查 port number
設定時間: * * * * * 分鐘 小時 天 月 星期
使電腦每分鐘在/tmp中顯示 "hello": */1 * * * * echo "hello" > /tmp
Centos7.3建置、管理與私服器架設實戰 (書籍)