Welcome to the CloverBootloader Documentation Clover Documentation Site
- Credit App: macgapproject Is under LICENSE
- Credit HTML Build: Github Wikito Converter
- Credit PDF Build: wkhtmltopdf
Spoiler Build App
Command Line Tools (CLT) f
or Xcode (from xcode-select --install or Developer Apple Command Line Tools
git clone https://github.com/CloverHackyColor/Clover-Documentaion.git
cd $HOME/Clover-DocumentaionmakeDownload Release App ➤ Documentation_Clover.app

- CloverBootloader.md
- Building.md
- Configuration.md
- Design.md
- Fixing-DSDT.md
- Installing.md
- Native-speedstep.md
- OC-integration.md
- Technical-Background.md
-
Slice, with help of Kabyl, usr-sse2, jadran, Blackosx, dmazar, STLVNUB, pcj, apianti, JrCs, pene, FrodoKenny, skoczy, ycr.ru, Oscar09, xsmile, SoThOr, rehabman, Download-Fritz, nms42, Sherlocks, Zenit432, cecekpawon, stinga11, TheRacerMaster, solstice, Micky1979, Needy, joevt, ErmaC, vit9696, ath, savvas, syscl, goodwin_c, clovy, jief_machak, chris1111, vector_sigma, LAbyOne, Florin9doi.
Intel, Apple, Oracle, Chameleon, rEFIt and Xom, nanosvg.
Chameleon team, crazybirdy, JrCs, chris1111.
-
Clover, rEFIt, XNU, VirtualBox. The main is EDK2 latest revision
-
Recent developments and changes in details at Clover Change Explanations
-
Support forum discussion AppleLife (Russian) Insanelymac (English) macos86.it (Italian)
mkdir -p $HOME/src && cd $HOME/src
git clone -q https://github.com/CloverHackyColor/CloverBootloader
cd CloverBootloader && git submodule update --init --recursive
cd OpenCorePkg && git checkout master && git pull
cd ..
./buildmesudo apt install build-essential nasm uuid-dev genisoimage
cd ~/Desktop/
git clone \--recurse https://github.com/CloverHackyColor/CloverBootloader.git
cd CloverBootloader
../edksetup.sh
./ebuild.sh -frClover will perform an automatic configuration based on the computer's hardware. Nevertheless, an automatic unit is never perfect and this is why the user can permanently change several parameters in the configuration file config.plist or on the fly in the GUI. The configuration file is written in XML but it can be handy to view it as a text file. It can be edited by simple text editors or by plist editors like PlistEdit or Xcode. Clover is shipped with a version with all possible configuration options.
** Here you will find the config-sample.plist used by the Clover package, you can adapt it to your hardware configuration.
- View ➢ config-sample.plist Download ➢ config-sample.plist
This way you get a nearly complete configuration file with the parameters used to successfully load the OS. Some more manual work is needed to finish it.
<key>ACPI</key> <dict> ... </dict>
Parameter group affecting various corrections of ACPI tables. This is a rather complex topic. There are several versions of ACPI specifications and additionally Mac has its own requirements. Often vendors are too lazy to write proper tables and internal devices may not be listed or CPU definitions are missing completely.
<key>ResetAddress</key> <string>0x64</string> <key>ResetValue</key> <string>0xFE</string>
These two parameters serve a very important purpose: to fix restart. These values theoretically should be in the FADT table, but it is not always the case. Furthermore, FADT may be shorter than required and not contain them at all. Default values are 0x64/0xFE, which means a restart through the PS2 controller. However, this does not work on every system and you can alternatively use 0x0CF9/0x06, which indicates a restart though the PCI rail. This is the default value for real Macs but does not always work on a hackintosh. The difference is clear: a hackintosh additionally has a PS2 controller, which may prevent rebooting, if not disabled. Last but not least you can set them to 0x0/0x0 to allow the use of default FACP values. If not present, the default values states above will be used instead.
<key>smartUPS</key>
This parameter affects the power profile, which will be written into table FADT.
1|Desktop  |AC
2|Mobile   |Battery
3|Server   |SmartUPS
Clover will choose between 1 and 2 according to the mobility bit and according to the Mobile parameter in SMBIOS. It is, for example, possible to fake a mobile MacMini. Value 3 will be chosen if this parameter is enabled.
<key>PatchAPIC</key>
Some systems can either be started using the kernel parameter cpus=1, or by using a patched kernel (Lapic NMI). It turns out that in these case the table MADT is incomplete and missing the NMI section. Enabling this parameter will cause Clover to automatically correct this table. If the table already is complete, then nothing will be changed.
<key>HaltEnabler</key> <true>
It works as OpenHaltRestart, clearing SLP_SMI_EN at start of OSX system.
<key>UseSystemIO</key> <true>
Key UseSystemIO at SSDT section will serve to choose in the generated _CST tables between:
Register (FFixedHW, Register (SystemIO,
<key>DSDT</key> <dict> ... </dict>
Parameter group affecting DSDT.
<key>Name</key> <string>DSDT.aml</string>
File name of the binary DSDT file to load and inject. If you dont want to load extra DSDT you may set BIOS.aml and the DSDT from BIOS will be used.
<key>Fixes</key> <dict> ... </dict>
See separate section for fixing DSDT
Binary DSDT patching
<key>Patches</key> <array> <dict> <key>Find</key> <data>W4IeQkFUMQhfSElEDEHQDAoIX1VJRAEUCF9TVEEApAA=</data> <key>Replace</key> <data></data> </dict> <dict> <key>Find</key> <data>UFhTWAhfQURSAAhfUFJXEgYC</data> <key>Replace</key> <data>UFhTWAhfQURSAAhfU1VOCgQIX1BSVxIGAg==</data> </dict> </array>
Rev 4314
Limit scope of binary DSDT patch by "Device" section with specified name in additional "TgtBridge" tag by goodwin_c.
Config.plist sample:
<dict> <key>Comment</key> <string>Rename PXSX to SSD0</string> <key>Disabled</key> <key>Find</key> <data>UFhTWA==</data> <key>Replace</key> <data>U1NEMA==</data> <key>TgtBridge</key> <data>UlAwOQ==</data> </dict> <dict> <key>Comment</key> <string>Rename PXSX to SSD0 2</string> <key>Disabled</key> <key>Find</key> <data>UlAwOS5QWFNY</data> <key>Replace</key> <data>UlAwOS5TU0Qw</data> <key>Skip</key> <integer>0</integer> </dict>
Rev 4468
More exact renaming Devices in DSDT and SSDT taking into account its bridge.
Example:
<key>RenameDevices</key> <dict> <key>_SB.PCI0.RP02.PSXS</key> <string>ARPT</string> <key>_SB.PCI0.EHC1</key> <string>EH01</string> <key>_SB.PCI0.POP2.PEGP</key> <string>GFX0</string> </dict>
Complex case such as this DSDT is also taken into account.
_SB.PCI0.RP02.PSXS We have to take into account fields like Scope(\_SB) { Device (PCI0) { Device(RP02) { Device(PSXS) <- to patch { Method(_ON) { } Method(_OFF) { }
  }
  PSXS.\_ON() <- to patch
}
Scope(RP02)
{
  PSXS.\_OFF() <- to patch
}
Device(RP03)
{
  Device(PSXS) <- to not patch
  {
  }
  PSXS.\_ON() <- to not patch
}
<key>SuspendOverride</key>
Influences the DSDT patch FixShutdown and extends the fix from state 5 to 3, 4 and 5 (sleep and suspend).
<key>ReuseFFFF</key> <true>
Some OEM DSDT contains some device with Name (_ADR, 0xFFFF). This is a big problem as we can convert it to ADR=0 and inject properties but this is dangerous patch, it may lead to panic on IOPCIFamily.kext. So this key is proposed which will convert this device to (ADR, 0) and reused for injection. (FakeID for example)
<key>PNLF_UID</key> <string>0x0A</string>
Assign the value for your PNLF device. If you have no PNLF device then you should use DSDT fix AddPNLF. The _UID value changes it behaviour for brightness control. Each UID corresponds to some MacBook value. If you have exactly the same screen then use the value from those book. If unsure then don't use UID substitution. Clover knows what to do.
<key>Rtc8Allowed</key> <false>
Some users claim that RTC length may be 8 bytes without CMOS reset, but others claim that the reset is still occurring. For those who wants len=8 it should be set to true. Default is false.
<key>SSDT</key> <dict> ... </dict>
Parameter group affecting SSDTs.
<key>DropOem</key>
Drops all internal SSDT tables to avoid conflicts when generating an SSDT for your processor, which contains P- and C-States. Clover can do this automatically or you can specify an external file, which will be loaded from EFI/OEM/[model]/ACPI/patched.
<key>Generate</key>
Generate an SSDT with p-states and c-states.
<key>Generate</key> <dict> <key>CStates</key> </dict>
Automatic SSDT table generation, which extends the processor section with __CST_methods for each core. _CST generation is affected by parameters EnableC2, EnableC4, EnableC6, EnableISS, C3Latency. There is no need to comment them as everything will work either way. Experiment by yourself. Besides, Clover already has obtained the processor type and core count. Not using this parameter will result in following error message:ACPI_SMC_PlatformPlugin::pushCPU_CSTData - _CST evaluation failed.
<key>Generate</key> <dict> <key>PStates</key> </dict>
Automatic SSDT table generation, which extends the processor section with _PPC, _PPC and _PSS methods.
_PCT- Performance control. Controls SpeedStep functions_PPC- Performance Present Capabilities. SpeedStep capabilities. This method returns a value limiting the frequency. Look further forPLimitDict._PSS- Performance Supported States. An array containing possible CPU states - P-States.PLimitDict,UnderVoltStepandTurbowill be taken into consideration when generated this array.
<key>EnableC2</key>
This key allows you to enable the C2 states generator. Disabled by default.
<key>EnableC4</key>
This key allows you to enable the C4 states generator. Disabled by default.
<key>EnableC6</key>
This key allows you to enable the C6 states generator.
<key>EnableC7</key>
This key allows you to enable the C7 states generator. Disabled by default.
<key>PLimitDict</key> <integer>1</integer>
Limits the maximal CPU frequency.
0- No limit.1- Reduce frequency by one step2- Reduce frequency by two steps
Example: A Core2Duo T8300 with 2400 MHz operates at a maximal frequency of 2000 MHz when limited by two steps. This parameter might be used to reduce heating in mobile systems.
The same parameter exists in platform plists, for example in:System/Library/Extensions/IOPlatformPluginFamily.kext/Contents/PlugIns/ACPI_SMC_PlatformPlugin.kext/Contents/Resources/MacBook5_1.plist. They will be discussed later.
Other CPUs may need other values. This value has a reversed effect on a Core2Quad for instance. The optimal value is 1 in this case. It might be a DSDT error, though.
<key>UnderVoltStep</key> <integer>1</integer>
This parameter lowers the CPU voltage and indirectly affects the temperature. Possible values are 0, 1, 2, etc. Clover will only allow sane values, meaning it is safe to increase this value until the CPU stops working correctly.
<key>MinMultiplier</key> <integer>7</integer>
Minimal CPU multiplier. Usually a value of 16 is ported, resulting in a frequency of 1600 MHz but you should use lower values when using SpeedStep, like 8 or even 7.
<key>MaxMultiplier</key> <integer>30</integer>
Introduces as an analogy to the minimal multiplier but not really necessary. It is not advised to set it.
<key>DropTables</key> <array> <dict> <key>Signature</key> <string>SSDT</string> <key>TableId</key> <string>SataTabl</string> </dict> <dict> <key>Signature</key> <string>BGRT</string> </dict> <dict> <key>TableId</key> <string>A M I</string> -- WARNING: DO NOT DO THIS!!!!!!! </dict> ... </array>
Drop OEM ACPI tables by signature and/or table identifier.
Additionally, now you can drop tables by their length. Why? Because we found Acer laptop where all SSDT have the same TableID.
<key>DropTables</key> <array> <dict> <key>Signature</key> <string>SSDT</string> <key>Length</key> <integer>720</integer> </dict> </array>
Rev 4427-4429
FixHeaders should be in common ACPI section, it is not DSDT-only fix.
<key>FixHeaders</key>
The fix is recommended to all users even if you are not going to fix DSDT. Anyway the fix is safe. The reason for the fix is sometimes an ACPI table to have a name with national characters which is impossible for macOS.
<key>Arguments</key> <string>ARGUMENTS</string>
At this section you can add "Boot Flags" and "Kernel Flags" to be used by the system... Here we will list only Clover's proprietary "Boot Flags", different flags, like for example, npci=0x2000, npci=0x3000, darkwake=0, etc..., should work as expected...
-v- Verbose Boot.-s- Boot OS X into Single User Mode.-x- Boot OS X into SafeBoot (Safe Mode).
<key>Legacy</key> <string>PBR</string>
Necessary for loading old versions of Windows and Linux. Greatly depends on hardware and BIOS. Several algorithms were developed to allow customisation:
LegacyBiosDefault- for UEFI BIOS variants containing protocol LegacyBiosPBRtest- PBR boot algorithmPBR- Another PBR boot algorithm
Additionally for UEFI boot you may specify which HDD to boot (not only the first one).
<key>Legacy</key> <string>LegacyBiosDefault</string> <key>LegacyBiosDefaultEntry</key> <integer>2</integer>
<key>Timeout</key> <integer>5</integer>
The boot loader will pause for 5 seconds after starting before automatically loading an operating system. If a key is pressed during this period of time, the countdown is stopped. Options:
0- GUI is not invoked, the OS is loaded instantly-1- GUI is invoked, automatic OS loading is turned off
Clover must have be able to find a default entry for it to automatically boot into an OS, see below.
NOTE: If the Timeout integer is set to 0, hold any key when powering on to invoke the bootloader GUI.
<key>DefaultVolume</key> <string>LastBootedVolume</string>
DefaultVolume is used to specify which entry is the default boot entry in Clover GUI. See also [DefaultLoader]. It can be set to:
- Volume Name - The name of the volume. E.g.
Macintosh. - GUID - Globally Unique ID of the volume shown in Clover's boot, preboot or debug log. E.g.
57272A5A-7EFE-4404-9CDA-C33761D0DB3C. - Part of Device Path - Also shown in Clover's logs. E.g.
HD(1,GPT,57272A5A-7EFE-4404-9CDA-C33761D0DB3C,0x800,0xFF000). LastBootedVolume- The last booted volume will be set as default one in Clover GUI.
OS X Startup Disk can be used to reboot into another volume, but for the following reboot DefaultVolume will be used again.
<key>DefaultLoader</key> <string>boot.efi</string>
In addition to [DefaultVolume] above, the path of the loader can be specified as DefaultLoader. This provides more precise default entry selection for Volumes that have multiple Loaders. The value can be the complete path or a unique portion like like file name.
Formerly known as "Log" before revision 3064
<key>Debug</key>
If you are unable to boot into the Clover you can use this setting to produces a debug output to /EFI/CLOVER/misc/debug.log. This log then can be assessed to find out what the problem is. !WARNING turning on this log will dramatically increase loading time as it has to write the log to the disk as it goes. So please be patient and give plenty of time before reseting your computer.
<key>Fast</key>
Similar to setting Timeout to 0 but: nvram.plist will be searched only until first occurrence does not search for the best video mode does not load themes and graphics no chance to enter the GUI
Having this parameter enabled might not really have any big effect. Instead, you can try a custom compilation: disable GUI in CloverEFI (3 seconds difference) only search for Sata0 drivers (9 seconds difference)
<key>XMPDetection</key> OR OR <string>Yes/No</string>
Detect best eXtreme Memory Profile when detecting memory or disable XMP detection.
<key>XMPDetection</key> <integer>1/2</integer>
<key>Secure</key>
Secure Boot protocol, a controversial subject, will restrict the booting process to signed binaries only. By enabling this option in your BIOS, booting of many operating systems won't be possible anymore, except Windows 8, 2013 and some Linux distributions.
The aim is to use Clover while Secure Boot is enabled. Clover's binary will need to be signed and a certificate to be loaded.
<key>NeverHibernate</key>
Disables the hibernation state detection.
CustomLogo OR <false/> OR Apple/Alternate/Theme/None/Path OR PNG/BMP/ICNS base64 data
Enable the drawing of the custom boot logo.
true- Uses the default boot style, Apple.false- Disables custom boot logo.Apple- Use the default gray on gray apple logo.Alternate- Use the alternate white on black apple logo.Theme- Use the theme boot screen for entry type - NOT IMPLEMENTED.None- Use no logo only background color, gray if not specified by custom entry.Path- A file path to load a custom image from<data>- A base64 encoded PNG, BMP, or ICNS data.
If no option is specified then the boot screen will be drawn only for >= 10.10 Yosemite, so it remains compatible with previous behavior.
The CustomLogo key can also be used under GUI/Custom/Entries in conjunction with BootBgColor for a different screen for every OS. However, the graphics output protocol is not in anyway modified so if the OS draws after it is started then it is after the boot screen is drawn and will overwrite the custom logo, at least for now.
Rev 4223
<key>HibernationFixup</key>
To be used for Hibernation modes 25 & 3 with Lilu.kext and HibernationFixup.kext.
Rev 4450
A data leak issue was identified in the hibernation code, allowing hibernation encryption key to be passed to the system through RTC and preserved till the next hibernation without a subsequent erase. More details could be found in this message. To workaround this issue a new option enabling RTC memory erase upon waking from hibernation was added: Boot > RtcHibernateAware = YES (BOOLEAN, off by default)
This option relies on a poorly documented (or rather undocumented) RTC memory access, and unspecified RTC memory layout, which is implementation-specific. While it is extremely recommended to be turned on if you rely on hibernation, it may not work on your hardware (should be fine on Ivy Bridge and newer at least), and is thus optional and disabled by default.
Note, that AppleRTC or FixRTC patches effectively break hibernation by reducing the available RTC memory and avoiding encryption key preservation. You should DISABLE them if you have no issues with BIOS preferences afterwards or use HibernationFixup. However, if RtcHibernateAware does not work for you, enabling AppleRTC patch and using HibernationFixup may be a safer workaround.
Revision 4515
Revision 4450 introduced a new key (Boot → RtcHibernateAware) which improved the situation with hibernation compatibility and reduced the impact of some security issues in this process. Starting with 10.13.6 a lot of legacy code got (finally) ditched on Apple side, and some changes are necessary to get hibernation to work on hacks. Revision 4515 incorporates them in Clover.
Mandatory stuff: 1) Clover must be r4450 and newer 2) AptioMemoryFix must be R20 (b83c025) or newer 3) Boot → RtcHibernateAware must be set to YES
Some additional notes: — Config changes (and driver updates) will benefit all the systems (starting from Yosemite if I remember correctly), not just 10.13.6 — OsxAptioFix1/2/3 will NOT work with hibernation on 10.13.6 and newer, and they may be removed from the default Clover installer in the future (time to upgrade). — If you can boot with AppleRTC/FixRTC patches OFF without BIOS settings reset, disable them, they break stuff in macOS
— If you have to use HibernationFixup, you may want to update it to 1.2.1, currently only available from source.
Last, but not least: If Hibernation does not work for you… well, RIP. Believe me or not, but it is not something you should rely on. Especially if you care about security and privacy of your data.
Rev 4270
<key>SignatureFixup</key>
Rev 4291
If not SignatureFixup, it will be zeroed.
Anyway, the Signature must be fixed. If True then the value is from hibernate image If False then the value is zero and it will be copied by kernel into the image.
<key>CPU</key> <dict> ... </dict>
This group of parameters helps with CPU definitions in case the internal algorithms fail.
<key>FrequencyMHz</key> <string>3200</string>
This number is used in the About This Mac window only and not influences on system functions.
<key>BusSpeedkHz</key> <integer>133330</integer>
Bus speed in kHz. Very important value for a stable system. It is passed from the boot loader to the kernel. If this value is not correct, the kernel will not start at all. If it is slightly incorrect, clock issues may arise and the system will behave in a strange way.
An automatic detection was introduced with revision 1060, which relies on the ACPI timer producing much more accurate values than the ones stored in DMI.
DMI stores this value in MHz, which is not accurate in contrast to a value calculated from CPU frequency. You can choose a more accurate value, if needed. For example my DMI has a value of 100 MHz, however manually overriding it to a value of 99790 kHz produced better clocks. Some vendors use a different meaning for BusSpeed and FSBSpeed and use values four times bigger in the BIOS. You can distinguish them according to the scale: either it is from 100 MHz to 400 MHz or it matches the formula CPUFrequency=RailFrequency*CPUMultiplier. If ASUS uses a rail frequency of 1600 MHz and a multiplier of 8, the formula does not work - a CPU with 12,8 GHz does not exist; a division into 4 is required.
Attention: UEFI booting will produce an inaccurate value. It is recommended manually specify the value, which is calculated more accurately during a boot with Clover EFI.
<key>UseARTFrequency</key>
In processors SkyLake and up there is new frequency parameter so called ARTFrequency and macOS will use it for calculating the bus speed. It may be 24MHz or sometimes other values. Clover will calculate it automatically and it will be more precise value then set by other methods.
<key>QPI</key> <integer>4800</integer>
System Profiler calls it Processor Bus Speed or Bus Speed. Chameleon has an algorithm for calculating this value for Nehalem CPUs (, which is however not correct). Clover has a corrected algorithm according to Intel datasheets. AppleSmbios sources describe two variants: either SMBIOS already contains this value as specified by the vendor, or it is calculated by the formulae BusSpeed*4. After a long discussions this value was sourced into the configuration file - write what you want (in MHz). This is a purely cosmetic value. Apparently this value only makes sense for Nehalems, the rest should use the formula stated above - or nothing at all.
Note: Real Mac’s report a hw.busfrequency = 100000000
To achieve that with Clover here’s what to do: 1 - Drop SMBIOS table type 132 for Sandy Bridge and newer CPU’s. Clover does this if you set QPI to a string value of 0. 2 - Set SMBIOS table type 4->ExternalClock to 0 (or 25Mhz as a real Mac). This currently has to be done in the source code and re-compile Clover.
If you don’t do step 2 then for Sandy Bridge and newer CPU’s, AppleSMBIOS.kext will multiply any non zero values reported by SMBIOS table type 4 -> External Clock by 4. See DHP’s posts for ref.
<key>Type</key> <string>0x0201</string>
This result of this value can only be found in Apple's specification and it is used in the window About this Mac, which is displaying the according processor name. Otherwise "Unknown CPU" will be displayed. An invocation of CPUID was not possible due to PowerPC and due to Apple's different view of the world SMBIOS table 4 is not used either. Clover knows most values but due to the fact that hardware development does not stand still, you can specify this value. Again, this is purely cosmetic.
<key>Latency</key> <string>0x03E9</string>
This parameter value represents the C3 entry latency issued when entering C3 state. The critical value is 0x3E8(1000). A lower value will allow SpeedStep, a higher one will not allow it. Real Macs always use 0x3E9, meaning SpeedStep is not turned on. Decide for yourself what you need. Notebook users should use 0x00FA to enable power management.
<key>Devices</key> <dict> ... </dict>
Parameter group for tweaking setting affecting PCI devices.
Properties PciRoot(0x0)/Pci(0x1,0x0)/Pci(0x0,0x0) @0,AAPL,boot-display AQAAAA== @0,AAPL,vram-memory AAAAwAAAABA= @0,ATY,EFIDisplay DP_INT @0,VRAM,memsize AAAAIAAAACA= @0,compatible ATY,Galago @0,connector-type AAQAAA== @0,device_type display @0,display-inverter-default-cycle /w== @0,display-link-component-bits CAAAAA== @0,display-pixel-component-bits CAAAAA== @0,display-type LCD @0,name ATY,Galago @1,AAPL,vram-memory AAAAwAAAABA= @1,VRAM,memsize AAAAAAAAACA= @1,compatible ATY,Galago @1,connector-type AAQAAA== @1,device_type display @1,display-type NONE @1,name ATY,Galago AAPL,aux-power-connected AQAAAA== AAPL,backlight-control AAAAAA== AAPL00,InverterFrequency yDIAAA== AAPL00,blackscreen-preferences AAAACA== AAPL01,blackscreen-preferences AAAACA== ATY,Card# 109-B98505-00 ATY,Copyright Copyright AMD Inc. All Rights Reserved. 2005-2009 ATY,DeviceID wGg= ATY,EFI-dpcd-post-training dwABAAAA ATY,EFI-dpcd-training-result CoIAAAAAABAB ATY,EFICompileDate Apr 23 2010 ATY,EFIDispConfig DxAAAAAAAAA= ATY,EFIDriverType Ag== ATY,EFIEnabledMode Ag== ATY,EFIHWInitStatus AAAAAAAAAAA= ATY,EFIOrientation AA8= ATY,EFIVersion MDEuMDAuNDE2AA== ATY,EFIVersionB 113-B98505-101 ATY,EFIVersionE 113-B9850E-416 ATY,MRT ATY,MemRevisionID BAA= ATY,MemVendorID BgA= ATY,PlatformInfo AQAAAAAAAAAAAAAAAAAAAAAAAAAAAAAAAAAAAAAAAAAAAAAAAAAAAAAAAAAA AAAAAAAAAAAAAAAAAAAAAAAAAAAAAAAAAAAAAAAAAAAAAAAAAAAAAAAAAAAA AAAAAAAAAAAAAAAAAAAAAAAAAAAAAAAAAAAAAAAAAAAAAAAAAAA= ATY,RefCLK jAoAAA== ATY,Rom# 113-B9850H-133 ATY,VendorID AhA= MVAD PgQC//+QAEgAAAAAAAAAABo2gAcgCDAAIAA4BFcEAwAFADgEgAdAAQAAAAAA AAAAAAAAAAAAAAAAAAAAAAAAAA== VRAM,totalsize AAAAIA== bksv /wAAAA== device_type ATY,GalagoParent graphic-options BAAAAA== model ATI Radeon HD 5670 name ATY,GalagoParent saved-config PgQC//+QAEgAAAAAAAAAABo2gAcgCDAAIAA4BFcEAwAFADgEgAdAAQAAAAAA AAAAAAAAAAAAAAAAAAAAAAAAAAAAAAABAAAAyAAAAMgAAAABAAAAAAAAAJAB AADIMgAA/wgICDAADwAAAAAAAAAAAAAAAAAAAAAAHCwAABQsAAAYLAAAJCwA ACAsAAAEaAAAEGgAAPiYAABILwAA1AsAAAAAAAAAAAAAAAAAAAAAAAAAAAAA AAAAAAAAAAAAAAAAAAAAAAAAAAAAAAAAAAAAAAAAAAAAAAAAABgAAAAYAAB/ lwAA73j0AwgBGgAGoEAAAAAYAAIAARICAAESAgABEA== PciRoot(0x0)/Pci(0x1b,0x0) MaximumBootBeepVolume M PinConfigurations UEArAUABEJBCARCQIDCLARABoJAw4MsBYOBLAQ== layout-id EgAAAA== platformFamily AA== PciRoot(0x0)/Pci(0x1c,0x2)/Pci(0x0,0x0)/Pci(0x0,0x0) fwswappedbib AQAAAA==
More detailed instructions followed. This way we can deprecate Arbitrary section.
<key>FakeID</key> <dict> <key>ATI</key> <string>0x68181002</string> <key>IntelGFX</key> <string>0x01268086</string> <key>NVidia</key> <string>0x0</string> <key>LAN</key> <string>0x436311ab</string> <key>SATA</key> <string>0x25628086</string> <key>WIFI</key> <string>0x431214E4</string> <key>XHCI</key> <string>0x0</string> <key>IMEI</key> <string>0x1E3A8086</string> </dict>
This is a method to change PCI properties DeviceID and VendorID for the device will work with native drivers. In the example above: - AMDRadeonHD7850 has unsupported DeviceID=0x6819. Change to 0x6818 - Dell Wireless 1595, DeviceID=0x4315 is not supported. Change to 0x4312 - Marvell Yukon 8056, DeviceID=0x4353. Change to 0x4363.
There are other known substitutions for unsupported devices.
This substitution will work if InjectATI (Nvidia, Intel) is set. Or if FixDsdtMask set for the device.
Likewise, the IMEI fix will only work if the DSDT Patch AddMCHC_0008 is enabled.
<key>Audio</key> <dict> ... </dict>
Parameter group for tweaking setting affecting audio devices.
<key>Inject</key> <string>Detect</string>
Property injection for the sound chip. Only works when the DSDT defines Device (HDEF). If you renamed it, you can also inject the other properties differently. Do not use this parameter with VoodooHDA. Possible options are:
No- Injection is turned offDetect- Automatic detection of the sound chip and injection of its ID as layout ID. Actually this is nonsense but still very popular. Does not do any harm and affects the display of sound properties in System Profiler.883- Decimal number representing. Refers to Realtek ALC883 in this case.0x373- Same as above in hexadecimal.
These numbers are incorrect, you will need to find the correct value and possibly replace the layout file bundled with AppleHDA to get the chip working.
<key>ResetHDA</key>
Audio controller initialization. Some users have non-working sound after cold boot but works after restart or wake (even on Windows!). This is a workaround that works at early boot, so it will affect Windows as well.
<key>AFGLowPowerState</key>
This helps remove cracking sounds at audio output after idle mode, so sound card is always on.
<key>USB</key> <dict> ... </dict>
Parameter group for tweaking setting affecting PCI devices.
<key>Inject</key>
Injects USB properties. You can turn it off for whatever reason, if you need. It is also disabled if the DSDT patch mask matches 0x1000 to prevent data duplication.
<key>FixOwnership</key>
It is possible to leave USB injection enabled and only turn off the ownership fix.
This fix is not relevant for UEFI booting.
<key>AddClockID</key>
<true/>- Enables a good, deep sleep, which cannot be exited by keyboard or mouse input.<false/>- The PC will possibly sleep and it can be woken up by keyboard or mouse; or it will be automatically woken up by some attached device
Injects the property "AAPL,clock-id" with a unique identifier for each device. Set it to your liking.
Requires USBInjection to be enabled.
Default value is set to disabled.
<key>HighCurrent</key>
More power needed to charge iPad from USB ports.
UseIntelHDMI
### If TRUE, *hda-gfx=onboard-1* will be injected into the GFX0 and HDEF devices. Also, if an ATI or Nvidia HDMI device is present, they'll be assigned to onboard-2. If FALSE, then ATI or Nvidia devices will get onboard-1 as well as the HDAU device if present.
NoDefaultProperties
### This key will affect DSDT fixes and force them to generate an empty _DSM. For example, if you enable FIX_DISPLAY Clover will create a device for the graphics card but with an empty _DSM. AddProperties and FakeID values will still be injected. This works only for Display, Sound, LAN and WiFi.
SetIntelMaxBacklight
Fix MaxBrightness for Intel HD3000/4000 proposed by Dr.Hurt [here](https://www.insanelymac.com/forum/topic/284656\-clover-general-discussion/page-722?p=2489740&do\=findComment&comment=2489740)
New setting in config plist
Set Intel Max Backlight Value in config an in menu.
<key>Devices</key> <key>#SetIntelBacklight</key> <key>SetIntelMaxBacklight</key> <key>IntelMaxValue</key> <integer>1808</integer>
- Sandy or IvyBridge: 1808
- Haswell or Broadwell: 2776
- Skylake or Kabylake: 1295
DisableDrivers CsmVideoDxe</string> VBoxExt4</string>
The purpose of this parameter is to have multiple configurations in the *OEM* folder. Only one driver folder exists, though, and it may be necessary to disable specific drivers for different configurations. One may need OsxAptioFixDxe, another one EmuVariableDxe.
The GUI settings can me modified by changing parameters in the GUI section of the main configuration file config.plist.
<key>GUI</key> </dict> ... </dict>
<key>TextOnly</key>
Text-only menu mode for a minimal GUI and faster loading times.
The design of the GUI depends on the chosen theme, which is set using:
<key>Theme</key> <string>cesium</string>
Additionally you can set the theme in the preference panel. This setting overrides the one in the configuration file. In case an invalid theme name is used here (no theme.plist exists at the given path), then the configuration file setting is used again. If even here the theme name is invalid, then you will be greeted with an ugly fallback theme that will still be operational.
<key>ScreenResolution</key> <string>1024x768</string>
You can set the desired screen resolution if it is supported by the video card and the monitor. Clover will try to set the highest available resolution, however it might fail. You can check the list of supported resolutions in the boot log. In case PatchVBios=Yes is used in the Graphics section, you will get the highest resolution supported by the monitor. In that case this parameter may be obsolete. The default value is 1024x768.
<key>ConsoleMode</key> <string>[Number]/Max/Min</string>
Will switch the console driver to requested console mode (which is used by shell, boot.efi, dumpueficalls, etc). It is usually not necessary to use this, and should be used only where needed.
0(default) - Disabled. No switch will be done due to possible incompatibility reasons.Min- Selects lowest mode available. Useful for slow consoles, like CloverEFI, with much debug output.Max- Select highest mode available. Useful for fast consoles, where it works.[Number]- Selects specific mode. See boot.log from revison >= 2496 for a list of available modes.
<key>Language</key> <string>en:0</string>
Sets language of Clover's help menu, that can be accessed with shortcut F1. Furthermore, this setting is passed to the OS and can have an influence on the language.
Available languages codes are: en, ru, fr, it, es, pt, br, de, nl, pl, ua, cz, hr, id, ko
<key>CustomIcons</key>
Enabling this key will load the icon from the partition itself. You may assign your own icons to each volume, and you can use different icons for different volumes, even when they have the same OS.
<key>Mouse</key> <dict> <key>Enabled</key> <key>Speed</key> <integer>2</integer> <key>Mirror</key> <key>DoubleClick</key> <integer>500</integer> </dict>
Enabled- The mouse may not work or even cause the whole GUI to lock up. Turn it off if this is the case.Speed- Mouse movement speed. Reasonable values range from2-8. Some mice may need a negative speed to reverse the movement.0turns off the mouse.Mirror- Negative movement speed on a single axisDoubleClick- Pause for double click detection in milliseconds. Until now500has been a good value for everyone.
<key>Scan</key>
Enable or disable all automatic scans.
<key>Scan</key> <dict> <key>Entries</key> </dict>
Enable or disable the automatic UEFI entries scan.
<key>Scan</key> <dict> <key>Tool</key> </dict>
Enable or disable the automatic UEFI tool scan.
<key>Scan</key> <dict> <key>Legacy</key> <string>Last</string> </dict>
Enable or disable automatic legacy scan. Also choose from First to list in the beginning, Last to list it in the end.
<key>Scan</key> <dict> <key>Kernel</key> <string>All/Newest/Oldest/First/Last/MostRecent/Earliest/None</string> </dict>
Enable or disable automatic Linux kernel scan. Additionally you may choose between several options:
All- all found kernels (default)Newest- newest file modification dateOldest- oldest file modification dateFirst- first matchingLast- last matchingMostRecent- most recent versionEarliest- earliest versionNone- no kernel scan
Hide WindowsHDD HD(1,GPT,E223FF7F-F2DA-4DBB-B765-756F2D95B0FE)
Hide a partition with given name or GUID.
<key>Custom</key> <dict> ... </dict>
If the automatically scan entries are not enough you can add your own custom boot entries.
<key>Entries</key> <array> <dict> <key>Disabled</key> <key>Volume</key> <string>Volume name or GUID</string> <key>VolumeType</key> <string>Volume type</string> <key>Path</key> <string>Loader path</string> <key>Arguments</key> <string>Load options</string> <key>AddArguments</key> <string>Load options</string> <key>Title</key> <string>Display title</string> <key>FullTitle</key> <string>Full display title</string> <key>Image</key> <string>ImagePath</string> <key>ImageData</key> <string>Image hex</string> OR <data>Image base64</data> <key>DriveImage</key> <string>ImagePath</string> <key>DriveImageData</key> <string>Image hex</string> OR <data>Image base64</data> <key>Hidden</key> or or <string>Yes/No/Always</string> <key>InjectKexts</key> or or <string>Yes/No/Detect</string> <key>NoCaches</key> <key>Kernel</string> <string>All/Newest/Oldest/First/Last/MostRecent/Earliest</string> <key>Type</key> <string>OSX/OSXInstaller/OSXRecovery/Windows/Linux</string> <key>BootBgColor</key> <string>RRGGBBAA</string> <key>CustomLogo</key> <key>KernelAndKextPatches</key> <dict> <key>AppleRTC</key> <key>KextsToPatch</key> <array> ... </dict> <array>...</array> Or / </dict> ... </array>
Disabled- Disables the entry so it is not taken into account.Volume- A volume name or GUID to be used when scanning for loader.VolumeType- The type of volume you want your custom entry to match. Can be a string with one type or an array with multiple types. Valid volume types areInternal,External,OpticalandFireWire.Path- Location to scan for the efi loader.Arguments- Arguments that are to be passed to the loader. Overides the default boot arguments in Boot / Arguments.AddArguments- Adds to the default boot arguments. For a SubEntry it adds to the arguments of the main entry.Title- Changes the display title. Uses the format "Boot <Title> from <VolumeName>"FullTitle- Sets the display title to only "<FullTitle>" without any format.Image- Path to a custom image file. Search path is root directory of entry volume, theme directory, clover directory, clover volume root directory, and finally os icon names.ImageData- Embedded custom image. Can be PNG or BMP format.DriveImage- Path to a custom drive image file. Search path is root directory of entry volume, theme directory, clover directory, clover volume root directory, and finally os icon names.DriveImageData- Embedded custom drive image. Can be PNG or BMP format.Hidden- Hides the entry. If value istruethe entry can be shown by pressing F3. If value isAlwaysthe entry can never be show.InjectKexts- Inject kexts. Valid options areYes,NoorDetect. UseDetectto inject kexts only if FakeSMC is not present in KernelCache or /S/L/E. ForOSX,OSXInstallerandOSXRecoverytype entries.NoCaches- Skip caches. ForOSX,OSXInstallerandOSXRecoverytype entries.Kernel- Set the linux kernel scan priority. If this option is not supplied Clover will show all kernels found. Valid options areNewest,Oldest,First,Last,MostRecent,Earliest. ForLinuxKerneltype entries.Type- The type of OS that is being scanned for. Valid types areOSX,OSXInstaller,OSXRecovery,Windows,Linux,LinuxKernel. If Type is not one of these it will be treated as all types.BootBgColor- Specifies the boot screen's background color. ForOSX,OSXInstallerandOSXRecoverytype entries.CustomLogo- Defines the boot screen logo style. For further information read Boot / CustomLogoSubEntries- (Default:true) Disables the default sub entries if set to false. Can also be used to create custom sub entries using the same structure as a main entry, any settings that aren't set in the sub entry will be inherited from the main entry.KernelAndKextPatches- Uses the same hierarchy and offers the same functionality found in KernelAndKextPatches, so you can selectively apply patches for each entry. Only works with revision 2797 or higher.
<key>Legacy</key> <array> <dict> <key>Volume</key> <string>Volume name or GUID</string> <key>Title</key> <string>Display title</string> <key>Hidden</key> <key>Disabled</key> <key>Ignore</key> <key>Type</key> <string>Windows/Linux</string> </dict> ... </array>
Volume- A volume name or GUID to be used when scanning for loader.Title- Changes the display title. Uses the format "Boot <Title> from <VolumeName>"Hidden- Hides the entry but can be shown by pressing F3.Disabled- Disables the entry so that is never shown.Ignore- Entry will be ignored, or not used, so it will not affect anything.Type- The type of OS that is being scanned for. Valid types areOSX,OSXInstaller,OSXRecovery,Windows,Linux,LinuxKernel. If Type is not one of these it will be treated as all types.
<key>Tool</key> <array> <dict> <key>Volume</key> <string>Volume name or GUID</string> <key>Path</key> <string>Loader path</string> <key>Arguments</key> <string>Load options</string> <key>Hotkey</key> <string>G</string> <key>Title</key> <string>Display title</string> <key>FullTitle</key> <string>Full Display title</string> <key>Hidden</key> <key>Disabled</key> <key>Ignore</key> </dict> ... </array>
More explanation will come.
<key>ShowOptimus</key>
Rev 4222 Tested on Dell Latitude E6430 which can be powered with Optimus enabled or disabled in BIOS.
The criteria is a number of videocard found. 2 = Embedded Intel + Discrete == "Intel" 1 = Discrete only == "Discrete"
I am not sure if someone else needed this feature so default behaviour to be not shown.
Rev 4719
Added prelang kbd option if want to keep language when updating macOS with native NVRAM.
- This is the key to fixing macOS language problems when using native NVRAM.
- This is macOS bug for long time ago.
- When using only
AptioMemoryFixorOsxAptioFixV3withoutEmuVariableUefi - When using a language other than English
You can fix issues below if use this key:
<key>GUI</key> <dict> <key>KbdPrevLang</key> <key>Language</key> <string>ru:0</string> <----- you want language </dict>
-
mixed language in restart popup after updating macOS.
-
always keep english when updating macOS in recovery despite to user already use other language in macOS.
Rev 4644 A possibility to choose between Light and Dark embedded themes
<key>GUI</key> <dict> <key>Theme</key> <string>embedded</string> <key>EmbeddedThemeType</key> <string>Dark</string>
Possible values Dark/Light/SVG /Daytime
The result:
Rev 4773
Daylight support in Clover GUI (like in Mojave). You should choose
<key>GUI</key> <dict> <key>Timezone</key> <integer>3</integer> <key>Theme</key> <string>embedded</string> <key>EmbeddedThemeType</key> <string>Daytime</string>
Then BIOS time + Timezone will be compared to 8:00 of morning and 20:00 of evening and set light type or dark.
Rev 4774
Clovy SVG theme has os_moja_night icon and Background_night to choose depending on daylight.
Rev 4794
Implemented command line to manage boot.efi output
Explanations by vit9696 here.
By default I set command line as "log=0"it means you will not see long output from system start to ++++++
The setting can be changed inClover GUI> Options> System Parameters
Rev 4840
Sync and Async sound play.
Sync play - sound play before enter Clover GUI. Clover GUI started after the sound is finished.
Async play - sound started to play before Clover GUI started and continue playing when GUI is ready.
To switch edit config.plist
<key>GUI</key> <dict> <key>PlayAsync</key>
Rev 4847-4852
There is interface in Clover GUI to tune startup sound parameters.

Computer will play a sound before enter Clover GUI. To do this you have to
-
Use CloverX64.efi revision 4852 or up.
-
Place AudioDxe-64.efi into drivers64 and drivers64UEFI. Playing is possible in both legacy and UEFI modes. AudioDxe.efi is included into Clover project and will be differ from original by Goldfish64 but almost compatible.
-
Place sound.wav and may be sound_night.wav into your theme folder, for example /EFI/CLOVER/theme/Clovy/. The sound must be 16bit, and 44100 or 48000Hz. But I also made conversion on the fly so 8000Hz is also supported.
-
Tune sound output in Clover GUI as on screen above. The settings will be stored in NVRAM and used next restart. With legacy Clover or systems without nvram you have to use EmuVariableUefi.efi and rc.scripts to save nvram.plist. For very new systems like Z370 where nvram is not working in macOS there is a chance that the nvram is working on Clover level and so all will works. SIC! Legacy Clover saved Variables only with Apple guid so why it will not work. After some discussing I may rebuild the system to use AppleBootGuid. In this case the system will not be compatible with the original driver but will work with legacy systems.
No more needs in BootChimeCfg and BootChimeDxe while the compatibility still remains
<key>Graphics</key> <dict> ... </dict>
This parameter group is made for injecting video card properties as done, for example, by Natit.kext. There are many different parameters that are injected, mostly constants, some of them calculated, some of them defined in the internal table and only a few parameters can be adjusted with the configuration file.
<key>Inject</key>
Enables graphics injection, which is necessary for a working system. It is only advised to disable it, if you do not know a better method. Some video cards, for instance Nvidia GTX 6xx or AMD Radeon HD 6xxx do not require injection and it will automatically be disabled without user interaction. At least it is enough to reach the desktop.
Enabled by default.
<key>Inject</key> <dict> <key>Intel</key> </dict>
<key>Inject</key> <dict> <key>ATI</key> </dict>
<key>Inject</key> <dict> <key>NVidia</key> </dict>
<key>VRAM</key> <integer>1024</integer>
Amount of video memory in MB. It is determined automatically but no one will be harmed if you write a correct value. However, changing it has not helped anyone yet.
<key>LoadVBios</key>
Loads a video bios from a file, which needs to be stored at the directory EFI/CLOVER/OEM/[model]/ROM or EFI/CLOVER/ROM with the name [vendor]_[device].rom, for instance 1002_68d8.rom. Sometimes it makes sense to load video bios manually, for example when you need a patched version or when the video card does not show it to the system - like mobile Radeon cards. In this case it is enough to set this parameter to Yes without providing any file. Clover will read the video bios from legacy memory at 0xC0000, where it is present most of the times, and enable functionality. Apparently the video bios written to the card's ROM does not match the one stored at address 0xC0000 - the shadow ROM. In short:
<true/>- Use for mobile Radeon cards without any external file. Can also be used to supply a legacy video bios to cards, which only contain a UEFI video bios.<false/>- For all other variants
<key>DualLink</key> <integer>0</integer>
Default is 1.
Some systems show a quartered screen. Use 0 to solve this problem, as showed in the example above.
<key>PatchVBios</key>
Clover applies corrections to the shadow ROM at address 0xC0000 to allow support of the highest monitor resolution. For instance, a monitor's EDID contains the mode 1920x1080 but the video bios does not. Clover will apply it as the first mode to be used. In case the monitor does not produce an EDID, it can be injected manually.
In case ScreenResolution in section GUI is set, it will be used for this patch.
Should the automatic patch fail, then you can specify a manual one.
<key>PatchVBiosBytes</key> <array> <dict> <key>Find</key> <data>gAeoAqAF</data> <key>Replace</key> <data>gAeoAjgE</data> </dict> </array>
This example applied to an AMD Radeon HD 6670 video bios, resulting in a replacement of mode 1920x1440 with mode 1920x1080. It is advised to choose a mode with the same horizontal resolution.
It is possible to apply multiple patches. An Nvidia video bios, for instance, was successfully modified with four patches.
<key>EDID</key> <dict> <key>Inject</key> <key>Custom</key> <data>AP///////wAyDADfAAAAAAASAQOAIRV4CunVmVlTjigmUFQAAAABAQEBAQEBAQEBAQEBAQEB3iGgcFCEHzAgIFYAS88QAAAY3iGgcFCEHzAgIFYAS88QAAAAAAAA/gBXNjU3RwAxNTRXUDEKAAAA/gAjMz1IZYSq/wIBCiAgAJo=</data> <key>VendorID</key> <string>0x1006</string> <key>ProductID</key> <string>0x9221</string> </dict>
Old keys InjectEDID and CustomEDID were moved here.
Inject parameter is useful when an EDID exists but is not seen by Apple's drivers. In this case it is enough to set this option to <true/>. Clover will automatically extract the EDID and provide it to the drivers. See Mobile Radeons for more info. For monitors without DDC and for UEFI-only computers a custom EDID is needed.
Custom parameter is for providing custom EDID when it's missing. The main requirement is to have a correct maximal resolution.
Another possibility is to use ViewSonic EDID Editor v3.1.5 that can easily be ported to Mac, if needed.
An EDID from a Dell Inspiron will be used in the sample configuration file with a matrix of 1440x900.
A custom EDID will also be used for automatic video bios patching. Look above.
You can override VendorID and ProductID in EDID.
Rev 4351, 4355
Additional patches for EDID.
Now config.plist may contain follow EDID section:
EDID #Custom AP///////wAGECGSAAAAAAASAQOAIRV4CunVmVlTjigmUFQAAAABAQEBAQEBAQEBAQEBAQEB3iGgcFCEHzAgIFYAS88QAAAY3iGgcFCEHzAgIFYAS88QAAAAAAAA/gBXNjU3RwAxNTRXUDEKAAAA/gAjMz1IZYSq/wIBCiAgAJo= #Inject #ProductID 0x9221 #VendorID 0x1006 #HorizontalSyncPulseWidth 100 #VideoInputSignal 0xA5
Custom is EDID obtained or created manually. You mostly don't need do it as Clover usually can obtain it by himself. Inject=true informs Clover to inject Custom or Discovered EDID into video device properties. You have to set it to true is you do patches. ProductID and VendorID- may be you want to mimic your display to be Apple manufactured. But you should know what you do. Making this patch I found that Brightness control stop working. Remove this patch and brightness control is working again! HorizontalSyncPulseWidth - this patch helps to resolve garbled screen at boot with Intel graphics. Known problem of 8 apples.
I see that the patch is still needed
<dict> <key>Comment</key> <string>Patch 8 apples</string> <key>Disabled</key> <key>Find</key> <data>AQAAdRc=</data> <key>MatchOS</key> <string>10.11</string> <key>Name</key> <string>IOGraphicsFamily</string> <key>Replace</key> <data>AQAA6xc=</data> </dict>
but this patch alone is not full solution. The apple is broken for a several seconds and then restored. With new Clover setting HorizontalSyncPulseWidth=100 there is a full solution. The image is good and not jumped.
VideoInputSignal - this is additional patch for the same problem but I found no inluence. Definition of the value is follow Bit 7=1 Digital input. If set, the following bit definitions apply:
Bits 6–4 Bit depth: 000=undefined, 001=6, 010=8, 011=10, 100=12, 101=14, 110=16 bits per color, 111=reserved Bits 3–0 Video interface: 0000=undefined, 0001=HDMIa, 0010=HDMIb, 0100=MDDI, 0101=DisplayPort
My default values for desktop 0x80 (Digital, all undefined), for laptop 0x90 -6bits per color?! - not good. It seems value 0xA0 will be better if used. And I don't know interface for intenal screen.
Credits. I was informed by Derek about this patch but initially it was wrong (byte 64 while it must be 63+65). https://github.com/1and1get2/Clover/commit/ee301efdcce8ae1e47be21267490753a0c145c1d The discussion was at tmx site as well wrong and without result. And I don't know who is initial inventor because in those matter it can't work properly.
<key>VideoPorts</key> <integer>2</integer>
The amount of ports on a video card, including TVO and/or HDMI. The chosen Apple framebuffer may not correspond to our real video card.
<key>FBName</key> <string>Macaque</string>
This parameter is specific to AMD Radeon cards, which have a bunch of different framebuffers without any specific pattern. For a wide range of common video cards Clover will automatically choose a suiting framebuffer name. Feel free to set your own if you want. If you do not know what to write here, delete this parameter completely.
Do not use Macaque! It is solely used for absurdity. But no - people still use it in their configurations!
Small guidance table:
*Series v / Type >* |Mobile |Desktop ----------------------|--------|-------- HD 5000 |Alouatta|Baboon HD 6000 |Cuttail |Ipomoea HD 7000 |Pondweed|Futomaki
<key>NVCAP</key> <string>04000000000003000C0000000000000A00000000</string>
This parameter is only useful for Nvidia video cards and configures types and usage of video ports. The example line contains 40 capitalised hexadecimal digits. Theory is missing in this case and praxis shows controversial results.
Following table exists (found somewhere on insanelymac) but its correctness is debatable:

You can also find other methods on calculating a correct value for this line.
Clover will try to generate one according to the video bios.
<key>display-cfg</key> <string>03010300FFFF0001</string>
This parameter is also just for Nvidia cards. For details see the topic on projectosx. However the listed examples are controversial. You can see real configurations in this topic. Apparently it is best to just let Clover handle this value. Leave it out completely and let Clover do the calculation.
<key>ig-platform-id</key> <string>0x01620005</string>
This parameter is used to enable the internal Intel HD 4000 video card. Until now no common rule for selecting a value was found, so either let Clover handle this parameter or use another one if it does not work.
Here is a table with possible values:
| Value | Type | Ports |
|---|---|---|
| 0x01660000 | Mobile | 4 ports: 1 LVDS, 3 DP |
| 0x01660001 | Mobile | 4 ports: 1 LVDS, 1 HDMI, 2 DP |
| 0x01660002 | Mobile | 1 port: LVDS |
| 0x01660003 | Mobile | 4 ports: 1 LVDS, 1 HDMI e 2 DP |
| 0x01660004 | Mobile | 1 port: LVDS |
| 0x01620005 | Desktop | 3 ports: DP |
| 0x01620006 | Desktop | 0 ports |
| 0x01620007 | Desktop | 0 ports |
| 0x01660008 | Mobile | 3 ports: 1 LVDS, 2 DP |
| 0x01660009 | Mobile | 3 ports: 1 LVDS, 2 DP |
| 0x0166000a | Mobile | 3 ports: 2 DP, 1 HDMI |
| 0x0166000b | Mobile | 3 ports: 2 DP, 1 HDMI |
Rev 4296
A possibility to de-init Radeon cards. It was very old problem since ElCapitan that AMD Radeon HD6xxx and up will not wake after sleep if used as first card. If the card is secondary and CSM enabled then the card works fine. So the differences is initialisation. The solution was found by vit9696 and used in private WhateverGreen.kext. Then Mieze proposed the solution as ACPI patch. Now I included this into Clover.
You have to set in config.plist:
<key>RadeonDeInit</key>
Related threads No graphics / USB / Audio after wake
Tracing back the AMD GPU wakeup issue to its origin
KernelAndKextPatches
<key>KernelAndKextPatches</key> <dict> ... </dict>
This parameter group enables patching on-the-fly.
Requirement: booting with kernel cache or with the key NoCache. Should the cache be missing because of other reasons, then patching will not be enabled.
<key>Debug</key>
Enables detailed output describing the patching process. This prints kernel patches and kext injection debug messages to the screen, since standard boot log is already closed. Useful for debugging purposes.
<key>KernelCpu</key>
Eliminates kernel panics related to an unsupported CPU like Yonah, Atom or Haswell for old systems. However, the kernel has other algorithms which will not work correctly when using an unsupported CPU and this patch will not solve all problems. It is highly unlikely that this will work with a Pentium M, Pentium 4 or and AMD. The use of a special replacement kernel is advised in such cases.
<key>FakeCPUID</key> <string>0x010676</string>
Fake CPUID is intended to be a replacement for the KernelCPU patch. It influences the kernel and AppleCPUPowerManagement as well.
If you want to install OSX with an unsupported CPU then you'll need to fake its ID to avoid kernel panics. Useful if you're trying to install OSX with an Atom CPU, or 10.7.2 with an IvyBridge CPU.
For these cases Clover allows you to set FakeCPUID in config.plist or even through the GUI, in the Binaries patching menu.
The following table shows all supported CPUIDs by different OS X versions:

<key>AppleIntelCPUPM</key>
AsusAICPUPM key was renamed to AppleIntelCPUPM.
Some vendors, like ASUS, restrict the use of MSR register 0xE2 in their power management module to ReadOnly. On Sandy/Ivy Bridge systems the kext AppleIntelCpuPowerManagement will try to write to this register and cause a kernel panic. This patch will eliminate the kext's write operations.
<key>KernelAndKextPatches</key> <dict> <key>KernelPm</key> </dict>
Kernel power management patch for Haswell with locked msrs. Works with 10.8.5 and 10.9 kernels.
<key>AppleRTC</key>
OS X has compatibility issues with a BIOS CMOS resulting in its reset on each wake after sleep and reboot, which is noticeable in a loss of BIOS settings. Mostly Gigabyte motherboards are affected. Usually it can be solved by patching Device(RTC) in the DSDT. If this does not help, the kext itself can be patched, which is done here.
<key>KernelLapic</key>
HP notebooks have lapic problems, which can be solved by using the boot parameter cpus=1 or by using this option.
<key>KernelHaswellE</key>
Haswell-E setups are currently not supported by the OS X kernel (as of OS X 10.10.2). This patch gets rid of the blocking compatibility checks. Note that this will not enable Power Management or similar features.
<key>KextsToPatch</key> <array>
Apart from the built-in patches you can create your own ones providing following data: the binary file name, the data to find and the data to replace with - both in hexadecimal. The data length must be equal. A smaller replacement data line can be filled with zeroes.
-
The following example shows a patch for VoodooHDA replacing the string Headphones with Telephones:
<key>KextsToPatch</key> <array> <dict> <key>Name</key> <string>VoodooHDA</string> <key>Find</key> <data>SGVhZHBob25lcwA=</data> <key>Replace</key> <data>VGVsZXBob25lcwA=</data> </dict> </array>
Note: the patch data is encoded in base64 due to the data type of the field.
Common patches are:
-
TRIM function for non-Apple SSDs:
<dict> <key>Name</key> <string>IOAHCIBlockStorage</string> <key>Find</key> <data>QVBQTEUgU1NEAA==</data>
<key>Replace</key> <data>AAAAAAAAAAAAAA==</data> </dict> -
Define external drivers as internal to fix yellow drive icons:
<dict> <key>Name</key> <string>AppleAHCIPort</string> <key>Find</key> <data>RXh0ZXJuYWw=</data> <key>Replace</key> <data>SW50ZXJuYWw=</data> </dict>
-
Allow booting with a MacPro4,1 or MacPro5,1 SMBIOS definition without ECC memory:
<dict> <key>Name</key> <string>AppleTyMCEDriver</string> <key>Find</key> <data>cgoATWFjUHJvNCwxAE1hY1BybzUsMQBY</data> <key>Replace</key> <data>cgoAAAAAAAAAAAAAAAAAAAAAAAAAAABY</data> </dict>
It is sometimes necessary to additionally modify a kext's Info.plist. In this case following syntax is used:
<dict> <key>Name</key> <string>AppleHDAController</string> <key>Comment</key> <string>Patch_to_not_load_this_driver</string> <key>InfoPlistPatch</key> <key>Find</key> <string>0x04020000</string> <key>Replace</key> <string>0x44220000</string> </dict>
Side note: The patch is supposed to be done in the cache. If you patch an Info.plist to allow the loading of a kext, then it is not yet present in the cache. You will need to reboot twice. First with the key NoCaches to allow FSInject to load the kext and a second time for the cache to be patched successfully. Not working in sytem 10.8 and later
Not working in BigSur and later
<key>ForceKextsToLoad</key> <array> <string>\System\Library\Extensions\AppleHDA.kext</string> <string>\Extra\Extensions</string> </array>
Force load kexts (and plugins) from booted volume so it can be patched. It also accepts directories to force load/inject every kext in the folder.
Not working since 10.11
<key>ATIConnectorsController</key> <string>6000</string>
For a fully working AMD video card injecting properties into the registry is not enough. Additionally a modification of the connectors in the according controller binary file is necessary. The example points to the 6000 series controller file:
<key>ATIConnectorsData</key> <string>000400000403000000010000210302040400000014020000000100000000 040310000000100000000001000000000001</string> <key>ATIConnectorsPatch</key> <string>040000001402000000010000000004040004000004030000000100001102 010500000000000000000000000000000000</string>
This method works for systems using Mac OS X 10.7 or newer.
More info in the post of bcc9 on insanelymac.
Rev 4250
<key>KernelXCPM</key>
XCPM patch for IvyBridge CPUs.
<key>RtVariables</key> <dict> ... </dict>
Parameter group for defining runtime variables affecting Apple services or Clover itself.
<key>MLB</key> <string>XXXXXXXXXX</string>
Digits and letters, 17 in length, describing the motherboard's serial number. No special rule exists here. The best option is to choose a real serial number and to replace digits in the middle. For instance, write …SLICE… or whatever comes to your mind.
<key>ROM</key> <data>AAAAAAAA</data> OR <string>UseMacAddrX</string>
Twelve hexadecimal digits, often corresponding to the MAC address of the ethernet card. According to several reports this value can be random.
Since revision 3051 Clover can detect the LAN MAC address of an ethernet device and use it as ROM. For UEFI, it will first check the UEFI protocol for LAN information, but for legacy it will attempt to get it from the hardware instead, and because this procedure is dangerous you'll need to enable the functionality by specifying the LAN device with: UseMacAddr0 or UseMacAddr1 (up to 4 devices are calculated but only 2 will be used). If UseMacAddrX is not set then the MAC address will not be tested for legacy; the UEFI method is safe and will always be tested.
- Since revision r3259
<key>CsrActiveConfig</key> <string>0x3</string>
Controls System Integrity Protection (SIP), see Wikipedia.
Relevant user options for SIP:
- csr-active-config 0x0 = SIP Enabled (Default). Some drivers will not work.
- csr-active-config 0x3 = SIP Partially Disabled (Loads unsigned kexts but not unapproved)
- csr-active-config 0xFEF = SIP Disabled completely (SIC! bit 0x10 shouldn't be set!)
- csr-active-config 0xA87 = SIP Disabled enough for hackintosh
- Since revision r3259
BooterConfig
0x28
<key>SMBIOS</key> <dict> ... </dict>
This group of parameters is used to mask your PC as a Mac. Clover will do this task automatically based on the given processor, video card and signs of mobility. However, you may choose differently. Get the MacTracker application, choose a model you like and find matching values. Chameleon Wizard may help you with this task. There is not much to comment here, these values are not for beginners. If you know them - change them; otherwise leave it. Calculating them is mostly not possible.
<key>ProductName</key> <string>MacBook1,1</string>
SMBIOS.table1->ProductName
You can set only this value and Clover will adjust the rest of the parameters automatically according to the model, so you can leave them out. Otherwise your custom values will be preferred.
Clover has built-in definitions for following models:
MacBook1,1MacBook2,1MacBook4,1MacBook5,2MacBook8,1MacBook9,1MacBook10,1MacBookPro5,1MacBookPro6,2MacBookPro8,1MacBookPro8,3MacBookPro9,2MacBookPro11,4MacBookPro12,1MacBookPro13,1MacBookPro13,3MacBookPro14,1MacBookPro16,1MacBookAir3,1MacBookAir5,2MacBookAir6,2Macmini2,1Macmini5,1Macmini6,2Macmini7,1iMac8,1iMac10,1iMac11,1iMac11,2iMac11,3iMac12,1iMac12,2iMac13,1iMac13,2iMac14,2iMac15,1iMac17,1iMac18,2iMac18,3iMac19,1MacPro3,1MacPro4,1MacPro5,1MacPro6,1MacPro7,1
All other models require setting all fields manually.
In case the model is not set, Clover will automatically choose one for you.
Some parameters like BoardSerialNumber should be generated and specified manually to be unique though.
<key>Family</key> <string>MacBookAir</string>
It is equal to model without model number.
SmUUID 00000000-0000-1000-8000-010203040506
This is the UUID, which is written into the SMBIOS table. Apparently it makes sense to fill the last pairs of digits with the MAC address of your ethernet card. This UUID will also be used in case CustomUUID is missing. It also be used to initialize ROM RtVariable (use by iMessage) in case ROM is missing.
<key>FirmwareFeatures</key> <string>0xC0001403</string>
SMBIOS.table128->FirmwareFeatures
These digits exceed the standard SMBIOS and are part of Apple's specification. Different real Macs show different values and no description of the meaning exists. The only clue is provided by the sources of the bless command:
&& (featureFlags & 0x00000001)) { contextprintf(context, kBLLogLevelVerbose, "Legacy mode suppported\n");
Therefore, we too need an odd number here.
    <key\>ExtendedFirmwareFeatures</key\>
<string\>0x8FE001403</string\>
<key\>ExtendedFirmwareFeaturesMask</key\>
<string\>0xFFFFFFFFFF</string\>
SMBIOS.table128-> ExtendedFirmwareFeatures
macOS Monterey asked for bit 35 which is not fitted in 32bits of FirmwareFeatures. So new field in SMBIOS and in NVRAM was implemented ExtendedFirmwareFeatures and corresponding ExtendedFirmwareFeaturesMask. And then old FirmwareFeatures will not be used in the case new field is present. Clover automatically assign some value for you hardware but you also may use this sample.
<key>SerialNumber</key> <string>W8000AAAAA</string>
Clover will use one specific value here per each model, which needs to be replaced by your own serial number. There are two formats of serial number, which one to use depends on the model. There are tools to generate a serial number for a given model, or it can be created manually, according to http://prasys.info/2009/11/understanding-mac-serial-number/ or something newer. The serial number used by Clover is most probably banned already.
<key>BoardSerialNumber</key> <string>C02032101R5DC771H</string>
SMBIOS.table2->SerialNumber
Don't mix it with system serial number. Clover will use one specific value here, which needs to be replaced by your own serial number. It is required for working iCloud and iMessage services (initialize MLB RtVariable if missing). The length must be 17 digits, consisting of letters from the Latin alphabet and numbers. The serial number used by Clover is most probably banned already.
BiosVersion MB11.YACC.0061.53PH.B03
We see only the first, third and fifth groups in System Profiler, but really we should specify the full Boot ROM version in config.
<key>BiosReleaseDate</key> <string></string>
It's the release date of Boot ROM specified in BiosVersion key.
<key>BoardType</key> <integer>10</integer>
SMBIOS.table2->BoardType
This parameter was introduced for the MacPro, which uses 11 (ProcessorBoard) instead of 10 (Motherboard), apparently for historical reasons. The effect is not clear, however it can be seen in Profiler.
<key>Mobile</key>
Usually Clover will automatically detect the mobility of a system, e.g. if is powered by a battery, needs energy saving, or not. Change it to trick the system into thinking that a battery is not available, or otherwise.
<key>ChassisType</key> <string>0x10</string>
SMBIOS.table3->Type
Used as an indirect indication for platform mobility. Here is a table according to SMBIOS standards:
Type |Value :---|--- MiscChassisTypeOther |0x01 MiscChassisTypeUnknown |0x02 MiscChassisTypeDeskTop |0x03 MiscChassisTypeLowProfileDesktop |0x04 MiscChassisTypePizzaBox |0x05 MiscChassisTypeMiniTower |0x06 MiscChassisTypeTower |0x07 MiscChassisTypePortable |0x08 MiscChassisTypeLapTop |0x09 MiscChassisTypeNotebook |0x0A MiscChassisTypeHandHeld |0x0B MiscChassisTypeDockingStation |0x0C MiscChassisTypeAllInOne |0x0D MiscChassisTypeSubNotebook |0x0E MiscChassisTypeSpaceSaving |0x0F MiscChassisTypeLunchBox |0x10
Clover will use a value according to the set Mac model, like it is used in real Macs. The effect, except mobility settings, is unclear.
<key>ChassisAssetTag</key> <string>LatitudeD420</string>
SMBIOS.table3->AssetTag
This field is never used with real Macs. We can use it for our own purpose, for example in the HWSensors project.
<key>Trust</key>
Used to give priority to memory descriptor values found in SMBIOS or SPD. Change if your memory is described incorrectly in Mac. Default is <true/>.
<key>NoRomInfo</key>
SMBIOS.table11->Apple ROM Info
Clover generated some info the System Profiler like some real Macs:
Apple ROM Info: Apple ROM Version. Board-ID : Mac-7BA5B2D9E42DDD94 ⌘ Powered by Clover revision: 5145 (master, commit a8d020845)
But if you don't want to see this you may use this key with value
<key>Memory</key> <dict> <key>Channels</key> <integer>2</integer> OR <string>1</string> <key>SlotCount</key> <integer>24</integer> OR <string>4</string> <key>Modules</key> <array> <dict> <key>Slot</key> <integer>0</integer> OR <string>5</string> <key>Size</key> <integer>2048</integer> OR <string>4096</string> <key>Frequency</key> <integer>1600</integer> OR <string>1333</string> <key>Vendor</key> <string>Some Company</string> <key>Part</key> <string>123456ABCDEF</string> <key>Serial</key> <string>ABCDEF123456</string> <key>Type</key> <string>DDR/DDR2/DDR3</string> </dict> </array> </dict>
Inject custom memory module tables into SMBIOS if original SPD and SMBIOS provide incorrect or incomplete information.
-
Channels- Number of hardware channels supported by your memory chipset, usually two. -
SlotCount- Total count of memory slots in your system. Max 24 (for now). -
Modules- An array of INSTALLED modules, if your slot is empty don't include an entry for it.For each module:
-
Slot- Physical slot location in which the module is installed. -
Size- Size of the module in megabytes. -
Frequency- Speed of the module in megahertz. -
Vendor- Memory manufacturer name -
Part- The part number identifier. -
Serial- The module's serial number. -
Type- The memory module's type.
<key>Slots</key> <array> <dict> <key>Device</key> <string>ATI/NVidia/LAN/WIFI/Firewire</string> <key>ID</key> <integer>2</integer> <key>Name</key> <string>Device name</string> <key>Type</key> <integer>0</integer> </dict> </array>
AAPL,slot-name injector. It allows you to add devices into System Profiler's PCI Cards section. This is a property that is usually injected by DSDT or property strings but this is a wrong way to go.
The injection of this property requires Name (_SUN, 0x02) to be present in the device's DSDT section. You can set this to any one byte number but 0 and 1 because of compiler optimizations. If you don't use a custom DSDT you may instead set DSDT Mask Fix bits for those devices. Sample:
Device (GIGE) { Name (_ADR, 0x00050000) // _ADR: Address Name (_SUN, 0x02) // _SUN: Slot User Number
Device- For now it can only be one of these: ATI, NVidia, LAN, WIFI or Firewire.ID- Must be the same number defined into your DSDT in_SUN.Name- The string that you want to assign toAAPL,slot-name.Type- Set to 0 for PCI, 1 for PCIe 1x, 2 for PCIe 2x, etc.
<key>SystemParameters</key> <dict> ... </dict>
CustomUUID 511CE200-1000-4000-9999-010203040506
Unique identification number of your computer. If not set, an automatically generated UUID will be used. Customise it with hexadecimal digits for full control over your hackintosh.
Do not use this example value. It is by far not unique, as there are enough fools who copied it already.
<key>InjectSystemID</key>
The number described above can be injected differently and transformed by the OS into another ID. The aim is to provide an option for Chameleon users to replicate their UUID. Set to <true/> and change CustomUUID to match the UUID used with Chameleon found in registry at IODeviceTree:/efi/platform>system-id. Profiler will show a different UUID that will match the one generated with Chameleon. Not Chameleon users should simply set .
<key>BacklightLevel</key> <string>0x0101</string>
Monitor brightness level. However, only few systems will be affected by this parameter. It also is read from NVRAM. By default a value given by the system is used. Specifying it in the configuration file will override it.
<key>InjectKexts</key> <string>Detect/Yes/No</string> or or
Recommended value true This key defines the global policy regarding kext injection.
Yesor<true/>- Always inject kexts from /EFI/CLOVER/kexts/Noor<false/>- Never inject kextsDetect- Kexts from /EFI/CLOVER/kexts/ will be injected only if FakeSMC is not present in the kernelcache
In case Custom Entries are defined, its own InjectKexts key will override this global one.
<key>NoCaches</key> <string>Yes/No</string> or or
If enabled, the cache will be skipped on each boot. And just like InjectKexts, this key defines the global rule, so the value defined on Custom Entries will override this one. It works on systems up to 10.7.5. Recent macOS don't allow skip caches.
<key>NvidiaWeb</key>
If key value is true, it will allow access to load and use Nvidia WebDriver kexts under the new MacOS systems (10.12-13). It is not same as bootarg.
Rev 5119+
Included ➢ Quirks
A theme represents elements of a design: a banner, a background, icons, buttons, fonts - all united into one artistic conception.
Some themes are currently bundled with the installer package. You can install them all and later set which one you want to use.

Note: At some point in the future, themes will no longer be included in the installer and instead Clover will be shipped with a single embedded theme (which it already has).
You can now get themes from the new Clover Theme Repository by either downloading them manually using the Terminal. or DownGit
Clover's GUI can load and use .png and .icns formats.
Traditionally, the OS device icons (for example, os_cougar.icns), used Apple's ICNS format which encapsulates multiple image sizes in one file. When using .ICNS files with Clover, two image sizes are made use of: 128x128 and 32x32 pixels. Click the following link to the os_cougar.icns file from the BGM theme for an example: os_cougar.icns
However, Clover's .ICNS decoding only supports icon types which were introduced in OS X 10.0. OS X 10.7 introduced extra icon types which are currently not supported. For example, you can see in the following wiki link that a 128x128 pixel image created from OS X 10.7 and newer can use an OSType of ic07. This is not supported because even though Clover can read and decode the embedded .PNG file itself, it is not aware of the new type(s) to extract the data from within the ICNS file. http://en.wikipedia.org/wiki/Apple_Icon_Image_format
To help this situation, as of Clover r2231, the GUI can now also use .PNG images to represent the OS device icons. Clover can scale the .PNG images, if necessary, depending on the user/designers choice of the Badges->Swap option in the theme.plist.
Please note: Clover still expects to find an OS device icon with a .icns file extension. So even though the image may be a .png it still needs to have a .icns extension.
A complete Clover theme can contain many images which if not controlled can result in a theme directory being many megabytes is size. This has had a direct impact on Clovers' packaged installer which has grown considerably over the last year. As a result the themes that are in the packaged installer are being optimised so the files can be as small as possible whilst retaining the original design.
It's the responsibility of the designer to keep their images optimised and to also make sure they remove any unwanted excess. To help you do that, please read this insanleymac forum topic which is a basic overview of an original post from projectosx which is no longer available.
The theme settings are defined in theme.plist, which resides in the theme directory and is unique for each theme. For instance the path to the metal theme is /EFI/CLOVER/themes/metal/theme.plist.
Opening the existing theme.plist in a plist editor (recommended) or a text editor will show the xml structure which is described as follows.
<key>Author</key> <string>Slice</string> <key>Year</key> <string>2012</string> <key>Description</key> <string>Main metallic looking theme</string> <key>Theme</key> <dict>
Let Clover know the screen resolution that the theme was originally design at. This is so animation positions can be recalculated when using the theme at a different resolution. * Note, this is currently only used when using the newer positioning settings in the Anime array (see below).
<key>Origination</key> <dict> <key>DesignWidth</key> <integer>1920</integer> <key>DesignHeight</key> <integer>1080</integer> </dict>
Background Path MetalBack.png Type Crop Sharp 0x80 Dark
Path- Name (or path) of the background imageTypeCrop- Cut a big image to fit the monitor size or fill the remaining space with a solid colour without rescaling.Tile- Tile the image to fill the area.Scale- Stretch the image to occupy the whole screen, with cutting.
Increasing the image size produces square pixels, which can be minimised with smoothing. However, smoothing distorts the edges. Clover will detect them and the following parameter allows fine-tuning:
-
Sharp
- Minimal value
0x0- no detection, smooth edges. - Maximal value
0xFF(255) - Full detection, no smoothing.
- Minimal value
-
Dark
<true/>- Dark image with bright lines.<false/>- Bright image with dark lines.
The image format is PNG, optimally with a correct header. The "Preview" app for example saves them in a correct format.
Badges are small icons in the lower right corner of a loader entry. The initial design was to show disk in the main icon (like Boot Camp) and the operating system in the badge.
<key>Badges</key> <dict> <key>Show</key> <key>Inline</key> <key>Swap</key> <key>OffsetX</key> <integer>nn</integer> <key>OffsetY</key> <integer>nn</integer> <key>Scale</key> <integer>nn</integer> </dict>
Show- Show badges or notInline- Move badge to the information line of a chosen loader.Swapis ignored in this case. Take iClover theme as a reference.Swap- Swap the meaning of icons and badges. Icons will show the OS, badges the device type (not interesting to display them in this case).Scale- Sets the badge's scale to n/16 of original size. Examples (based on original image being 128x128px). A value of 5 results in scaling to 40x40px, 8 scales to 64x64px, 16 doesn't scale so leave at 128x128px.OffsetX- Sets the badge's horizontal position inside the main menu item.OffsetY- Sets the badge's vertical position inside the main menu item.
OffsetX and OffsetY set the number of pixels across and down from the top left corner of the OS device selection area and indicate where to draw the badge icon. Valid lowest value is 0, and the max valid value is calculated by subtracting the badge width (64px) from the with of the OS device selection area (Selection Big). If either value is larger than the result then the default position of the result is automatically set and the boot log will contain an entry similar to ‘User offset X nn is out of range’.
The banner is a centred image with limited dimensions depending on the monitor size. For instance, theme dawn has a banner with a dimension of 672x190px, which should be considered as a limit. If you do not use a background drawing, the banner should be opaque and its first pixel will determine the background colour. Otherwise you may use a trick and set transparency of the first pixel to 1%.
<key>Banner</key> <string>logo-trans.png</string>
UPDATE: Since rev2524 (and with better placement with rev2534) the Banner can now optionally use new positional settings as used for the animations.
<key>Banner</key> <dict> <key>Path</key> <string>logo_trans.png</string> <key>ScreenEdgeX</key> <string>left</string> <key>DistanceFromScreenEdgeX%</key> <integer>nn</integer> <key>ScreenEdgeY</key> <string>top</string> <key>DistanceFromScreenEdgeY%</key> <integer>nn</integer> <key>NudgeX</key> <integer>nn</integer> <key>NudgeY</key> <integer>nn</integer> </dict>
See the Anime section for an explanation of these settings.
Components are groups of UI elements, you may specify which groups your theme uses.
<key>Components</key> <dict> <key>Banner</key> <key>Functions</key> <key>Tools</key> <key>Label</key> <key>Revision</key> <key>MenuTitle</key> <key>MenuTitleImage</key> </dict>
Banner- Show or hide the banner image.Functions- Show or hide the system functions such as About, Restart, and Shutdown.Tools- Show or hide the system tools such as Shell.Label- Show or hide the entry description label.Revision- Show or hide the Clover GUI revision version.MenuTitle- Show or hide the menu title on the help, about and options screens.MenuTitleImage- Show or hide the menu icons that are drawn beside the menu text on the help, about and options screens.
<key>Selection</key> <dict> <key>Color</key> <string>0xF3F3F380</string> <key>Small</key> <string>Select_trans_small.png</string> <key>Big</key> <string>Select_trans_big.png</string> <key>OnTop</key> <key>ChangeNonSelectedGrey</key> </dict>
Color- Row selection colour in menus, optimally matching the overall theme colours. Example0x11223380: red=0x11, green=0x22, blue=0x33, alpha=0x80. The transparency (alpha) value of 0x80 is 50%. 0x00 means a fully transparent selection, 0xFF means a solid colour.Small- Selection image for small option icons in the lower GUI row.Big- Selection image for big OS icons in the upper GUI row.OnTop- If true, the selection image will be drawn over the main image.ChangeNonSelectedGrey- Draw all non selected device icons and their associated badges as greyscale.
Note: The Selection Big image is to be sized at 144x144 pixels when using 128x128 pixel device icons, or 288x288 pixels when using 256x256 pixel device icons. The Selection Small image is to be sized at 64x64 pixels. Note2: Clover r2707 or newer is required for full support of positioning device icons sized 256x256 pixels.
Change the vertical position of some of the GUI's elements.
<key>Layout</key> <dict> <key>BannerOffset</key> <integer>nn</integer> <key>ButtonOffset</key> <integer>nn</integer> <key>MainEntriesSize</key> <integer>nn</integer> <key>TextOffset</key> <integer>nn</integer> <key>TileXSpace</key> <integer>nn</integer> <key>TileYSpace</key> <integer>nn</integer> <key>Vertical</key> </dict>
BannerOffset- Increase the space (pixels) under the banner. Effectively pushing the OS icons down on the main screen.ButtonOffset- Move the vertical position (pixels) of the tool buttons.MainEntriesSize- The size of the main device icons is set internally in the code to 128. Changing this value will instruct Clover to scale the device icons. For example, using a value of 256 on a theme with 128px icons will show the device icons scaled up to 256px. Note: badges will not be affected and will more than likely need repositioning.TextOffset- Move the vertical position (pixels) of the Main menu text; the one that reads 'Boot Mac OS X from xxxx'.TileXSpace- The spacing between the Selection Big area of each main device icon. Internally, this defaults to 8. So if using 128x128 pixel icons with a 144x144 pixel selection big, the next device icon's selection big area will be drawn 144 + 8 pixels to the right of the previous one.TileYSpace- The spacing between the Selection Big area of the main device icons and the Selection Small area of the smaller tool buttons. Internally, this defaults to 24. Note, the ButtonOffset setting also affects this position (needs to be verified).Vertical- Displays the OS Icons vertically down the right edge of the screen. Set either true or false. (Introduced in rev2535).
Note experiment moving these by small amounts (ie. 10's pixels and not 100's pixels because when viewed at a smaller resolution this could be drawn off screen).
<key>Font</key> <dict> <key>Type</key> <string>Load</string> <key>Path</key> <string>BoG_LucidaConsole_10W_NA.png</string> <key>CharWidth</key> <integer>10</integer> </dict>
- Type
- Font type
-
Alfa- built-in font -
Gray- built-in font -
Load- Load external font -
Path
- External font path, e.g.
BoG_LucidaConsole_10W_NA.png
- Following conventions exist for the file name (blackosx):
- BoG - Black on Gray
- LucidaConsole - original font name
- 10W - font width
- NA - No Antialiasing
- Following conventions exist for the file name (blackosx):
-
CharWidth- Character width, default is 16
One way to create fonts is by using a bash script together with Imagemagick. See this thread at insanelymac
The settings menu can be bigger than the actual vertical size of the monitor and in this case scroll bars will appear.
<key>Scroll</key> <dict> <key>Width</key> <integer>N</integer> <key>Height</key> <integer>N</integer> <key>BarHeight</key> <integer>N</integer> <key>ScrollHeight</key> <integer>N</integer> </dict>
Width-Height-BarHeight-ScrollHeight-
A theme may contain animated images in PNG format.
<key>Anime</key> <array> <dict> <key>ID</key> <integer>1</integer> <key>Path</key> <string>logo_3D</string> <key>Frames</key> <integer>15</integer> <key>FrameTime</key> <integer>200</integer> <key>Once</key> <key>ScreenEdgeX</key> <string>left</string> <key>DistanceFromScreenEdgeX%</key> <integer>nn</integer> <key>ScreenEdgeY</key> <string>top</string> <key>DistanceFromScreenEdgeY%</key> <integer>nn</integer> <key>NudgeX</key> <integer>nn</integer> <key>NudgeY</key> <integer>nn</integer> </dict> </array>
ID
- Determines the animation type and placement
-
1- Logo -
2- About -
3- Help -
4- Options -
5- Graphics -
6- CPU -
7- Binaries -
8- DSDT -
9- BOOT Sequence -
10- SMBIOS -
11- Tables Dropping -
12- RC Scripts Variables -
13- PCI Devices -
14- Themes -
21- Apple -
22- WinXP -
23- Clover -
24- Linux -
25- BootX64.efi -
26- Vista -
30- Recovery -
34- Tiger -
35- Leopard -
36- Snow Leopard -
37- Lion -
38- Mountain Lion -
39- LynxPath
- Animation name. Points to a folder containing the animation sequence. It is possible to omit frames to create a pause while the last working frame is being used:
-
ML_Anim_000.png
-
ML_Anim_001.png
-
ML_Anim_008.png
-
ML_Anim_014.png
-
Frames- Total frame amount. Missing frames will be replaced using above method. -
FrameTime- Time between each single frame in milliseconds.Once
- Loop setting
-
<true/>- Animation is played once until the menu is quit with the Esc key or pressing the right mouse button. -
<false/>- Animation is looped endlessly without any pause between the last and first frame. -
ScreenEdgeX- the edge of the screen to use for the calculation. Options are left or right. -
DistanceFromScreenEdgeX%- % away from left or right of the screen edge to place the animation. Value is as an integer. -
ScreenEdgeY- the edge of the screen to use for the calculation. Options are top or bottom. -
DistanceFromScreenEdgeY%- % away from top or bottom of the screen edge to place the animation. Value is as an integer. -
NudgeX- Fine tune the horizontal position by a range of +-32 pixels. -
NudgeY- Fine tune the vertical position by a range of +-32 pixels.
New feature for theme designers. Automatic choose "yourtheme" or "yourtheme@2x" if monitor is 2k or larger.
The criteria is ScreenHight > 1100. For example, if you choose theme=metal then you will use theme from folder "metal" on monitor 1920x1080 and a theme from folder "metal@2x" on monitor 2048x1560.
Rev 4844
Here I want to introduce support for Scalable Vector Graphics for Clover GUI will not depend on screen resolution.
Dedicated topic ➤ Clover Vector Themes
We will can draw all interface elements in SVG and scale theme to screen resolution. To do that I found very tiny and simple project nanosvg which is written in C and open source. Nonetheless including it into Clover has obvious problems:
- we have no float mathematica; (OK, I made it)
- we have no standard
sscanf(), we just have feeble StrDecimalToUintn()function, etc.; - we have no some other standard functions (malloc, realloc, free, qsort); and non-obvious problem: I don't know how many logical mistakes in the project. I will work on these problems and invite all coders to help me. Next steps will be learn Clover how to load SVG graphics and render it. Then scalable GUI layout. Then scalable fonts. AFAIK there can be SVG fonts. Moreover SVG can be animated. Meanwhile designers may started to draw vector themes. Welcome to new era!
Rev 4752
Multilevel dithering. By default level = 1. level = 0 will be without dithering.
For radial gradients like on Clovy vector theme this is not enough. A distance between different colors is too big. So we need dithering with larger steps. I can't calculate the step automatically, so I introduce addition for SVG "ditherCoarse". It must have a namespace Clover to be ignored by other applications.
<radialGradient id="GrayRadialBackground_1_" cx="358.2806" cy="0.743" r="0.8783" gradientTransform="matrix(4.700000e-14 768 -768 4.700000e-14 1176.1536 -274946.875)" gradientUnits="userSpaceOnUse" clover:ditherCoarse="16"> <stop offset="0" style="stop-color:#606060"/> <stop offset="1" style="stop-color:#1F1F1F"/> </radialGradient>
Rev 4779
Implemented bootcamp style for vector themes It looks like this:
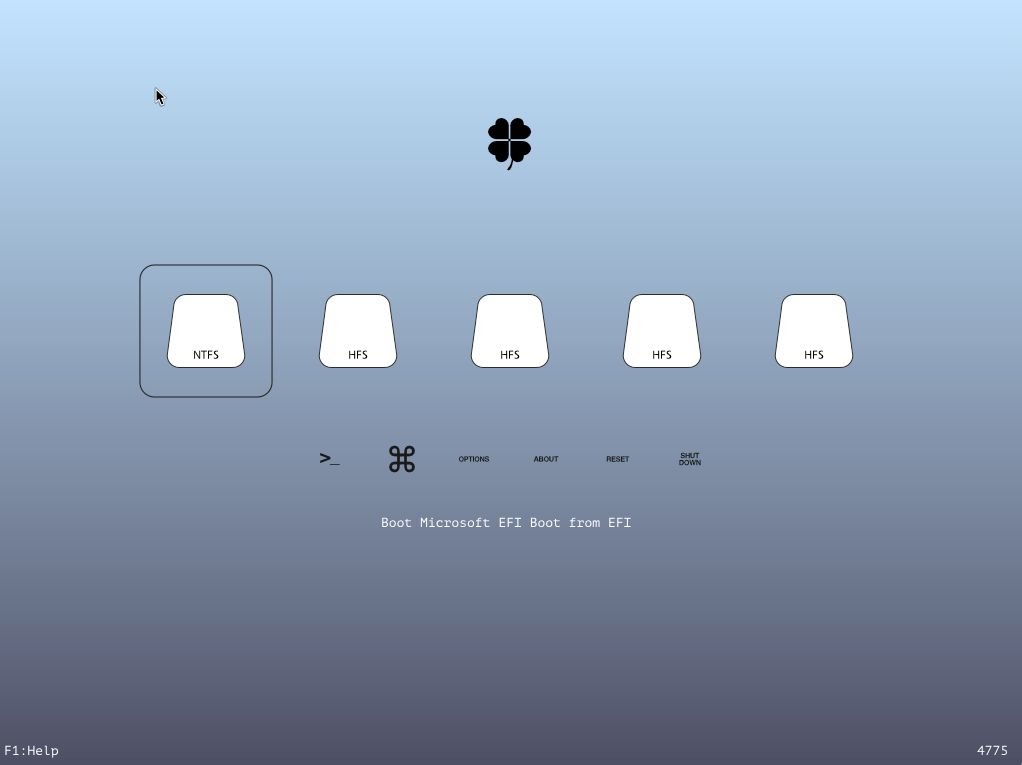
In <clover:theme...settings there will be: BootCampStyle="1"
And there must be indicator image. I draw simple triangle.
Rev 4789
Three big news with SVG support:
- Image can contain text

- Vector theme can have animated main screen, Day/Night
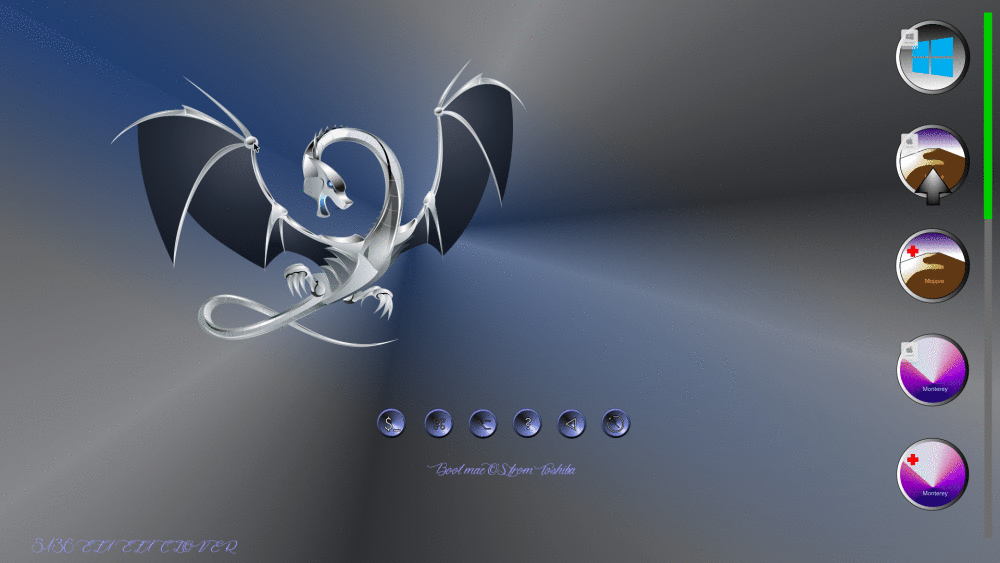
DSDT - Differentiated System Description Table - is the biggest and most complex ACPI table. The minimal length is 36 bytes, in reality it is about 20 kb or even more. This table describes devices and methods for accessing them. These methods can contain arithmetic and logical expressions, representing a program written in a C-like programming language. Correcting this table means you need to have some sort of programming knowledge. Clover offers an option to automatically apply corrections, however it is important to understand that an artificial intelligence was not created yet and that the automatic method is far from being complete. It is better to do the corrections manually. Why does it need to be fixed at all? DSDT patching was created with the intention to fix device HPET - High Precision Events Timer. The point is that OS X includes a kext named AppleIntelCPUPowerManagement for power management control (SpeedStep), which - by all means - needs interrupts IRQ 0 and 8. Otherwise it will create a kernel panic. This kext can either be removed or blocker, however you can alternatively correct the DSDT to ensure a normal behaviour of this kext.
Nr. 1 : This is a necessity. Does Mac OS X really need HPET? Not really, but BIOS vendors tend to be slow and they just started writing the correct parameters. Usually a DSDT will still need to be corrected.
Nr. 2 : A DSDT contains certain dependencies on the operating system like Windows 98, Windows 2001, Windows 2006 or Linux. Mac OS X uses identifier Darwin, which usually is missing. Even if it is not, it was created for FreeBSD. Mac OS X makes great use of the ACPI system and uses a DSDT to its maximum, as does Windows 2001; but not Linux, Windows 98 and not Windows 2006. It is always correct to mask the system as Windows 2001. Even if you find Darwin in your DSDT, mask it as Windows2001. New computers have ACPI more like Windows 2009. For this case Clover has a fix FixDarwin7 Many BIOS variants can use the variable OSYS = 0x07D2, but not 0x07D6, 0x07D9 or 0x2410 as written into a real Mac's DSDT.
Nr. 3 : The vendor of a motherboard's and thus the creator of a DSDT, cannot predict the devices you will be using (CPU, video card, etc.). They should be written into the DSDT however! Vice versa, devices like the internal speaker, floppy drive or parallel port should be excluded. Their drivers do not exist and are not even needed. Additionally it is often necessary to add or remove framebuffers/ports to devices like video cards or SATA controllers. The DSDT is is written into the BIOS and is used by the system in AML binary code. It can be de-/compiled using IASL, which translates binary code into human readable DSL source code. A user will use this path to apply corrections: AML>DSL>edit>DSL>AML - this is the next point.
Nr. 4 : The last part is made impossible because of syntax and logical errors initially present in the OEM DSDT. You will need to correct them, too. Additionally, you can fix other mistakes, which prevent the PC from sleeping or waking up, or add new devices. (It is a bit strange, compiling/decompiling is not a strictly reversible operation and will change the table or even prevent further compiler operations. From my point of view the compiler is not bug-free. Non-conformance to the specification, however, should be considered as a warning, not as an error).
When you reached this step you can instruct Clover to use your modified DSDT by placing it into the directory EFI/CLOVER/OEM/xxx/ACPI/patched or - when the computer's name is not known yet - into EFI/CLOVER/ACPI/patched. Alternatively the OS can have its own DSDT in the root of the system partition. Where can you obtain the initial DSDT that needs to be patched? There are different ways involving Windows, Linux or OS X. If you were able to start Clover somehow, you can enter its GUI and press F4. If Clover was installed on a FAT32 partition, then it will be able to save all ORM ACPI tables, including DSDT and FADT. The process can take a while, especially when saving many tables to a USB flash drive. This is especially useful when you have no access to other means of extracting the table set, for example with AIDA64. Also you can save the patched DSDT variant: enter Options in CloverGUI, change the DSDT mask, exit Options and press F5. A DSDT with the specified patches will be saved, which are represented in the file name, for example: DSDT-F597.aml. You can save multiple variants for comparison. Now you can edit the DSDT and if you are not really comfortable doing this, Clover offers some automatic patches:
For injecting device properties you can - apart from DeviceProperties - use a variant involving method _DSM (Device Specific Method), which is written into the DSDT table. _DSM is widely used since OS X 10.5. It contains properties for a device and makes use of the method DTGP, which is universal for all devices. This fix simply adds the DTGP method for later use with other fixes. It has no significance on its own.
Provide a set of corrections to DSDT to make your system "Darwin" identified as "Windows 2001" like the most ACPI system. More ACPI devices will work in this mode.
Provide a set of corrections to DSDT to make your system "Darwin" identified as "Windows 2009". More ACPI devices will work in this mode. Recommended for IvyBridge and up hardware.
A condition is added to method _PTS: if the argument is 5 (shutdown), then no other actions shall be performed. Many reports confirmed this option to fix shutdown issues with ASUS boards, maybe even with other vendors. Some DSDT tables already contain such a condition and it is advised to turn the fix off in this case.
Added device MCHC to DSDT. For board H61M this is obligatory, else KP.
Add IRQ(0, 8, 11) to device HPET. Obligatory for SandyBridge and recommended for others.
Changes the DeviceID of the LPC controller to allow the loading of kext AppleLPC. This fix is necessary when the chipset is not recognised by OS X. However, the list of supported Intel and NForce chipsets is so big that the fix is rarely needed. Verify if AppleLPC is loaded and use this fix, if it is not. Moreover, the kext can unload itself even if the chipset is supported.
Removes the interrupt from device IPIC. Helpful for Power button will work.
Adds an SMBusController to the device tree, which fixes a warning about its absence in the system log. Helps to sleep/wake.
Create device GFX0 if still absent. It is needed for correct Power Management but the device is usually absent in DSDT because it is not a part of the motherboard. Added also device HDAU that is HDMI sound device on the videocard. If we set FakeID in config.plist it will be inserted here. Intel video will be patched separately.
10.6.1 introduces a kernel panic related to AppleIntelPIIXATA. There are two options to solve the problem: using a patched kext or patching the DSDT. Probably not needed for recent systems. Not recommended.
Fixes several SATA problems and removes yellow hard drive icons by masking the controller as ICH6. The method is controversial but it can fix the DVD drive and simply replacing the hard drive icons is not enough in this case. An alternative is to patch the kext AppleAHCIPort.kext. Not recommended.
Add device Firewire into DSDT if absent and if the device really present. Adds the property fwhub to the device.
Tries fixing USB the countless USB issues for USB1.0, USB2.0 and USB3.0.
Injects the property built-in to the Ethernet card, which is necessary for correct operation. Additionally injects the card's name for a better looking System Profiler. Also made FakeID for some known substitutions.
Same as above for WiFi. Furthermore, the actual device is created and written into DSDT. A DeviceID will automatically written for known cards to enable airport functionality. Not recommended.
Corrects sound card properties to enable the native AppleHDA driver. The name is changed from AZAL to HDEF, layout-id and PinConfiguration are injected. Adding HMDI device if absent.
Exclude IRQ(0) from RTC device.
Exclude IRQ(8) from TMR device. This is ancient DOS device and not needed in modern computers. Just wonder it present.
This device is used for IntelHDxxx graphics. Adding them if very desirable operation. This bit also needed for use FakeID->IMEI. Do nothing for Core 2 systems.
Correct device class for the IGPU from 038000 to display class 030000
adding Return(Package(0)) into method _WAK if absent. This patch is for warning elimination. I don't know about working influence.
There are not used devices like Floppy drive, LPT port and others that will be good to delete from DSDT to not occupy interrupts.
Rename AC0 device to ADP1 device.
Adding device PNLF is very useful: only with it you may have brightness control. This patch is also influence on good Sleep/Wake of the system.
In my case there are: DSDT_FIX: AddPNLF OEM SSDT NvdTable, but _DSM -> ZDSM corrected by Clover. No new _DSM No additional kexts.
A trick to assign keys to reduce/increase brightness:
- Insert temporarily USB keyboard
- Control Panel -> Keyboard -> Shotcuts -> Screen (appeared due to USB keyboard)
- Assign F1 to Reduce brightness and F2 to Increase. No other combinations!
- After removing the USB keyboard assigning will continue working.
Also resolving some Sleep/Wake problems by correcting _S3D methods.
Name ACST have different use for Apple and for ASUS. For ASUS it is AC adapter state. For Apple it is a replacement for _CST, c-states table. To not conflict it is needed to rename such names to something else.
Address of some regions in DSDT depends on many factors and may change time to time
OperationRegion (GNVS, SystemMemory, 0xDE6A4E18, 0x01CD)
The presence of floating regions make impossible to use custom DSDT because this region may be shifted and will not correspond to current state. This patch is intended to find all such regions in BIOS and correct them in custom DSDT. So now you can produce your custom DSDT with wrong regions and set this patch.
How can you choose the necessary patches and how do you know which ones are harmless or dangerous? The computer will not be harmed either way. All the changes are stored memory only and will be removed after rebooting. You can try setting different combinations in CloverGUI and save them by pressing F5 in the Options menu. To make sure the currently patched DSDT is not creating a conflict, you can change the DSDT name in the menu - DSDT name: BIOS.aml. This file will not be found, Clover will extract the original OEM DSDT from BIOS and apply fixes set in the DSDT mask section. In case the OS did not load successfully, your previously set (working) values will be used. 0xFFFFFFFF enables all fixes and if the OS loads successfully this way, you will know that our efforts were not for nothing. Given the descriptions above you already realised that some fixes are not needed for your system (for example WiFi), they can even make things worse.
You may make patched DSDT once with full mask. Then correct patched DSDT manually. Then use this manually patched DSDT.aml loading but set FixRegions (10000000) only. The mask will be 0x10000000
Each Clover revision contains file Clover***.pkg which is macOS executable installer to make all work automatically. 
If you want to make this manually then read carefully.
When you power on your computer you see BIOS which want to start some operating system. Old computers (legacy computers) have legacy BIOS which is able to boot some drive HDD, CDROM or USB-HDD. The BIOS read first sector (MBR) from the physical drive into memory and start is as a program written in 16bit codes. The program is less then 512 byte. It named boot0 boot sector. The program boot0 searches the partition table of the drive, finds first partition position (PBR) on the drive and reads there first one or two sectors named boot1. Start the program. The program PBR intended to use on the specific file-system. So use boot1hfs on HFS+ filesystem, use boot1f32 on FAT32 filesystem, boot1ex on exFAT file system and more. After years of investigations we decided to choose one case: drive must be formatted to GPT and have first partition EFI formatted to FAT32. Partition signature will be EF00. We have several variants but recommended one is boot0af It can be installed from macOS by command
sudo fdisk440 -f boot0 -u -y /dev/rdisk0
or by
dd if=/dev/rdisk0 count=1 bs=512 of=origMBR cp origMBR newMBR dd if=boot0 of=newMBR bs=1 count=440 conv=notrunc dd if=newMBR of=/dev/rdisk0 count=1 bs=512
But the disk should not be system as macOS protect system disk from modifications.
Sector PBR must be updated by commands
dd if=/dev/rdisk0s1 count=1 bs=512 of=origbs cp boot1f32alt newbs dd if=origbs of=newbs skip=3 seek=3 bs=1 count=87 conv=notrunc dd if=newbs of=/dev/rdisk0s1 count=1 bs=512
Modern computers have UEFI BIOS which is much larger then legacy BIOS and able to start some EFI-applications from some drives. Usually an UEFI BIOS searches /EFI/BOOT/BOOTX64.EFI. Some BIOSes tuned to search /EFI/Microsoft/Boot/bootmgfw.efi Some BIOSes have own interface to tune what application to start. As we want Clover then we have to mimic to the BIOS-known variant. First one we copy
CLOVERX64.EFI -> /EFI/BOOT/BOOTX64.EFI
Second case we make two copies
/EFI/Microsoft/Boot/bootmgfw.efi -> /EFI/Microsoft/Boot/bootmgfw-orig.efi
and
CLOVERX64.EFI -> /EFI/Microsoft/Boot/bootmgfw.efi
Clover knows what is bootmgfw-orig.efi and is able to start it if we choose to start Windows from Clover. Moreover Clover is able to write itself as boot option in UEFI BIOS to start the file
/EFI/CLOVER/CLOVERX64.EFI
and this is recommended configuration because BOOTX64.EFI and bootmgfw.efi will be rewritten at the next Windows update while CLOVER will stay forever. See picture  Second button in low row will perform the writing /EFI/CLOVER/CLOVERX64.EFI into BIOS as first boot option.
To do this manually you may launch Shell.efi (this is the first button in low row at the Clover GUI).
> fs0:
cd \EFI\CLOVER bcfg boot add 0 cloverx64.efi "start Clover" exit
More options about bcfg command you may see by the command
> help bcfg boot
It is more correct to say power management and CPU frequency control or simply EIST - Enhanced Intel SpeedStep Technology.
The topic is for very old computers like Core2Duo.
This topic is more about setting up a hackintosh than about the boot loader, but as Clover performs several steps, they are described separately. Clover does not fully automate this process, you still need to adjust some things manually.
Why is this needed at all? The purpose of it is to allow the CPU to work with its lowest frequency and voltage when it is idling (to reduce power and heat) and to increase both under load again.
EIST can be activated using several options: using a special utility like CoolBookController or GenericCPUPM, or enabling native native SpeedStep where following steps are required:
- HPET needs to be fixed, which can be done with mask
0x0010 - A correct CPU section must be present in ACPI (SSDT). See section CPU.
- A correct Mac model needs to be chosen. EIST does not work on all models. For instance - it will work with MacBook5,1 and will not work with MacBook1,1
Alternatively you can leave any model but change the platform configuration file to enable SpeedStep. Each model has its own file. Look at:
/System/Library/Extensions/IOPlatformPluginFamily.kext/Contents/PlugIns/ACPI_SMC_PlatformPlugin.kext/Contents/Resources/
Compare different models and choose the right values.
<key>ConfigArray</key> <array> <dict> <key>WWEN</key> <key>model</key> <string>MacBook4,1</string> <key>restart-action</key> <dict> <key>cpu-p-state</key> <integer>0</integer> </dict> </dict> </array>
The key restart-action specifies the P-State value of the CPU, which will be set on a reboot. Sleep and shutdown only started working after this value was added!
<key>CtrlLoopArray</key> <array> <dict> <key>Description</key> <string>SMC_CPU_Control_Loop</string> <key>PLimitDict</key> <dict> <key>MacBook4,1</key> <integer>0</integer> </dict>
The key PLimitDict is mentioned at GeneratePStates. It represents the limit of the maximal frequency. If it is missing, the CPU will be stuck at the lowest frequency.
<key>CStateDict</key> <dict> <key>MacBook4,1</key> <string>CSD3</string> <key>CSD3</key> <dict> <key>C6</key> <dict> <key>enable</key>
It is recommended to delete this section to allow power control through P-States and not through C-States.
Rev 5119 commit 620401d
Included OcQuirks and OpenRuntime into Clover repository.
The drivers will be built at Clover compilation.
commit 60901993b
OcQuirks driver and plist now excluded. Now Quirks included into config.plist as separate section
## Config.plist Quirks structure
Set default and most recommended values
<key>Quirks</key>
<key>AvoidRuntimeDefrag</key>
-- recommended for all except native Apple
<key>DevirtualiseMmio</key>
-- may be useful for Z390
<key>DisableSingleUser</key>
-- prohibit using Single User Mode. If you are paranoiac.
<key>DisableVariableWrite</key>
-- prohibit write to NVRAM. If you are paranoiac.
<key>DiscardHibernateMap</key>
-- in some rare cases memory after hibernation can be
wrong mapped. Usually no.
<key>EnableSafeModeSlide</key>
-- safe mode (-x) by default will use slide=0. You may set
other value if enable. Mojave crashes with <true>. Ventura works.
<key>EnableWriteUnprotector</key>
-- clear memory protect bit. See note below.
<key>ForceExitBootServices</key>
-- never used
<key>MmioWhitelist</key>
-- list of memory regions to protect. Only good hackers
know why.
<key>Address</key>
<integer>4275159040</integer>
<key>Comment</key>
<string>Haswell: SB_RCBA is a 0x4 page memory region, containing SPI_BASE at 0x3800 (SPI_BASE_ADDRESS)</string>
<key>Enabled</key>
<key>Address</key>
<integer>4278190080</integer>
<key>Comment</key>
<string>Generic: PCI root is a 0x1000 page memory region used by some firmwares</string>
<key>Enabled</key>
<key>ProtectMemoryRegions</key>
-- set true if you use CSM, if your videocard if not UEFI
<key>ProtectSecureBoot</key>
-- rarely used with InsideH2O
<key>ProtectUefiServices</key>
-- needed for VMWare if it will be used with hackintosh
bootloader, usually no.
<key>ProvideCustomSlide</key>
-- if you see OCABC: Only N/256 slide values are usable
then set this to true
<key>ProvideMaxSlide</key>
<integer>0</integer> -- for the case above set a value between 1 and 254.
Never used.
<key>RebuildAppleMemoryMap</key>
-- see note below
<key>ResizeAppleGpuBars</key>
<integer>-1</integer> -- only for RX6800 if set in BIOS Resizable Pci Bar,
which is incompatible with MacOS
<key>SetupVirtualMap</key>
-- always true
<key>SignalAppleOS</key>
-- always false. May be assumed for OpenCore that
cant start windows.
<key>SyncRuntimePermissions</key>
-- always true
<key>FuzzyMatch</key>
-- for system Snow Leopard it may be true
<key>KernelCache</key>
<string>Auto</string> -- (Auto, Cacheless, Mkext, Prelinked) for system
Lion (10.7). No more.
<key>AppleXcpmExtraMsrs</key>
-- support for XCPM for non-native CPU like Haswell-E
<key>AppleXcpmForceBoost</key>
-- set maximum P-state for CPU, maximum frequency.
Install water cooler for this case
<key>DisableIoMapper</key>
-- switch off VT-d. It will be better to drop or
replace DMAR table. Dont set this if you want Monterey
<key>DisableLinkeditJettison</key>
-- fix Lilu bug
<key>DummyPowerManagement</key>
-- block AppleIntelCpuPowerManagement because you have
locked 0xE2. Should be resolved other way.
<key>ExternalDiskIcons</key>
-- usual patch from KextPatches section
changing "External" -> "Internal"
<key>IncreasePciBarSize</key>
-- never use
<key>PowerTimeoutKernelPanic</key>
-- never use
<key>ThirdPartyDrives</key>
-- usual patch "Enable Trim on Non-Apple."
changing "Apple" -> ""
<key>XhciPortLimit</key>
-- usual patch extended maximum XHCI ports because
Apple has limit to 15. Don't do this!
The extended limit will break the system.
Create LegacyUSB.kext to use 15 ports without
needless ports.
<key>ProvideCurrentCpuInfo</key>
-- dangerous patch for the AlderLake CPU.
Use if needed with precautions.
Note! If you system contains MATS table then you should set such quirks
EnableWriteUnprotector - False RebuildAppleMemoryMap - True SyncRuntimePermissions - True
Otherwise contrary.
Booting macOS 11 and macOS 12 OpenRuntime.efi is need.

Rev 5142+ Using new OpenRuntime.efi.
There is incompatibility with older version. Clover before 5142 requires OpenRuntime.efi version 1.1 while 5142+ requires version 1.2.
What to do if you sometime want to reboot with older version?

Slice made special folder drivers/5142 where OpenRuntime-v12.efi is placed. And common folder drivers/UEFI contains OpenRuntime-v11.efi.
How it works ⤵︎
Old Clover not see the folder 5142 and uses common folder drivers/UEFI and read here openRuntime-v11.efi.
New Clover see the folder drivers/5142 and read here new OpenRuntime-v12.efi which is in priority in the version.
That's all!
OpenCorePkg repos used by Clover ☞ OpenCorePkg is used by Clover
OpenCorePkg is not same as original. Based on OpenCore 0.7.5 it is improved up to latest version. Clover uses some part of the package delegating kext injecting and patching abilities to OC libraries. Big respect to vit9696 for these libraries. Clover keeps own syntax for kernel and kext patching and converted them to OC syntax Conversion rulez but the method for binary patching in the OC library is replaced by Clover's method because it has more possibilities.
Some new quirks implemented in new OC versions have no analogs in the Clover's config.plist because they are very specific for rare hardware. If you really need them then search how to do the same by common kext patching. Usually the new quirk is just a shortcut to one kernel or kext patch.
The (Unified) Extensible Firmware Interface or (U)EFI is a software interface between an operating system and the platform firmware. In contrast to BIOS based firmware that takes 64kb space and uses a 16-bit processor mode, (U)EFI is 32-bit or 64-bit, allows use of this full range of memory, and in theory positions itself as platform-independent. However, reality is different and achieving a full compatibility to all platforms is impossible.
Clover is an operating system boot loader for computers already equipped with an UEFI firmware and for those equipped with legacy BIOS firmware. An operating system (OS) may support (U)EFI (macOS, Windows 7, 8, or 10, Linux) or not (Windows XP). Legacy boot is used for the last one, that is, the old BIOS system is used to handle boot sectors.
(U)EFI is not only present during the booting of an OS, but it also creates tables and services that are accessible to the OS, and the operability of the OS depends on the correct functionality of (U)EFI. It is not possible to boot macOS from the built-in UEFI. Neither is it possible to boot macOS with the original DUET firmware emulation. CloverEFI firmware emulation and CloverGUI take care of a great amount of tasks to correct the internal tables and provide a possibility to run macOS.
- SMBIOS (DMI) is filled with data emulating a real Apple Macintosh - a requirement for running macOS. Serial numbers are fake, but valid.
- ACPI tables - contained in the PC's ROM - are usually not written properly and may contain bugs, mostly because the manufacturer was lazy: an incorrect CPU core count in APIC table, NMI data is missing, missing reset register in table FACP, wrong power profile, missing EIST data in SSDT tables, and it is better to not even mention the DSDT table. Clover attempts to fix these problems.
- Further OS X tries to obtain data from the boot loader describing additional devices like the video, ethernet or sound card through so called EFI strings. Clover generates such data.
- BIOS-based computers will use USB in legacy mode during the initial boot process, which becomes a problem when passing control to the OS. Clover will change the USB mode.
- macOS uses a special memory called NVRAM for information exchange that is included in RuntimeServices (not present in a legacy loader). Clover provides this kind of information exchange, enabling correct Firewire functionality and the use of the Startup Disk preference panel. Additionally NVRAM is used for registration of the iCloud and iMessage services.
- ConsoleControl protocol is a necessity and is absent in DUET.
- It is necessary to fill certain data in EFI/Platform through the DataHub protocol, which is absent in DUET and not always present in UEFI. Furthermore, the utterly important FSBFrequency value, which sometimes is wrong or completely missing, is set.
- The CPU must be correctly initialized before working, but as motherboards are made universal to match a big amount of different CPUs, the internal tables do not contain any correct CPU data. Clover performs a full detection of the installed CPU, corrects the tables and the CPU itself. One side effect is a working turbo mode.
- One more small thing: DUET and EDK2 sources are written universally to match different hardware but the hardware dependency itself depends on constants. This implies a compilation process for one specific platform. Clover aims to be universal and to provide an automatic platform detection.