🎥 YouTube: https://bit.ly/ajonp-youtube-sub
🌎 Site: https://ajonp.com
📦 GitHub: https://github.com/ajonpllc
🎓Lessons: https://ajonp.com/lessons/
🗞AJ’s Week in Web: https://bit.ly/aj-week-in-web
💬 Slack: https://bit.ly/ajonp-slack-invite
🐦 Twitter: https://bit.ly/ajonp-twitter
Just a little donation reminder as Hugo says "Hugo stands on the shoulder of many great open source libraries", as does many of my tutorials.
Brew
Hugo
Checkout the guide at gohugo.io. My guides will always be on a Mac, but I will always try to provide a link for additional operating systems.
- Install Hugo
- Create new Hugo site
- Start Using AJonP Template
Please chekcout Hugo Ionic-Lesson 2 for the next set of features
- Victor Hugo
- Deploy
If you are like me and just bought a new Mac, you probaly are taking brew for granted and think it is just there right 😀! Well first you can head over to brew.sh they will tell you to run
/usr/bin/ruby -e "$(curl -fsSL https://raw.githubusercontent.com/Homebrew/install/master/install)"brew install hugohugo new site 4-hugo-ionic
cd 4-hugo-ionicAt this point you will notice that the project remains pretty empty in a generic skeleton.
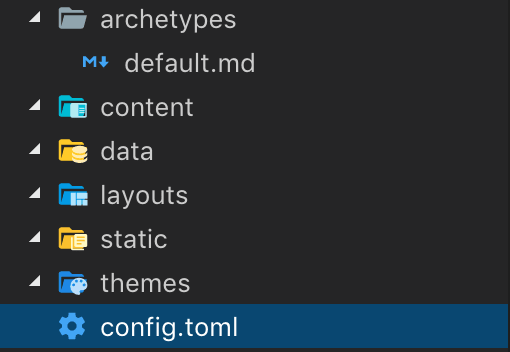
It only has two files config.toml and archetypes/default.md
{{% blockquote-warning %}}
If you run
hugo serveright now, you will see a blank screen as there is no content to show. {{% /blockquote-warning %}}
Adding this to the base of our site will be used for setting up the Home Page. This is the only required page you will ever need to build a Hugo based site. Please keep in mind that this is still a
layouts/Index.html
You could make an entire site here if you wanted.{{% blockquote-warning %}}
Again if you run
hugo serveright now, you will see a blank screen as there is no content to show. {{% /blockquote-warning %}}
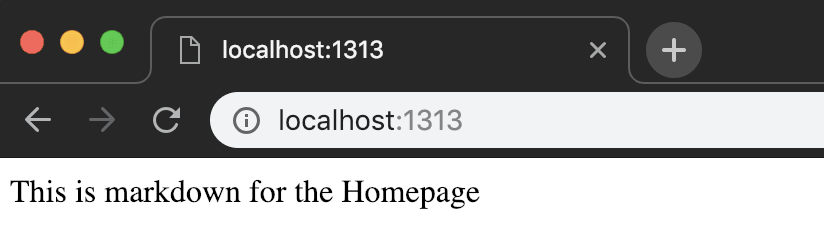
content/_index.md
This is markdown for the Homepage{{% blockquote-warning %}}
I know this is getting a little frustrating! Again if you run
hugo serveright now, you will see a blank screen as there is no content to show. {{% /blockquote-warning %}}
This will be the first page that will show anything in the browser!
layouts/index.html
{{ .Content }}Now run the command hugo serve and you will see a page that has
Now I wanted to walk you through all of that to show
- The steps really necessary to make a Hugo site
- Prove that laying out a site from scratch is time consuming
-
You can find the link on Hugo's Theme site https://themes.gohugo.io/ajonp-hugo-ionic/
-
Directly from github
git clone https://github.com/AJONPLLC/ajonp-hugo-ionic themes/ajonp-hugo-ionicgit submodule add https://github.com/AJONPLLC/ajonp-hugo-ionic themes/ajonp-hugo-ionicAdding the submodule will allow you to receive all of the updates that you want, or lock into a specific commit to run your site from. Then later you are able to run
git submodule update --remote --mergeNow you should have a new folder in themes/ajonp-hugo-ionic. This has the full theme including an example site found in themes/ajonp-hugo-ionic/exampleSite
Features
- Layouts
- Shortcodes
- Sitemap
- Font Awesome
- Ionic
- Google Ads
- Google Analytics
- Disqus
- AddThis
- OpenGraph
- Twitter Cards
Next Lesson Features
- []
Taking things a step further you can change any of the colors on the site by using Ionic's Color Generator.
Here is a Hugo inspired look.
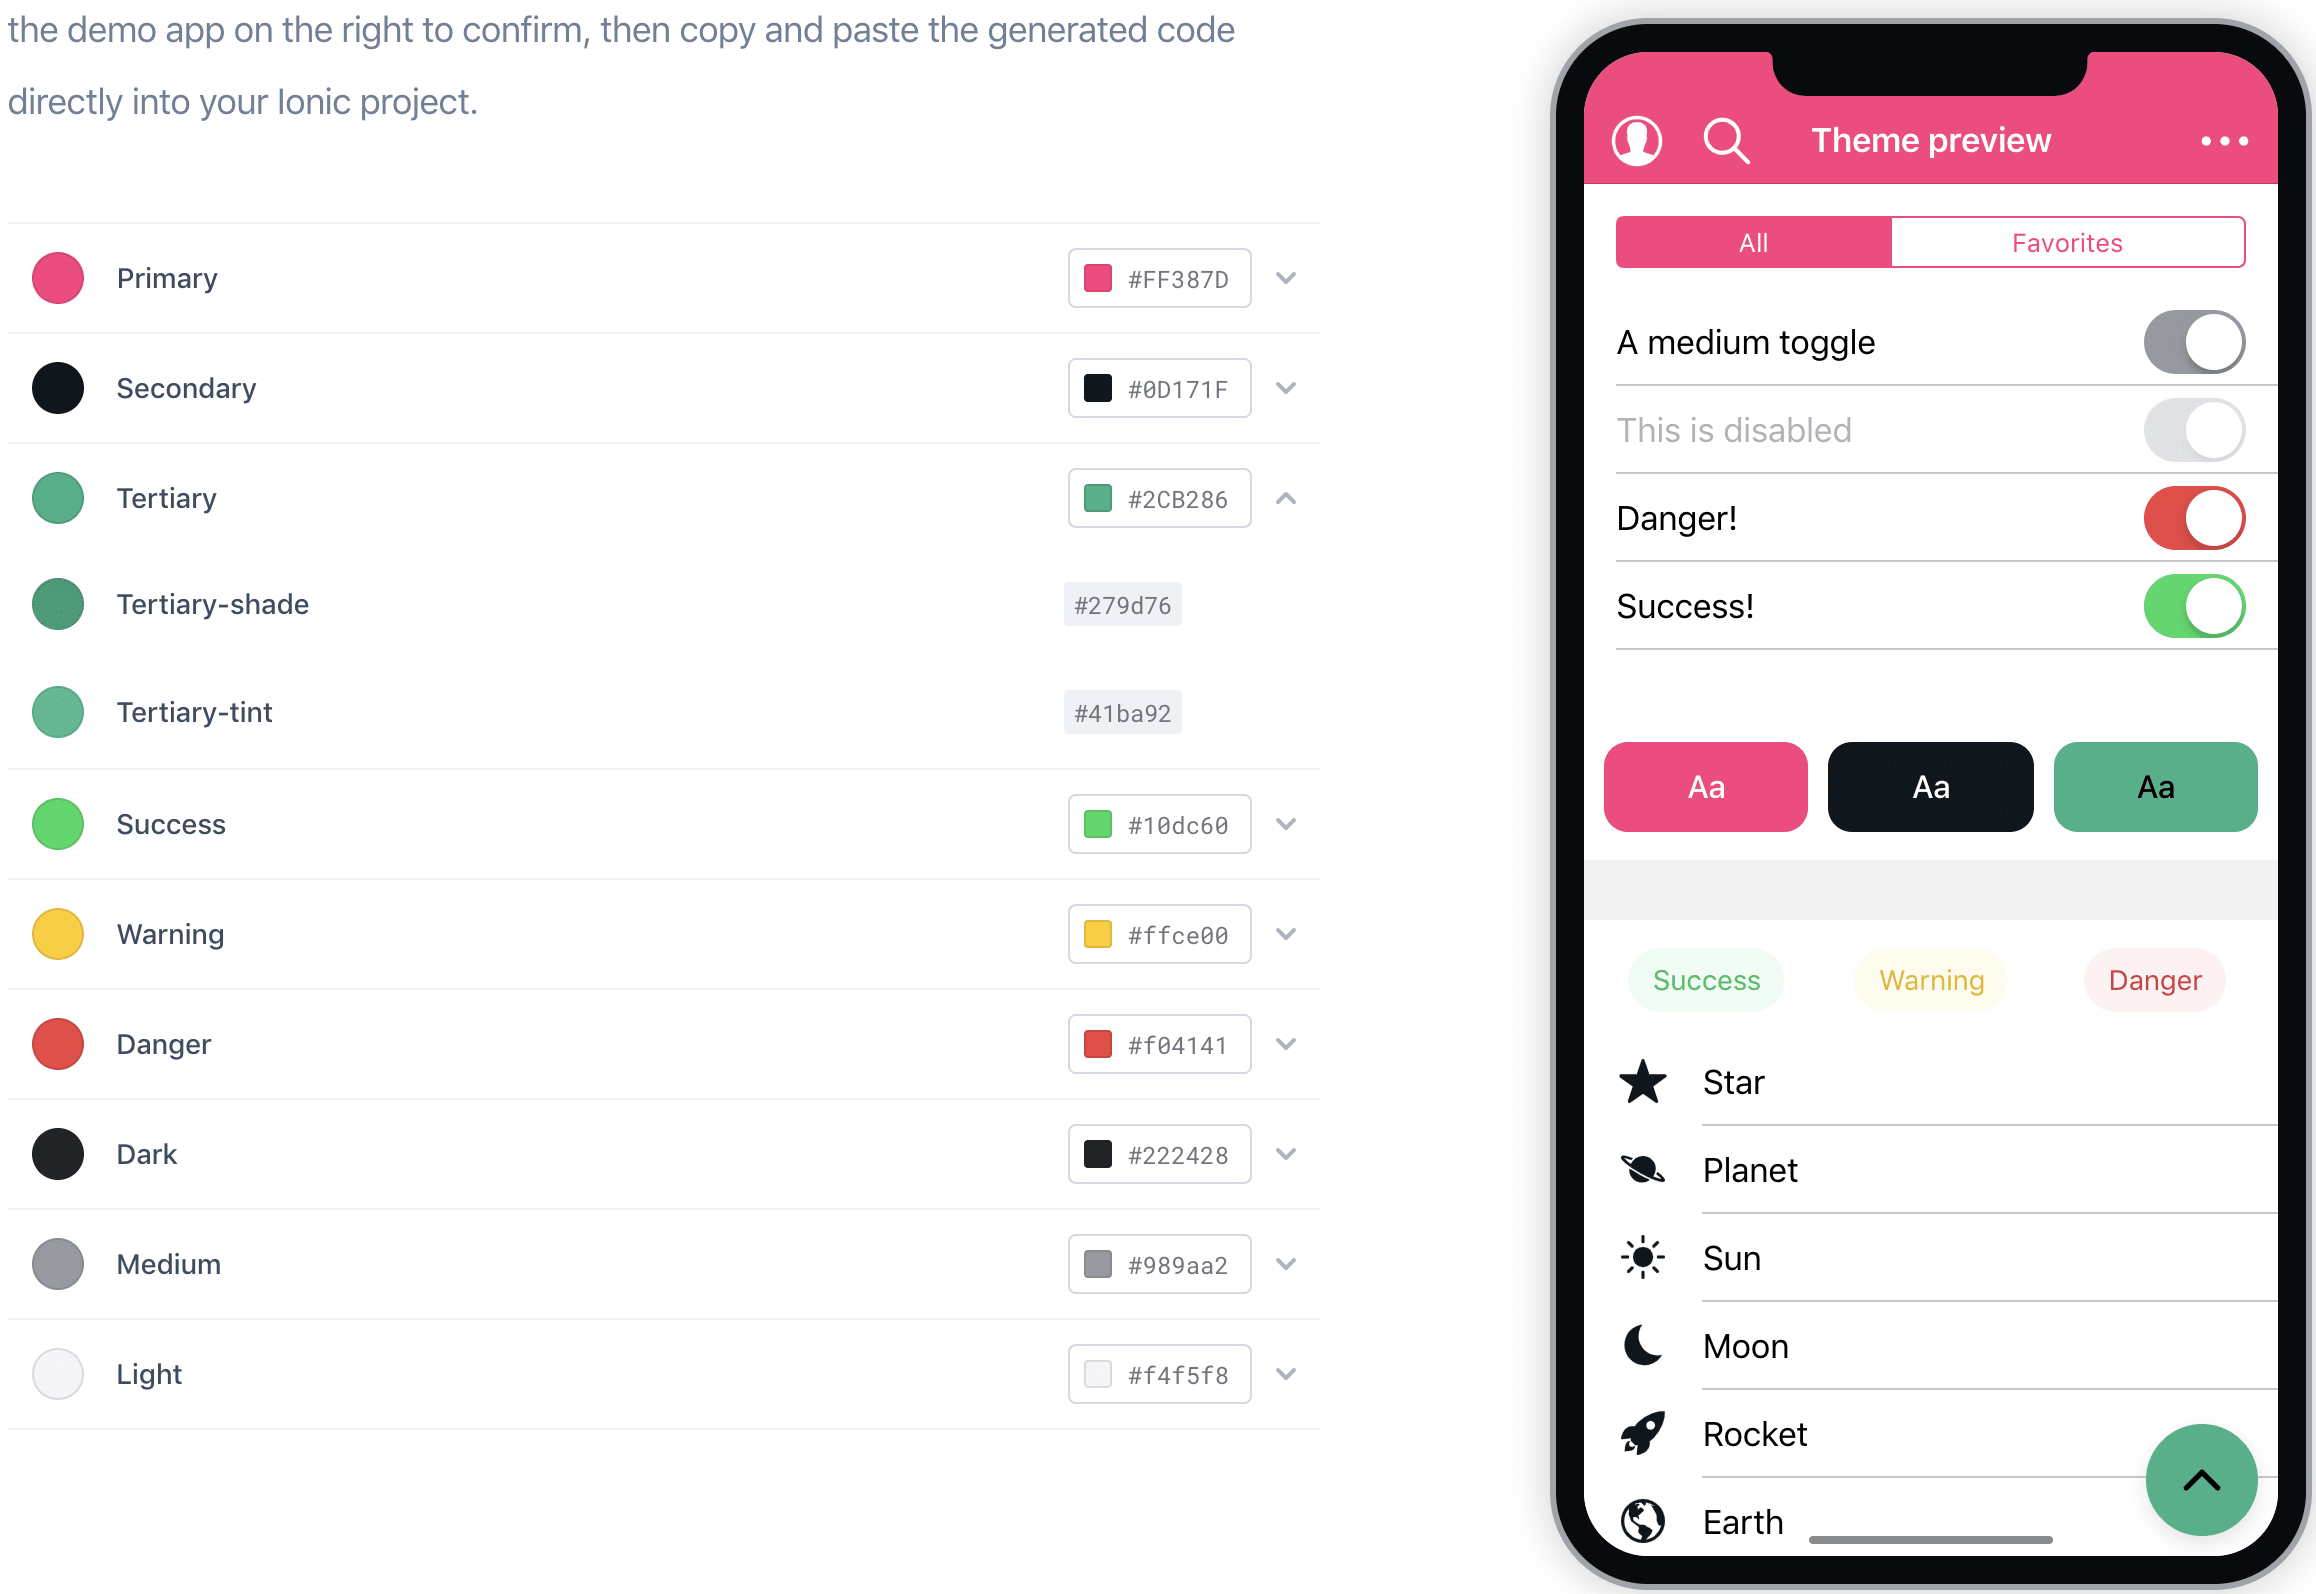
Just copy the CSS Variables it produces into static/css/custom.css
:root {
  --ion-color-primary: #FF387D;
  --ion-color-primary-rgb: 255,56,125;
  --ion-color-primary-contrast: #ffffff;
  --ion-color-primary-contrast-rgb: 255,255,255;
  --ion-color-primary-shade: #e0316e;
  --ion-color-primary-tint: #ff4c8a;

  --ion-color-secondary: #0D171F;
  --ion-color-secondary-rgb: 13,23,31;
  --ion-color-secondary-contrast: #ffffff;
  --ion-color-secondary-contrast-rgb: 255,255,255;
  --ion-color-secondary-shade: #0b141b;
  --ion-color-secondary-tint: #252e35;

  --ion-color-tertiary: #2CB286;
  --ion-color-tertiary-rgb: 44,178,134;
  --ion-color-tertiary-contrast: #000000;
  --ion-color-tertiary-contrast-rgb: 0,0,0;
  --ion-color-tertiary-shade: #279d76;
  --ion-color-tertiary-tint: #41ba92;

  --ion-color-success: #10dc60;
  --ion-color-success-rgb: 16,220,96;
  --ion-color-success-contrast: #ffffff;
  --ion-color-success-contrast-rgb: 255,255,255;
  --ion-color-success-shade: #0ec254;
  --ion-color-success-tint: #28e070;

  --ion-color-warning: #ffce00;
  --ion-color-warning-rgb: 255,206,0;
  --ion-color-warning-contrast: #ffffff;
  --ion-color-warning-contrast-rgb: 255,255,255;
  --ion-color-warning-shade: #e0b500;
  --ion-color-warning-tint: #ffd31a;

  --ion-color-danger: #f04141;
  --ion-color-danger-rgb: 245,61,61;
  --ion-color-danger-contrast: #ffffff;
  --ion-color-danger-contrast-rgb: 255,255,255;
  --ion-color-danger-shade: #d33939;
  --ion-color-danger-tint: #f25454;

  --ion-color-dark: #222428;
  --ion-color-dark-rgb: 34,34,34;
  --ion-color-dark-contrast: #ffffff;
  --ion-color-dark-contrast-rgb: 255,255,255;
  --ion-color-dark-shade: #1e2023;
  --ion-color-dark-tint: #383a3e;

  --ion-color-medium: #989aa2;
  --ion-color-medium-rgb: 152,154,162;
  --ion-color-medium-contrast: #ffffff;
  --ion-color-medium-contrast-rgb: 255,255,255;
  --ion-color-medium-shade: #86888f;
  --ion-color-medium-tint: #a2a4ab;

  --ion-color-light: #f4f5f8;
  --ion-color-light-rgb: 244,244,244;
  --ion-color-light-contrast: #000000;
  --ion-color-light-contrast-rgb: 0,0,0;
  --ion-color-light-shade: #d7d8da;
  --ion-color-light-tint: #f5f6f9;
}I usee the theme for AJonP so it may change (you can always stay at a commit), but please contact me on Slack or Pull request on Github.
{{% blockquote-warning %}}
Please note that while working through this lesson I chose to make branches instead of tags to see if people would enjoy that more. However there was an update to the Victor/Hugo template to start using webpack and I don't want to confuse anyone, so please don't pull the master branch to start.
- master (initial)
- netlify-victor-hugo (moves everything to npm setup)
- complete-lesson-4 (has everything you need to go-live)
- prod (shows the example trigger, as well as moving over to git submodule) {{% /blockquote-warning %}}
Google Cloud Build - Deploying Artifacts
Clone Lesson 4- Add Netlify Victor/Hugo template to project.
- Update branding.
- Configure Firebase Hosting
- Configure Algolia Indexing
- Configure Google Cloud Build
You can follow along step-by-step at the Initial Setup Lesson, and YouTube Video.
Or you can start by cloning Lesson 4 Hugo Ionic, we are using a specific branch to start this lesson as the master was for the original lesson.
git clone --single-branch -b netlify-victor-hugo https://github.com/AJONPLLC/lesson-4-hugo-ionic.git|--site // Everything in here will be built with hugo
| |--content // Pages and collections - ask if you need extra pages
| |--data // YAML data files with any data for use in examples
| |--layouts // This is where all templates go
| | |--partials // This is where includes live
| | |--index.html // The index page
| |--static // Files in here ends up in the public folder
|--src // Files that will pass through the asset pipeline
| |--css // Webpack will bundle imported css seperately
| |--index.js // index.js is the webpack entry for your css & js assets
You can still run this project as a normal hugo site at this point, by running the command while in the site folder.
cd site/ && hugo serve{{% blockquote-warning %}}
Make sure to return to your root folder
cd ..{{% /blockquote-warning %}}
There are a few additional requirements at this point that we need to install.
Install the files via npm npm comes with NodeJs
npm installStart a browsersync server
npm startYou should see something like:
[13:29:18] Starting 'server'...
[Browsersync] Access URLs:
 --------------------------------------
       Local: http://localhost:3000
    External: http://192.168.86.23:3000
 --------------------------------------
          UI: http://localhost:3001
 UI External: http://localhost:3001
 --------------------------------------
[Browsersync] Serving files from: ./dist
[13:29:34] Starting 'hugo'...
[ '-d', '../dist', '-s', 'site', '-v' ]
Why this becomes powerful is that you can start installing all of your favorite npm modules and importing them like you would with most non-static projects.
Copy the baseof.html file from our theme to our base directory so that we can override the themes file.
mkdir site/layouts && mkdir site/layouts/_default && cp site/themes/ajonp-hugo-ionic/layouts/_default/baseof.html site/layouts/_default/baseof.html{{% blockquote-warning %}}
Remember to edit baseof.html in your files not the themes (or they won't be saved.) {{% /blockquote-warning %}}
Now we are going to edit the baseof.html and remove these two lines (just before </head>)
<link href="{{ "/css/custom.css" | absURL }}" rel="stylesheet" as="style" type="text/css">
<link href="{{ "/css/syntax.css" | absURL }}" rel="stylesheet" as="style" type="text/css">
These were originally coming from our site folder, both in theme and direct, we are going to update this file to allow for victor/hugo to handle this requirement. So we will replace that line in the html with
<link rel="stylesheet" href="css/main.css">Also while we are in /site/layouts_default/baseof.html add a reference right above </body>.
<script src="app.js"></script>

You should now see the theme change back to the stock Ionic Blue color, as we have not moved our styles to the source location.
However there will be a new addition to the console in debugger.
Subscribe to 😺 AJonP's Youtube Channel
Move our custom.css file to the source folder.
```sh
mv site/static/css/custom.css src/css/imports/custom.css
Now we need to import this file into our src/css/main.css
/*
  You can use import statements to include partials:
 */
@import "imports/reset.css";
@import "imports/custom.css";

/*
  Or add your statements here:
 */
body{
  font-family: sans-serif;
  font-size: 1em;
  text-align: center;
}Lets try adding something simple that we might use like lodash
npm install lodashNow this will be avalabel for us to use in our app.js or any other file we would like to reference the module.
src/js/app.js
console.log(`Subscribe to 😺 <a href="https://www.youtube.com/channel/UCnKZ8gEb78zXKMi1ns-IQ2g">AJonP's Youtube Channel</a>`);

var _ = require('lodash');
console.log(_.VERSION);
In the console you will now see the current version of lodash.
I am sure that you love looking at AJ on your favicon and manifest (he likes being there 😺). But you probably want to update a few things.
In the themes/ajonp-hugo-ionic/static/icons folder you will find several images that can be used for your manifest file. I typically use www.favicon-generator.org to update these files based on an image that I create. You can now add all of these images to site/static/icons so they can be referenced later in manifest.json or anywhere in your site.
You should update this file to reflect any changes in your icons folder.
{
  "name": "AJonP",
  "manifest_version": 1,
  "short_name": "AJonP",
  "start_url": "/",
  "scope": "/",
  "display": "standalone",
  "background_color": "#FFFFFF",
  "theme_color": "#3D2D4D",
  "gcm_sender_id": "103953800507",
  "icons": [
    {
      "src": "/icons/android-icon-36x36.png",
      "sizes": "36x36",
      "type": "image/png",
      "density": "0.75"
    },
...If you are using an older browser the main icon that goes in your browser will be used by /site/static/favicon.ico. Otherwise you should hvae larger images spelled out in the themes/ajonp-hugo-ionic/layouts/partials/head.html, they look similar to this...
<link
  rel="icon"
  type="image/png"
  sizes="32x32"
  href="/icons/favicon-32x32.png"
/>
<link
  rel="icon"
  type="image/png"
  sizes="96x96"
  href="/icons/favicon-96x96.png"
/>
<link
  rel="icon"
  type="image/png"
  sizes="16x16"
  href="/icons/favicon-16x16.png"
/>
Please feel free to update the entire head.html partial, or any of the layouts for that matter AJ doesn't mind too much 😼.
Please make sure to checkout Google Cloud Firebase CI/CD for a great example.
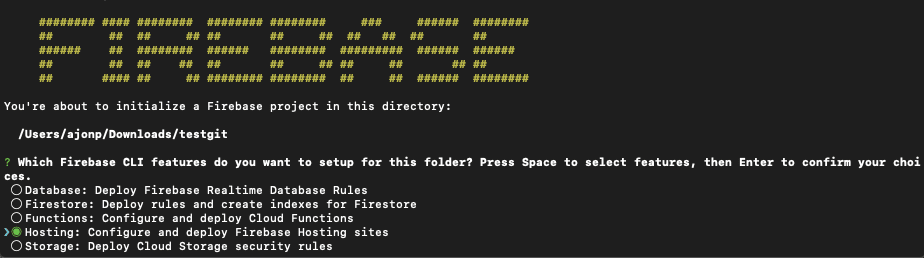
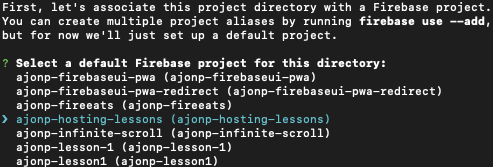
firebase init-
Select Hosting
-
Pick your project
-
Set the output folder to dist, and select no for rewrite all urls.

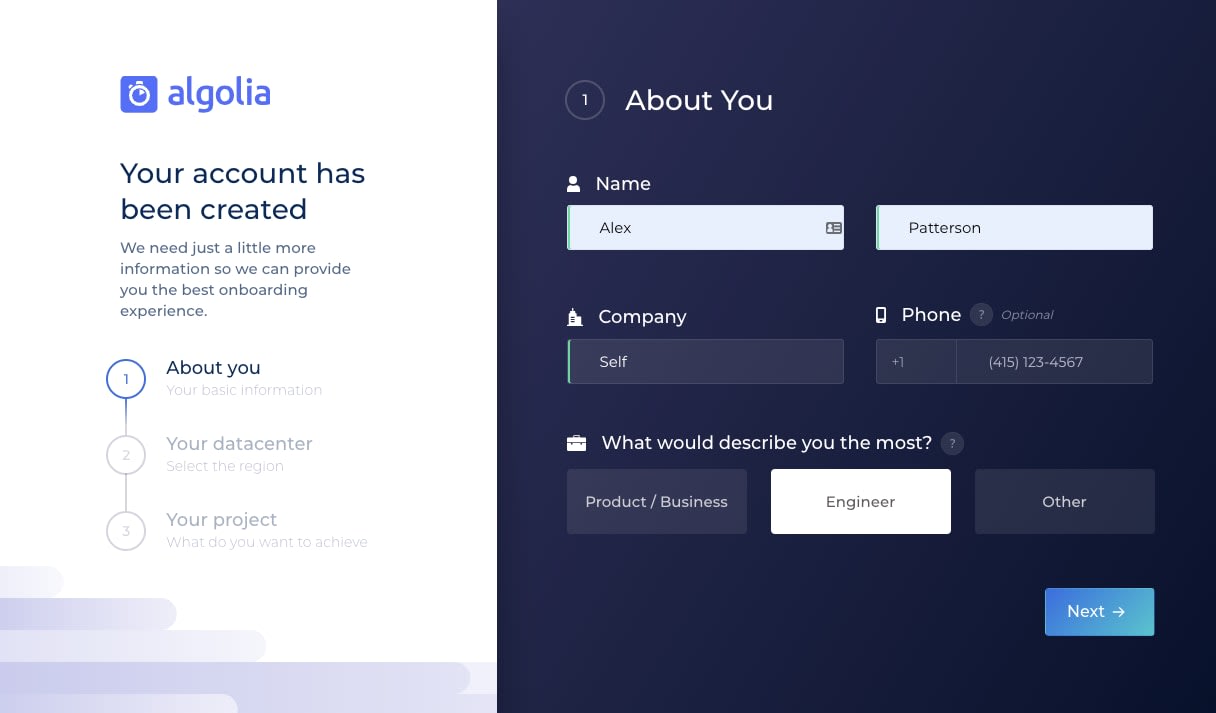
First signup on www.algolia.com/.
-
About You!
Algolia Signup about -
Your Datacenter!
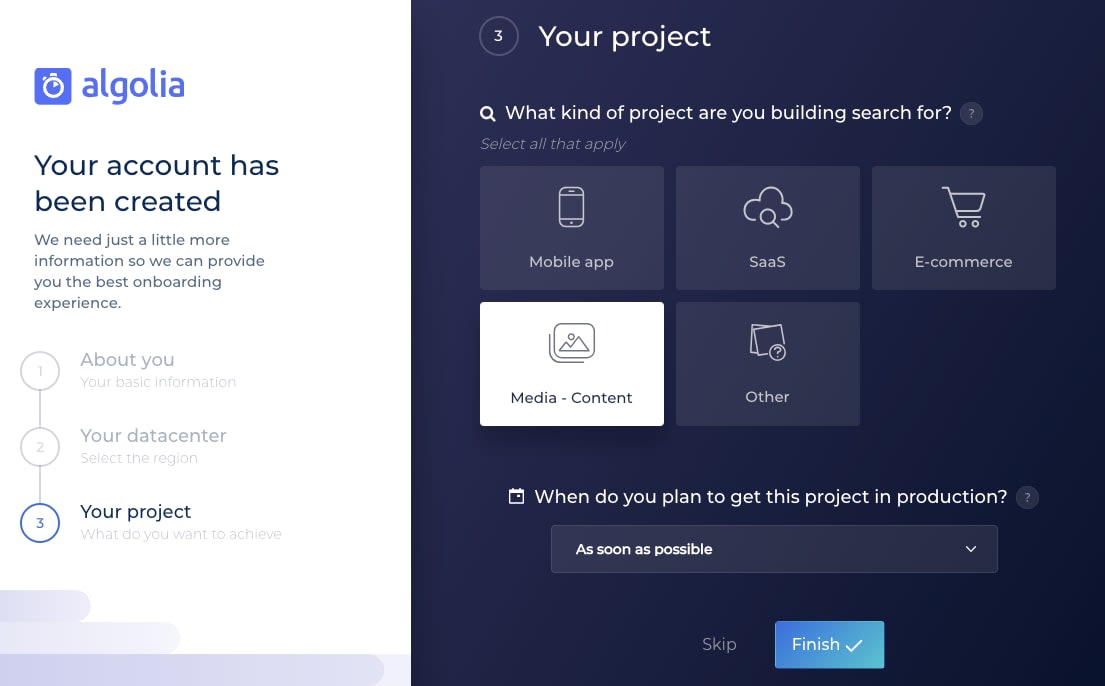
Algolia Your Data Center -
Your Project Type - Depends on what you are making but I would choose Media for most sites.
-
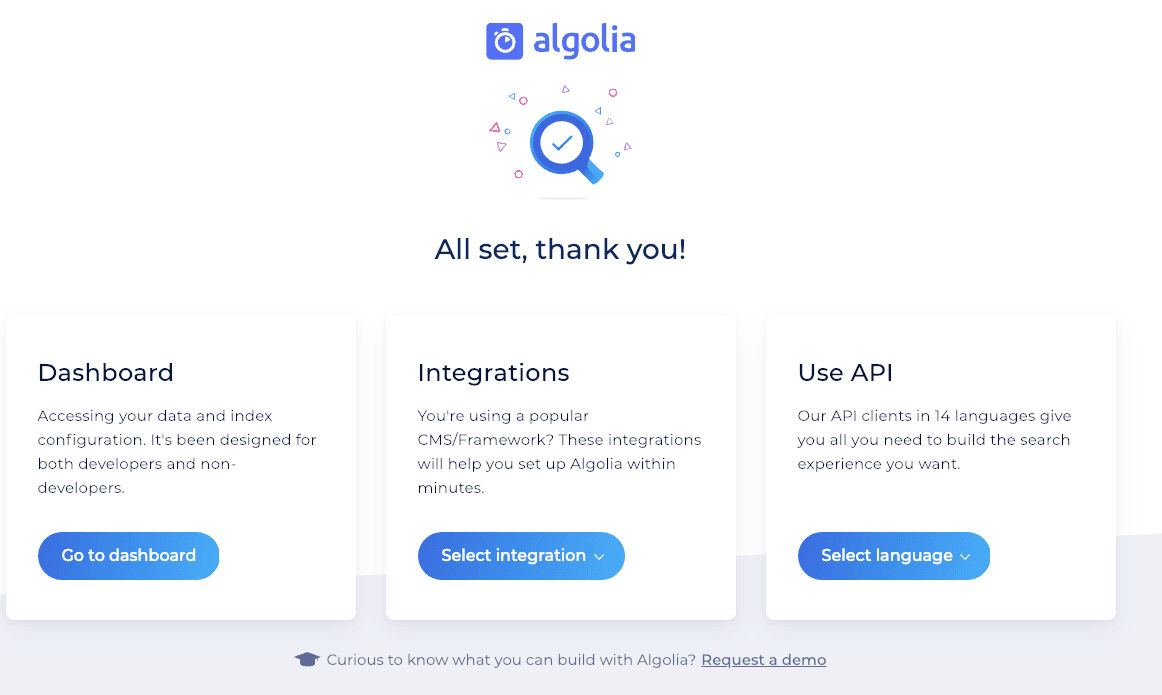
Pick Dashboard once you get here
-
You can run the tutorial or just skip for now.
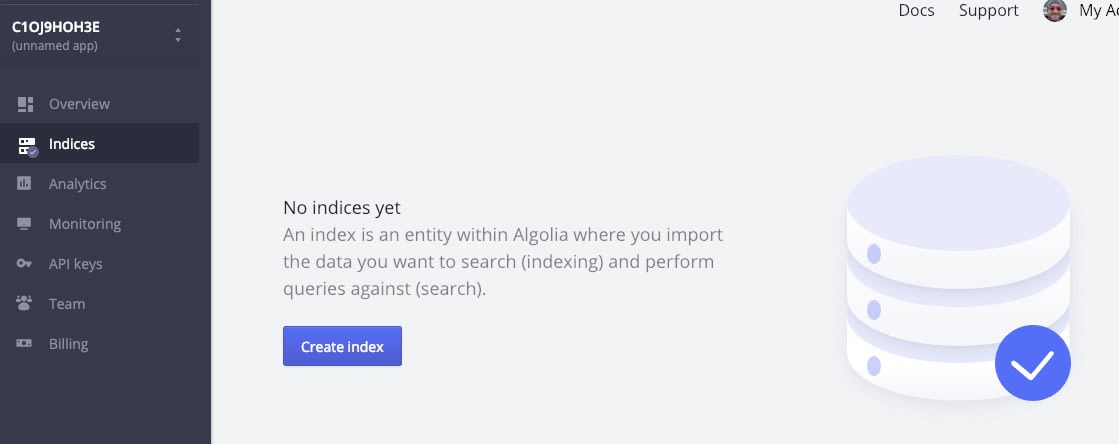
-
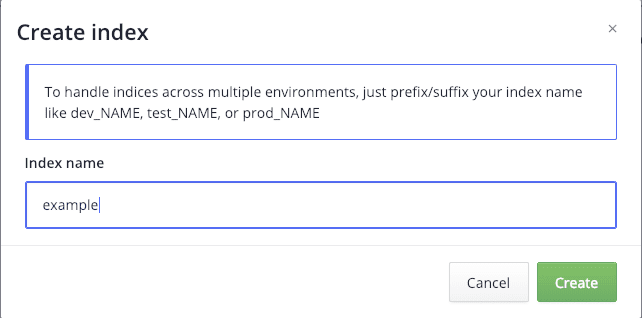
Now select Indicies, and Create Index!
Indicies
-
Example of an Index Creation
-
API Keys are where we can now get the remainder of our information that we will need.
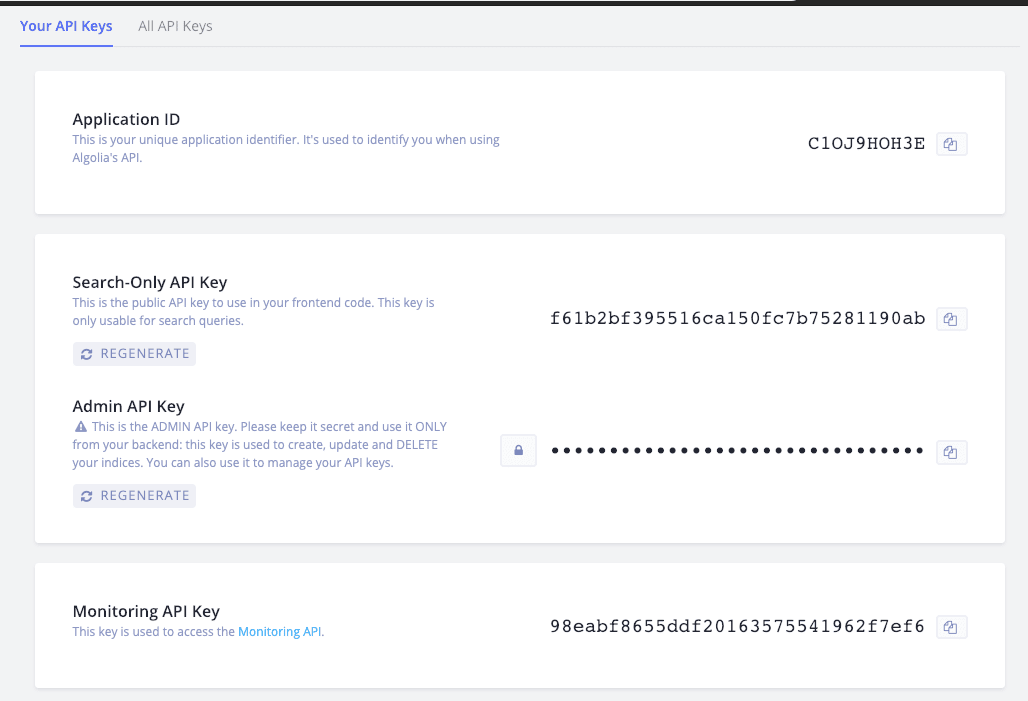
{{% blockquote-warning %}}
In your site/config.toml file you will see params.algolia. These are used just for the search bar to make the search happen...do not use your Admin API KEY!! {{% /blockquote-warning %}}
  # Search Only
  [params.algolia]
    appId = "C1OJ9HOH3E"
    apiKey = "f61b2bf395516ca150fc7b75281190ab"
    indexName = "example"
You will notice a section later when we use Cloud Depoy that will require you to add
- ALGOLIA_APP_ID
- ALGOLIA_ADMIN_KEY
- ALGOLIA_INDEX_NAME
- ALGOLIA_INDEX_FILE
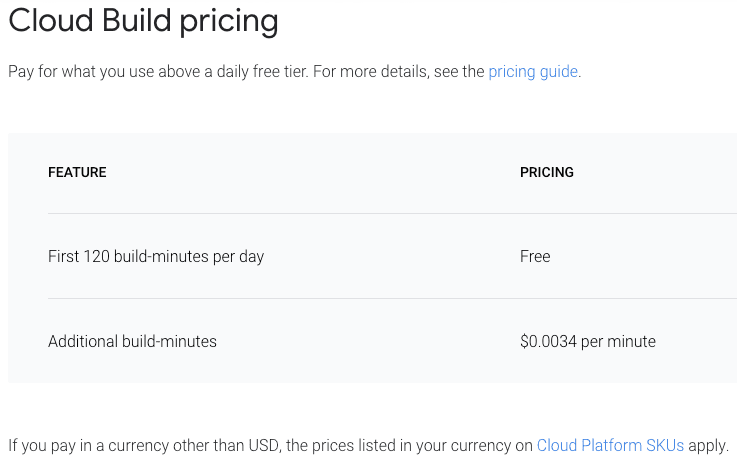
An important part to any project is setting up a solid CI/CD pipeline (Continuous Integration/Continuous Delivery). I still believe that Google Cloud offers the best pricing for any size development team! If you are a very small shop you will run builds for free, for a very long time.
{{% blockquote-tertiary %}}
I found out recently from Mike McDonald, that there are a great set of Google Cloud Platform Community Images. They should work really well most of the time, but you might have to be careful on versioning. For instance Hugo is currently at .49 and I need something above .50 for my site. This is why I remain using my own Docker files. {{% /blockquote-warning %}}
This file controls all of the steps necessary throughout our build process. You can manually execute each step locally to see that everything works as expected on your docker images.
steps:
# Build the hugo image
- name: 'gcr.io/cloud-builders/docker'
  args: [ 'build', '-t', 'gcr.io/$PROJECT_ID/hugo', './dockerfiles/hugo' ]
# Git the submodules, run npm install, hugo build
- name: 'gcr.io/$PROJECT_ID/hugo'
  args: ['bash', './deploy.sh']
# Algolia index update
- name: 'gcr.io/cloud-builders/npm'
  args: [ 'run','algolia']
  env:
  - 'ALGOLIA_APP_ID=${_ALGOLIA_APP_ID}'
  - 'ALGOLIA_ADMIN_KEY=${_ALGOLIA_ADMIN_KEY}'
  - 'ALGOLIA_INDEX_NAME=${_ALGOLIA_INDEX_NAME}'
  - 'ALGOLIA_INDEX_FILE=${_ALGOLIA_INDEX_FILE}'
# sw-precache
- name: 'gcr.io/cloud-builders/npm'
  args: [ 'run','generate-service-worker']
# Build the firebase image
- name: 'gcr.io/cloud-builders/docker'
  args: [ 'build', '-t', 'gcr.io/$PROJECT_ID/firebase', './dockerfiles/firebase' ]
# Deploy to firebase
- name: 'gcr.io/$PROJECT_ID/firebase'
  args: ['deploy', '--token', '${_FIREBASE_TOKEN}']
# Optionally you can keep the build images
# images: ['gcr.io/$PROJECT_ID/hugo', 'gcr.io/$PROJECT_ID/firebase']
Please checkout all of the cloud builder images.
Docker is an available image we will use this to create our own image instance from our Dockerfile in dockerfiles/hugo/Dockerfile. The Google Cloud build image Node seems to offer a lot of the tools we will need already so we just add Hugo into this Dockerfile.
FROM node
LABEL author="developer@ajonp.com"

# Set debconf to run non-interactively
RUN echo 'debconf debconf/frontend select Noninteractive' | debconf-set-selections

# Install base dependencies
RUN apt-get update && apt-get upgrade -y
RUN apt-get install -y -q --no-install-recommends \
        apt-transport-https \
        asciidoc \
        build-essential \
        ca-certificates \
        curl \
        git \
        libssl-dev \
        python \
        python-pygments \
        rsync \
        software-properties-common \
        devscripts \
        autoconf \
        ssl-cert \
    && apt-get clean

# Download and install hugo
ENV HUGO_VERSION 0.51
ENV HUGO_BINARY hugo_${HUGO_VERSION}_Linux-64bit.deb

#ADD https://github.com/spf13/hugo/releases/download/v${HUGO_VERSION}/${HUGO_BINARY} /tmp/hugo.deb
RUN curl -sL -o /tmp/hugo.deb \
    https://github.com/spf13/hugo/releases/download/v${HUGO_VERSION}/${HUGO_BINARY} && \
    dpkg -i /tmp/hugo.deb && \
    rm /tmp/hugo.deb

# confirm hugo
RUN hugo env
The next step in this will execute our local file deploy.sh so that we can execute a few key commands.
The purests out there will say that we can execute both the git command and the npm commands using the two external images. I find that it is faster to not spin up a new image since we are sitting in a node image already for npm. The git submodule also is a bit of a pain because you have to go through a complicated process (from what I have gathered) to either link github to google source repos or create tokens for one off logins.
#!/bin/bash

echo -e "\033[0;32mAdding Submodules...\033[0m"

git submodule init
git submodule update --recursive --remote

echo -e "\033[0;32mInstalling via npm...\033[0m"

npm install

echo -e "\033[0;32mBuilding via npm...\033[0m"

npm run build- Update any submodules (like our theme).
- Install all of the victor/hugo dependencies (or all other).
- Run the build command which will push all of our files to the
/distfolder.
Now I know everything I said up above about npm image...sorry for any confusion. However, I thought it was better to leave these npm commands seperate from the deploy as they are not required and can be easily commented out of your builds.
In the case of this evn variables, we can again leave these out of the public git repos of the world and only have them stored wihtin Google Cloud builder variable values, using the notation ${_variable}.
# Algolia index update
- name: 'gcr.io/cloud-builders/npm'
  args: [ 'run','algolia']
  env:
  - 'ALGOLIA_APP_ID=${_ALGOLIA_APP_ID}'
  - 'ALGOLIA_ADMIN_KEY=${_ALGOLIA_ADMIN_KEY}'
  - 'ALGOLIA_INDEX_NAME=${_ALGOLIA_INDEX_NAME}'
  - 'ALGOLIA_INDEX_FILE=${_ALGOLIA_INDEX_FILE}'
This is again using atomic-algolia to look at our newly created dist/algolia.json file and compares that to what is in the Algolia index.
Want a PWA still? Then we need to have a service worker. No AJ not an Animal service worker. 🐱
# sw-precache
- name: 'gcr.io/cloud-builders/npm'
args: [ 'run','generate-service-worker']Please make sure to checkout Google Cloud Firebase CI/CD for a great example.
The biggest item that you need to remember here is adding your token to the cloud builder.'
Make sure to checkout Firebase Administrative Commands
firebase login:ci# Build the firebase image
- name: 'gcr.io/cloud-builders/docker'
args: [ 'build', '-t', 'gcr.io/$PROJECT_ID/firebase', './dockerfiles/firebase' ]
# Deploy to firebase
- name: 'gcr.io/$PROJECT_ID/firebase'
args: ['deploy', '--token', '${_FIREBASE_TOKEN}']Now you should have your full Hugo site up and running on Firebase Hosting!