Please fork and clone this repository
Students will build an app to access the photos of NASA's Mars Rovers. This app will help students practice and solify the following concepts in Objective-C:
- Table Views
- Collection Views
- REST API calls
- Caching data
- Bridging Objective-C files so they are usable in Swift code.
Please note and be aware that parts of these instructions are intentionally vague as this is Unit 5, and you have accrued a lot of experience thus far. A decent portion of this app is fairly simple, and you have done these things many times (Table Views, model objects, etc.), simply not in Objective-C. Remember the 20 minute rule, and try Googling, looking at Stack Overflow, and use the documentation before you ask a mentor. This is for your own benefit to help you aquire the skills to find solutions independently.
Take the time to look through the documentation for the API here. It will be essential that you can navigate and know how to find the information needed from the API throughout the project, again as the instructions are intentionally vague.
There is a file called APIKeys.plist that should be in your project if you cloned the repo. This contains the API key for NASA's API, and returns it to you as an instance of NSString. There is an APIKeys.plist file in your project. Go to NASA's API documentation here and go through the process to get an API key. Once you're done, add the API key to the plist file as the value, and make the key "APIKey". You will use this in the client later.
Use your API Key and what you learned from exploring NASA's API documentation to make various sample requests through a web browser or HTTP Client (e.g. Postman or Paw). The following endpoints may be helpful in searching the API. (You will have to add your API KEY onto each of these as a query parameter in order to recieve data.)
*The Base API URL (returns no data on its own): https://api.nasa.gov/mars-photos/api/v1?api_key={YOUR API KEY} *The list of mars rovers: https://api.nasa.gov/mars-photos/api/v1/rovers?api_key={YOUR API KEY}] *A list of sol objects for a given rover: https://api.nasa.gov/mars-photos/api/v1/manifests/{ROVER NAME}?api_key={YOUR API KEY} Example *A list of photo objects for a given martian sol and rover: https://api.nasa.gov/mars-photos/api/v1/rovers/{ROVER NAME}/photos?sol={NUMBER OF The SOL}&api_key={YOUR API KEY} Example]
Each of these endpoints will provide you with the basis of one of you model objects. Each will require its own fetch functions. You should familiarize yourself with the structure of the json of each query.
You will need three model objects in this project. First, a model representing a Mars rover, second, a photo that a rover took, and third, a description of each sol.
Create a new Cocoa Touch subclass of NSObject for each of these three model objects.
-
Add properties for the following model objects. Use the json trees above to determine the type of each property. Assume all properties should be nonatomic and readonly:
-
Rover:
-
Name of the rover
-
The launch date
-
Landing date
-
The max sol that represents the most recent sol that photos exist for the rover
-
The max date (on Earth) that the photos exist for the rover
-
The status of the rover. Make an enum (
NS_ENUM) representing either active or complete. Follow standard naming convention forNS_ENUMs. See this for a good introduction to NS_ENUM syntax. -
The number of photos taken by the rover
-
An array of sol descriptions
-
Photo:
-
The photo's identifier
-
The sol it was taken
-
The name of the camera that took the photo
-
The Earth date it was taken
-
The url to the image
-
Sol Description:
-
Which sol it is
-
The amount of photos taken during the sol
-
An array of cameras as strings
-
On the photo model, you will have to add the Objective-C equivalent of the Equatable Protocol using the method
isEqual. This will simply be an instance function which returns a bool by comparingthe imageURL of the photo object you pass into the function to the url of self (the instance the function is called on). -
Think about where we're getting the data from, and create an appropriate initializer for each model object. *Hint: Everything returned in JSON is contained in an Array or a Dictionary. You will need to reference the JSON for each model's respective endpoint heavily to create these initializers.
Create a new Cocoa Touch subclass of NSObjectcalled MarsRoverClient with a three letter prefix at the start. This will be where we make the network calls to get the JSON from NASA's API.
In the header file, create four instance method signatures:
fetchAllMarsRoversWithCompletionhas a completion block as a parameter that returns an array of rover names, and an error.fetchMissionManifestForRoverNamedtakes in a string and has a completion block that returns an instance of your rover model, and an errorfetchPhotosFromRoverthat takes in an instance of your rover model, which sol you want photos for, and a completion block that returns an array of photos, and an error.fetchImageDataForPhotothat takes in an instance of your photo model, and has a completion block that returns imageData (NSData, notData)
Look here and here at the sections named 'Blocks As Completion Handlers' for both of them for better understanding of blocks.
In the .m file, add the following private class methods:
- Copy and paste this snippet.
+ (NSString *)apiKey {
static NSString *apiKey = nil;
static dispatch_once_t onceToken;
dispatch_once(&onceToken, ^{
NSURL *apiKeysURL = [[NSBundle mainBundle] URLForResource:@"APIKeys" withExtension:@"plist"];
if (!apiKeysURL) {
NSLog(@"Error! APIKeys file not found!");
return;
}
NSDictionary *apiKeys = [[NSDictionary alloc] initWithContentsOfURL:apiKeysURL];
apiKey = apiKeys[@"APIKey"];
});
return apiKey;
}
This class computed property will return the API key from the info plist you inserted at the beginning of the project.
-
Create a class method called
baseURLthat returns an instance ofNSURLcreated from the base url of the API. -
Create a class method called
URLForInfoForRoverthat takes in a string called 'roverName' and returns anNSURLpointing to the mission manifest of the rover passed in. (hint: It should return an instance ofNSURLcreated using the baseURL and the information passed in to create a more specific url pointing to the information for that mission). Hint: You will need to construct your NSURL to access the lists of sols for a given rover endpoint mentioned at the beginning of this readme. -
Create a class method called urlForPhotosFromRover that takes in a string called 'roverName' and the sol that you want photos for, then like above, return a new, more specific
NSURLpointing to the photos for the given rover and sol. Hint: You will need to construct your NSURL to access the list of photo objects for a given martian sol and rover mentioned at the beginning of this readme.
Make sure that you add the API key as one of the query items in both of your urls above.
You will now fill out the methods that you defined in the .h file.
fetchAllMarsRoversWithCompletionfetchMissionManifestForRoverNamedfetchPhotosFromRoverfetchImageDataForPhotoThe following four methods will all useNSURLSession, and follow the same steps as in Swift to take a URL, get data from it, turn it into JSON, and then turn the JSON into our model objects. Since Objective-C does not have access to Swift'sCodableprotocol, we will need to follow the failable initializer method, using[NSJSONSerialization JSONObjectWithData:]to initialize a dictionary. You will then need to call an initializer (which you should have written in each of your model objects) which takes in a dictionary (from the JSON) and returns an instance of the model. Use the class methods we made above to generate the URLs necessary. Remember to look at what each method should return through the completion block for the end goal of the method.
Implement the following view hierarchy in the Storyboard. As you create each scene in the storyboard, create the appropriate Cocoa Touch files for each scene. Follow standard file naming conventions.
- The project will have a
UITableViewControlleras its initial View Controller embedded in aUINavigationController, with a basic cell. This will show a list of the Mars Rovers. - From the table view cell, create a show segue that will then display a list of sols that contain photos. You can use a Right Detail Cell to show which sol it is, and how many photos were taken on that sol.
- From the table view cell just created, create a show segue to a
UICollectionViewController. The collection view's cell should have an image view that fills the whole cell. Each cell will display a preview of the sol's photos. Remember to create a Cocoa Touch file for the collection view cell as well. - From the collection view cell, create a show segue to a new
UIViewControllerthat will display a larger version of the image on the cell that you segued from, along with labels to display which camera the photo was taken with, which sol it was taken on, and the Earth date it was taken on.
If you haven't already, create Cocoa Touch Files for the views and view controllers you just made in the Storyboard. Remember to subclass each of your storyboard View Controllers and Views with the proper CocoaTouchClass.
No other classes will reference properties or methods on the RoversTableViewController and therefore the .h file should be blank.
- In the implementation create a private array called
roversthat will be the data source for the table view. - In
ViewDidLoadcall thefetchAllMarsRoversWithCompletion:method to fetch the Mars Rovers available to display. Within the closure use a for loop to loop through the rover names returned in the JSON. Within this for loop, use each name to callfetchMissionManifestForRoverNamedand add the returnedRoverobect to theroversarray to the returned rovers in the completion handler. Placing a fetch function within a for loop will lead to as many fetches as there are items in the array you are looping through. This means the app will be waiting on a large number of asyncronys call occuring on different threads. You will need a way to determine when the last fetch function has returned its data before you move on to reloading the tableView and updating UI elements contingent upon this data retrieval. In order to do this, you will need to use a Dispatch Group. Please read Apple's Concurrency Programming Guide for further explanations. The section labeled Waiting on Groups of Queued Tasks will be especially helpful. - Implement the
UITableViewDataSourcemethods using theroversarray.. - Using the prepareForSegue method, pass the appropriate
Roverobject to the destination view controller. Make sure that the destination view controller has a public (thing "landing pad") property that serves as a placeholder to put the information to.
- Implement the
UITableViewDataSourcemethods. (hint: Use the passed rover's solDescriptions) - Create a custom setter-
setRover:for the public rover property that checks if the rover being passed through the setter is the same as the current rover (_rover). If it isn't, then set the current rover to the one passed into the setter, and also reload the tableview. Remember that this setter is where we can do the Objective-C equivalent of a SwiftwillSetanddidSet. - In the prepareForSegue, you should pass two things to the destination view controller; the rover that the SolsTableViewController got from the initial view controller's prepareForSegue, and the sol from the cell that the user just tapped on. (Again, make sure to create public properties on the destination view controller to be placeholders for these two things- i.e. two separate "landing pads")
At this point, you should be able to run the app and be able to select a rover from the inital table view controller, and see a list of its sols with a photo count on the table view controller that you segue to. Make sure this works before continuing.

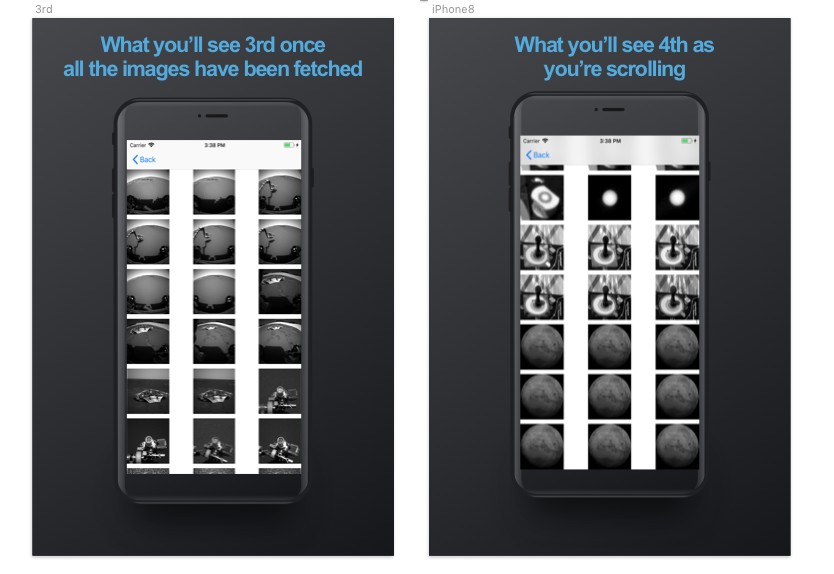
You will set up the collection view controller to display thumbnail images of each photo taken on the sol passed into it.
-
Create two private properties:
- An instance of your MarsRoverClient
- An array of photo references.
-
Create a method called
fetchPhotoReferencesthat doesn't return anything, but uses the appropriate MarsRoverClient method to fetch the photo references from the API, and sets the photo references property you just made to the photo references returned from the API. Call this method in theviewDidLoad
If you haven't already, go to your custom collection view cell file, create the necessary outlet. In the implementation of the cell file, call the prepareForReuse function. This will be explained later on, we will come back to it.
The private photo references property will be your data source for the collection view. Implement the required UICollectionViewDataSource methods. For now, just set the cell's imageView's image to the placeholder image in the assets folder.
Implement the prepareForSegue method to pass the photo reference from the cell that the user taps on.
Create a new Cocoa Touch file, called PhotoCache (with a prefix) as a subclass of NSObject. We will set up a cache in the device's memory for our photos so we aren't needlessly performing network calls to re-download photos that we've already downloaded from the API. We wil be using a class called NSCache to accomplish this. Take the time to look at the documentation (and elsewhere if you want) to understand how NSCache works before moving on.
- In the header file, create the following:
- A singleton instance called
sharedCache - A method that returns nothing called
cacheImageData...forIdentifierthat takes in data of typeNSDataand an identifier as anNSInteger. This will be used to store the image data returned from the api, and store it so that later on, we can access it whenever we want without having to do another network call. - A method called
imageDataForIdentifierthat takes in an identifier as anNSInteger, and returnsNSData. This is the method used to access/fetch the image data in the cache instead of the API.
- A singleton instance called
In the .m file:
-
Create a private property called 'cache' of type
NSCache -
Fill out the initializer:
- Set the private cache you just created to a new instance of
NSCache - Set the cache's name property to
@"com.DevMountain.MarsRover.PhotosCache"or something similar to uniquely identify the cache.
- Set the private cache you just created to a new instance of
-
The
cacheImageData...forIdentifiermethod should simply call the appropriate method on the private cache property to set the image data in the cache with the identifier as the key. (Remember thatNSCachestores data as key-value pairs.) -
Similarly, the
imageDataForIdentifiermethod should return the data in the cache, using the identifier as the key.
Now that we have set up the cache to store our images, let's go back to the PhotosCollectionViewController in the cellForItemAtIndexPath and refactor it so that it will fetch photos, and make use of the photo cache to efficiently store and fetch them from there.
In the cellForItemAtIndexPath of the PhotosCollectionViewController:
- Grab an instance of your
MarsPhotomodel object from your array of photo references. - Use the photo you just got and run it through your caches
imageDataForIdentifiermethod. Create a property called 'cachedData' to hold theNSDatait returns. - Check if the the cachedData is nil or not. If it isn't nil (there is NSData), initialize a new
UIImagewith the cachedData and set the cell's imageView's image to the new image. If it is nil, set the cell's imageView to the placeholder image in the Assets folder. - We don't want to keep the placeholder image on the cell forever, so use the MarsRoverClient class we made to fetch the appropriate image, then set the cell's imageView's image to the returned image.
We need to go back to the PhotoCollectionViewCell and use the prepareForReuse function. Its purpose is to do any setup needed before the cell gets reused in the collection view. What you will do is set the cell's image view's image back to the placeholder image.
We need to implement the prepareForSegue method on the PhotosCollectionViewController to pass the instance of our photo model object that from the collection view cell the user taps on.
- Like before, create a public property in the destination view controller (
PhotoDetailViewController) to place the photo. The destination view controller file should be a Swift file. - Implement the
prepareForSegueand pass the photo object to the destination view controller
The last thing we need to do is put the correct information in the labels, and the right image into the image view.
- Create a private function that follows the
updateViewspattern you should be familiar with by now. This function should be called as soon as the photo property on this view controller is set. - The photo model object doesn't contain the UIImage to be displayed. You will have to get it from the cache, or if it doesn't exist in the cache, you will have to use the
MarsRoverClientto fetch the image. Handle both cases accordingly. - Also in the
updateViewsfunction, make the date that will be put into the dateLabel look good. (hint: Use aDateFormatter)
Run the project and make sure everything works.