Microscope Measurement plugin for FIJI.
This set of FIJI plugins provides a quick way to save distance/length calibrations for various microscopes/objectives in a simple text file, and then draw calibrated distances onto your images.
You can then choose any of your prior calibrations to be applied to an open image (or all open images), as so:

The "Draw Measurement" plugin then allows you to draw a line with the calibrated measurement length, as so:

- Download and install the scientific image analysis program FIJI
- Download the most recent Microscope Tools Release from Github
- Extract/Unzip the file you downloaded from Github called:
Microscope-Measurment-tools - Move the folder into the FIJI plugins directory on your MacOS

- Extract/Unzip the file you downloaded from Github called:

note MacOS may prevent you from opening an unverified application follow steps below to open
- In System Preferences, click
Security & Privacy > General, then click the Lock button to allow you to make changes to your settings. You will need to provide your password, or use Touch ID, to unlock this. - The last app you attempted to open will be listed underneath your App Store security options. To launch the app (or rather, the DMG image file containing your app), click Open Anyway.
- Once installed, if you have not previously opened the app, macOS will warn you that you are attempting to open an app from the internet. You’ll need to approve it for launch, so click the Open button to do this
- Take photos of a known measurment sample with your microscope, at each magnification you want to calibrate
- Open FIJI
- Open an image file taken at the desired maginification with a measurment marker. e.g. Open a photo of your micrometer slide taken with your 40x objective
- Zoom in on the photo to view the micrometer scale
- Draw a line
ROI(Region Of Interest) along the calibration measurment feature. e.g. along the micrometer
- Navigate to and select
Analyze > Set Scale - The "Distance in Pixels" will already be set by your line ROI
- Type in the "Known Distance" from your measurement feature, mine is 5μm

- Record the resulting "Scale" value, e.g. 31.1716 pixel/unit, where unit is cm, mm, μm, etc
- The "Scale" value will be used in your
Microscope_Calibrations_user_settings.pyfile, so recored both a name and the scale value. e.g:these are just dummy valuesSwift 350T 4x: 0.9058 px/μm Swift 350T 10x: 1.81 px/μm Swift 350T 40X: 12.5455 px/μm Swift 350T 100X: 31.1716 px/μm - Open up
/Applications/Fiji.app/plugins/Analyze/Microscope Measurement Tools/Microscope_Calibrations_user_settings.pyin your IDE (Integrated Deelopment Environment) - Edit the
nameslist to reflect the name of each calibration on line 21:names = [ 'Swift 350T 4x', 'Swift 350T 10x', 'Swift 350T 40x', 'Swift 350T 100x', ] - Edit the
calslist to reflect the correspondingpixel-per-unitcalibration for each setting, from your previous records, on line 30:cals = [ 0.9058, 1.81, 12.5455, 31.1716, ] - Quit FIJI
- Re-start the FIJI application. This will allow the application to register the changes you made to the plugin note for any subsquent changes, you will have to save the file, quit the application and re-open it to see the changes
- Open an image
- Run
Analyze > Microscope Measurment Tools > Choose Microscope Calibrationand see a pop-up window that shows the new names and calibration values you set inMicroscope_Calibrations_user_settings.py.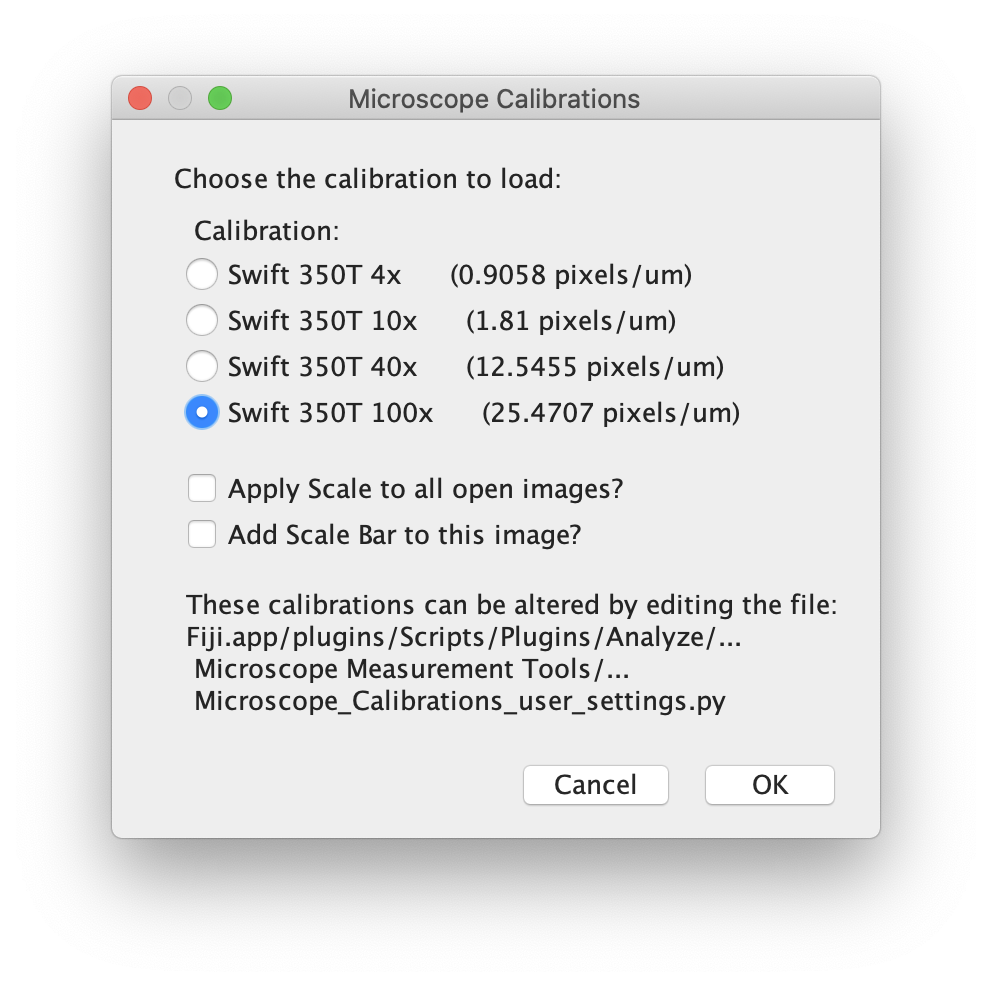
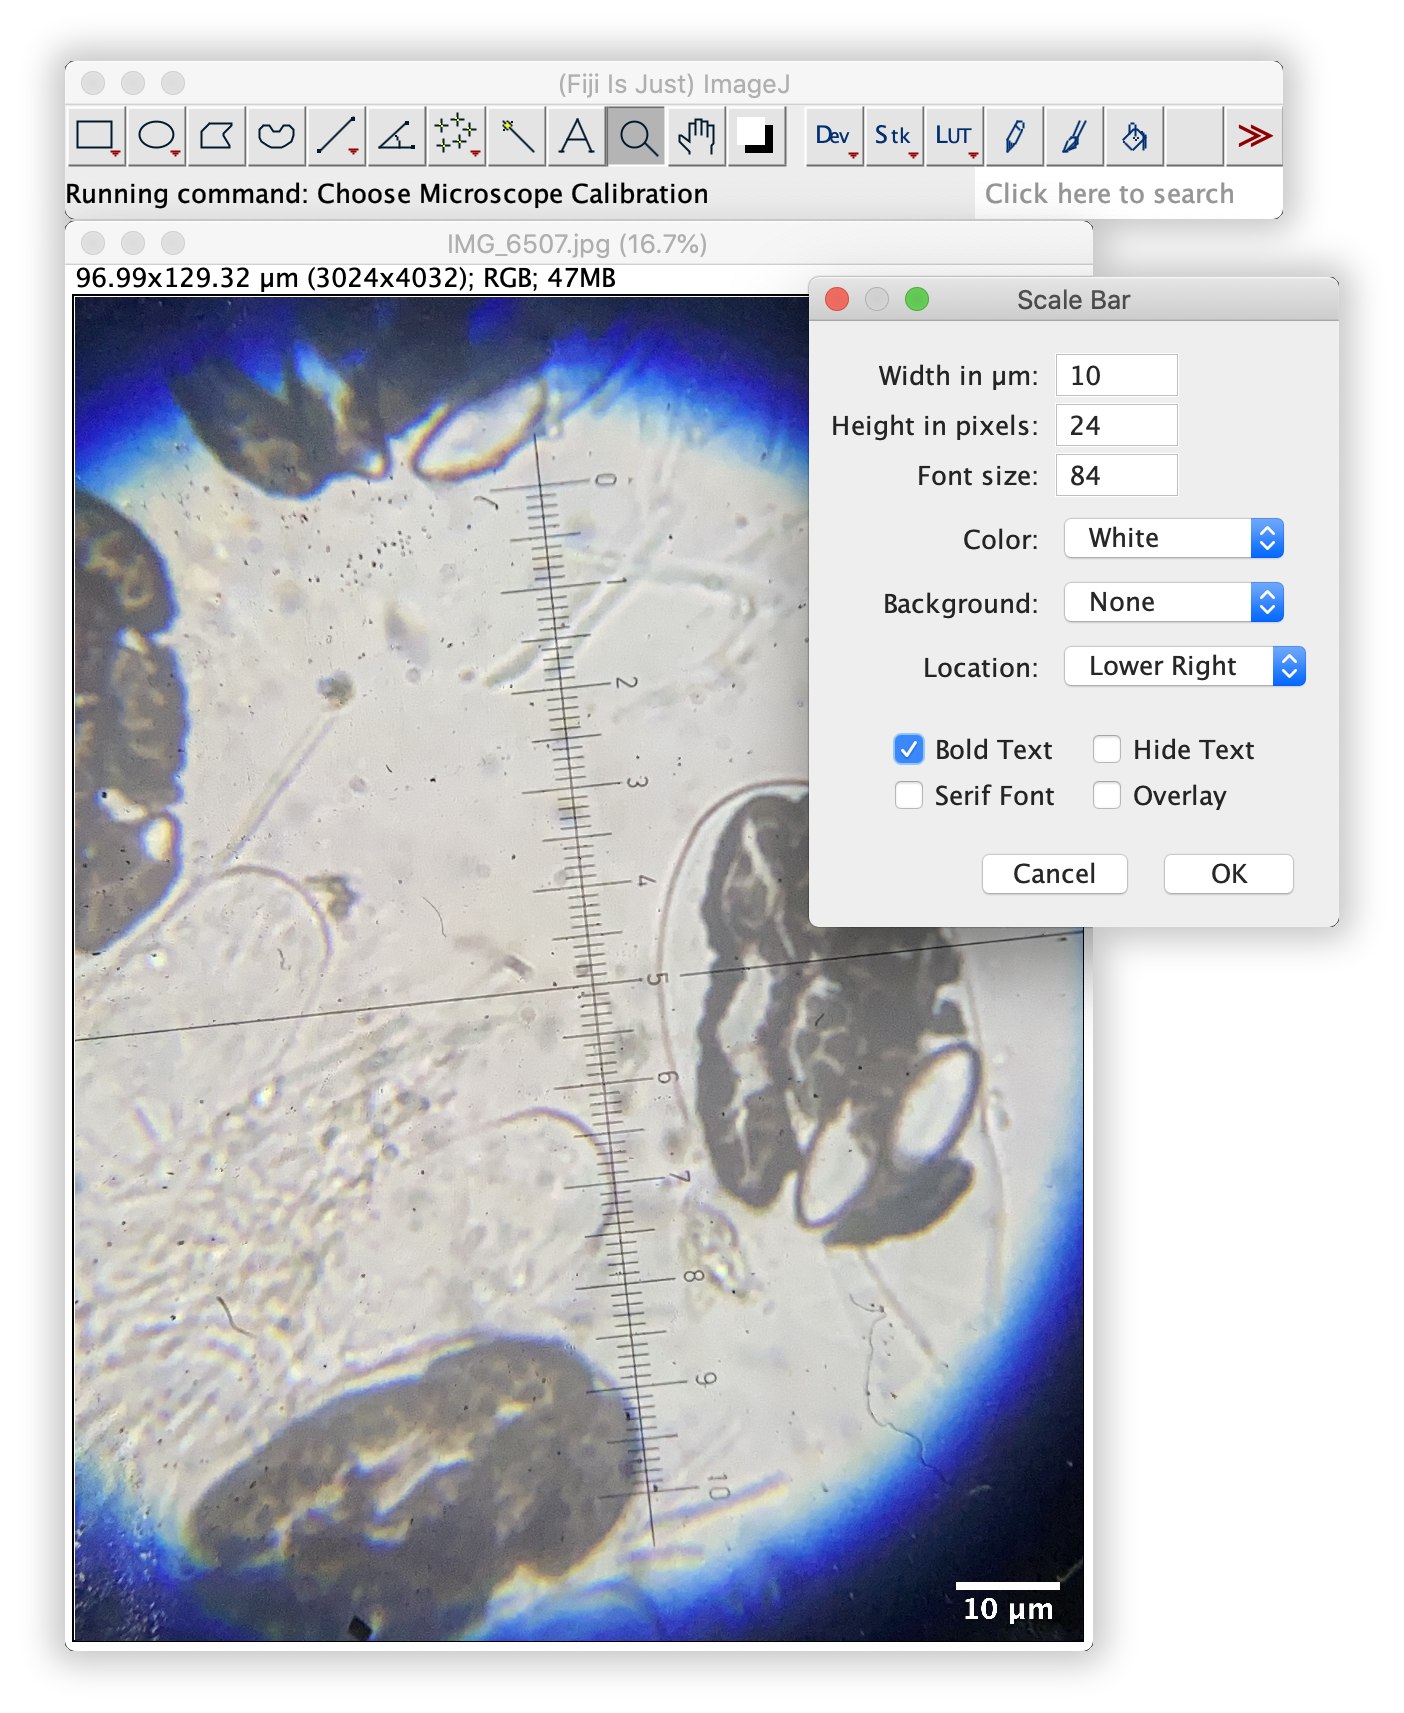
- You may also apply the same scale and scale bar to all images you have open, but selecting the checkboxes. Doing so will open another pop-up, where you can see how the scale will look. In the example below, the bar is set to 10μm, white text and placed in the lower right corner


Three files are included, which will show up in your FIJI "Analyze" menu:
-
Choose_Microscope_Calibration.py
- Opens the "Choose Calibration" window, for setting the measurement scale to a preconfigured value.
-
Draw_Measurement_-_Line.py
- Converts a Line ROI into a drawn annotation with the measurement length indicated.
-
Microscope_Calibrations_user_settings.py
- User-editable Settings file that contains your pre-configured scale calibrations, along with settings for drawing annotations (background/text color etc.)
View the How-To Calibrate an Ocular Micrometer
Select the Menu Item Plugins > Analyze > Microscope Measurement Tools > Choose Microscope Calibration, and select your microscope/objective from the resulting list. The pixel scale will be applied.
You can now drag a Line (or other type of ROI) on any feature, and the FIJI toolbar will show you the measurement dynamically. Other FIJI functions can now also be used for calibrated measurements (areas etc.).
To draw this measurement on your image, drag the Line to the desired location, and select the menu item Plugins > Analyze > Microscope Measurement Tools > Draw Measurement - Line
A custom function can be added to the list of available calibrations (as opposed to a static scale value). A sub-folder is included showing an example of how to do this. The example is for a JEOL SEM (scanning electron microscope), and the example function will determine the scale of the SEM image by parsing an accompanying text file.
See the files in the sub-folder "MScopeCals - custom function example" for more info, and move both of the *.py files into the main Microscope Measurement Tools folder to see how they can be used. An example SEM image and TXT file from a JEOM 7600F SEM are included.