How to get started
Windows as a host performs not very stable for complex docker network scenarios. The machine might crash severely (blue-screen). We recommend using Linux for this machine but it can be the same computer as the development machine.
- Install a container environment. For beginners, we recommend docker.
- Install docker-compose
- Follow the post installation steps
Might work with the new (2020) Unity for Linux versions, but we could not test it during development.
-
Install Unity version: 2019.3.7f1
-
Install python 3 (we recommend miniconda)
-
Install python packages:
pip install roslibpy TODO OTHER PACKAGES -
Download the MRTK V 2.3. We need the 4
*.unitypackagefiles. -
Install Visual Studio (we used the community edition). We provide a working module config file here.
We are going to clone the mono repository to the server as well as the development machine. Preparing the client and the server can be done simultaneously.
git clone https://github.com/EricVoll/ARbotics
cd ARbotics/Docker
In ARbotics/Docker/swagger_config/AR-Manager_swagger_cfg.json change the value of servers.url
to <server ip/url>:5001 or
use the swagger-ui functionality to change the ip to the server ip if it is not running on localhost:

Start the system with the command:
docker-compose up
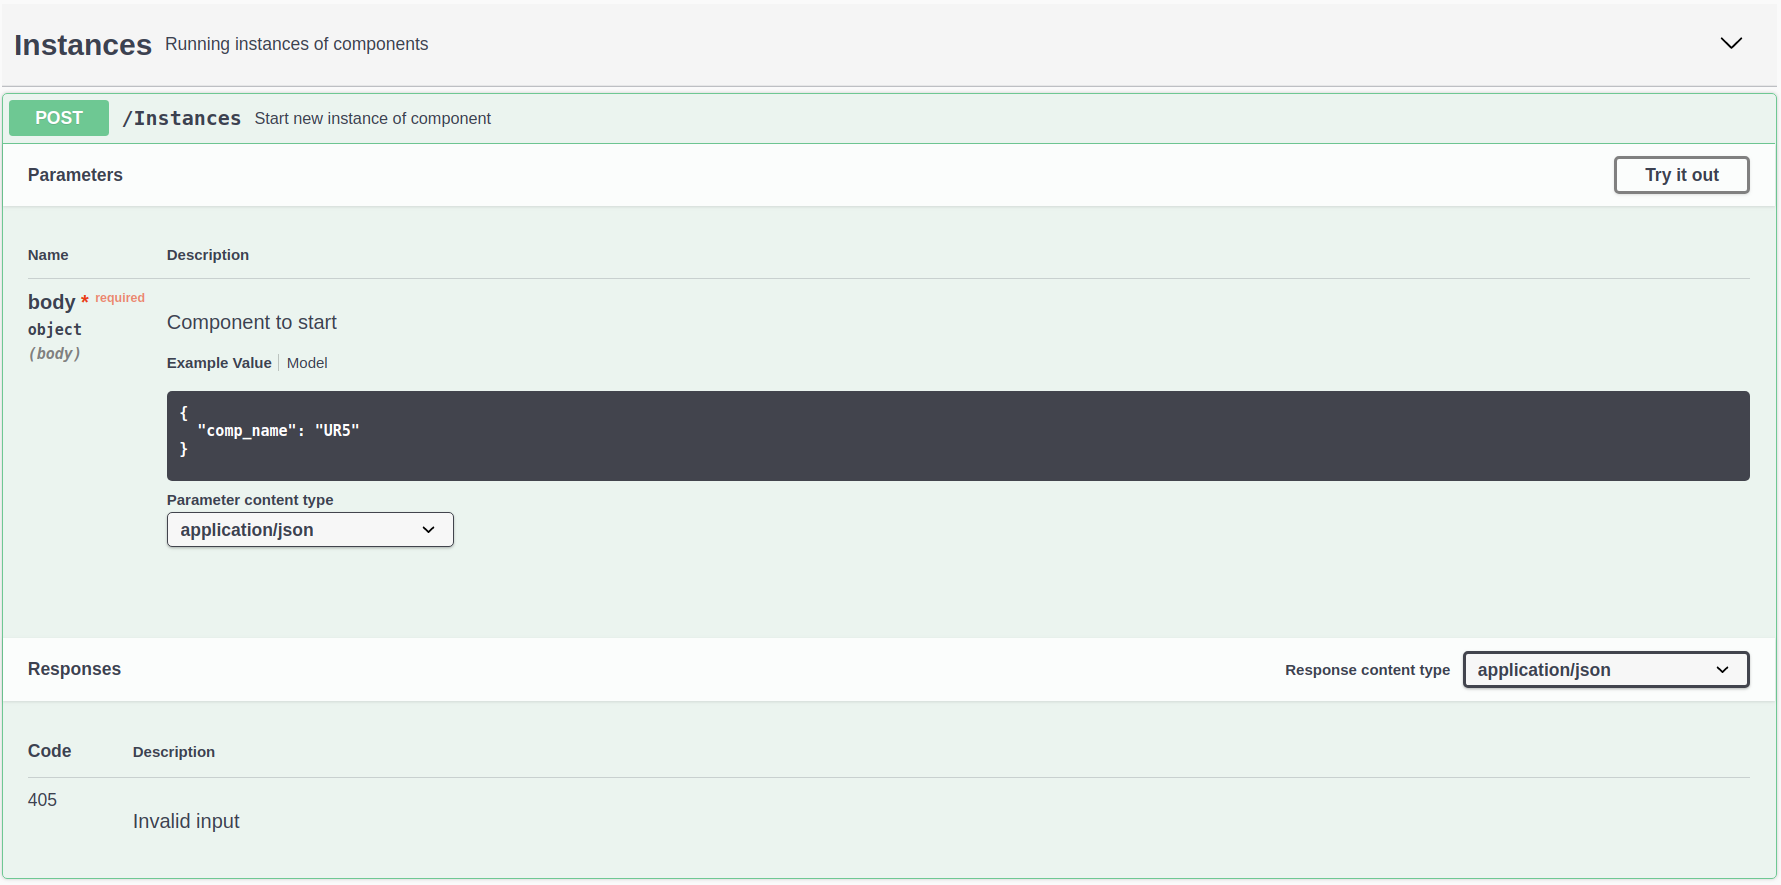
Open the Swagger API at <server ip/url>:5001
Spawn a new robot (here UR5) by sending a POST request to /Instances:
You can start a demo scene in unity now to verify that the robot is up and running.
It should appear shortly after the scene is started.
We recommend using HololensEmpty for this test.
git clone https://github.com/EricVoll/ARbotics
-
Import the Unity project folder
Unityto unity hub.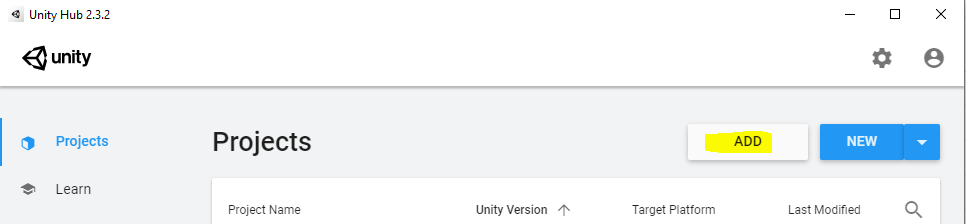
-
Start the project, then import MRTK to the assets, using this guide
-
Find the demo scene in the assets (
Scenes). We provide some examples:- Hololens: Scenes that are meant to be run on an Hololens 1.
-
HololensEmpty: Empty scene with no contents, will render the environment meshes and robots on Hololens. -
HololensSensors: Same asHololensEmptybut with the sensors manager included.
-
- Plots:
-
PlotsDemo: Scene that demonstrates the plots. Intended to be used with Unity's play feature.
-
- Sensors:
-
SensorsDemo: Scene that demonstrates the sensors. Intended to be used with Unity's play feature.
-
Potential Unity Bug: MRTK might fail to detect the custom profile. Check:

if the
SensorsProfileis not selected, use the right-clickReimportfunctionality on profiles:
Also make sure that the
DefaultMixedRealitySpatialAwarenessSystemProfileis selected if the profile was not there:
- Hololens: Scenes that are meant to be run on an Hololens 1.
-
Change the ROS bridge server IPv4 / URL to point to your server:

-
Start a build:

You need to configure the build. Using this configuration you can switch between
Debug(enableDevelopment Build) andRelease: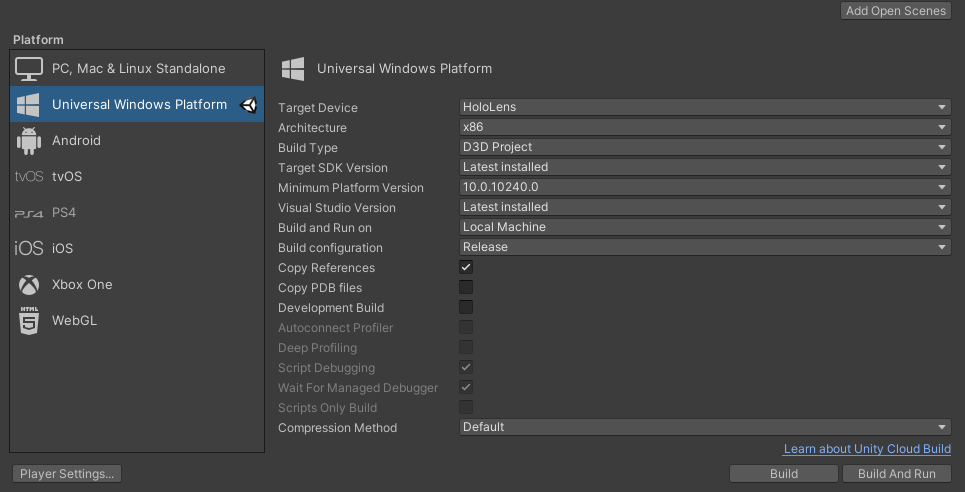
If this is your first build, you have to
Switch Platformto build and UWP (Hololens) app. After this step, pressBuildand select a new, empty folder as your target location. Building process takes a while (5-10 mins).
Open the generated C++ project in your build destination. Switch the build mode in Visual Studio to:

and enter the device IP address here:


Visual Studio uses the ip for debugging as well as release builds!
Boot the Hololens and keep it awake during the build, the final bundle will be directly deployed to the HMD.
We recommend using the app Microsoft HoloLens to connect to the device simultaneously to check its state.

After you see a robot up and running, use the python for prototyping. We provide an example script here. It allows us to show enable / disable data sources via python and display plots in the AR world. This script is meant to be executed on your developer laptop. It communicates with the rosbridge server. The IP has to be configured in the script. The script also shows how to efficiently plot data using MatplotLib. To run the script on your local machine install the provided conda-environment with the following command:
conda env create -f .config/conda-ARbotics.yml
This will create a conda env with the name ARbotics.
conda activate ARbotics activates the newly created enviorment.
Then go to the script here and modify the IP-address to point to the server running the docker containers or your local host IP.
ip ='http://127.0.0.1'
ip_ros ='127.0.0.1'
port_rest = 5000
port_rossharp = 9090
Start the python script with:
python Python/roslibpy/send_euclidean_goal_pose.py
In the terminal you can now add or delete plots with specified keys.
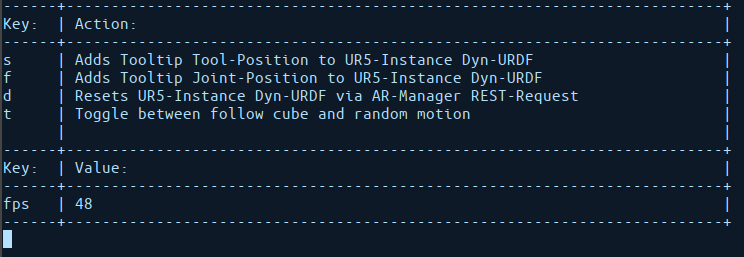
The final result should look like this:
One caveat of this framework at the moment is that robot models have to be imported once in editor mode before they can be used in a built application.
For this, we prepared a Unity-project called RosSharpRobotImporter, which contains a (minimally) modified version of the original ROS# repository.
First, launch the ros_launch file on your ubuntu system you want to import, similarly to this example.
There click "Import urdf from ROS"

apply your specific changes (such as IP-Adress etc.) and click "Read Robot Description"

The project will then download some files via the RosBridge and create prefabs out of them. Create a folder with your exact robot name at "Resources/Urdf/Models/"

For a more detailed description refer to the original Ros# Wiki, which should also work with the adapted versions of ROS# used in this repository.