Tutorial #3: Using Our Database
This continues from Part 2 of the tutorial track.
Credit goes to Christopher Buecheler for his April 2018 version of The Dead-Simple Step-By-Step Guide for Front-End Developers to Getting Up and Running With Node.JS, Express, and MongoDB - the content below is his text and content tweaked in places for Scoutradioz specifics.
We're leaving our text editor for a bit and diving into the terminal. Make sure you've installed Mongo - see Part 6 of Tutorial #1.
Instead of opening separate command prompt windows, VS Code has a trick up its sleeve. If you are using VS Code, hit Ctrl + ` on your keyboard (or click View -> Terminal). You can have as many command prompts as you want, all in the same window as your text editor! Click the + to add new instances, the trash can to close an instance, and the x to hide the terminal.
In the root of your C:/ drive (or whatever drive you have your tutorial directory), create a directory called "data" and a sub-directory called "db" with the following commands on Windows or Linux:
# Windows
mkdir C:\data
mkdir C:\data\db
# Linux
mkdir /data
mkdir /data/db
Now open a new terminal because we're going to be running this database server while also running our Express server.
In the terminal, type the following command to launch MongoDB:
mongodIf you get an error saying the system could not find the file specified, you may not have successfully added the MongoDB installation to your PATH. Make sure the filepath is correct, and restart VS Code or the terminal.
If it crashes with an error saying NonExistentPath, make sure C:\data\db (Windows) or /data/db (Linux) exists. If your project is on a different drive (e.g. D:, make sure D:\data\db exists.)
You'll see the Mongo server start up. This is going to take a while if it's the first time, because it has to do some preallocating of space and a few other housekeeping tasks. Once it says "[initandlisten] waiting for connections on port 27017", you're good. There's nothing more to do here; the server is running. Now you need to go back to your original terminal and type:
mongoYou'll see something like the following:
Mongo Console
MongoDB shell version v3.6.2
connecting to: mongodb://127.0.0.1:27017
MongoDB server version: 3.6.2
Server has startup warnings:
[a bunch of warnings that you can ignore for this tutorial]
>
Additionally, if you're paying attention to your mongod instance, you'll see it mention that a connection has been established. All right, you've got MongoDB up and running, and you've connected to it with the client. We'll use this client to manually work on our database, for a bit, but it's not necessary for running the website. Only the server daemon (mongod) is needed for that.
The first thing we're going to do is create a database in which to store stuff. In your Mongo console, type the following:
Mongo Console
use tutorial
Now we're using the database named "tutorial," which is great except nothing actually exists yet. To make the database exist, we have to add some data. We're going to start off by doing that right inside of the Mongo client.
My favorite thing about MongoDB is that it uses JSON for its structure, which means it was instantly familiar for me. If you're not familiar with JSON, you can read up here: https://www.w3schools.com/js/js_json_intro.asp
Let's add a record to our collection. For the purposes of this tutorial, we're just going to have a simple database of usernames and email addresses. Our data format will thus look like this:
Mongo Console
{
	"_id" : 1234,
	"username" : "myusername",
	"email" : "myusername@example.com"
}
You can create your own _id assignment if you really want, but I'd recommend letting Mongo just do its thing. It will automatically provide a unique identifier for every single top-level collection entry. Let's add one and see how it works. In your Mongo client, type this:
Mongo Console
db.usercollection.insert({ "username" : "testuser1", "email" : "testuser1@example.com" })Something important to note here: that db stands for our database, which as mentioned above we've defined as tutorial. The usercollection part is our collection. Note that there wasn't a step where we created the usercollection collection. That's because the first time we add to it, it's going to be auto-created. Handy. OK, Hit enter. Assuming everything went right, you should see WriteResult({ "nInserted" : 1 }), which is Mongo's way of telling you everything went according to plan. That's not very exciting, though, so type this:
Mongo Console
db.usercollection.find().pretty()In case you're curious, the .pretty() method gives us linebreaks. It will return:
Mongo Console
{
	"_id" : ObjectId("5202b481d2184d390cbf6eca"),
	"username" : "testuser1",
	"email" : "testuser1@example.com"
}
Except, of course, your ObjectId will be different, since as mentioned, Mongo is automatically generating those. That's all there is to writing to MongoDB from the CLI, and if you've ever worked with JSON services before, you are probably going "oh, wow, that's going to be easy to implement on the web." … you're right!
A quick note on DB structure: obviously in the long run you're unlikely to be storing everything at the top level. There are a ton of resources on the internet for schema design in MongoDB. Later, we will be going deeper in how we designed the schema design for Scoutradioz.
Now that we've got one record, let's add a a couple more. In your Mongo console, type the following:
Mongo Console
newstuff = [{ "username" : "testuser2", "email" : "testuser2@example.com" }, { "username" : "testuser3", "email" : "testuser3@example.com" }]
db.usercollection.insert(newstuff);
Note that, yes, we can pass an array with multiple objects to our collection. Handy! Another use of db.usercollection.find().pretty() will show all three records:
Mongo Console
{
		"_id" : ObjectId("5202b481d2184d390cbf6eca"),
		"username" : "testuser1",
		"email" : "testuser1@example.com"
}
{
		"_id" : ObjectId("5202b49ad2184d390cbf6ecb"),
		"username" : "testuser2",
		"email" : "testuser2@example.com"
}
{
		"_id" : ObjectId("5202b49ad2184d390cbf6ecc"),
		"username" : "testuser3",
		"email" : "testuser3@example.com"
}
Now we're going to start actually interacting with the web server and site that we set up earlier. You can quit out of the MongoDB console with ctrl-c or by typing "exit" and hitting enter. We're done here.
This is where the rubber meets the road. Let's start by building a page that just spits out our DB entries in a mildly pretty form. Here's the HTML we're shooting to generate:
<ul>
<li><a href="mailto:testuser1@example.com">testuser1</a></li>
<li><a href="mailto:testuser2@example.com">testuser2</a></li>
<li><a href="mailto:testuser3@example.com">testuser3</a></li>
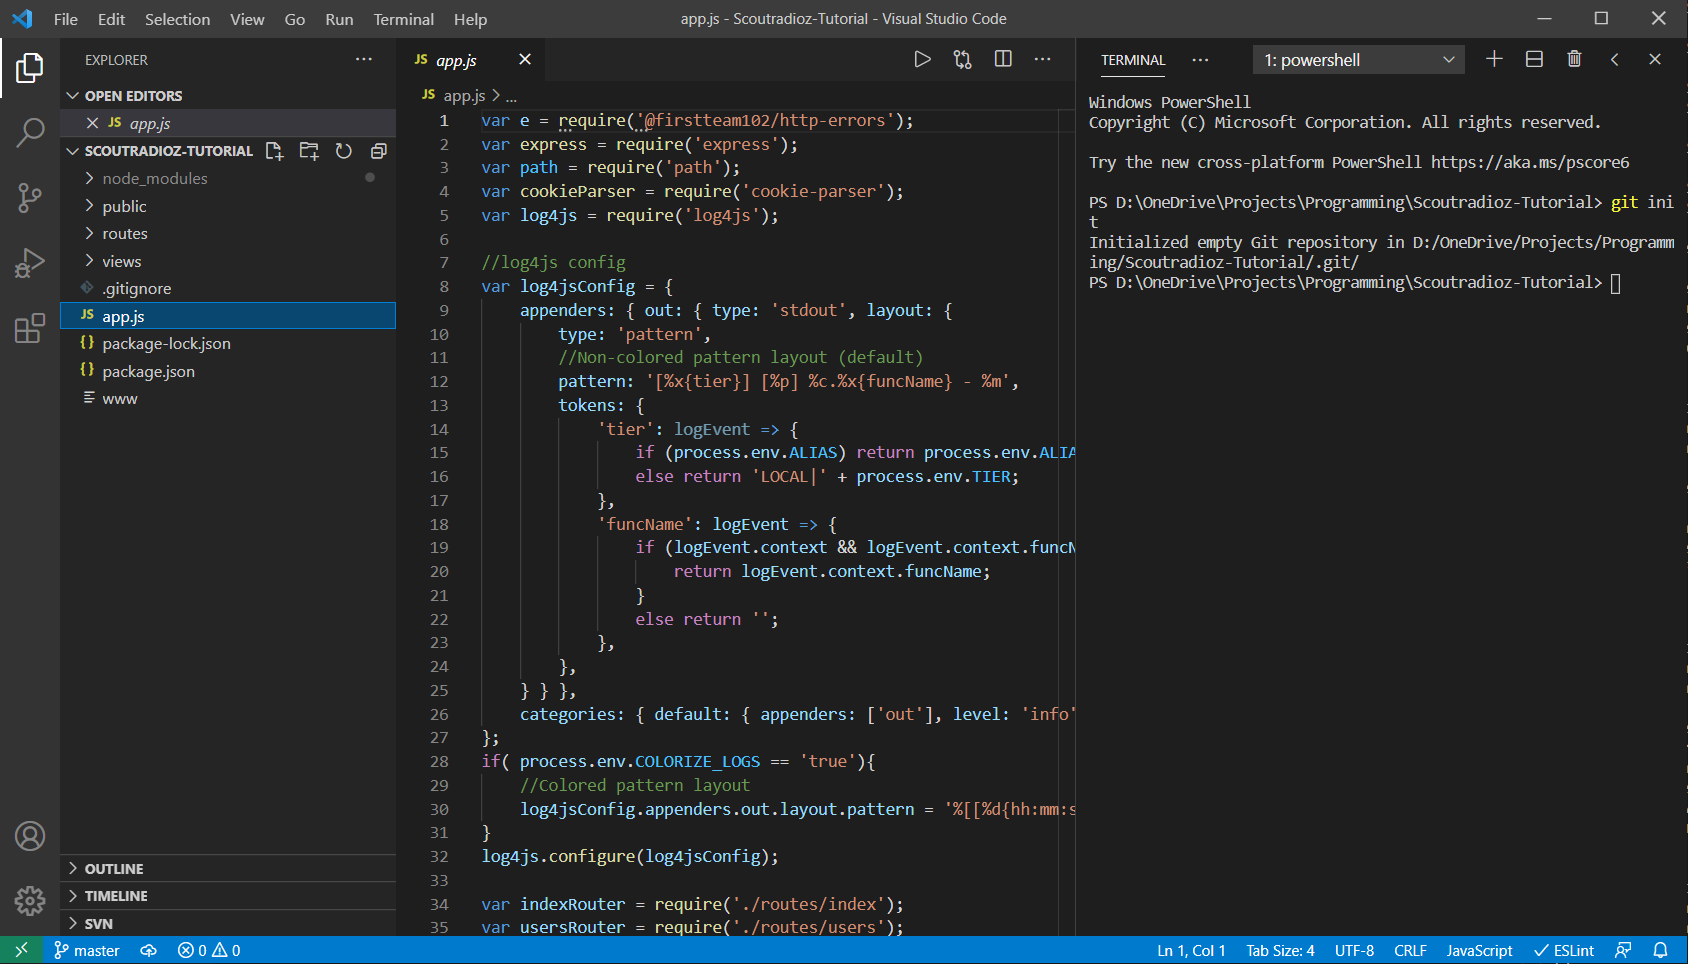
</ul>I know this isn't rocket science, but that's the point. We're just doing a simple DB read-and-write in this tutorial, not trying to build a whole website. First things first, we need to add a few lines to our main app.js file—the heart and soul of our app—in order to actually connect to our MongoDB instance. Open C:\node\tutorial\app.js and at the top you'll see:
C:\node\tutorial\app.js
var e = require('@firstteam102/http-errors');
var express = require('express');
var path = require('path');
var cookieParser = require('cookie-parser');
var log4js = require('log4js');
Now add these two lines:
C:\node\tutorial\app.js
var e = require('@firstteam102/http-errors');
var express = require('express');
var path = require('path');
var cookieParser = require('cookie-parser');
var log4js = require('log4js');

//New Code
var monk = require('monk');
var db = monk('localhost:27017/tutorial');
These lines tell our app we want to talk to MongoDB. For now, we will just be using Monk to do it, and our database is located at localhost:27017/tutorial. Note that 27017 is the default port your MongoDB instance should be running on. If for some reason you've changed it, use that port instead. Now look further down in the file, where you have this:
C:\node\tutorial\app.js
app.use('/', indexRouter);
app.use('/users', usersRouter);
We need to do some work here. Those app.use statements (along with the others you'll find in app.js) are establishing middleware for Express. The short, simple explanation is: they're providing custom functions that the rest of your app can make use of. It's pretty straightforward, but due to chaining it needs to come before our route definitions, so that they can make use of it.
Above the two lines just mentioned, add the following:
C:\node\tutorial\app.js
// Make our db accessible to our router
app.use(function(req, res, next){
	req.db = db;
	next();
});
NOTE: If you don't put this above the routing stuff mentioned above (app.use('/', indexRouter);), your app WILL NOT WORK.
We already defined "db" when we added Monk to app.js. It's our Monk connection object. By adding this function to app.use, we're adding that object to every HTTP request (ie: req) our app makes. This is fine and will not cause performance issues. Unlike MySQL, MongoDB connections don't need to be manually opened and closed, so the db object will just be there, not using any resources, until we need it.
So, again, that code needs to go above our routing code. Your entire app.js should look like this, now:
C:\node\tutorial\app.js
var e = require('@firstteam102/http-errors');
var express = require('express');
var path = require('path');
var cookieParser = require('cookie-parser');
var log4js = require('log4js');

//New Code
var monk = require('@firstteam102/monk-fork');
var db = monk('localhost:27017/tutorial');

//log4js config
var log4jsConfig = {
	appenders: { out: { type: 'stdout', layout: {
		type: 'pattern',
		//Non-colored pattern layout (default)
		pattern: '[%x{tier}] [%p] %c.%x{funcName} - %m',
		tokens: {
			'tier': logEvent => {
				if (process.env.ALIAS) return process.env.ALIAS;
				else return 'LOCAL|' + process.env.TIER;
			},
			'funcName': logEvent => {
				if (logEvent.context && logEvent.context.funcName) {
					return logEvent.context.funcName;
				}
				else return '';
			},
		},
	} } },
	categories: { default: { appenders: ['out'], level: 'info' } }
};
if( process.env.COLORIZE_LOGS == 'true'){
	//Colored pattern layout
	log4jsConfig.appenders.out.layout.pattern = '%[[%d{hh:mm:ss}] [%x{tier}] [%p] %c.%x{funcName} - %]%m';
}
log4js.configure(log4jsConfig);

var indexRouter = require('./routes/index');
var usersRouter = require('./routes/users');

var app = express();

// view engine setup
app.set('views', path.join(__dirname, 'views'));
app.set('view engine', 'pug');

app.use(express.json());
app.use(express.urlencoded({ extended: false }));
app.use(cookieParser());
app.use(express.static(path.join(__dirname, 'public')));

// Make our db accessible to our router
app.use(function(req, res, next){
	req.db = db;
	next();
});

app.use('/', indexRouter);
app.use('/users', usersRouter);

// catch 404 and forward to error handler
app.use(function(req, res, next) {
	next(new e.NotFoundError());
});

// error handler
app.use(function(err, req, res, next) {
  // set locals, only providing error in development
  res.locals.message = err.message;
  res.locals.error = req.app.get('env') === 'development' ? err : {};

  // render the error page
  res.status(err.status || 500);
  res.render('error');
});

module.exports = app;
Next thing we need to do is modify our route so that we can actually show data that's held in our database, using our db object.
Open up C:\node\nodetest1\routes\index.js in your editor. It's still got the index route, and the goofy /helloworld route. Let's add a third:
C:\node\tutorial\routes\index.js
/* GET Userlist page. */
router.get('/userlist', function(req, res) {
	var db = req.db;
	var collection = db.get('usercollection');
	collection.find({},{},function(e, users){
		res.render('userlist', {
			"userlist" : users
		});
	});
});
OK... it is getting fairly complicated. We'll see soon, however, how we can clean up our database-related code using scoutradioz-utilities. But until then: All it's really doing is extracting the "db" object we passed to our http request, and then using that db connection to fill our users variable with database documents, ie: user data. Then we do a page render just like the other two GETs in this route file.
Basically, we tell our app which collection we want to use (usercollection) and do a find, then return the results as the variable users. Once we have those documents, we then do a render of userlist (which will need a corresponding Pug template), giving it the userlist variable to work with, and passing our database documents to that variable.
Next let's set up our Pug template. Navigate to C:\node\tutorial\views\ and open index.jade. Once again, immediately save it as userlist.pug. Then edit the HTML so it looks like this:
C:\node\tutorial\views\userlist.pug
extends layout

block content
  h1.
	User List
  ul
	each user, i in userlist
	  li
		a(href="mailto:#{user.email}")= user.username
This is saying that we're going to pull in the set of documents we just called userlist over in the route file, and then for each entry (named 'user' during the loop), get the email and username values from the object and put them into our html. We've also got the count - i - handy in case we need it; though in this instance we don't.
We're all set. Save that file. If you're using Nodemon, it will automatically restart our server.
Now open your browser and head to http://localhost:3000/userlist and marvel at the results.
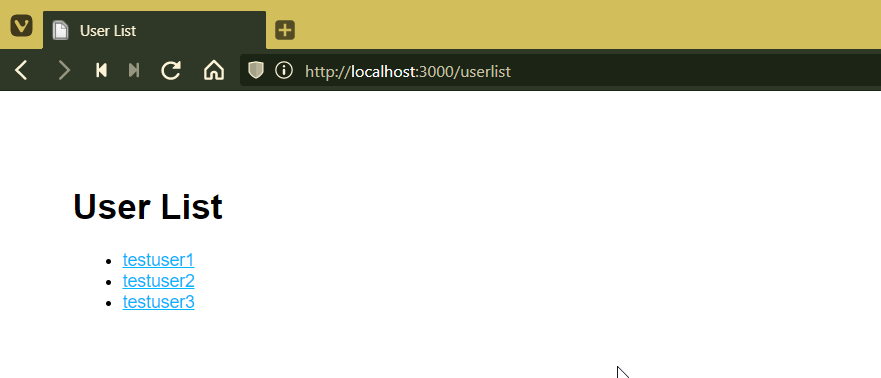
You're now pulling data from the DB and spitting it out onto a web page. Nice!
Note: Getting an error? Pug is super nitpicky with its spacing. You cannot mix spaces with tabs, and "each" loops must have their contents indented. I'd recommend using tabs instead of spaces. At the bottom of the VS Code window, you'll see a button saying Tab Size: 4. After you click it, a dialog will appear at the top of the screen. Click "Indent using tabs" and then "Tab size: 4". To auto convert spaces to tabs, click the button again then Convert Spaces to Tabs.

Writing to the database is not particularly difficult. Essentially we need to set up a route that takes a POST, rather than a GET.
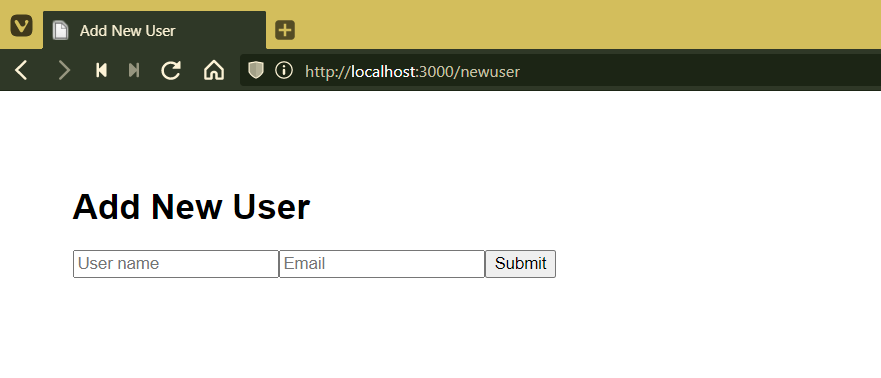
We're going quick and dirty here: two ugly, unstyled text inputs and a submit button. 1996-style. We'll get into styling later. But before we get to that, we're going to do some scripting. Let's start by quickly wiring up a route for our add user form. Open /routes/index.js and add the following code above the last module.exports line:
C:\node\nodetest1\routes\index.js
/* GET New User page. */
router.get('/newuser', function(req, res) {
	res.render('newuser', { title: 'Add New User' });
});
Now we just need a template. Open up /views/index.pug, save it as newuser.pug, and replace the whole file contents with this:
C:\node\nodetest1\views\newuser.pug
extends layout

block content
	h1= title
	form(id="formAddUser" name="adduser" method="post" action="/newuser")
		input(id="inputUserName" type="text" placeholder="User name" name="username")
		input(id="inputUserEmail" type="text" placeholder="Email" name="useremail")
		button(id="btnSubmit" type="submit") Submit
Here we're creating a form with the ID "formAddUser" (I like to preface my IDs with the type of thing we're ID'ing. It's a personal quirk). Method is post, action is adduser. Pretty straightforward. Under that we've defined our two inputs and our button.
Save all your files and go to http://localhost:3000/newuser, and you'll see your form in all its glory.
Go ahead and submit. Enjoy the 404 error. We're about to fix that.
OK, this is pretty much the same process as with the user list. We don't need another app.use statement since we've already wrapped our database object into every request (see above). That means it'll be accessible to any new routes we write. That means that all we need to do is add a route for POSTing to /newuser.
Go back to /routes/index.js and let's create our insertion function. Once again, you'll want to put this above the final module.exports line (it doesn't REALLY matter, but it makes things cleaner to wrap up with the export). This is a big one, so I've commented the code pretty thoroughly. Here it is:
C:\node\nodetest1\routes\index.js
/* POST to Add User Service */
router.post('/newuser', function(req, res) {

	// Set our internal DB variable
	var db = req.db;

	// Get our form values. These rely on the "name" attributes
	var userName = req.body.username;
	var userEmail = req.body.useremail;

	// Set our collection
	var collection = db.get('usercollection');

	// Submit to the DB
	collection.insert({
		"username" : userName,
		"email" : userEmail
	}, function (err, result) {
		if (err) {
			// If it failed, return error
			res.send("There was a problem adding the information to the database.");
		}
		else {
			// And forward to success page
			res.redirect("userlist");
		}
	});
});
Obviously in the real world you would want a ton more validating, error-checking, and the like. You'd want to check for duplicate usernames and emails, for example. And to vet that the email address at least looks like a legit entry. But this'll work for now. As you can see, on successfully adding to the DB, we forward the user back to the userlist page, where they should see their newly added user.
Are there smoother ways to do this? Absolutely. We're staying as bare-bones as possible here. Now, let's go add some data!
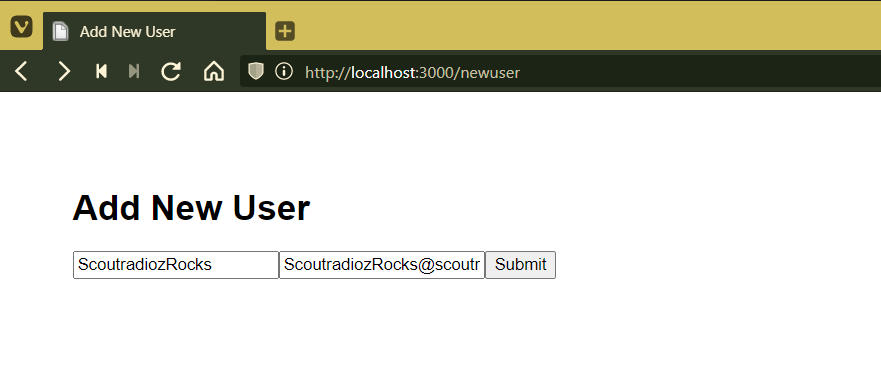
Make sure mongod is running! Assuming your server is running, which it should be, return to your web browser and point it at http://localhost:3000/newuser again. There's our exciting form, just like before. Except now let's fill in some values before we hit submit. I went with username "ScoutradiozRocks" and email "ScoutradiozRocks@scoutradioz.com"... you can go with whatever you'd like.
Click submit, and check it out ... we're back at /userlist and there's our new entry!

We are officially reading and writing from a MongoDB database using Node.js, Express, and Pug. You are now what the kids call a "full stack" developer (probably not a GOOD one, just yet, but I didn't promise that).
Congratulations. Seriously. If you followed this all the way through, and if you really paid attention to what you were doing and didn't just paste code, you should have a really solid grasp on routes and views, reading from the DB, and posting to the DB. That is all you need to get started developing whatever app you want to build. I don't know about you, but I think that's really cool.
What's Next? Well, you've only just begun your Scoutradioz journey. Let's start with an introduction to async/await.