Chapter 3 code_Project_80 The second part 2 of "The Arduino World Book" code_Project_80
- code_Project_80
- By:Farkad Adnan فرقد عدنان - -E-mail: farkad.hpfa95@gmail.com -inst : farkadadnan
- #farkadadnan , #farkad_adnan , فرقد عدنان#
- FaceBook: كتاب عالم الاردوينو
- inst : arduinobook
- #كتاب_عالم_الاردوينو
- #كتاب_عالم_الآردوينو
- facebook : https://www.facebook.com/profile.php?id=100002145048612
- instagram: https://www.instagram.com/farkadadnan/
- linkedin : https://www.linkedin.com/in/farkad-adnan-499972121/

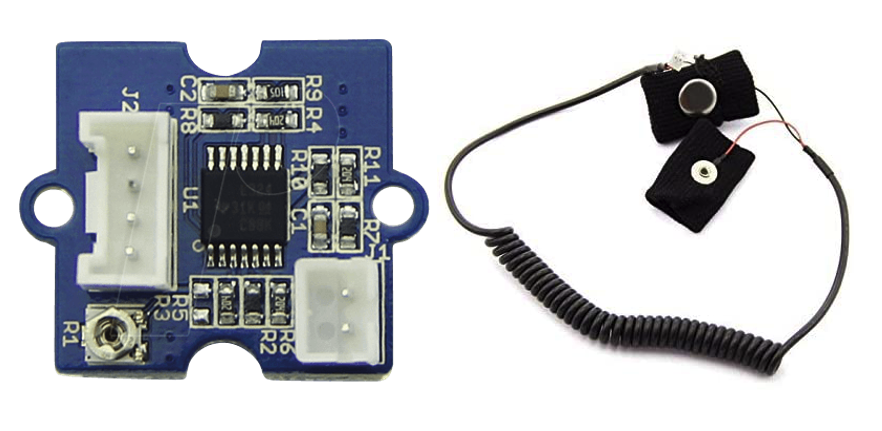
-GSR تعني استجابة الجلد الجلفانية ، وهي طريقة لقياس التوصيل الكهربائي للجلد. يمكن أن تؤدي العاطفة القوية إلى تحفيز الجهاز العصبي السمبثاوي ، مما يؤدي إلى إفراز المزيد من العرق بواسطة الغدد العرقية. يتيح لك GSR اكتشاف هذه المشاعر القوية عن طريق ربط قطبين كهربائيين بإصبعين في يد واحدة. من المثير للاهتمام إنشاء مشاريع متعلقة بالعاطفة مثل مراقبة جودة النوم. -GSR stands for galvanic skin response, is a method of measuring the electrical conductance of the skin. Strong emotion can cause stimulus to your sympathetic nervous system, resulting more sweat being secreted by the sweat glands. GSR allows you to spot such strong emotions by simple attaching two electrodes to two fingers on one hand. It is an interesting to create emotion related projects like sleep quality monitor.
- Supply voltage: 3.3 V / 5 V
- Sensitivity: adjustable by potentiometer
- Interface: Analog
- Set includes:
- GSR sensor
- Fingerbands required for measurement
- Connection cable, Grove type
- Dimensions: 24 x 20 x 9.8 mm
- Weight: 29 g


/*
 By:Farkad Adnan
 E-mail: farkad.hpfa95@gmail.com
 inst : farkadadnan
 #farkadadnan , #farkad_adnan , فرقد عدنان#
 FaceBook: كتاب عالم الاردوينو
 inst : arduinobook
 #كتاب_عالم_الاردوينو  #كتاب_عالم_الآردوينو
 */
const int GSR=A0;
int sensorValue=0;
int gsr_average=0;

void setup(){
  Serial.begin(9600);
}
void loop(){
  long sum=0;
  for(int i=0;i<10;i++){
      sensorValue=analogRead(GSR);
      sum += sensorValue;
      delay(5);
      }
   gsr_average = sum/10;
   Serial.println(gsr_average);
}
- الخطوة 1. انسخ الكود إلى Arduino IDE وقم بتحميله.
- الخطوة 2. لا ترتدي مستشعر GSR.
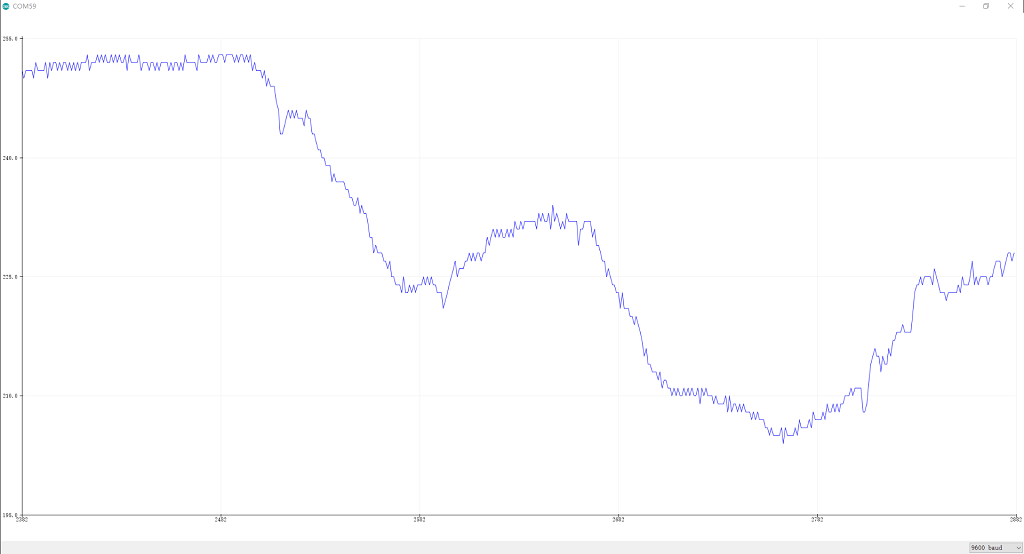
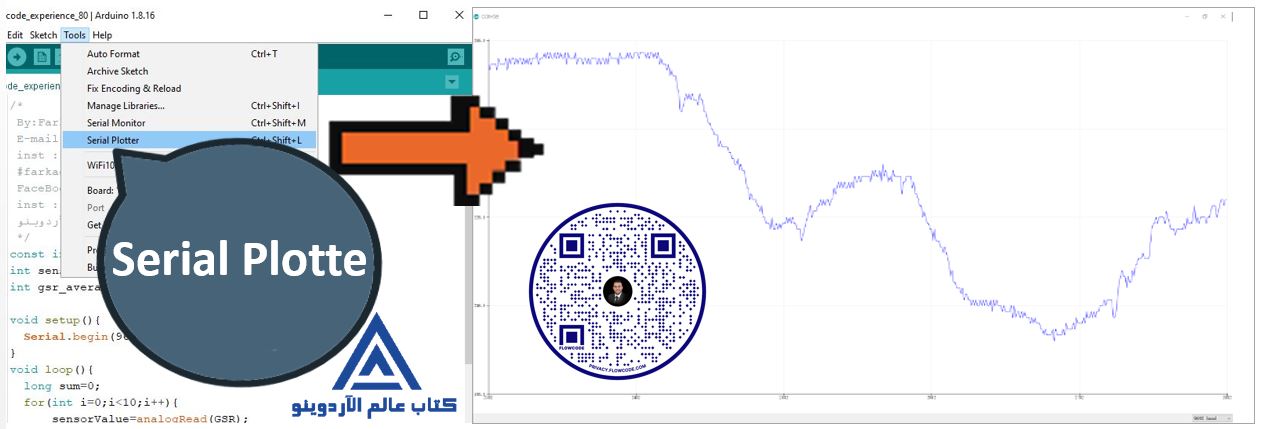
- الخطوة 3. انقر فوق Tools-> Serial Plotter من Arduino IDE
- الخطوة 4. استخدم المفك اللولبي لضبط المقاوم حتى يصبح الناتج التسلسلي 512.
- الخطوة 5. قم بارتداء مستشعر GSR.
- الخطوة 6. سنرى الرسم البياني أدناه. يرجى التنفس العميق وانظر الاتجاهات.