This project is aim to recognizes the objects with RGB-D camera. RGB-D camera can extract depth information and RGB raw image informaion. BY using these data, algorithm can extracts the objects' type and get their other information.
I tried to run the pick and place part and control the robot arm, but it failed. So only recognition part code files were uploaded here.
I followed steps as below.
I have to say.... the launch process may appears many errors... but as long as Gazebo and Rviz open, then it can works. If not, the only easy way is re-install the environment in catkin_ws. sklearn version need to change to 0.16 version. 0.2 version doesn't have cross_validation function.
3.1 pass a statistical outlier fitler to pcl data from ros environment. This step is in order to filtering the noise in pcl environemnt. mean setted to 12 and the deviation setted as 0.01
3.2 Voxel Grid downsampling. Downsampling the the 3d data into 0.01m gird. This step can help perception more easier. It can helps filtering the useless features.


3.3 PassThrough filter. Perception doesn't need to process all the data. It just need forcus on the ROI of the objects. ROI x axis limit setted as [0.42, 0.8] , and the z axis limit setted as [0.6,0.9]


3.4 RANSAC plane segmentation . Through this step, algorithm extracts the target cloud point group with distance threshold. So point of objects can be extracted. However , in this step, we just know the clould points are objects, but we can't know each points label(class).So we need to figure out the each cloud points label(class)
3.5 Euclidean Clustering. Before figure out the each points class, we need to figure out each group. So we used euclidean clustering method to divided points into each group.


3.6 object recognition. After clustering step finished, every point was divided into each cluster. Then we use SVM method to teach algorithm to train a model to process the feature detection and feature mapping.
3.6.1 by using the capture_features.py , many data were generated.
3.6.2 by using above training_set, trained the svm model. the confusion matrix like below.The accuracy was pretty high.

I tried to do this step, but I can't move the arm in ROS Rviz and Gazebo environment.
Simulation results shows the pipeline could extract correctly in 100% in world1 and world2. However, in world3, it mis-predicted 2 items. I tried to figure it out, but failed. I think maybe I can try neural network in future.


Before starting any work on this project, please complete all steps for Exercise 1, 2 and 3. At the end of Exercise-3 you have a pipeline that can identify points that belong to a specific object.
In this project, you must assimilate your work from previous exercises to successfully complete a tabletop pick and place operation using PR2.
The PR2 has been outfitted with an RGB-D sensor much like the one you used in previous exercises. This sensor however is a bit noisy, much like real sensors.
Given the cluttered tabletop scenario, you must implement a perception pipeline using your work from Exercises 1,2 and 3 to identify target objects from a so-called “Pick-List” in that particular order, pick up those objects and place them in corresponding dropboxes.
For this setup, catkin_ws is the name of active ROS Workspace, if your workspace name is different, change the commands accordingly If you do not have an active ROS workspace, you can create one by:
$ mkdir -p ~/catkin_ws/src
$ cd ~/catkin_ws/
$ catkin_make
Now that you have a workspace, clone or download this repo into the src directory of your workspace:
$ cd ~/catkin_ws/src
$ git clone https://github.com/udacity/RoboND-Perception-Project.git
Note: If you have the Kinematics Pick and Place project in the same ROS Workspace as this project, please remove the 'gazebo_grasp_plugin' directory from the RoboND-Perception-Project/ directory otherwise ignore this note.
Now install missing dependencies using rosdep install:
$ cd ~/catkin_ws
$ rosdep install --from-paths src --ignore-src --rosdistro=kinetic -y
Build the project:
$ cd ~/catkin_ws
$ catkin_make
Add following to your .bashrc file
export GAZEBO_MODEL_PATH=~/catkin_ws/src/RoboND-Perception-Project/pr2_robot/models:$GAZEBO_MODEL_PATH
If you haven’t already, following line can be added to your .bashrc to auto-source all new terminals
source ~/catkin_ws/devel/setup.bash
To run the demo:
$ cd ~/catkin_ws/src/RoboND-Perception-Project/pr2_robot/scripts
$ chmod u+x pr2_safe_spawner.sh
$ ./pr2_safe_spawner.sh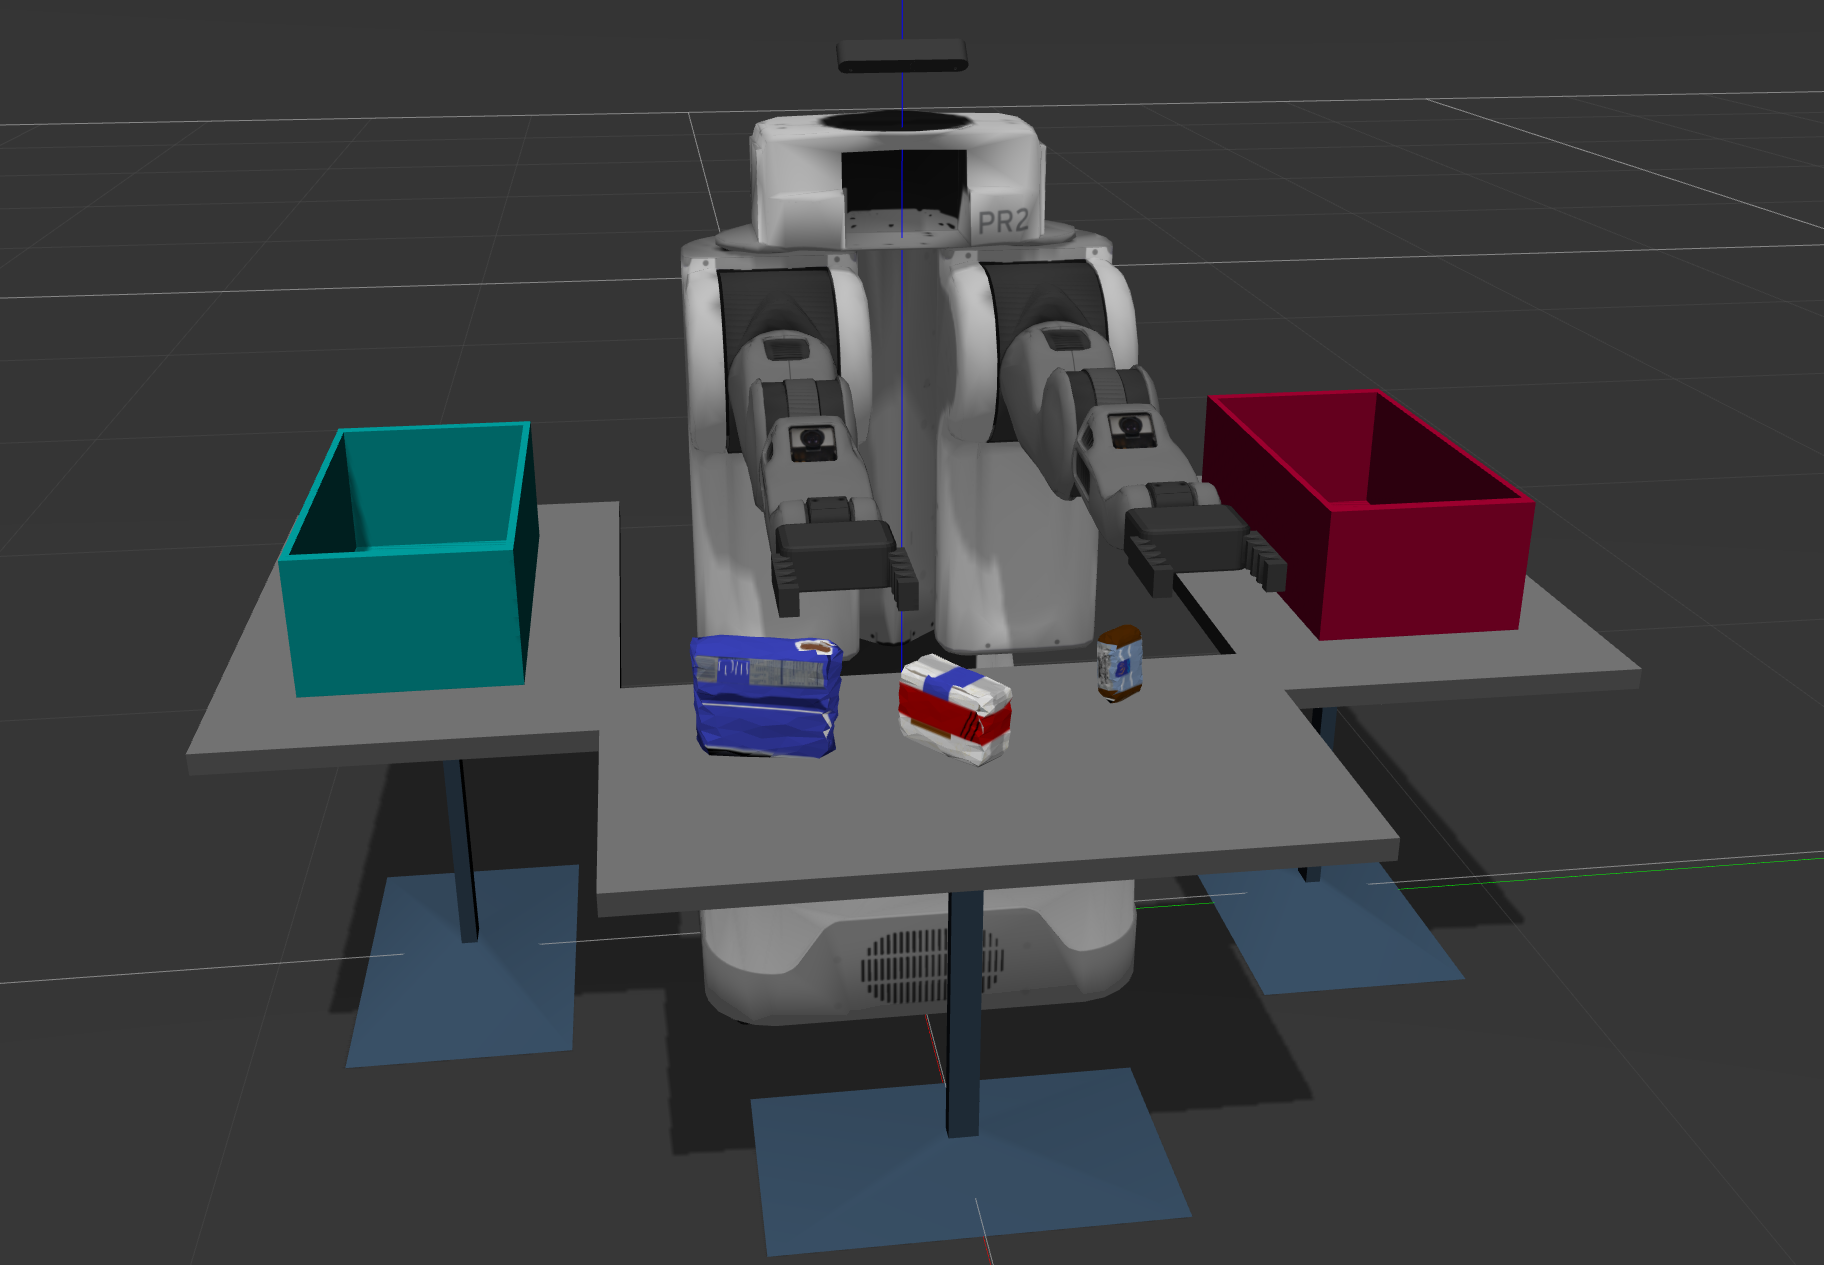
Once Gazebo is up and running, make sure you see following in the gazebo world:
-
Robot
-
Table arrangement
-
Three target objects on the table
-
Dropboxes on either sides of the robot
If any of these items are missing, please report as an issue on the waffle board.
In your RViz window, you should see the robot and a partial collision map displayed:
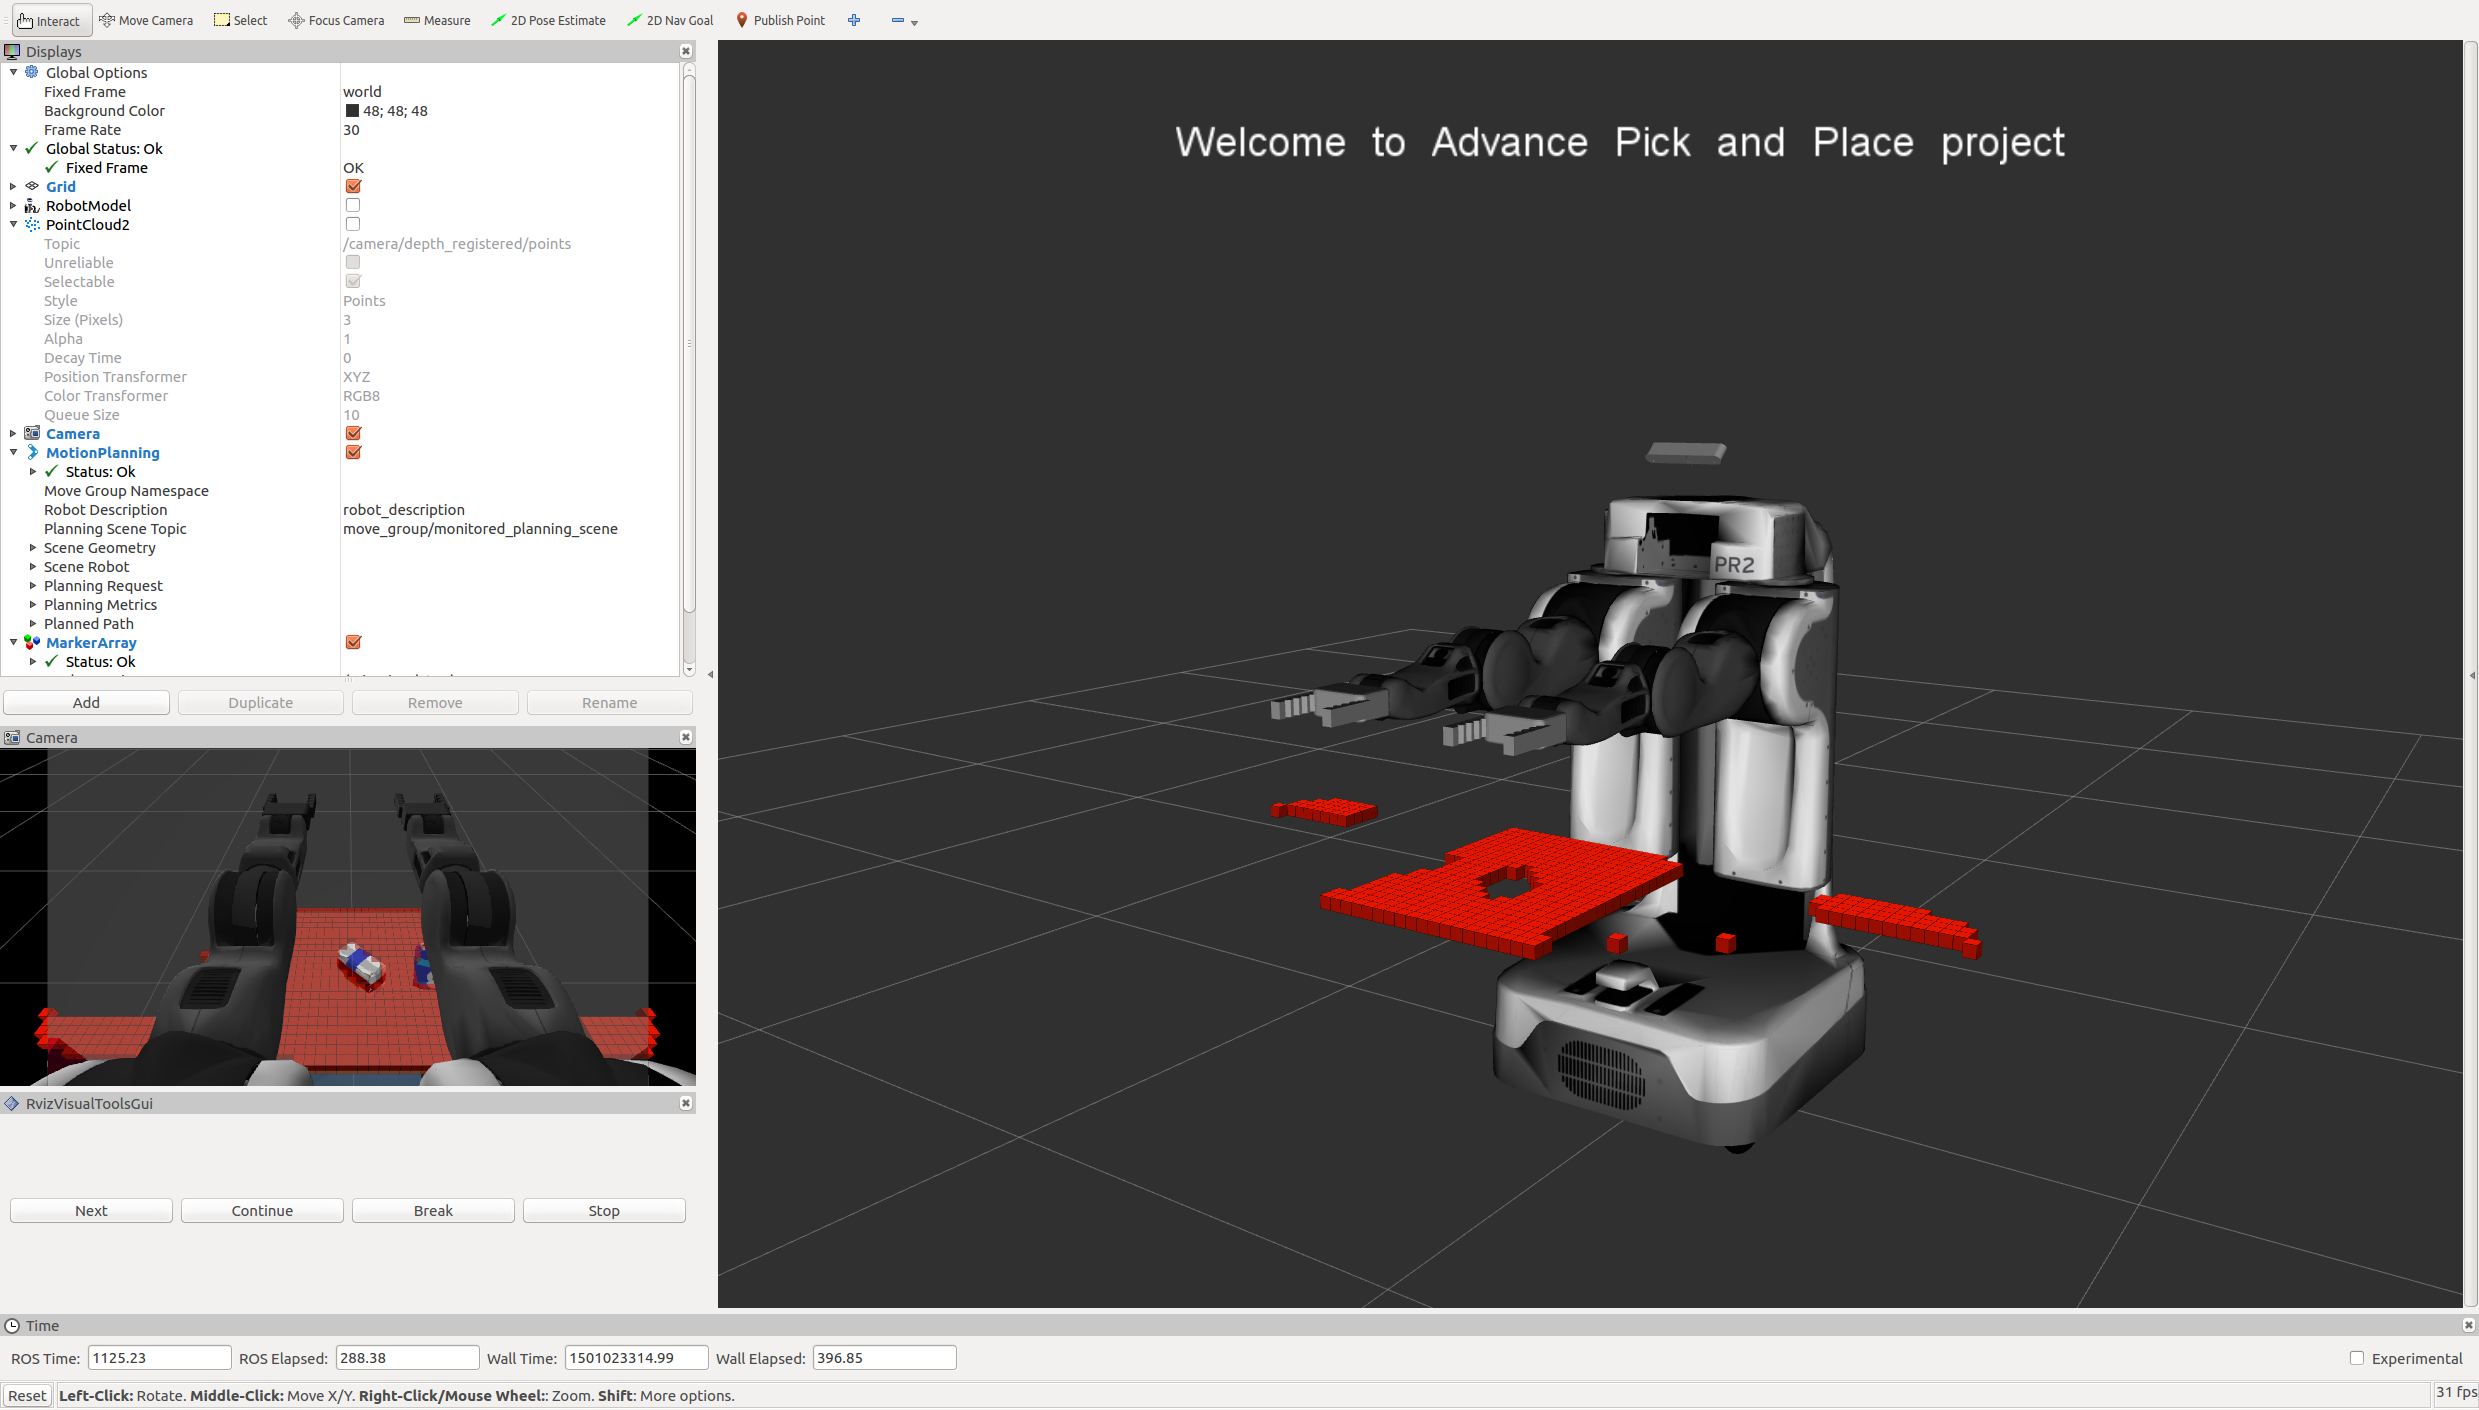
Proceed through the demo by pressing the ‘Next’ button on the RViz window when a prompt appears in your active terminal
The demo ends when the robot has successfully picked and placed all objects into respective dropboxes (though sometimes the robot gets excited and throws objects across the room!)
Close all active terminal windows using ctrl+c before restarting the demo.
You can launch the project scenario like this:
$ roslaunch pr2_robot pick_place_project.launch- Extract features and train an SVM model on new objects (see
pick_list_*.yamlin/pr2_robot/config/for the list of models you'll be trying to identify). - Write a ROS node and subscribe to
/pr2/world/pointstopic. This topic contains noisy point cloud data that you must work with. - Use filtering and RANSAC plane fitting to isolate the objects of interest from the rest of the scene.
- Apply Euclidean clustering to create separate clusters for individual items.
- Perform object recognition on these objects and assign them labels (markers in RViz).
- Calculate the centroid (average in x, y and z) of the set of points belonging to that each object.
- Create ROS messages containing the details of each object (name, pick_pose, etc.) and write these messages out to
.yamlfiles, one for each of the 3 scenarios (test1-3.worldin/pr2_robot/worlds/). See the exampleoutput.yamlfor details on what the output should look like. - Submit a link to your GitHub repo for the project or the Python code for your perception pipeline and your output
.yamlfiles (3.yamlfiles, one for each test world). You must have correctly identified 100% of objects frompick_list_1.yamlfortest1.world, 80% of items frompick_list_2.yamlfortest2.worldand 75% of items frompick_list_3.yamlintest3.world. - Congratulations! Your Done!
- To create a collision map, publish a point cloud to the
/pr2/3d_map/pointstopic and make sure you change thepoint_cloud_topicto/pr2/3d_map/pointsinsensors.yamlin the/pr2_robot/config/directory. This topic is read by Moveit!, which uses this point cloud input to generate a collision map, allowing the robot to plan its trajectory. Keep in mind that later when you go to pick up an object, you must first remove it from this point cloud so it is removed from the collision map! - Rotate the robot to generate collision map of table sides. This can be accomplished by publishing joint angle value(in radians) to
/pr2/world_joint_controller/command - Rotate the robot back to its original state.
- Create a ROS Client for the “pick_place_routine” rosservice. In the required steps above, you already created the messages you need to use this service. Checkout the PickPlace.srv file to find out what arguments you must pass to this service.
- If everything was done correctly, when you pass the appropriate messages to the
pick_place_routineservice, the selected arm will perform pick and place operation and display trajectory in the RViz window - Place all the objects from your pick list in their respective dropoff box and you have completed the challenge!
- Looking for a bigger challenge? Load up the
challenge.worldscenario and see if you can get your perception pipeline working there!
For all the step-by-step details on how to complete this project see the RoboND 3D Perception Project Lesson Note: The robot is a bit moody at times and might leave objects on the table or fling them across the room :D As long as your pipeline performs succesful recognition, your project will be considered successful even if the robot feels otherwise!