this repo contains the code and documentation for the shiny javascript tutorials at the Shiny Development Center offered by RSTUDIO. The series consist of 6 in depth lessons for the intermediate shiny enthusiast with limited experience in HTML, CSS and/or JavaScript, who wants to learn how to extend shiny.
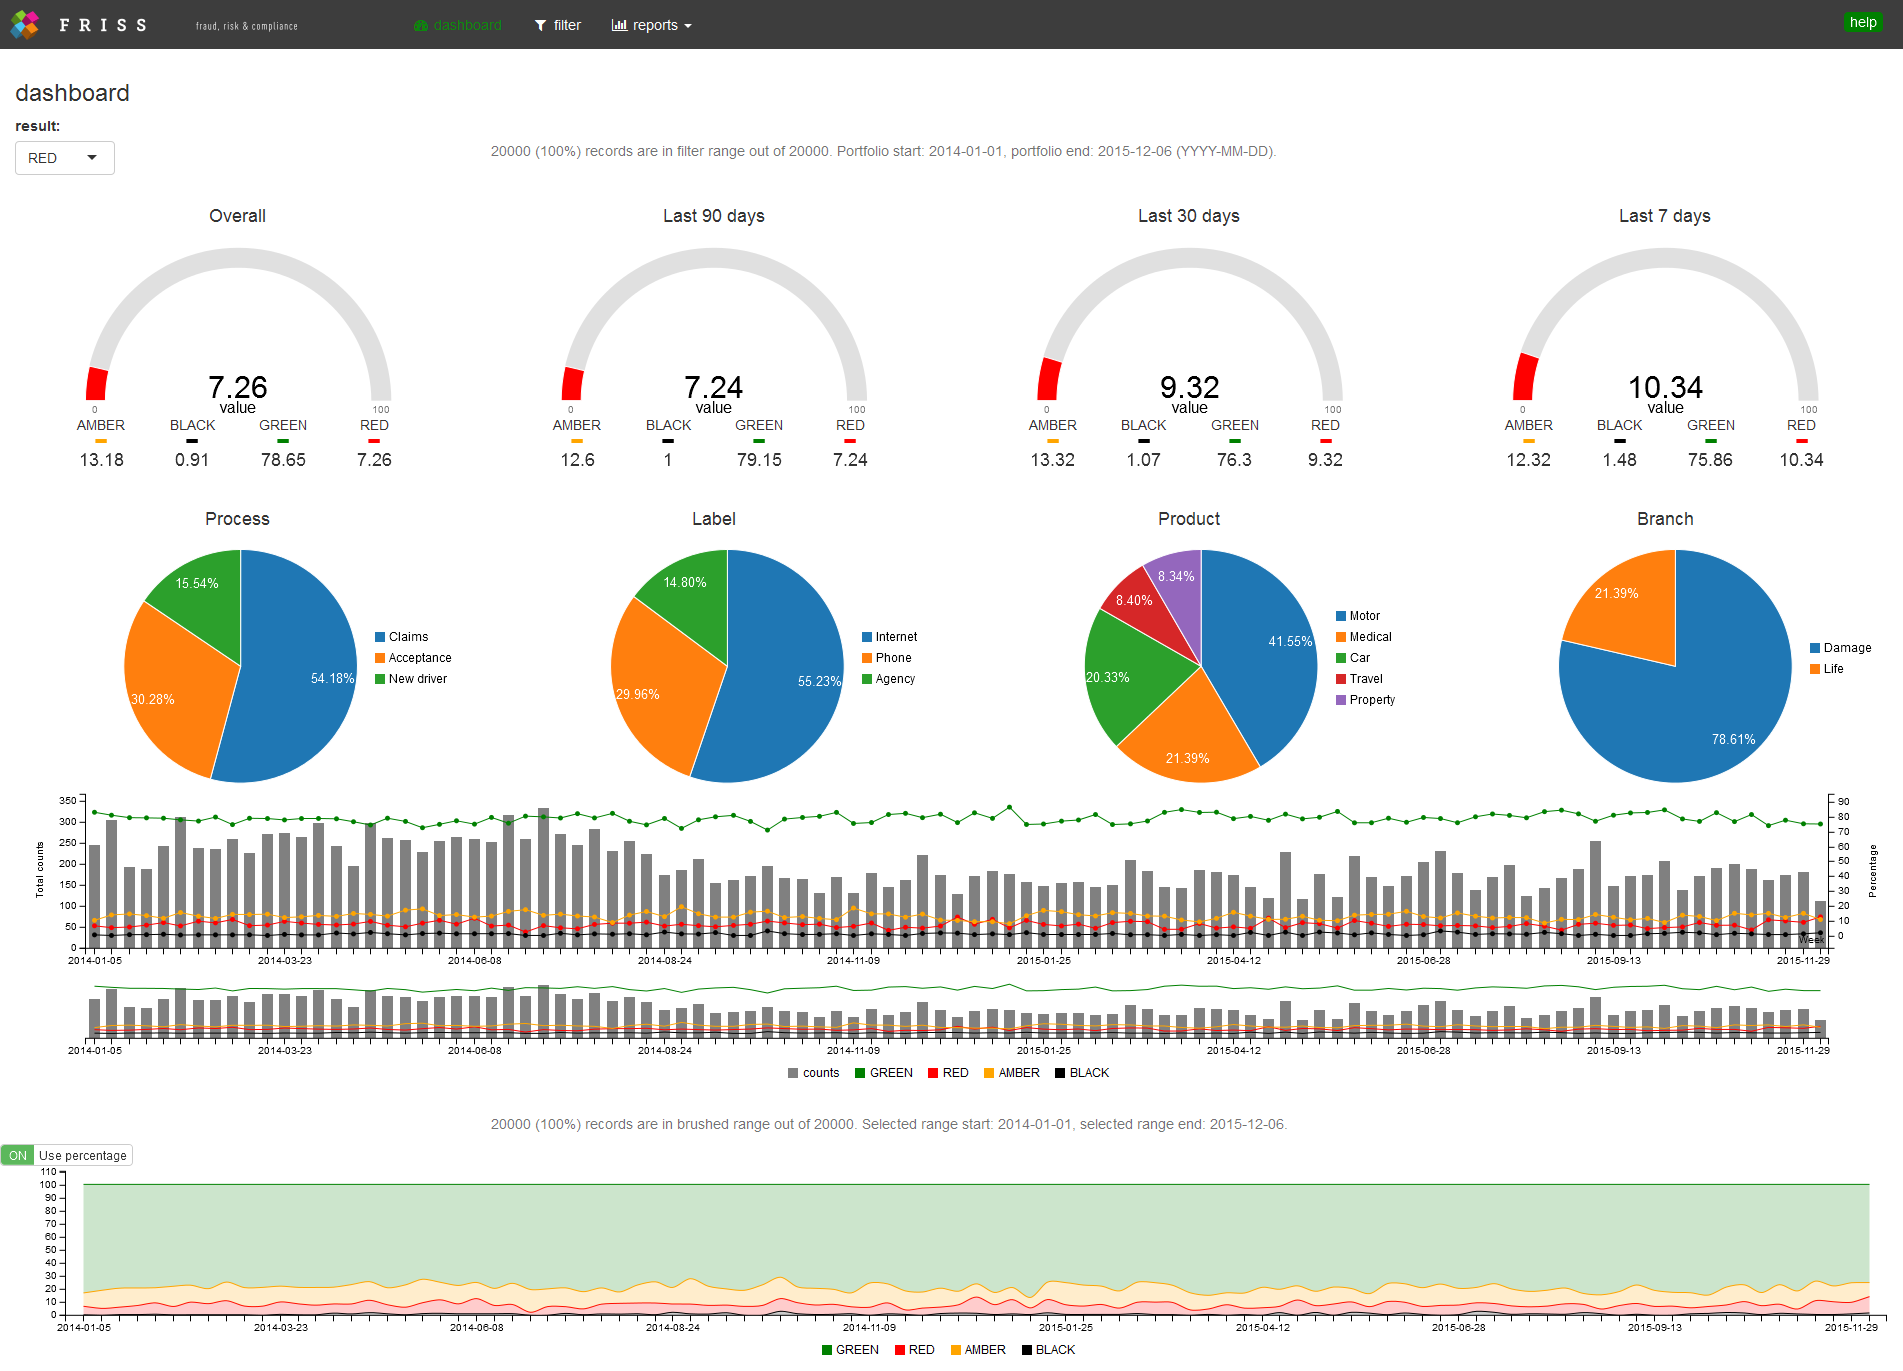
In order to master the techniques of extending shiny through these frameworks we'll construct a fully functional dashboard application. During the course of the tutorials we'll develop a number of HTMLWidgets based on c3.js. In addition, we'll create input bindings, a brushable timeline and an interactive help system, based on intro.js.
tutorial 1: In this tutorial we'll build our first htmlwidget, based on c3.js, a popular chart library build on d3.js. In addition, we'll take a deeper look in the tasks related to HTML, CSS and JavaScript a widget has to perform such that we can render JavaScript based interactive charts from R. Here we only create a single gauge chart, with limited functionality.
tutorial 2: In this tutorial we expand the functionality of the gauge widget and elaborate on related JavaScript concepts such as closures, events, objects and methods. In addition, we’ll create widgets for a c3 pie chart, line bar chart and stacked area chart;
tutorial 3: In this tutorial we take a closer look at JavaScript events and see how we can send messages from R to JavaScript and back. In addition, we show how you can create proxy objects, via which you can send updates to already existing charts. You'll also learn how to create chainable functions via the pipe (%>%) operator.
tutorial 4: In this tutorial we'll learn how to develop an interactive, dynamic help system for our dashboard, based on intro.js. This library allows you to easily create a step-by-step guide for your application. It will draw a nice box around elements of your choice, combined with an annotation layer and a navigation system.
tutorial 5: In this tutorial we'll learn how to create shiny input bindings, which capture events from the browser and send them back to shiny. We learn how to create an interactive toggle switch, as well as an interactive button group, which we'll use in a latter tutorial to create a filter system for our dashboard application.
tutorial 6: In the last tutorial in this series we'll put everything together we learned in the previous tutorials and create a fully functional dashboard. Here we learn how we can set up an interactive filter system that uses a brushable timeline component, as well as the interactive button groups developed in tutorial 5. In addition, we learn how to send events from JavaScript to R at different rates such that we don't overflow R with computations when we slide our brush over the timeline.