
This is an Android app DEMO project based on Sensoro™ Beacons (https://www.sensoro.com) and Azure Iot Hub (https://azure.microsoft.com/en-us/services/iot-hub/). The idea is to make it easier to find free parking lots. This is done through bluetooth connectivity to Sensoro beacons and Azure cloud computing.

App has been developed on android studio and tested on Android 9.0, other versions are not supported.
- Import the Easy2ParkApp folder as a project into Android studio.
- In Constant.java class, replace SENSORO_DEVICEs Strings with the SN codes of your Sensoro devices.
//Constant.java
package com.example.easy2park;

public class Constant {
    public static final String BLE_STATE_CHANGED_ACTION = "android.bluetooth.adapter.action.STATE_CHANGED";
    public static final String SENSORO_DEVICE1="0117C59B4EC7";
    public static final String SENSORO_DEVICE2="0117C582CAD7";
    public static final String SENSORO_DEVICE3="0117C5578442";
}- You need to continue with following procedure to register you to Azure.
- Download azure cloud shell, after you need to login to azure from command line:
az login
- Register your device on the azure iot hub platform
In order to register your device on the azure iot hub platform, you need to perform the following two commands from the azure cloud shell:
az extension add --name azure-cli-iot-ext
az iot hub device-identity create --hub-name YourIoTHubName --device-id MyAndroidDevice
where YourIoTHubName is the name of the device registered on the azure iot hub platform.
az iot hub device-identity show-connection-string --hub-name YourIoTHubName --device-id MyAndroidDevice --output table
- Put the connection string obtained at step 2 in the file gradle.properties
- Now you can run the app pressing the START button
- In order to check if data are sent to azure iot hub you can check this from the azure cloud shell with the following command:
az iot hub monitor-events --hub-name YourIoTHubName --output table
App has been developed on android studio and tested on Android 9.0, other versions are not supported.
- Make sure your Android device is connected to your computer via a USB cable.
- Connect the device to WiFi/UMTS network that allows for communication with the server.
- Make sure your device is set up for development as explained here (https://developer.android.com/training/basics/firstapp/running-app#RealDevice).
- Change USB mode to data transfer and allow the RSA fingerprint request of access if asked.
- Click on run button on Android Studio GUI and select your device.

Alternatively you can use adb from shell (http://delphi.org/2013/11/installing-and-running-android-apps-from-command-line/)
N.B. You cannot run the app through android studio emulator (at the time of writing) due to the lack of bluetooth connection.
If you completed the installation part the app will open on your device.
- Turn on bluetooth and gps.
- Go into the range of your sensoro beacons.
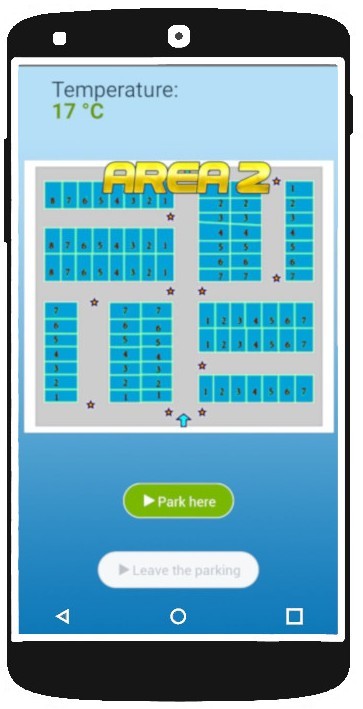
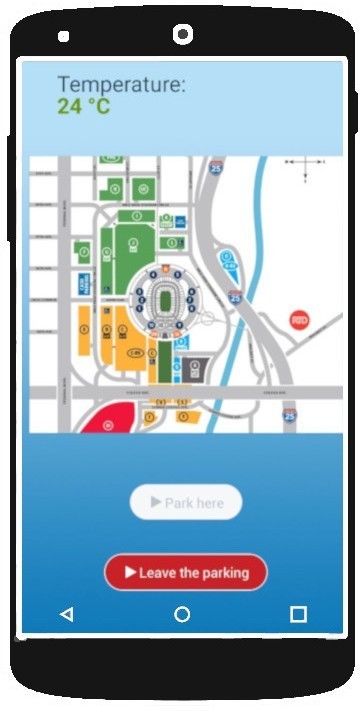
This will be displayed on your screen:

Features to be implemented:
- Background proper functioning
-
Giuseppe Capaldi


-
Gianluca Capozzi
-
Daniele Davoli
Code is under Apache License 2.0.