
The beating heart: This repository houses the hardware blueprints for the Arduino and ESP32 devices that power Glutara, serving as the vital link between sensor data and the cloud, enabling real-time monitoring and seamless data exchange. This repository code development is based on this reference.


Make sure you already have these components before following the 'how to run' steps
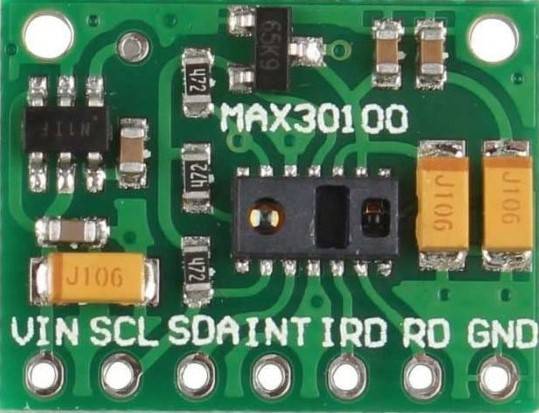
- MAX30100 Sensor Arduino
- Install Arduino IDE on your computer
- Appropriate board (e.g., ESP32)
- USB Cable
Clone this repository from terminal using this following command
$ git clone https://github.com/Glutara/glutara-hardware.git- Sensor Connection:
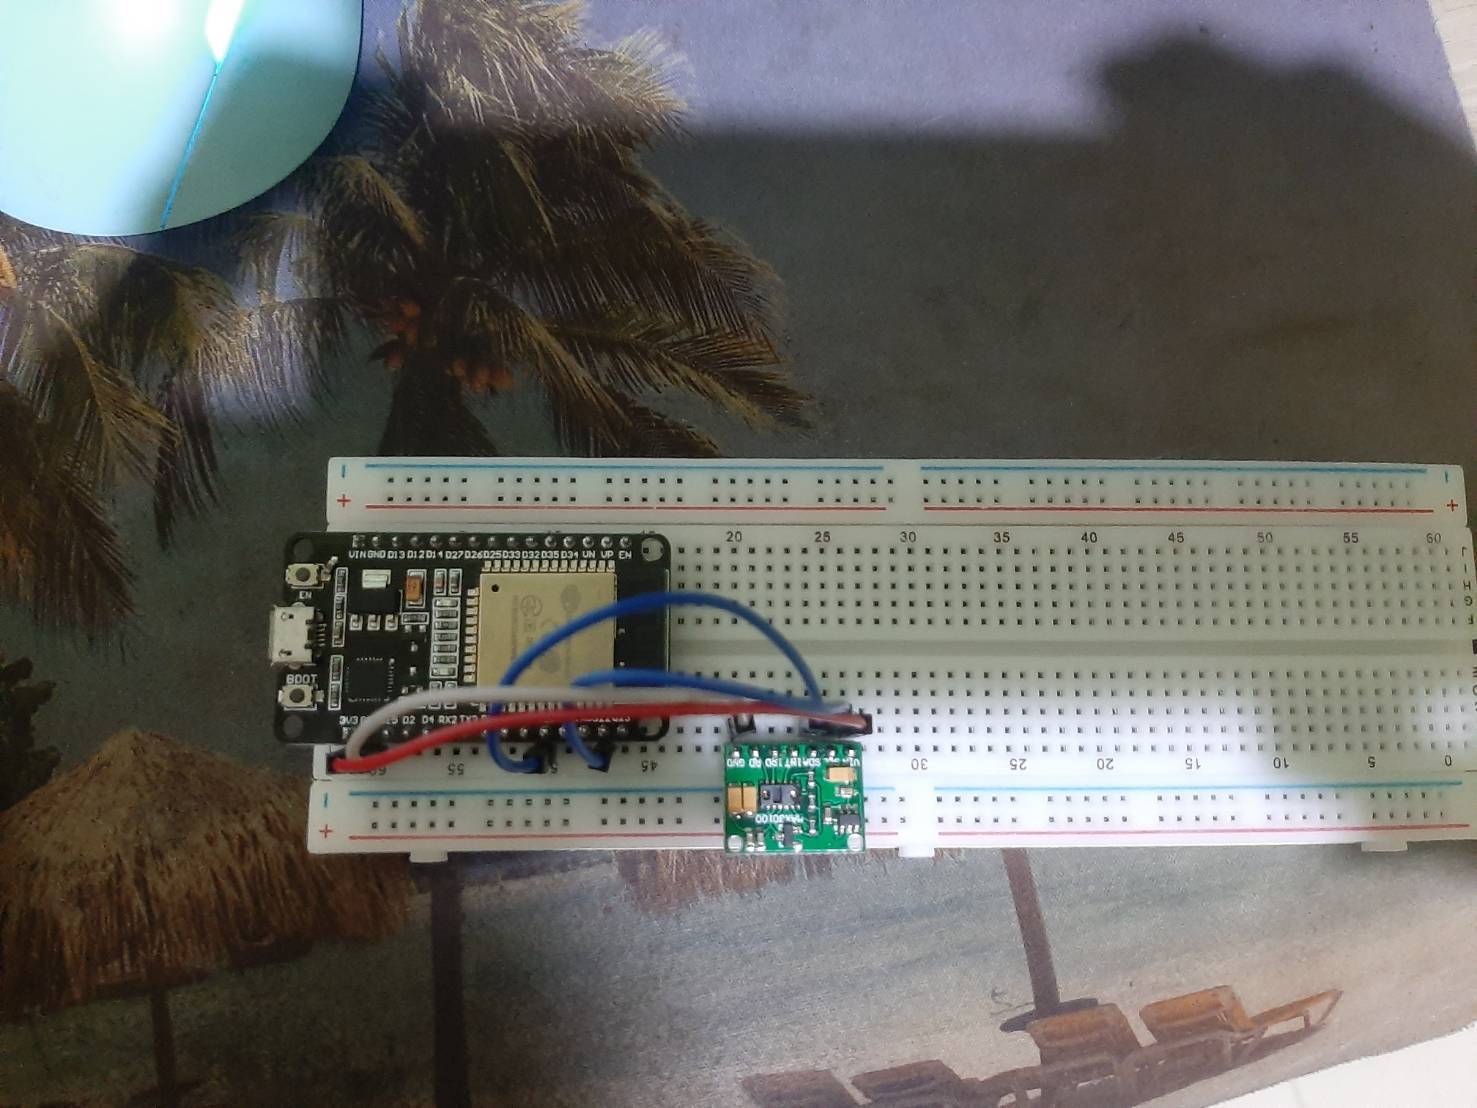
- Connect the MAX30100 sensor to an Arduino board (e.g., ESP32). Ensure the VCC, GND, SDA, and SCL pins of the sensor are correctly connected to the corresponding pins on the Arduino.
- Computer Connection:
- Connect the Arduino board to your computer via a USB cable.
- Arduino IDE:
- Install the Arduino IDE if it is not already installed on your computer.
- Library Installation:
- Install the
MAX30100_PulseOximeterlibrary via the Library Manager in the Arduino IDE or download it from GitHub if available.
- Install the
- Open the Sketch:
- Open the
MAX30100_Debug.inofile in the Arduino IDE.
- Open the
- Board and Port Selection:
- Select the appropriate board (e.g., ESP32) and the correct port in the Arduino IDE.
- Upload:
- Upload the code to the Arduino by clicking the "Upload" button in the Arduino IDE.
- Open Serial Monitor:
- Open the Serial Monitor in the Arduino IDE after the code has been successfully uploaded.
- Set Baud Rate:
- Set the baud rate of the Serial Monitor to 115200 bps to match the configuration in the code (
Serial.begin(115200);).
- Set the baud rate of the Serial Monitor to 115200 bps to match the configuration in the code (
-
Serial Data Logging:
- Data will be displayed on the Serial Monitor at specified intervals (e.g., every 1000 ms).
-
Python Script for CSV:
- Use a Python script with the pyserial library to read data from the Serial Monitor and write it to a CSV file. Here is an example script:
import serial
import csv
import time

ser = serial.Serial('COM_PORT', 115200)  # Replace 'COM_PORT' with the appropriate COM port
with open('data.csv', 'w', newline='') as file:
    writer = csv.writer(file)
    while True:
        line = ser.readline().decode('utf-8').rstrip()
        if line.startswith('H:') or line.startswith('O:'):
            writer.writerow([time.strftime("%Y-%m-%d %H:%M:%S"), line])
You can also use available python scripts here.
Arduino MAX30100
Under Development Board
 |
 |
 |
 |
|---|---|---|---|
Bandung Institute of Technology |
Bandung Institute of Technology |
Bandung Institute of Technology |
Bandung Institute of Technology |