Home
- Introduction
- Deploying the environment
- Deploying core infrastructure
- The Cloud Orchestrate workflow
- Next steps
Virtual workstations are the central component to a cloud-native production environment. But creating, assigning, and managing the environment to run these high-powered, graphics workstations can be challenging if you don't have the right tools in place.
This tutorial will help you plan, deploy, and manage an entire cloud-based infrastructure for creating and managing a virtual production environment.
This solution is aimed at content creators, game developers, visual effects artists, architects, engineers, or anyone who wants to run high powered, graphics-intensive workloads on the cloud.
- Create a Compute Engine instance to use as a stateful deployment environment.
- Install Cloud Orchestrate into your project environment.
- Register your project with Cloud Orchestrate.
- Deploy the Teradici Cloud Access Manager (CAM) environment using Cloud Orchestrate, including:
- An Active Directory Domain Controller.
- One or more Cloud Connectors to act as traffic gateways.
- A Global Load Balancer to provide a single access point for workstation users.
- Build a default Windows image to use in your workstations.
- Create a Cloud Orchestrate workstation template.
- Create and assign a virtual workstation to a user.
- Log into this virtual workstation to validate performance and behavior.
This tutorial will deploy an architecture similar to the following diagram:
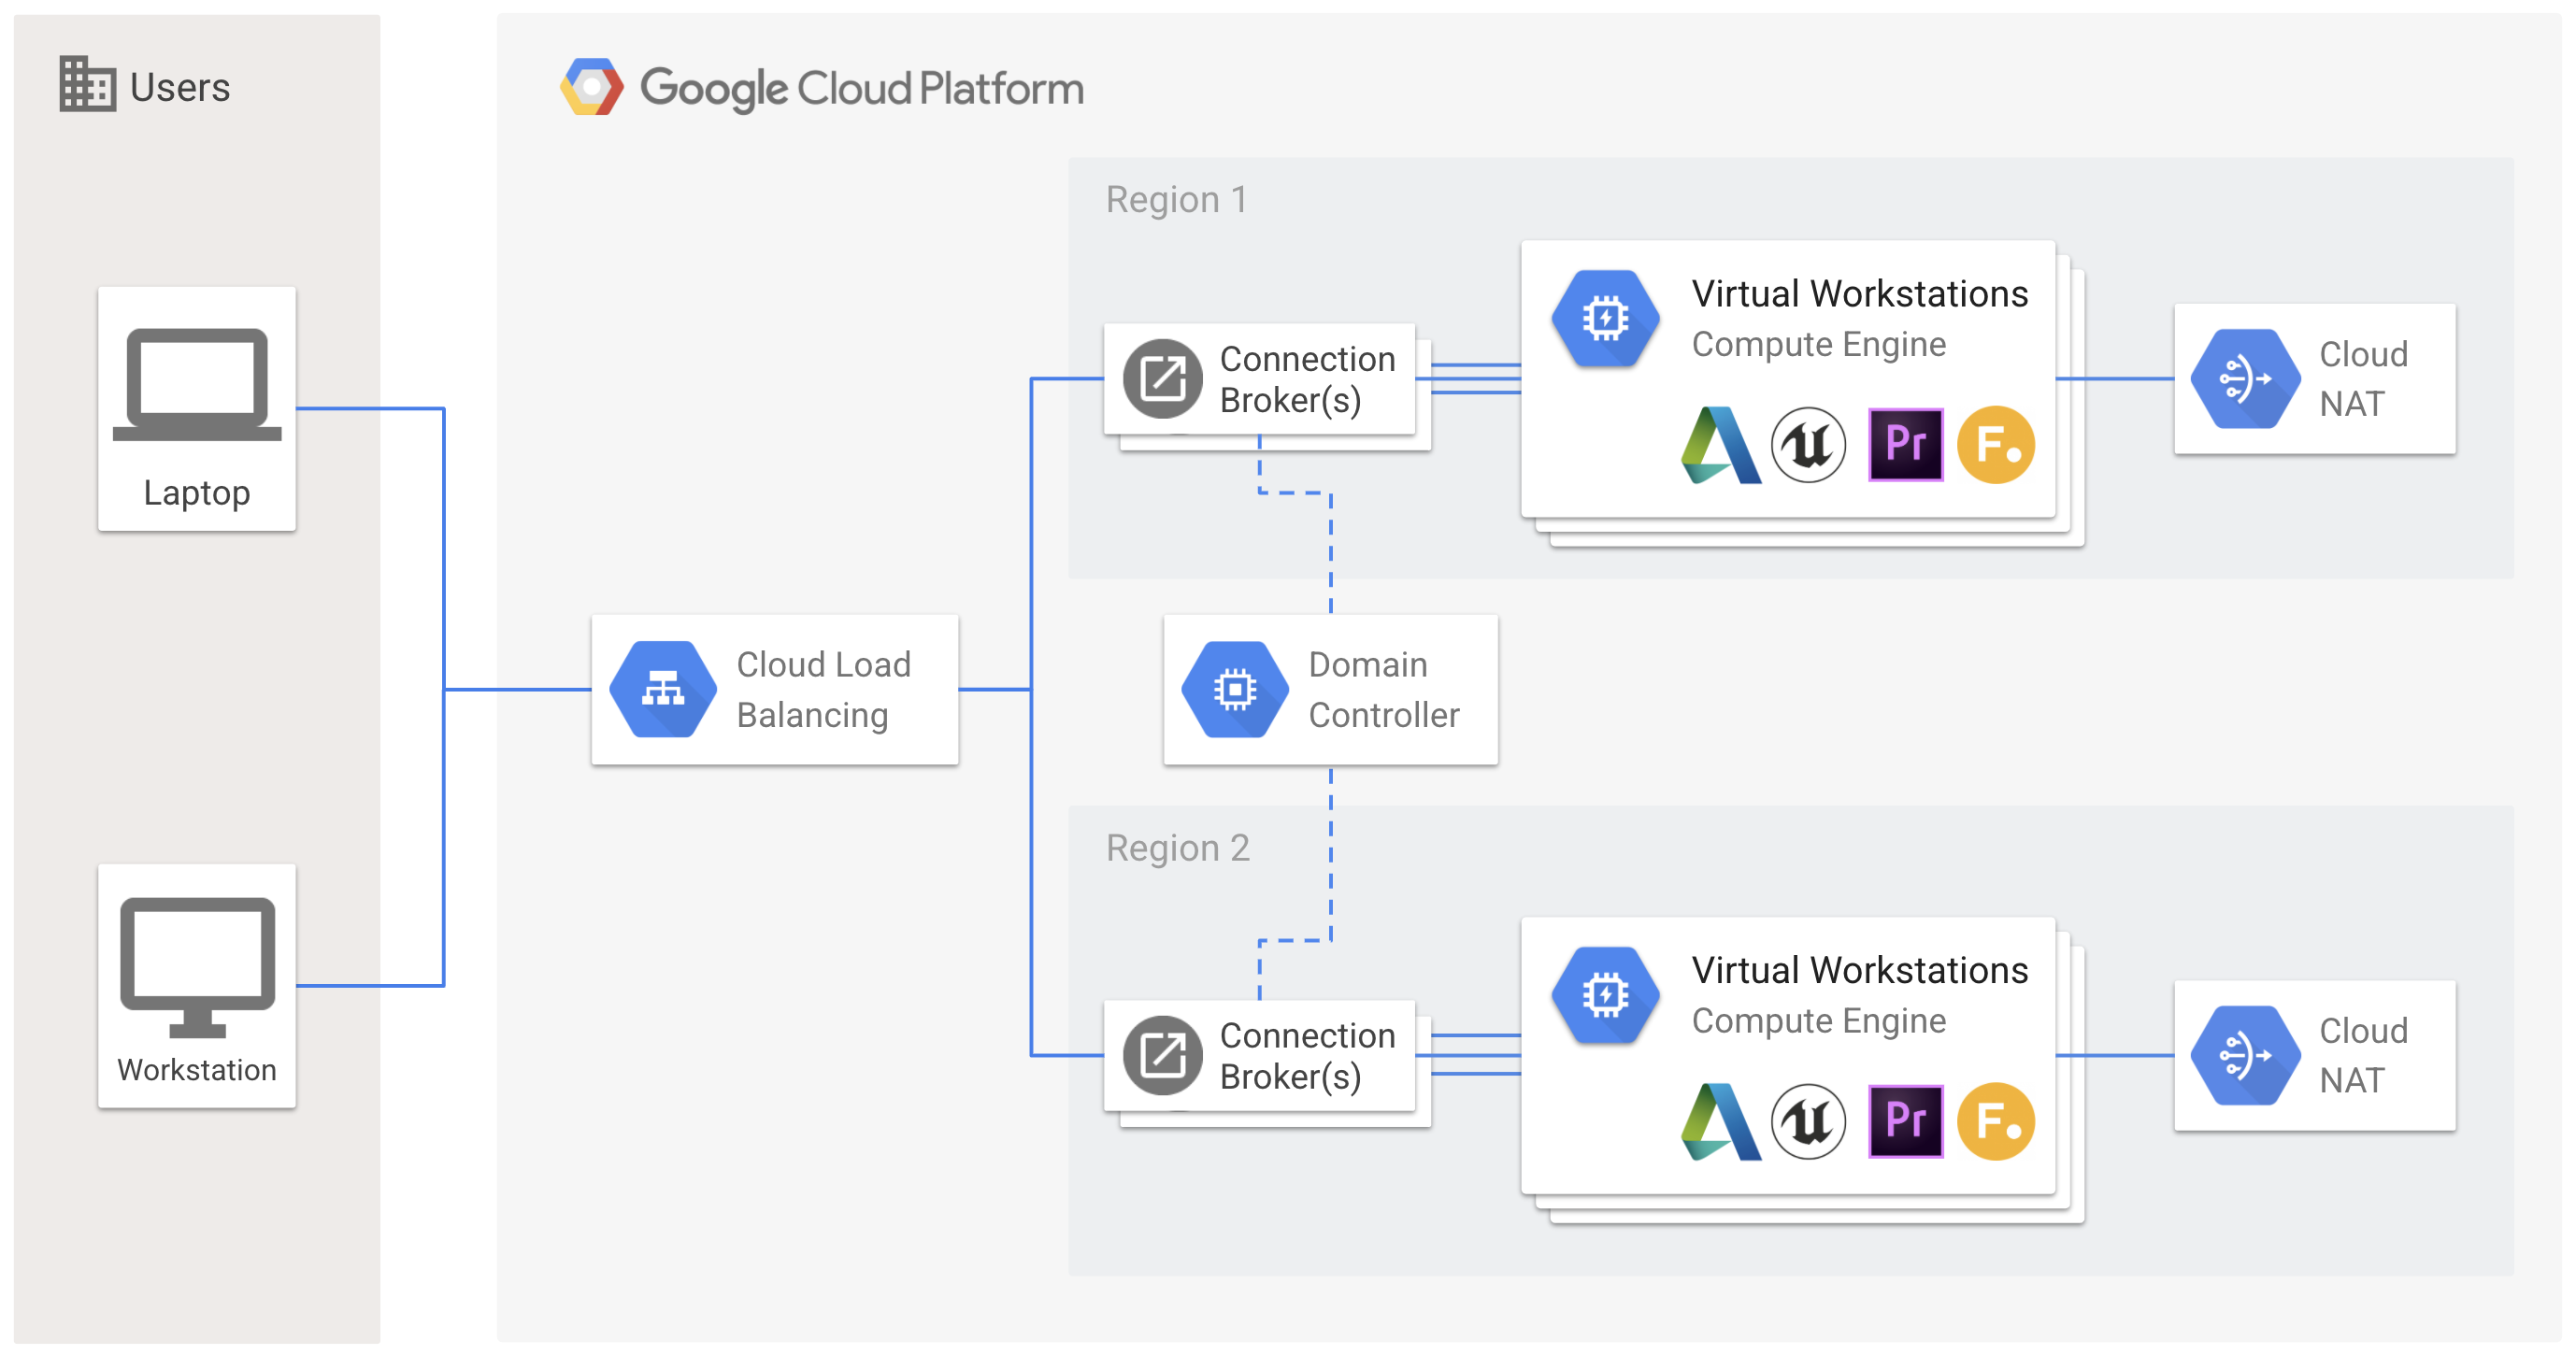
There are a few minor components not shown such as Cloud DNS, Firewall Rules, and Cloud Routers that all get created automatically as part of the overall deployment.
For this tutorial, start with a new Google Cloud project. Existing projects may have conflicting network configurations with overlapping IP ranges or firewall rule conflicts.
This tutorial uses gcloud commands, which you can run from a Cloud Shell instance launched from the Cloud Console. If you want to use gcloud on your local workstation, install the Cloud SDK.
Before you can use Cloud Orchestrate, you need to set up a Google Cloud project and enable the Compute Engine API for that project.
-
In the Cloud Console, on the project selector page, select or create a Cloud project.
-
Make sure that billing is enabled for your Google Cloud project. Learn how to confirm billing is enabled for your project.
-
Enable the Compute Engine API. You can do this in one of a few ways:
- Navigate to the Compute Engine section of the Console.
- Enable directly from the Console.
-
Your project will need enough resource quota to create the basic infrastructure: between 20 and 30 vCPUs in a region of your choice as well as at least 1 visualization-capable GPU. On creation, most projects will be assigned the small amount of resource quota required for this tutorial.
- Your project will need quota for virtual workstation GPUs in your selected zone. You can get a listing of GPU availability using the
gcloud compute accelerator-types listcommand.
- Your project will need quota for virtual workstation GPUs in your selected zone. You can get a listing of GPU availability using the
-
Make sure you have access to cam.teradici.com, as well as CAS licenses issued by Teradici.