This is mainly copied from https://github.com/marcfager/nspanel-mf with a little from https://github.com/masto/NSPanel-Demo-Files, and lastly colorWheel from https://github.com/MMMZZZZ/Random-Stuff/tree/master/Nextion%20Circular%20Color%20Picker give them the credit they deserve, I'm merely a copy paste ninja.
The key changes from what Marc's repository is that I have moved a lot of yaml from ESP-Home to Home Assistant or hard coded it in Nextion. Marc has sensors with the friendly names of the lights which is great, but because of the flash memory limitation I rather hard code it and live with that I some day may need to change it.
Just to begin with, you do not need to copy the yaml codes from below, these are just to explain what the code does and why they exist. It's all in the folders.
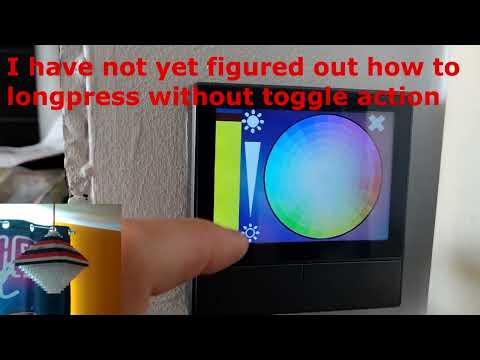
Each light button can be configured to be either just toggle or toggle and long press (2 seconds, I tried with 1 second but I didn't feel I got a good consistency).
The weather on the first page displays todays weather every time you open that page. But you can click on the weather symbol and it will display tomorrow and so on. The weather integration I use (SMHI) only displays the windspeed on todays weather, but since that is a "nice to have" I made a little hack to get todays wind and the other days show blank. If you don’t use SMHI as the weather integration then this will need some work to "undo" my hack. But I have a few comments in the yaml so it’s probably not that big deal.
I have not either managed to get the QR-code to work, but since I like the idea of displaying the wifi credential on QR codes I opted to replace the dynamic QR code with two static images of credentials (the images are removed from the hmi file).
Most actions on the display are handled by a variable that is on all pages (I think) and is called va0, I know I should have given it proper name but I spent days trying to get it to work and when it finally worked I just got excited and didn’t stop and think about what I was doing.
But yes, va0. It holds either “newtxt” or blank value most of the time. When a button is pressed this variable is set to the entity of the button/image clicked with va0.txt="light.lightbulb".
And then as I lift my finger from the button it sets it to empty va0.txt=""
In ESP-Home I have a sensor that reads this variable every 100 ms and pass it to Home Assistant. This variable is called last_click. That might sound like I named it appropriate, but you will be surprised.
text_sensor:
  - platform: nextion
    nextion_id: disp1
    name: $device_name last click va
    id: disp1_last_click_va
    update_interval: 100ms
    component_name: va0
And in Home Assistant automation I use trigger:
  - platform: template
    value_template: >-
      {{ states('sensor.ns_panel_last_click_va') is
      match("light.*|switch.*|climate.*") }}
    id: short
Since the entitíes that I want to be able to toggle/do actions on are lights, switches or climates.
The action on light and switches are simply:
  - choose:
      - conditions:
          - condition: state
            entity_id: sensor.ns_panel_current_display_page
            state: '1.00'
          - condition: trigger
            id: short
        sequence:
          - service: homeassistant.toggle
            data: {}
            target:
              entity_id: '{{ states(''sensor.ns_panel_last_click_va'') }}'
    default: []
  - choose:
      - conditions:
          - condition: state
            entity_id: sensor.ns_panel_current_display_page
            state: '5.00'
          - condition: trigger
            id: short
        sequence:
          - service: homeassistant.toggle
            data: {}
            target:
              entity_id: '{{ states(''sensor.ns_panel_last_click_va'') }}'
    default: []
I could probably have done that more effeciently but it's just two pages..
This is how I can "read" buttonpresses on the Nextion display from Home Assistant. And if I hold my finger on the button the state in Home Assistant will remain until I let go, so that is how I see long press events. The colorwheel is a copy of MMMZZZ’s work and I just changed it from displaying the color on the screen to sending it to Home Assistant with the variable va0/last click. (told you the name would be bad).
The brightness and color temp sliders also use the variable va0/last click. So this variable is used for most of clicking/passing data to Home Assistant.
There is another variable called vprevpage, and this holds the page number of the page you just left when you enter the colorwheel page. That way you can click on the X and get back to where you were. This variable is set in Home Assistant automation when you do the long press and sent to Nextion with the ESP-Home send command service.
# this part is if a long press is detected.
  - choose:
      - conditions:
          - condition: trigger
            id: long
        sequence:
          - choose:
              - conditions: # this list is my lights that has some extra settings
                  - condition: template
                    value_template: >-
                      {{ states('sensor.ns_panel_last_click_va') in
                      ['light.davids_lampa', 'light.matildas_lampa',
                        'light.skapen', 'light.kokslampa', 'light.taklampan'] }}
                sequence:
                  # send the current page to Nextion as the previous page
                  - service: esphome.ns_kitchen_send_command
                    data:
                      cmd: >-
                        Colorwheel.vprevpage.val={{states('sensor.ns_panel_current_display_page') | replace(".00","") }}

                   # save the light that was pressed since this will be gone as you lift the finger
                  - service: input_text.set_value
                    data:
                      value: '{{ states(''sensor.ns_panel_last_click_va'') }}'
                    target:
                      entity_id: input_text.ns_panel_kitchen_selected_device

                  # Go to colorwheel page
                  - service: esphome.ns_kitchen_set_page
                    data:
                      page: 10

                   # Now we need to figure out what to display on the colorwheel page
                   # is it just brightness or color temp or RGB?
                  - choose:
                      - conditions: # These are my RBG lights, they get brightness and colorwheel
                          - condition: template
                            value_template: >-
                              {{ states("sensor.ns_panel_last_click_va") in
                              ['light.davids_lampa', 'light.matildas_lampa',
                              'light.skapen'] }}
                        sequence:
                          - service: esphome.ns_kitchen_send_command
                            data:
                              cmd: vis h1,0
                          - service: esphome.ns_kitchen_send_command
                            data:
                              cmd: vis p0,0

                    # So default means "it's not RGB light", but it can still be only brightness or brightness and color temp
                    default:
                      - service: esphome.ns_kitchen_send_command
                        data:
                          cmd: vis colorWheel,0
                      - choose:
                          - conditions: # this is the only light that has just brightness
                              - condition: template
                                value_template: >-
                                  {{ states("sensor.ns_panel_last_click_va") ==
                                  'light.taklampan' }}
                            sequence:
                              # hide color temp settings
                              - service: esphome.ns_kitchen_send_command
                                data:
                                  cmd: vis h1,0
                              - service: esphome.ns_kitchen_send_command
                                data:
                                  cmd: vis p0,0

                        # default here means display color temp slider and the send command is to set the slider in the correct position
                        default:
                          - service: esphome.ns_kitchen_send_command
                            data:
                              cmd: vis h1,1
                          - service: esphome.ns_kitchen_send_command
                            data:
                              cmd: vis p0,1
                          - service: esphome.ns_kitchen_send_command
                            data:
                              cmd: >-
                                h1.val={{state_attr(states('sensor.ns_panel_last_click_va'),
                                'color_temp')}}

                  # this is set the brighness slider to the correct value and should be done on all lights on color wheel page.
                  - service: esphome.ns_kitchen_send_command
                    data:
                      cmd: >-
                        h0.val={{state_attr(states('sensor.ns_panel_last_click_va'),
                        'brightness')}}
            default: []
    default: []
When I open my thermostat page the selected room should be yellow and that room thermostat setting should be in the settingsarea below. That was easy to fix, but if I selected a room and lef the page and then returned back to it again, the selected room was still selected and the temperature setting was displayed, but the room was not "yellow". So what I did was I created an automation that runs when I enter that page to update the icons to make the selected room yellow.
This is a very bad automation, I know. I just haven't gotten around to fix it yet. But since you need to either rename your kids or redo the automation I suggest you fix what I haven't yet. What you should be doing is to set all rooms to "off" icon, then with choose set the one that is selected to "on"/yellow. What I'm doing is not very effecient.
  - choose:
      - conditions:
          - condition: trigger
            id: thermostat
        sequence:
          - choose:
              - conditions:
                  - condition: state
                    entity_id: input_text.ns_kitchen_temp
                    state: climate.vardagsrum
                sequence:
                  - service: esphome.ns_kitchen_send_command
                    data:
                      cmd: Thermostat.kitchen.pic=43
                  - service: esphome.ns_kitchen_send_command
                    data:
                      cmd: Thermostat.matilda.pic=51
                  - service: esphome.ns_kitchen_send_command
                    data:
                      cmd: Thermostat.david.pic=49
                  - service: esphome.ns_kitchen_send_command
                    data:
                      cmd: Thermostat.sovrum.pic=47
            default: []
          - choose:
              - conditions:
                  - condition: state
                    entity_id: input_text.ns_kitchen_temp
                    state: climate.matilda
                sequence:
                  - service: esphome.ns_kitchen_send_command
                    data:
                      cmd: Thermostat.kitchen.pic=42
                  - service: esphome.ns_kitchen_send_command
                    data:
                      cmd: Thermostat.matilda.pic=50
                  - service: esphome.ns_kitchen_send_command
                    data:
                      cmd: Thermostat.david.pic=49
                  - service: esphome.ns_kitchen_send_command
                    data:
                      cmd: Thermostat.sovrum.pic=47
            default: []
          - choose:
              - conditions:
                  - condition: state
                    entity_id: input_text.ns_kitchen_temp
                    state: climate.david
                sequence:
                  - service: esphome.ns_kitchen_send_command
                    data:
                      cmd: Thermostat.kitchen.pic=42
                  - service: esphome.ns_kitchen_send_command
                    data:
                      cmd: Thermostat.matilda.pic=51
                  - service: esphome.ns_kitchen_send_command
                    data:
                      cmd: Thermostat.david.pic=48
                  - service: esphome.ns_kitchen_send_command
                    data:
                      cmd: Thermostat.sovrum.pic=47
            default: []
          - choose:
              - conditions:
                  - condition: state
                    entity_id: input_text.ns_kitchen_temp
                    state: climate.sovrum
                sequence:
                  - service: esphome.ns_kitchen_send_command
                    data:
                      cmd: Thermostat.kitchen.pic=42
                  - service: esphome.ns_kitchen_send_command
                    data:
                      cmd: Thermostat.matilda.pic=51
                  - service: esphome.ns_kitchen_send_command
                    data:
                      cmd: Thermostat.david.pic=49
                  - service: esphome.ns_kitchen_send_command
                    data:
                      cmd: Thermostat.sovrum.pic=46
            default: []
    default: []
The rest of the NS-panel actions automation is probably easier to understand what it does and how it works.
I have another automation to controll the boost of heat in a room. So when you press the fire icon it will run a script that turns a boolean on, and a datetime is set to when it should turn off again. The triggers in the boost heating automation is probably fairly easy, but the actions may need some explenations.
action:
  # if a room is turned on this choose is true
  - choose:
      - conditions:
          - condition: template
            value_template: '{{ trigger.id.split(" ")[0] == "on" }}'
        sequence:
          # I set the temperature of that room to 24 degrees
          - service: climate.set_temperature
            data:
              temperature: 24
            target:
              entity_id: '{{ ''climate.'' ~ trigger.id.split(" ")[1] }}'
    default: []

  # if the boost turns off then it should resume to what we have as normal temperature
  # that is 22 in one of the rooms and 21.5 in the other rooms.
  # So this DOES NOT resume it to what it was before the boost.
  - choose:
      - conditions:
          - condition: template
            value_template: '{{ trigger.id.split(" ")[0] == "off" }}'
        sequence:
          - choose:
              - conditions:
                  - condition: template
                    value_template: '{{ trigger.id.split(" ")[1] == "vardagsrum" }}'
                sequence:
                  - service: climate.set_temperature
                    data:
                      temperature: 22
                    target:
                      entity_id: '{{ ''climate.'' ~ trigger.id.split(" ")[1] }}'
            default:
              - service: climate.set_temperature
                data:
                  temperature: 21.5
                target:
                  entity_id: '{{ ''climate.'' ~ trigger.id.split(" ")[1] }}'
    default: []
In order for this to work (if copied exactly) then you need a few helpers and sensors in Home Assistant.
input_text.ns_kitchen_temp Since the panel is in the kitchen, that is what I named it. But this entity holds the entity name of the selected room in the thermostat page. This helper is set in the NS panel actions automation.
To each room there is two entities, one boolean to say if boost heating is on/off and one datetime when it should be turned off. (and already we can see the naming convention is broken)
input_datetime.ns_panel_kitchen_boost_david
input_boolean.ns_panel_kitchen_boost_david
And then the other rooms:
input_datetime.ns_panel_kitchen_boost_matilda
input_boolean.ns_panel_kitchen_boost_matilda
input_datetime.ns_panel_kitchen_boost_sovrum # bedroom
input_boolean.ns_panel_kitchen_boost_sovrum
input_datetime.ns_panel_kitchen_boost_vardagsrum # livingroom/kitchen
input_boolean.ns_panel_kitchen_boost_vardagsrum
And lastly we need one helper to hold the selected device when you long press a light.
input_text.ns_panel_kitchen_selected_device
sensors:
  # this will use the helper above to get what the thermostat is set to of the selected room.
  # So the flow is as follow: You click on a room, NS panel actions automation kicks in, it turns the room yellow, and sets the helper with climate entity of that room.
  # The sensor below is updated to hold the selected rooms thermostat setting.
  # So instead of having (in my case) four entities that needs to be displayed on the screen, I use Home Assistant to swiitch this sensor to the selected room.
  - platform: template
    sensors:
      ns_kitchen_selected_room:
        value_template: "{{ state_attr(states('input_text.ns_kitchen_temp'), 'temperature') }}"

  # My TRVs have switch entities that toggled when the heating is on/off.
  # Here I return if the selected room is currently in heating or idle (on/off)
  # The value is later used to make the text on the Nextion display red if on, else white.
  - platform: template
    sensors:
      ns_kitchen_selected_room_heating:
        value_template: "{{ states('switch.trv_' ~ states('input_text.ns_kitchen_temp') | replace('climate.', '') ~ '_on_off') }}"


  # This takes the selected room and returns if the boolean example input_boolean.ns_panel_kitchen_boost_david
  # is on or off. Meaning if the heat boost is on or off.
  # The value is used to make the fire icon yellow.
  - platform: template
    sensors:
      ns_kitchen_selected_room_boost:
        value_template: "{{ states('input_boolean.ns_panel_kitchen_boost_' ~ states('input_text.ns_kitchen_temp') | replace('climate.', '')) }}"


  # last sensor is the weather. I use SMHI weather integration. If you want to use something else then go ahead but I can't help with that.
  # I recommend you create a SHMI entity just to use as a baseline to know what to change if you want to change to a different integration.
  # as of right now the sensor creates this:
  # 3.3| Tisdag;4-16°C;0,0mm;partlycloudy#Onsdag;3-13°C;0,1mm;partlycloudy#Torsdag;2-14°C;0,0mm;sunny#Fredag;2-13°C;0,0mm;partlycloudy#Lördag;4-13°C;0,0mm;partlycloudy#
  # where the first value is the current windspeed in m/s then each day is delimited with # and each value in the days is delimited with ;
  - platform: template
    sensors:
      weather_fivedays_ns:
        friendly_name: "Vädret fem dagar NS-Panel"
        value_template: >-
                {% set days = {'Mon':'Måndag','Tue':'Tisdag','Wed':'Onsdag','Thu':'Torsdag','Fri':'Fredag','Sat':'Lördag','Sun':'Söndag'} %}
                {{ (state_attr('weather.smhi_home', 'wind_speed') | float / 3.6) |round(1) }}|
                {% for state in states.weather.smhi_home.attributes.forecast[0:5] -%}

                {{ days[as_timestamp(state.datetime, 0)| timestamp_custom("%a", 0)] }};{{state.templow}}-{{ state.temperature }}°C;{{ state.precipitation | replace('.', ',') }}mm;{{ state.condition }}#

                {%- endfor %}
I'm not going to get in to what each part of this yaml does. I have mentioned the va0 sensor and briefly mentioned vprevpage. But this text sensor probably needs some explenation. In Nextion there is a number that is what day should be displayed as the weather. When I click on the display this number changes. The code below here listens for this value and when it changes it updates what day should be displayed as the weather.
text_sensor:
  # this is what day as in a integer you want to display on the weather.
  # 0 is today, 1 is tomorrow and so on. The number is incremented per click in Nextion.
  - platform: nextion
    nextion_id: disp1
    name: $device_name day
    id: disp1_day
    component_name: Home.dayt
    update_interval: 1s
    on_value:
      then:
        - wait_until:
             switch.is_on: nextion_init
        - lambda: |-
            std::string str = "";
            std::vector<std::string> v;
            std::vector<std::string> five;
            char * token;
            char seps[] = ";";
            std::string fivedays = "";
            fivedays = id(weather_symbol).state;

            //ESP_LOGD("%s", fivedays.c_str());
            five.clear();
            std::string w_speed = "";

            int count = 0;
            int daycount = 0;
            std::string day;

            // Here I first strip out the windspeed from the string and preserve the rest in the variable fivedays
            w_speed = strtok (&fivedays[0],"| ");
            fivedays = strtok (NULL, " ");

            // the string is split to an array. So after this part five becomes:
            // [todays weather, tomorrows weather, ....]
            token = strtok (&fivedays[0],"#");
            while (token != NULL)
            {
              five.push_back(token);
              token = strtok (NULL, "#");
            }

            // the sensor it'self (what daynumber to display)
            day = id(disp1_day).state;


            // loop the days to fiv
            for ( std::string fiv : five ) {
              // daycount is just a counter to keep track of the iterations.
              // day is the sensor, so we compare if the current iteration is the same as the selected day
              if(to_string(daycount) == day){
                str = "";
                str = fiv;
                //ESP_LOGD("test: ", "String to Vector: %s", str.c_str());
                v.clear();

                // now we know we are on the correct day, now we need to split the days values to array
                token = strtok (&str[0],seps);
                while (token != NULL)
                {
                  v.push_back(token);
                  token = strtok (NULL, seps);
                }
                // so v is currently [day, temperature, rain....]
                for ( std::string s : v ) {

                  // output the values on the display
                  if(count == 0){
                    if(daycount == 0){ // if today make the day say "today" instead of dayname
                      id(disp1).set_component_text_printf("Home.dag", "%s", "Idag");
                      id(disp1).set_component_text_printf("Home.wind", "%s m/s", w_speed.c_str());
                    }else if(daycount == 1){ // if tomorrow make the day say "tomorrow" instead of dayname
                      id(disp1).set_component_text_printf("Home.dag", "%s", "Imorgon");
                      id(disp1).set_component_text_printf("Home.wind", "%s", " ");
                    }else{
                      id(disp1).set_component_text_printf("Home.dag", "%s", s.c_str());
                      id(disp1).set_component_text_printf("Home.wind", "%s", " ");
                    }
                  }else if(count == 1){
                    id(disp1).set_component_text_printf("Home.temp", "%s", s.c_str());
                  }else if(count == 2){
                    id(disp1).set_component_text_printf("Home.tempfl", "%s", s.c_str());
                  }else if(count == 3){
                    int symbol=5; // 5 is a empty box.
                    if (s == "clear-night") {
                      symbol=6;
                    } else if (s == "cloudy") {
                      symbol=7;
                      if (id(sun_sun).state == "below_horizon" && daycount == 0) { // only make it display night images when daycount is 0
                        symbol=8;
                      }
                    } else if (s == "fog") {
                      symbol=9;
                    } else if (s == "hail" || s == "snowy-rainy") {
                      symbol=10;
                    } else if (s == "lightning") {
                      symbol=11;
                    } else if (s == "lightning-rainy" || s == "exceptional") {
                      symbol=12;
                      if (id(sun_sun).state == "below_horizon" && daycount == 0) { // only make it display night images when daycount is 0
                        symbol=13;
                      }
                    } else if (s == "partlycloudy") {
                      symbol=14;
                      if (id(sun_sun).state == "below_horizon" && daycount == 0) { // only make it display night images when daycount is 0
                        symbol=8;
                      }
                    } else if (s == "pouring") {
                      symbol=15;
                    } else if (s == "rainy") {
                      symbol=16;
                    } else if (s == "snowy") {
                      symbol=17;
                    } else if (s == "sunny") {
                      symbol=18;
                      if (id(sun_sun).state == "below_horizon" && daycount == 0) { // only make it display night images when daycount is 0
                        symbol = 6;
                      }
                    } else if (s == "windy" || s == "windy-variant") {
                      symbol=19;
                    }
                    id(disp1).send_command_printf("Home.weather_symbol.pic=%i", symbol);
                  }

                  //ESP_LOGD("test: ", "s %s", s.c_str());
                  count += 1;
                }

                count = 0;
              }
              daycount += 1;
            }
And the same code is used for when Home Assistant updates the weather entity.