In the basic configuration, the simulator runs as a Cloud Foundry app in Bluemix.

or to deploy the full system (including the Logistics Wizard user interface) all at once, check out the Logistics Wizard Toolchain
-
If you do not already have a Bluemix account, sign up here
-
Download and install the Cloud Foundry CLI tool
-
Clone the app and its submodules to your local environment from your terminal using the following command:
git clone https://github.com/strongloop/acme-freight-erp.git -
cdinto this newly created directory -
Open the
manifest.ymlfile and change thehostvalue to something unique.
The host you choose will determinate the subdomain of your application's URL: <host>.mybluemix.net
-
Connect to Bluemix in the command line tool and follow the prompts to log in.
cf api https://api.ng.bluemix.net cf login -
Create a new ElephantSQL service
cf create-service elephantsql turtle logistics-wizard-erp-db
-
Push the app to Bluemix.
cf push
And voila! You now have your very own instance of simulator running on Bluemix.
- Get the code locally
git clone https://github.com/strongloop/acme-freight-erp.git
-
Change to the checkout directory
-
Get the application dependencies
npm install
- Start the application
npm start
At that point the application runs with an in-memory database. You lose all changes when you stop the app. Let's configure a persistent storage.
- Create the file server/datasources.local.json with the following content:
{
  "db": {
    "name": "db",
    "connector": "memory",
    "file": "in-memory-database.json"
  }
}
- Start the application
npm start
The data is now persisted in in-memory-database.json.
- Create a new ElephantSQL service
cf create-service elephantsql turtle logistics-wizard-erp-db
- Create a set of credentials
cf create-service-key logistics-wizard-erp-db erp
- Retrieve the credentials
cf service-key logistics-wizard-erp-db erp
Note that ElephantSQL returns a uri but the Loopback connector requires more parameters that can be extracted from the uri. The uri looks like:
"uri": "postgres://<username>:<password>@<host>:<port>/<database>"
- Create the file server/datasources.local.json with the following content, replacing the placeholders with values extracted from the uri.
{
  "db": {
    "name": "db",
    "connector": "postgresql",
    "database": "<database>",
    "host": "<host>",
    "port": "<port>",
    "username": "<username>",
    "password": "<password>",
    "max": 3
  }
}
Note: max defines the number of connections that can be established to the database. If you are seeing a "too many connections" error on app startup, check out the explanation and solution in the FAQ
- Start the application
npm start
The data is now persisted in ElephantSQL. You can use the same structure for the databases.local.json if you work with your own PostgreSQL database.
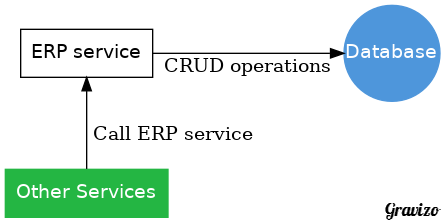
The ERP simulator uses Loopback for its implementation. LoopBack is a highly-extensible, open-source Node.js framework that enables you to:
- Create dynamic end-to-end REST APIs with little or no coding.
- Access data from major relational databases, MongoDB, SOAP and REST APIs.
- Incorporate model relationships and access controls for complex APIs.
- Use geolocation, file, and push services for mobile apps.
- Easily create client apps using Android, iOS, and JavaScript SDKs.
- Run your application on-premises or in the cloud.
From the Loopback model definition, we derived a Swagger specification,
initially generated with slc loopback:export-api-def -o spec.yaml.
Swagger is a simple yet powerful representation of a RESTful API. The Swagger specification has been donated to the Open API Initiative as part of an effort to define a standard specification format for REST APIs.
To review the API specification, open the Swagger Editor.
To better understand some of the code below including Loopback tips, the blog post titled Build a smarter supply chain with LoopBack is worth a read.
| File | Description |
|---|---|
| Loopback models | Contains JSON definitions of the object model and implementation of remote methods. |
| integrity.js | A mixin to check foreign key constraints. |
| isolated.js | A mixin to isolate data per demo environment. |
| seed/ | Seed data loaded into the database at startup and when new demo environments are created. |
| server/boot/ | Startup scripts including table creation, static data injection. |
| datasources.local.js | Initializes data sources (database) from a local file or by reading the Cloud Foundry VCAP_SERVICES. |
| datasources.local.template.json | Template file to define local data sources. |
| test/ | Unit tests. |
The unit tests use Mocha as test runner.
To run the unit tests (all .js under test), run
npm run test
The unit tests use a dedicated datasource definition file.
To run the tests and collect coverage data with istanbul, run
npm run localcoverage
and view the coverage report in coverage/index.html.
To run tests and post coverage results to coveralls, either through a continuous integration tool like Travis or through your own tool (by adding a .coveralls.yml file with a repo_token property as described here), run
npm run coverage