


Use rolling-ball algorithm for estimating background intensity.
We strongly recommend using a virtual environment. If you're not sure where to start, we offer a tutorial here.
pip install ikomiafrom ikomia.dataprocess.workflow import Workflow
from ikomia.utils.displayIO import display
# Init your workflow
wf = Workflow()
# Add algorithm
algo = wf.add_task(name="skimage_rolling_ball", auto_connect=True)
# Run on your image
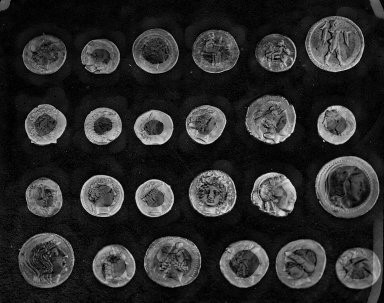
wf.run_on(url="https://raw.githubusercontent.com/Ikomia-hub/skimage_rolling_ball/main/sample%20images/coins.png")
display(algo.get_output(0).get_image())Ikomia Studio offers a friendly UI with the same features as the API.
-
If you haven't started using Ikomia Studio yet, download and install it from this page.
-
For additional guidance on getting started with Ikomia Studio, check out this blog post.
- combo_model (str) default 'Dark': Background model choice 'Light' or 'Dark'
- radius (int) - default '10': Radius of a ball shaped kernel to be rolled/translated in the image.
- kernel_choice (str) - default 'ball_kernel': Kernel type. Other option: 'ellipsoid_kernel'
- kernel_x (int) - default '10'
- kernel_y (int) - default '10'
Parameters should be in strings format when added to the dictionary.
from ikomia.dataprocess.workflow import Workflow
from ikomia.utils.displayIO import display

# Init your workflow
wf = Workflow()

# Add algorithm
algo = wf.add_task(name="skimage_rolling_ball", auto_connect=True)


algo.set_parameters({
    "combo_model": "Light",
    "radius": "20",
    "kernel_choice": "ellipsoid_kernel",
    "kernel_x": "20",
    "kernel_y": "20",
})

# Run on your image
wf.run_on(url="https://raw.githubusercontent.com/Ikomia-hub/skimage_rolling_ball/main/sample%20images/coins.png")

display(algo.get_output(0).get_image())Every algorithm produces specific outputs, yet they can be explored them the same way using the Ikomia API. For a more in-depth understanding of managing algorithm outputs, please refer to the documentation.
import ikomia
from ikomia.dataprocess.workflow import Workflow

# Init your workflow
wf = Workflow()

# Add algorithm
algo = wf.add_task(name="skimage_rolling_ball", auto_connect=True)

# Run on your image
wf.run_on(url="https://raw.githubusercontent.com/Ikomia-hub/skimage_rolling_ball/main/sample%20images/coins.png")

# Iterate over outputs
for output in algo.get_outputs():
    # Print information
    print(output)
    # Export it to JSON
output.to_json()The algorithm works as a filter and is quite intuitive. We think of the image as a surface that has unit-sized blocks stacked on top of each other in place of each pixel. The number of blocks, and hence surface height, is determined by the intensity of the pixel. To get the intensity of the background at a desired (pixel) position, we imagine submerging a ball under the surface at the desired position. Once it is completely covered by the blocks, the apex of the ball determines the intensity of the background at that position. We can then roll this ball around below the surface to get the background values for the entire image. This algorithm is recommended for grayscale images. However, if you want to apply it to color images, use the ellipsoid_kernel method.