

Library of Infineon's Stepper-Motor-Shield-IFX9201-XMC1300 for Arduino.
The stepper motor control shield based on Infineon’s h-bridge IFX9201 and XMC1300 microcontroller is capable of driving the two coils in a stepper motor featuring dual-h-bridge configuration. The implemented integrated IFX9201 h-bridges can be controlled by a STEP-signal via the STEP Pin. Interfacing to a microcontroller is made easy by the integrated XMC1300 microcontroller that holds the peripherals to allow high-speed current control. Micro-stepping of the stepper motor can be achieved using the internal comparators. Operational amplifiers are installed to adapt the motor current sense signal to the microcontroller’s input levels.
This high current stepper motor control boards is compatible with Arduino microcontroller boards and with Infineon’s XMC™ microcontroller kits using the Arduino form factor.
- Compatible with Arduino Uno R3
- Capable of high performance current control
- Microstepping degree can be adjusted by software
- Driver circuit with logic level inputs
- Fast and inexpensive prototyping of stepper motor control
- Simple testing of microstepping algorithms
- Diagnose pin to allow hardware feedback during development
- Overtemperature shut down with latch behavior and undervoltage shut down of the power section
- Stepper motors up to 5A phase current
- 24V nominal input voltage for the power stage
- Average motor current 3A without additional cooling effort, 5A possible with proper cooling
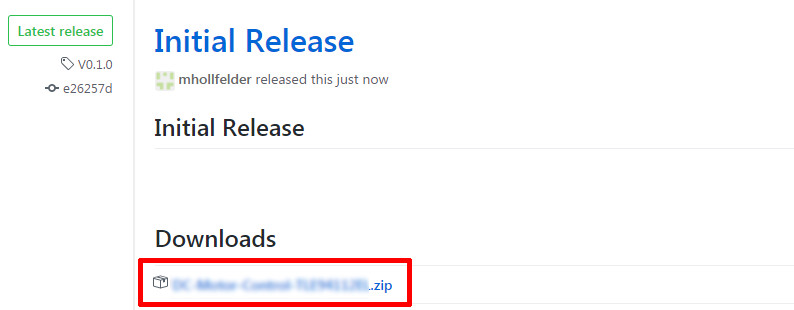
First of all, please download this repository from GitHub by clicking on the field with the .zip file in the releases of this repository or directly here.
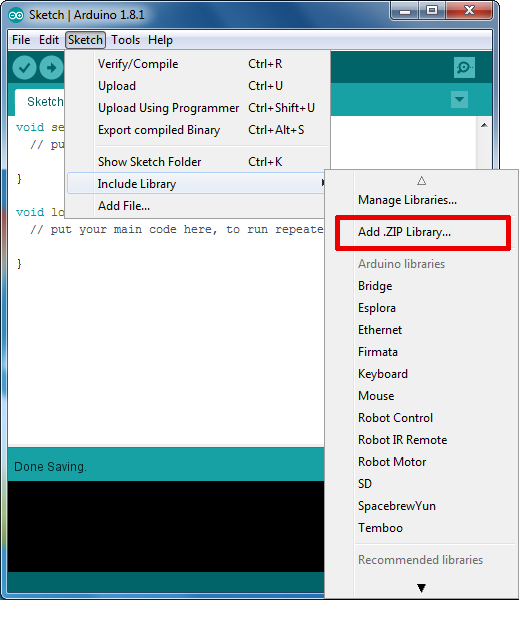
To install the Stepper Motor Shield IFX9201 XMC1300 Library in the Arduino IDE, please go now to Sketch > Include Library > Add .ZIP Library... in the Arduino IDE and navigate to the downloaded .ZIP file of this repository release. The library will be installed in your Arduino sketch folder in libraries and you can select as well as include this one to your project under Sketch > Include Library > Stepper Motor Shield IFX9201 XMC1300.
After installing this library in your Arduino IDE, you can do a quick test of your stepper motor, using the example testStepperMotor.ino. The default coil current is set to 1A. If your motor is rated for less, please read on below before testing the motor. Otherwise it could be damaged.

The stepper motor will not be powered through the 5V supply of the Arduino. Please connect an external power source (typ. DC 12-24V) to the PWR_MOT input of your stepper motor shield.

In this section you learn, how to change the configuration settings of your motor shield to fit your target application.
In order to change the configuration of your stepper motor shield, please follow these steps:
- Open the example sketch
configureStepperMotor.inoin your Arduino IDE - Adapt the parameters according to your preferences, with help of the Parameters section below
- Compile and upload the Arduino sketch to your Arduino
- Connect the pins as shown in the Hardware section below
- Press the reset button of the Arduino and wait, until the builtin LED of the Arduino lights up constantly
- The new configuration is now running on the stepper motor shield
- Remove the serial pin connection from step (4)
- Flash your actual motor control code to the Arduino, e.g. the example Sketch
testStepperMotor.ino
In the example sketch configureStepperMotor.ino you find the different configuration parameters:
| Parameter | Options | Default |
|---|---|---|
| SteppingMode | IFX9201_STEPPERMOTOR_STEPPINGMODE_FULL, IFX9201_STEPPERMOTOR_STEPPINGMODE_HALF, IFX9201_STEPPERMOTOR_STEPPINGMODE_MICROSTEP |
Full step mode |
| FreqPWMOut | PWM output frequency. For higher currenty stay at some kHz, for low current up to 20 kHz is possible. Note: The effective frequency may be different in order to limit the current. |
3000 [Hz] |
| PWMDutyCycleNormFactor | Current limit. Calculated as: current [A] = value / 3333 | 3333 (1A) |
| NumMicrosteps | Microsteps per full step: 8, 12, 16, 20, 24, ... 128. Only valid in microstepping mode. | n/a |
| Store | IFX9201_STEPPERMOTOR_STEPPINGMODE_DO_NOT_STORE_CONFIG, IFX9201_STEPPERMOTOR_STEPPINGMODE_ STORE_CONFIG. If set, the non-volatile memory of the onboard microcontroller will be updated with the new values. If not set, the configuration will be set to the default parameters after each power cycle. Note: The non-volatile memory has a high, but limited amount of writing cycles, so it is not recommanded to e.g. script a regular re-write of the configuration parameters to the memory. |
In order to write the new parameters to the onboard microntroller, the serial port (UART) of the Arduino is used. Before executing the configureStepperMotor.ino sketch, you have to connect the onboard microcontroller serial port to the one of the Arduino as shown here:

Important note: The Arduino cannot be flashed via USB, while these pins are connected. Please disconnect them, before trying to flash the Arduino.
Please refer to the Board User Manual for additional and more detailed information.
The two IFX9201 half bridges on the stepper motor shield can become very hot during operation. Do not touch them! The half bridges have a temperature protection and will not die because of overheating. However, if they overheat, they will disable the output until they cool down. Usually, that's not desired, so lets see what we can do about that:
| Motor coil current | Minimum cooling |
|---|---|
| < 2A | none |
| < 3A | small passive heatsink e.g. this |
| <= 5A | additional cooling effort, e.g. active cooling, proper heatsink |
Note: these statements are empirical values and depend on environment temperature, operation time and supply voltage. Values are based on an environment temperature of 21°C, supply voltage of 12V and operation time ~1h. For long/continous operation proper cooling is always recommended.
A PDF summarizing the features and layout of the Stepper Motor Shield IFX9201 XMC1300 is stored on the Infineon homepage here. The datasheet for the IFX9201 can be found here IFX9201 Datasheet.