Part 5. Configure Your Own Beer Alerts
Let's create a SMS alert whenever inventory gets low inside of our fridge.
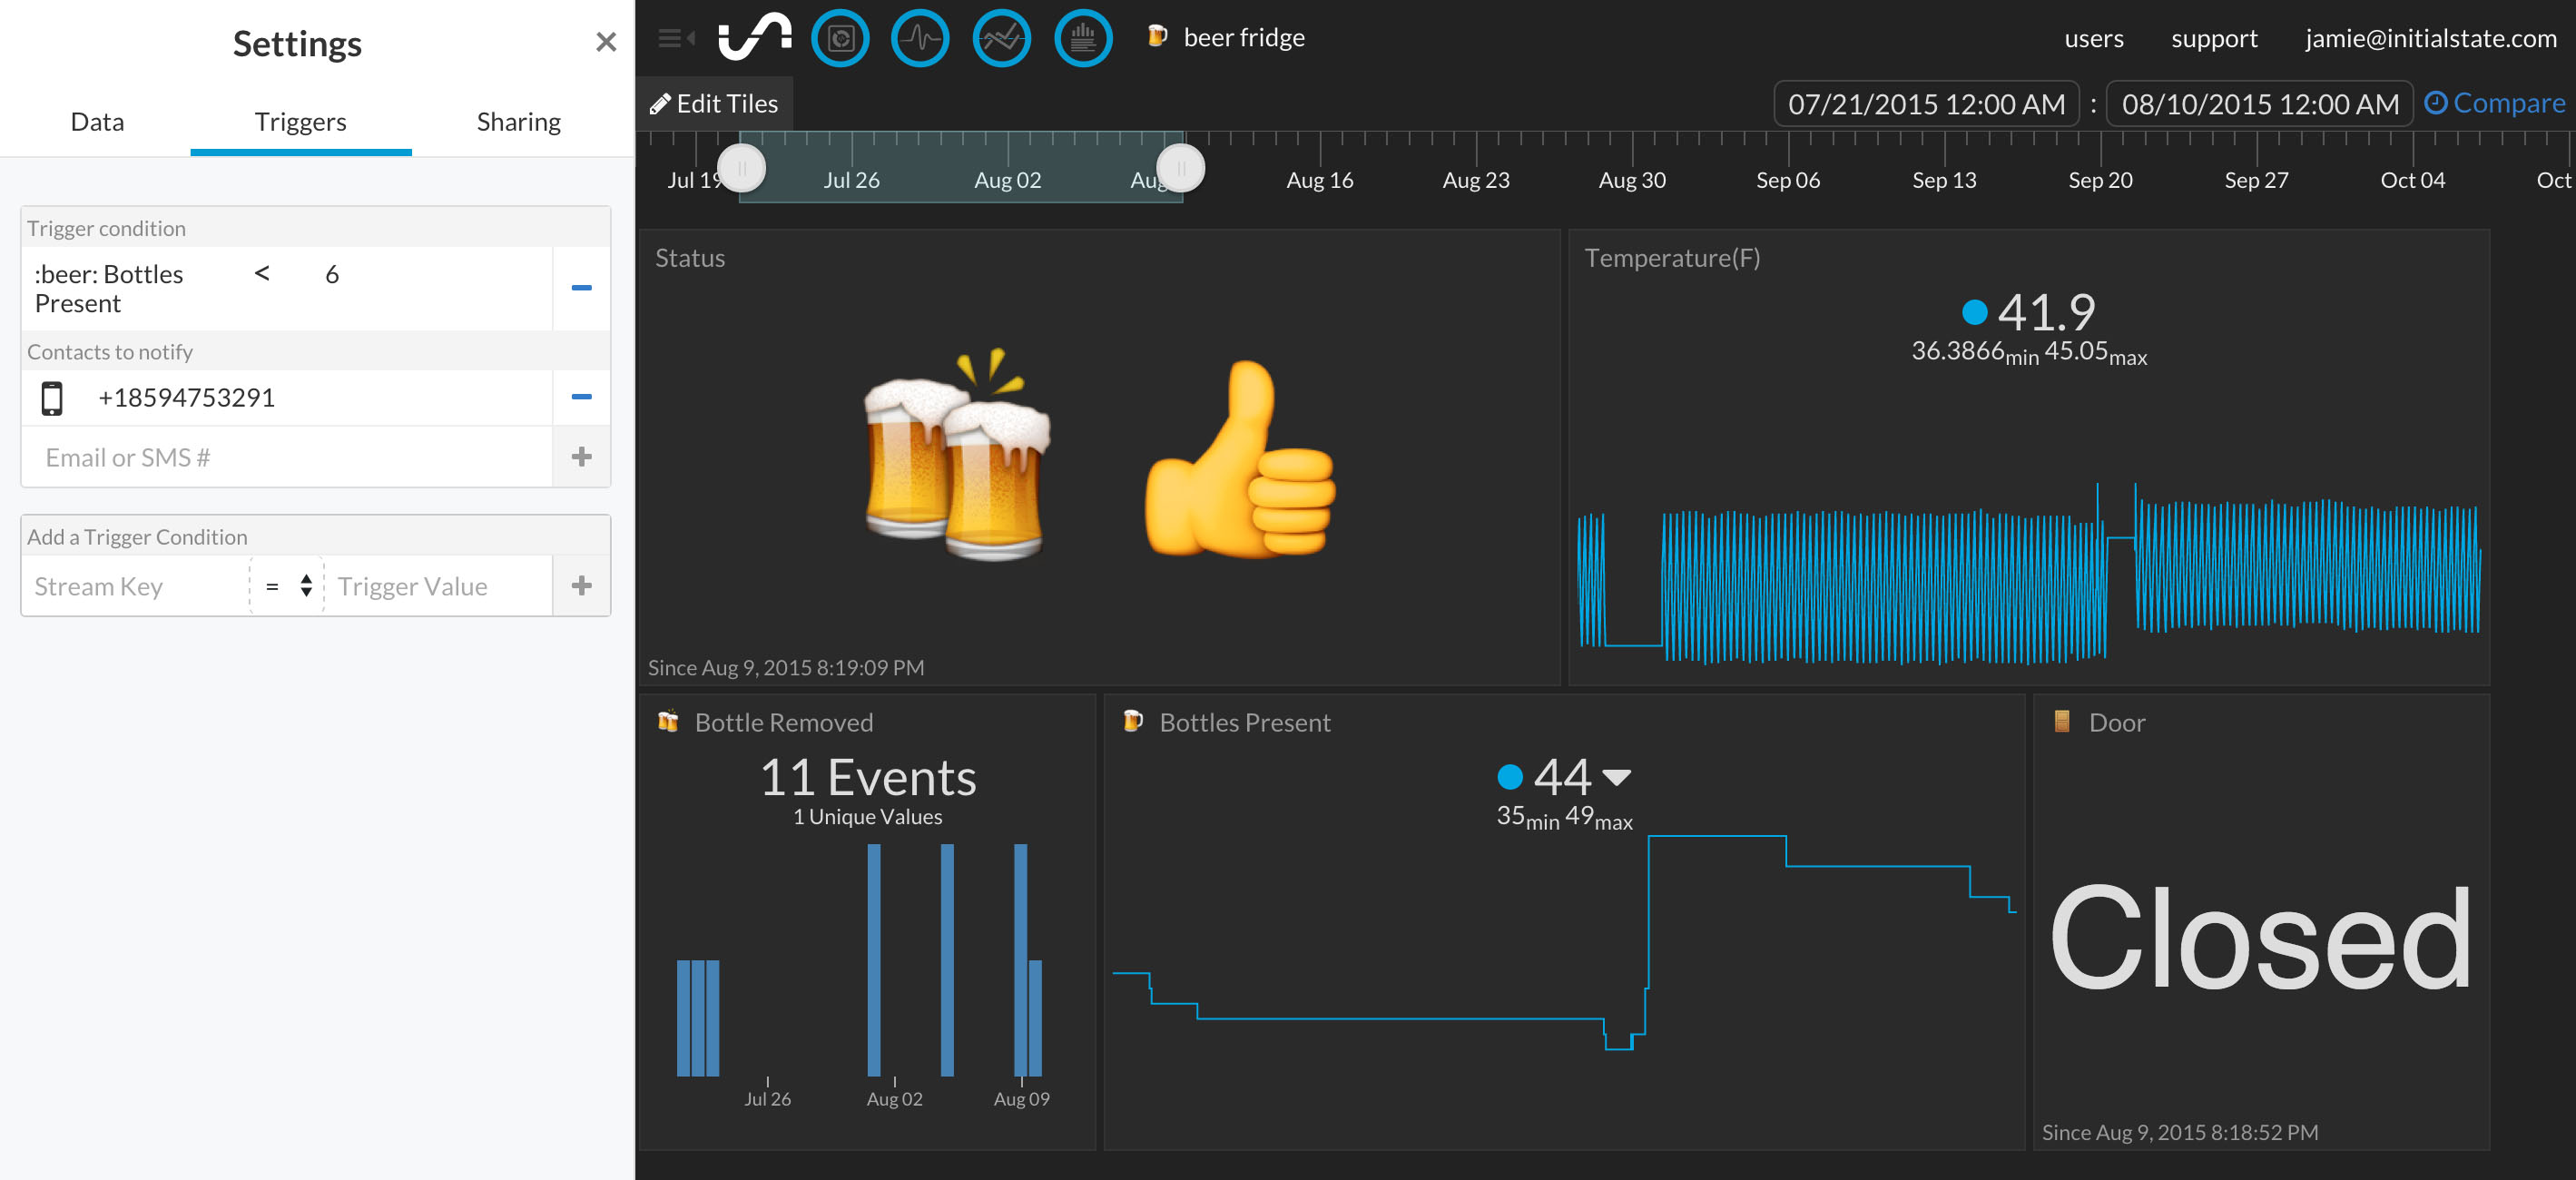
We are going to follow the Trigger notification setup process outlined on the support page.
- Make sure your beer data bucket is loaded.
- Click on the bucket's settings in the data shelf (under its name).
- Click on the Triggers tab.
- Select the data stream to trigger on (you can use the drop-down list to select from existing streams once a data bucket has loaded or you can type in the stream name/key manually; *note Safari does not support HTML5 dropdown lists). In my example screenshot above, I selected 🍺 Bottles Present.
- Select the conditional operator, in this case '<'.
- Select the Trigger value that will trigger an action (manually type in the desired value). In my example, I typed in 6. Whenever my fridge detects less than 6 beers present, I will get a notification.
- Click the '+' button to add the Trigger condition.
- Select the action (current actions available are notify by SMS or email).
- Click the '+' button to add the action.
- Input any verification code if adding a new phone number or email to complete setup.
Your trigger is now live and will fire when the condition is met. Click done to return to the main screen.

Whenever the number of beers present is less than the threshold you set, you will get a text message. You can set alerts on anything in your beer fridge dashboard such as "Temperature(F) < 41" if your fridge gets too hot or anytime ":door: Door = Open".
*Note: for all triggers, the actual emoji token is used for both the input stream and the condition. For example:
:beer: Bottles Present