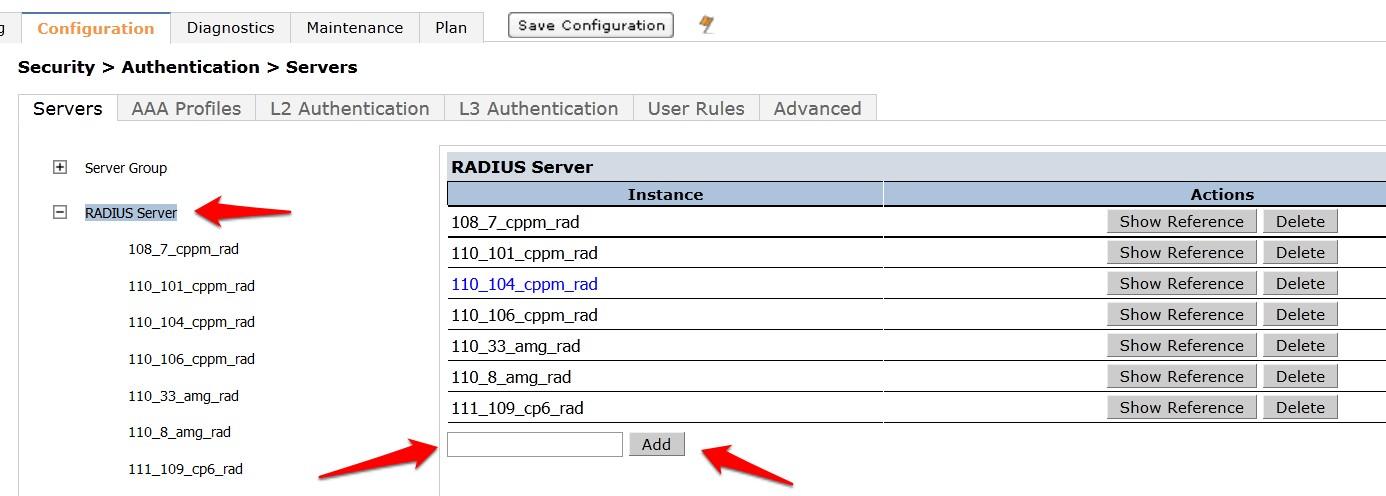
- Login to the controller GUI as an admin user. Navigate to Configuration → Security → Authentication → Servers tab. Click on RADIUS Server and create a new RADIUS server by entering the new RADIUS server reference name in the empty Add box and clicking Add.
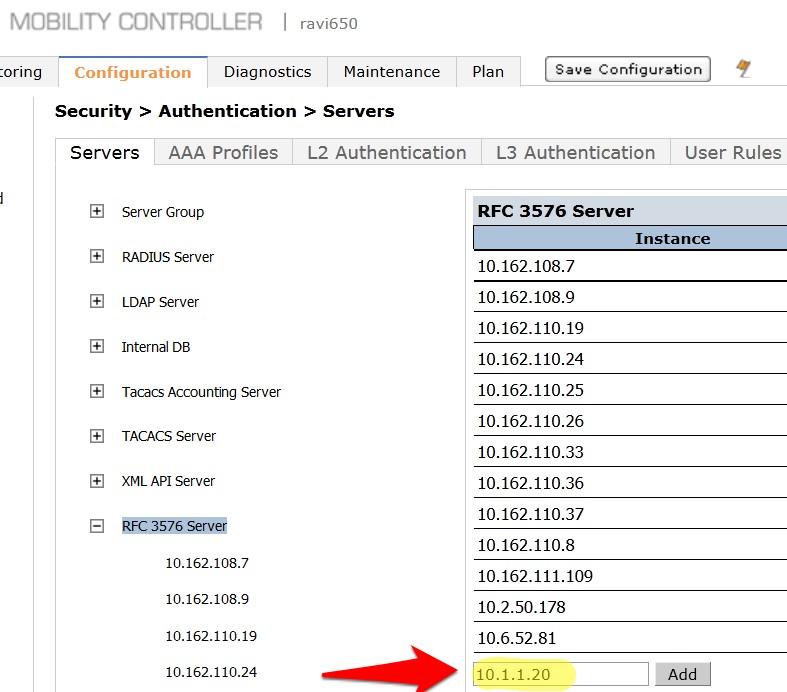
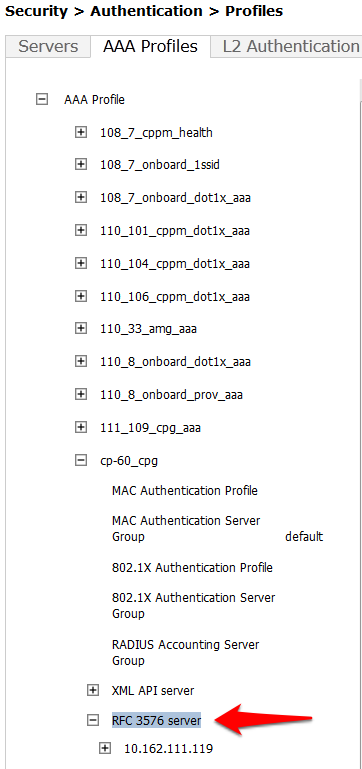
- Click on RFC 3576 Server.

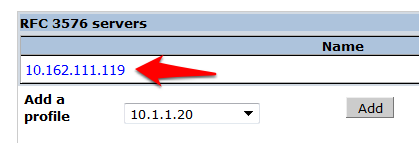
- Enter the IP address of IronWifi RADIUS server in the entry box and click Add.
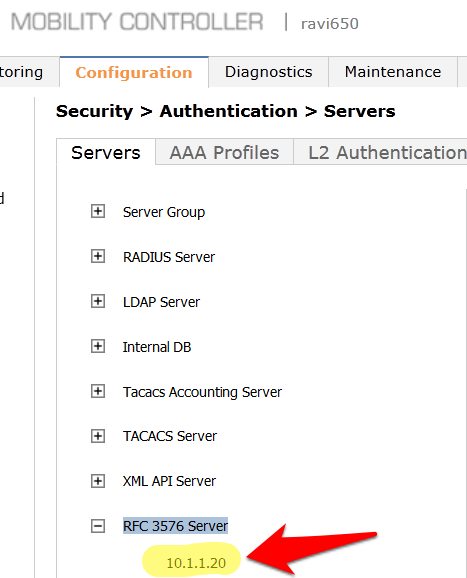
- Click on the IP address of IronWifi RADIUS server that appears in the left column under RFC 3576 Server.
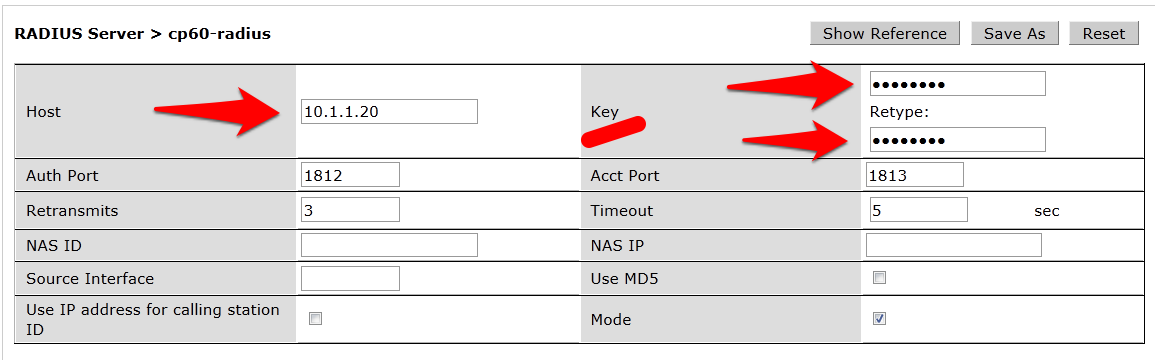
- You will be presented with a screen in the right column that looks like this:

- You MUST enter the RADIUS shared key into the key boxes. Enter IronWifi RADIUS server shared secret in both boxes and click Apply at the bottom of the page to save the changes.
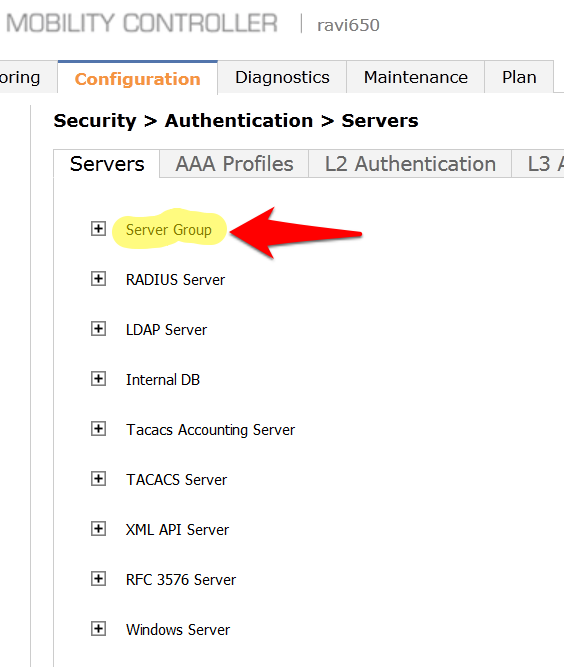
- The next step is to create a new Server Group for IronWifi. Click on Server Group.
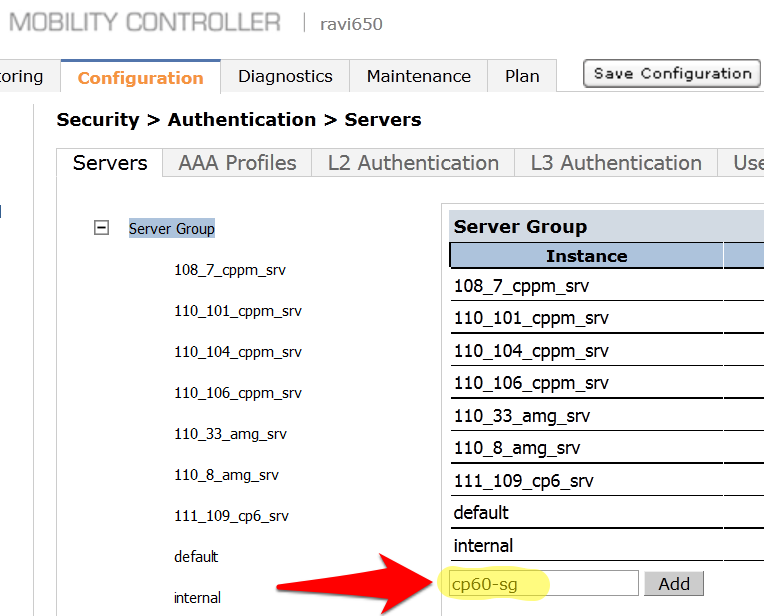
- Enter a reference name for your IronWifi Server Group in the empty box and click Add.
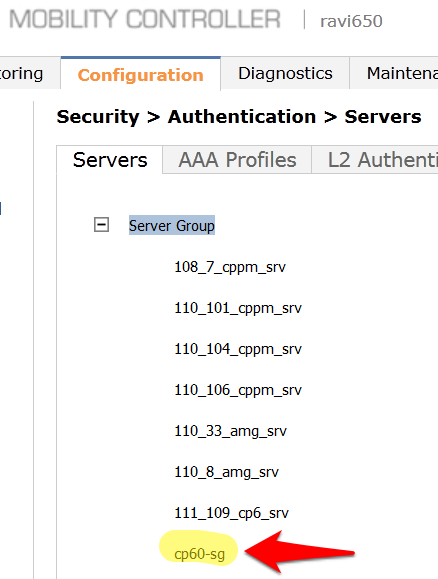
- Select the newly created Server Group on the right under Server Group
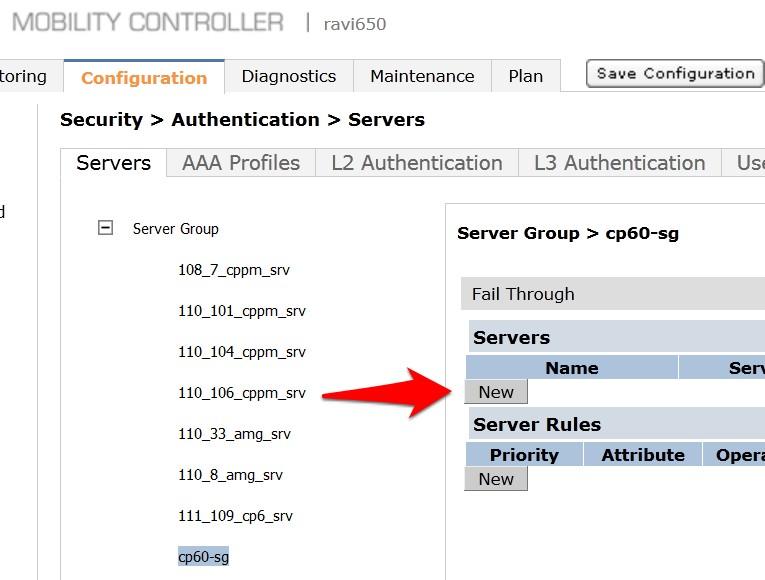
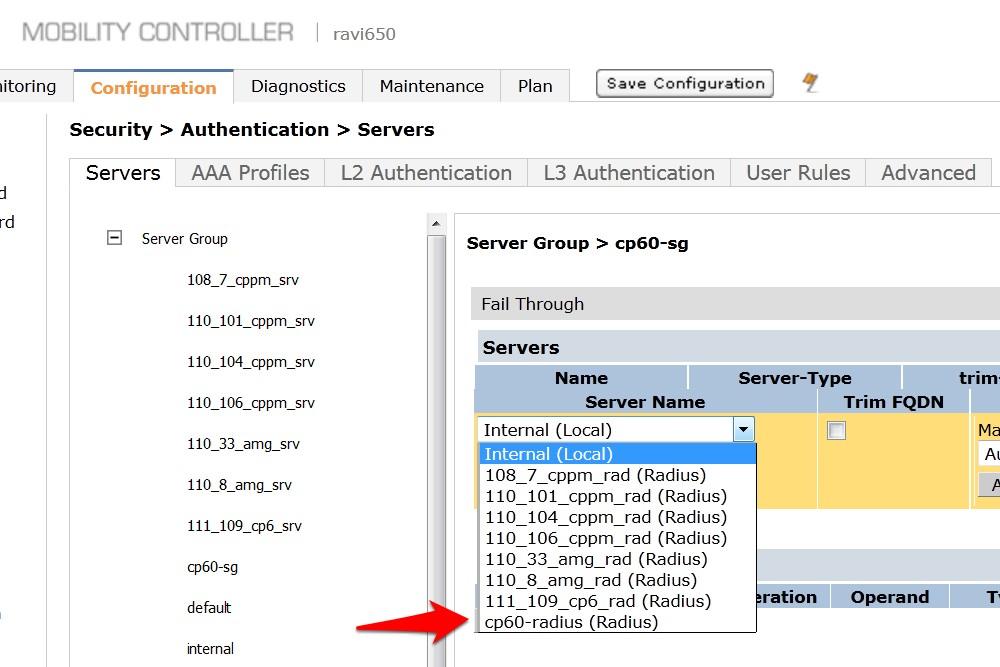
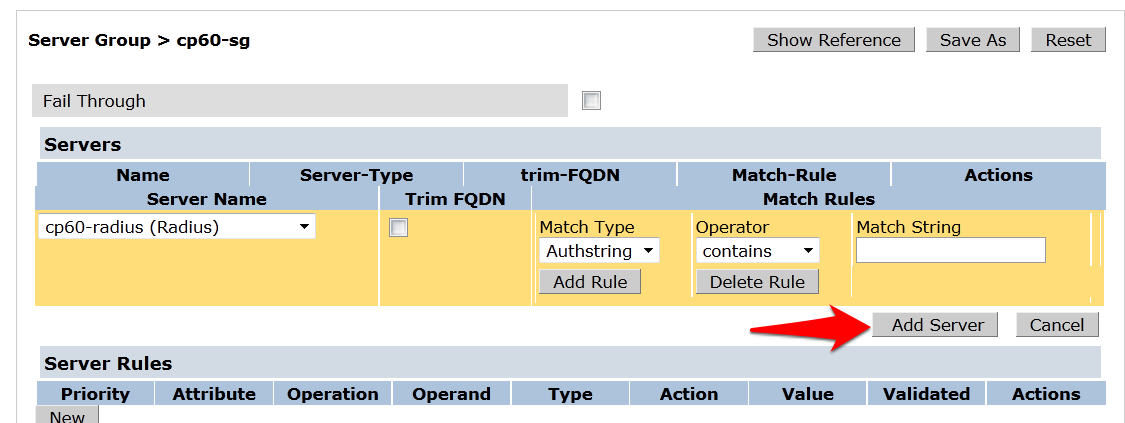
- Click New and select the IronWifi RADIUS server from the previous step.
- Click Add Server. Click Apply at the bottom of the page to save the changes.
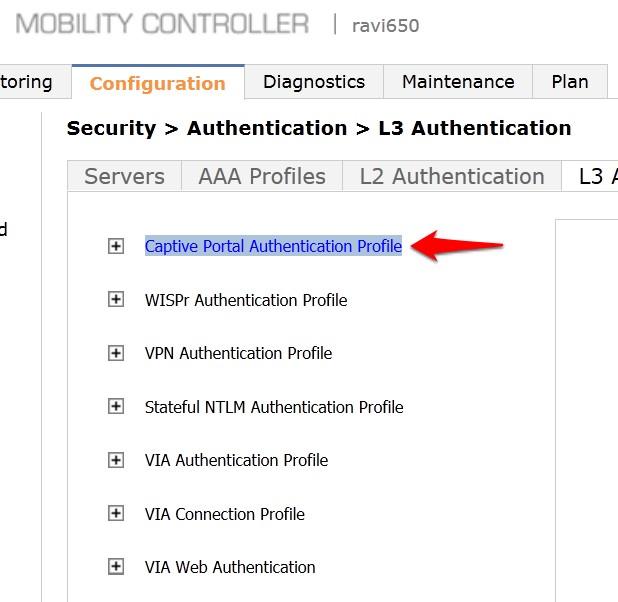
- Click on the L3 Authentication tab.

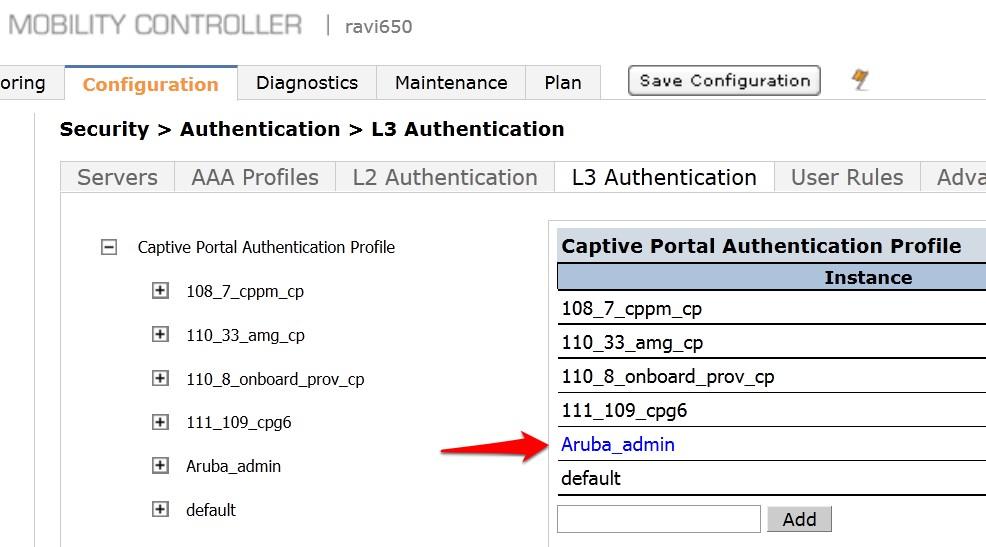
- Click on Captive Portal Authentication Profile.
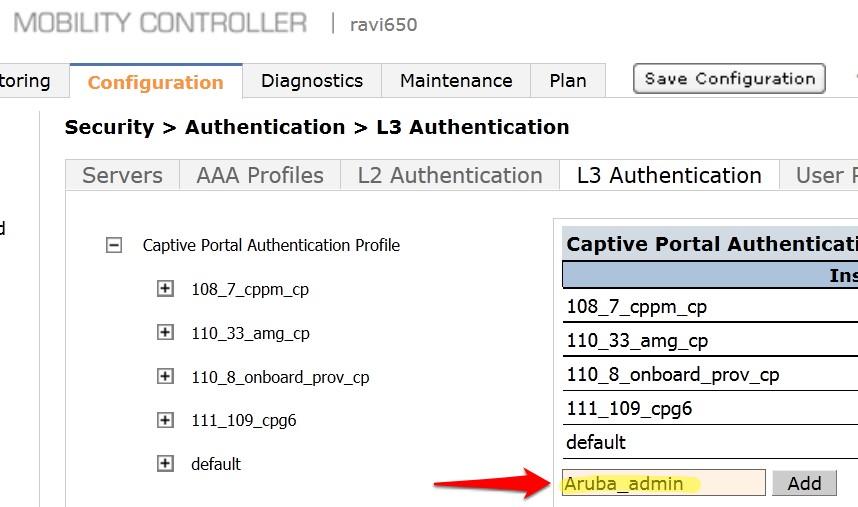
- Enter a new Captive Portal profile name in the empty box and click Add.
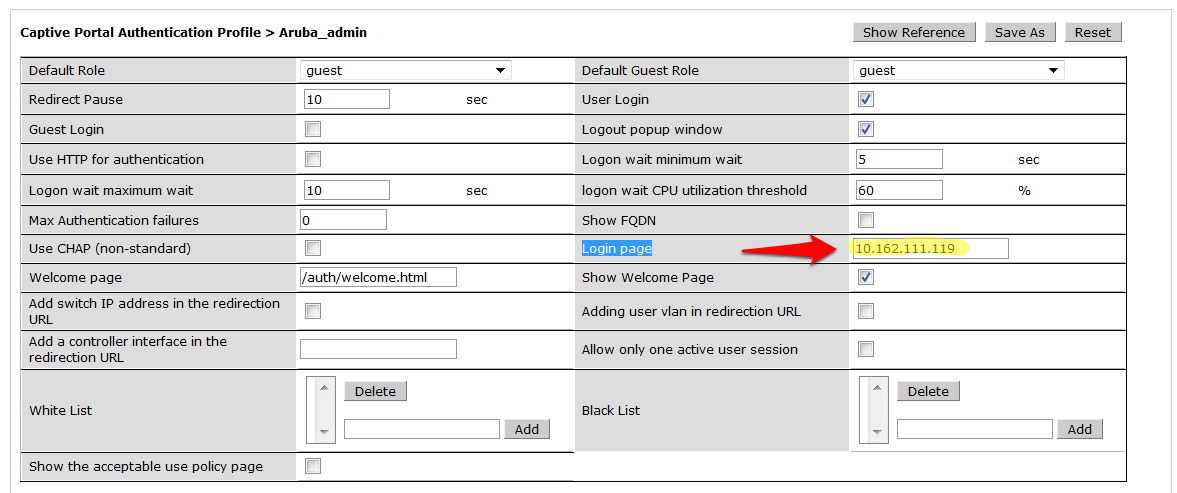
- Select the newly created Captive Portal Authentication Profile under Captive Portal Authentication Profile on the right.
- Change the Login page to https://splash.ironwifi.com/api/pages/r-xxxxxxx/ (replacing the URL with the Splash Page URL from IronWifi Console.
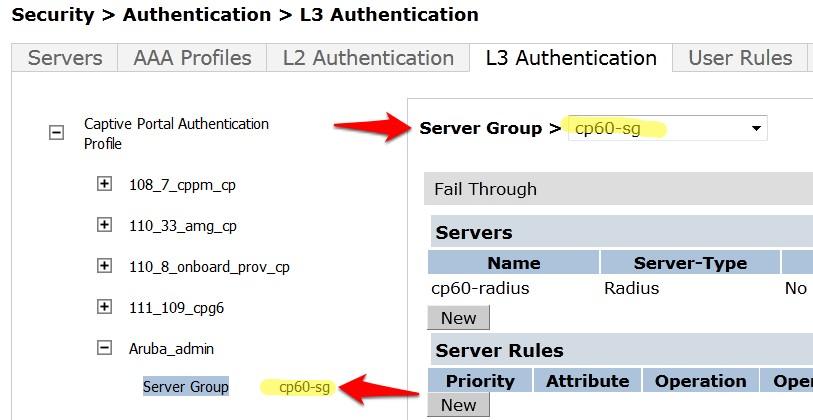
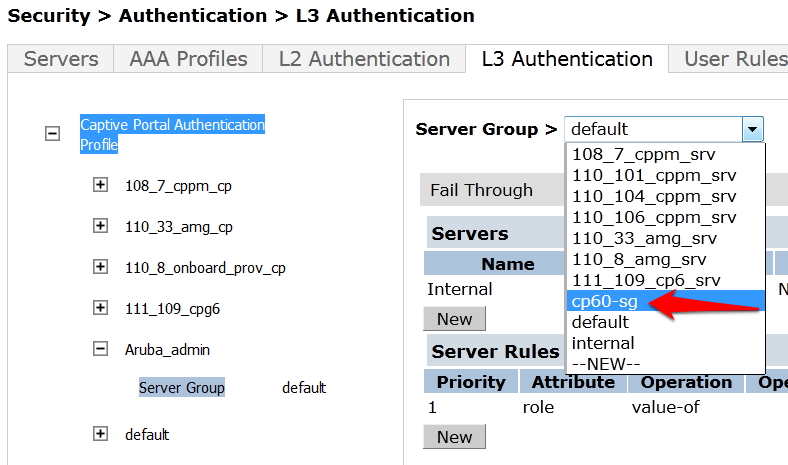
- Click on Server Group under the Captive Portal Authentication Profile and change the Server Group from default to the Server Group that you created for IronWifi in the previous steps and click apply at the bottom of the page to save the changes.
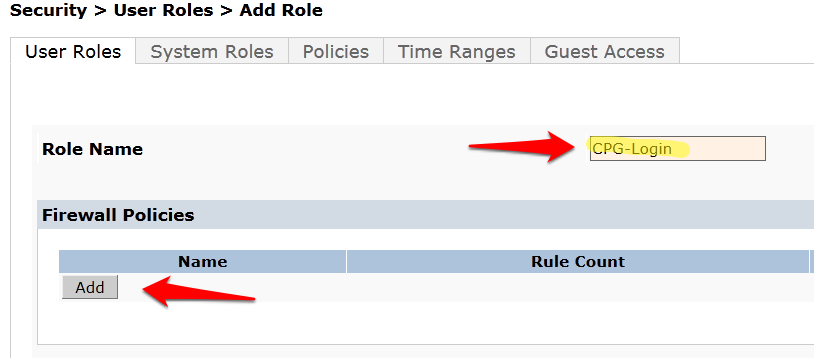
- Navigate to Configuration → Security → Access Control → User Roles tab. Click Add to create a new User Role.

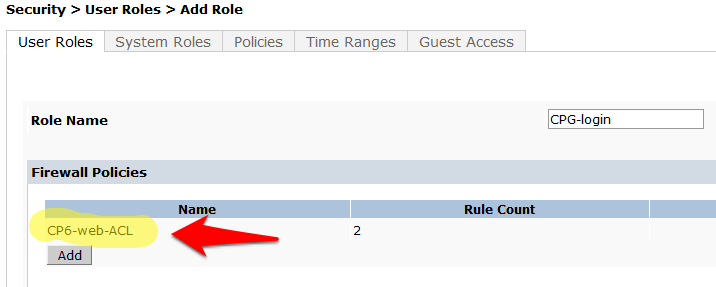
- Enter a name like CPG--Login for the Role Name under Firewall Policies, Click Add.
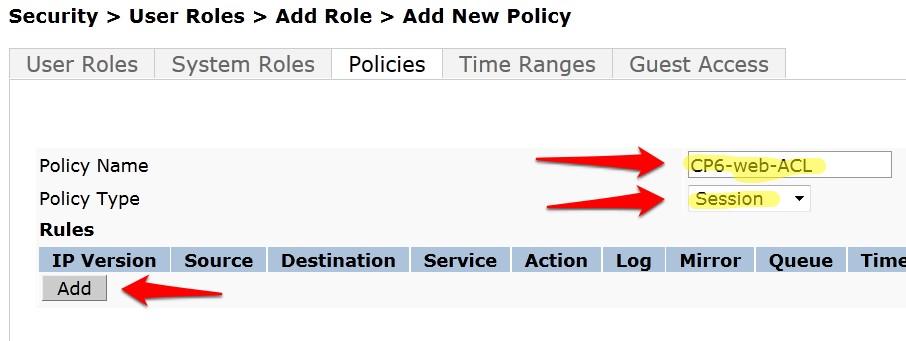
- Choose the radio button for Create New Policy, and click the Create button

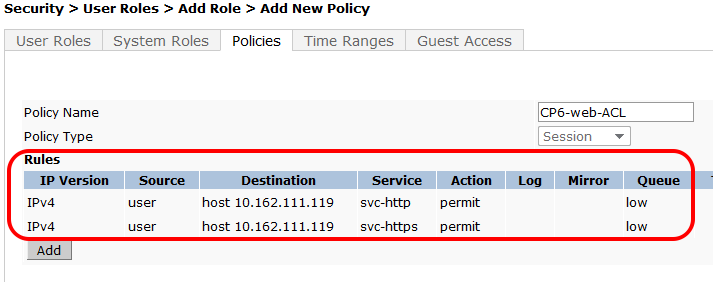
- Enter and select the following information:
- Policy Name: CP6-web-ACL
- Policy Type: Session
Click Add.
- Select and enter the following information for the first line of the ACL:
- IP Version: IPv4
- Source: User
- Destination: host
- Host IP: (the IP address of IronWifi web server: 107.178.250.42)
- Service: service
- Service: svc--httt (tcp 80)
- Action: Permit
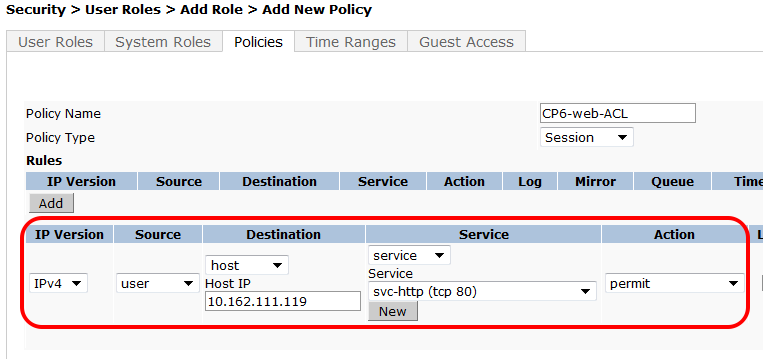
- Click Add at the far right underneath this rule

- Click Add again to add another line to this ACL, identical to the previous line except:
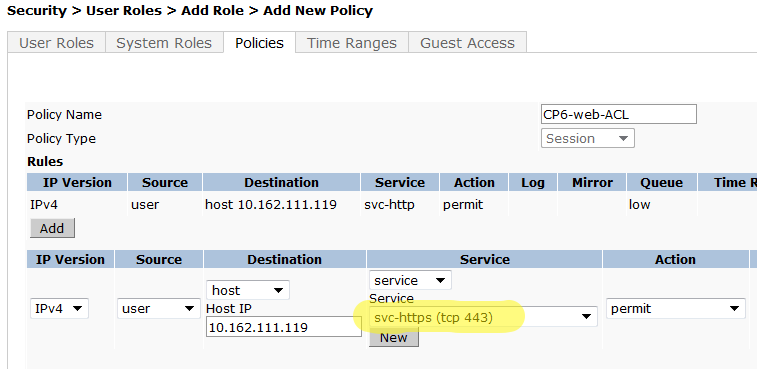
- Click Add at the far right underneath this rule
- Click Done (You will be brought back to the Add Role page where you were creating you CPG--Login User Role)
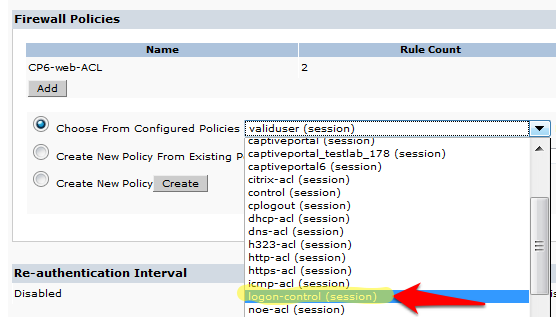
- Click Add under Firewall Policies. Select the radio button for Choose From Configured Policies and select the policy called logon-control (session).
- Click Done in the Firewall Policies section. Click Add again in the Firewall Policies section.Select the radio button for Choose From Configured Policies and select the policy called captiveportal (session).
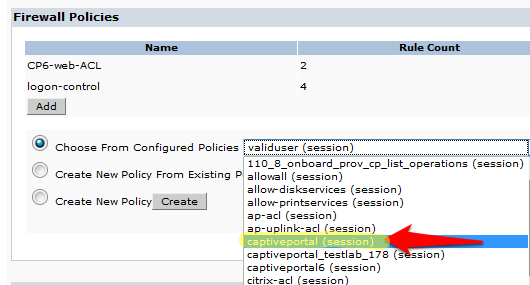
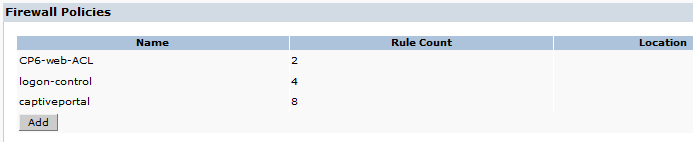
- Click Done in the Firewall Policies section. Your Firewall Policy should look like this:
- Scroll down this page to the Captive Portal Profile section. Select the previously configured Captive Portal Profile from the drop-down list.
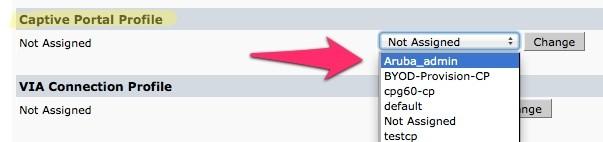
- Verify that the “Not Assigned” has changed to the name of your Captive Portal Profile.

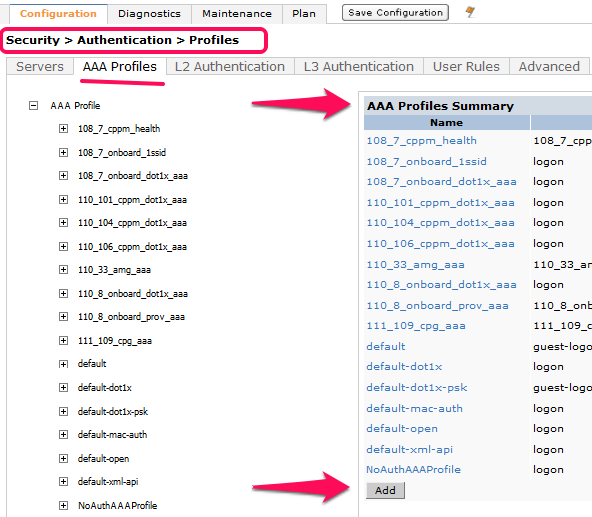
- Navigate to Configuration --> Security --> Authentication --> AAA Profiles tab. Click Add, enter a name for the IronWifi Guest Profile, and then click Add again.
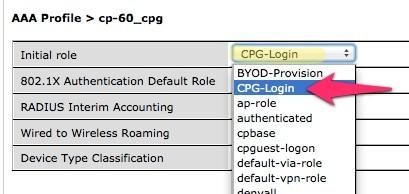
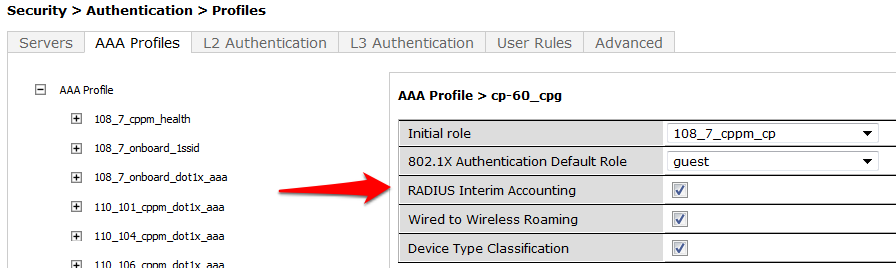
- Now in the left column, click on the new profile that you just created. Change the Initial role to the role that you have already created
- Tech Tip: On this page you will see an option for RADIUS Interim Accounting. This should be checked if you want live utilization updates in IronWifi Console, usually used to control guest users based on Bandwidth Utilization.
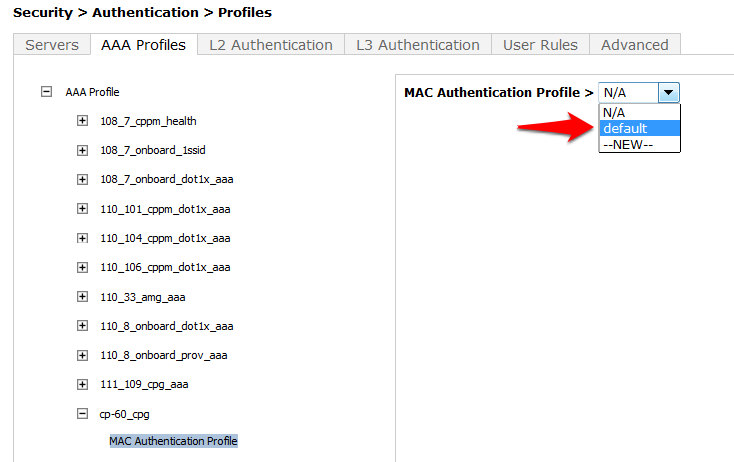
- Set the subsections of the profile as described below, clicking Apply after each change:
- MAC Authentication Profile: default
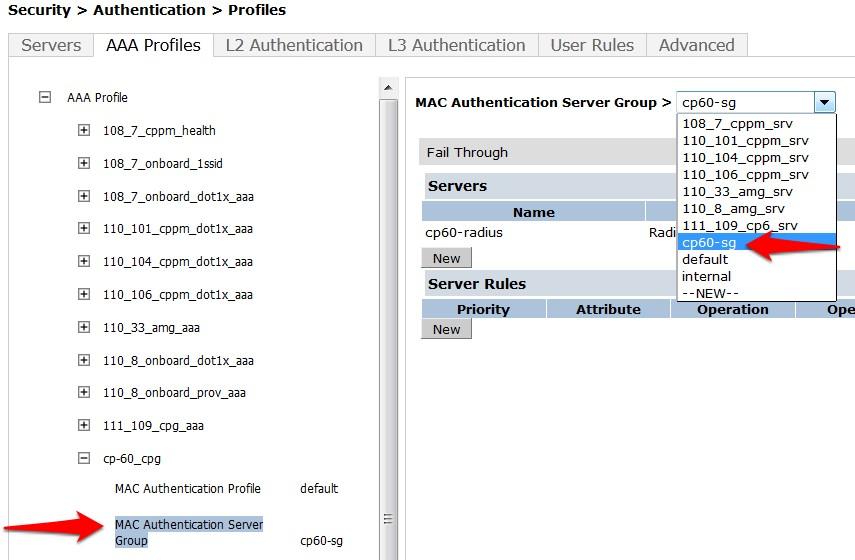
- MAC Authentication Server Group: (Your IronWifi Server Group)
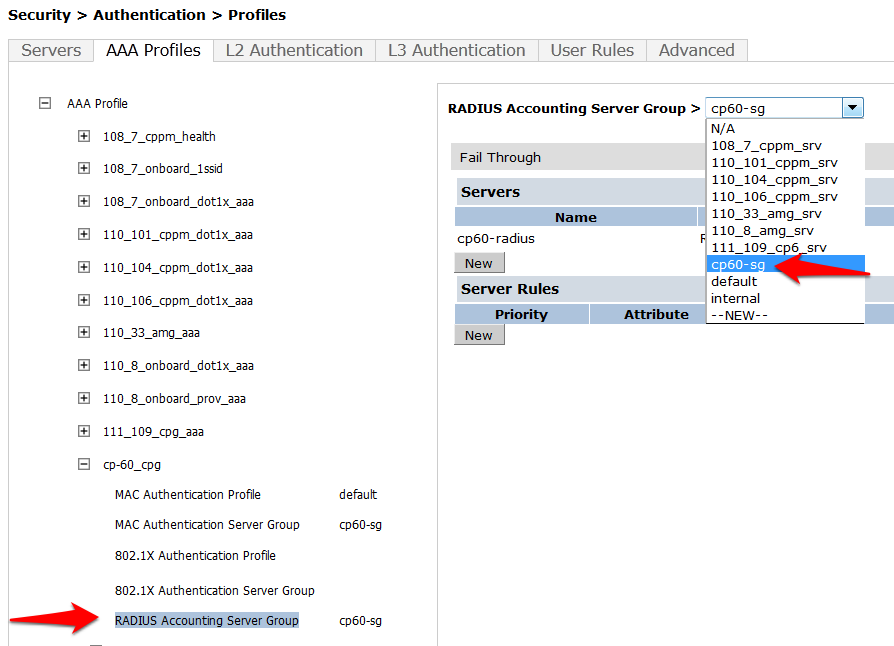
- RADIUS Accounting Server Group: (Your IronWifi Server Group)
- Click on RFC 3576 for this AAA Profile.
- From the Add a profile list, select the IP address of your IronWifi RADIUS server and click Add.
Click Apply to save these settings
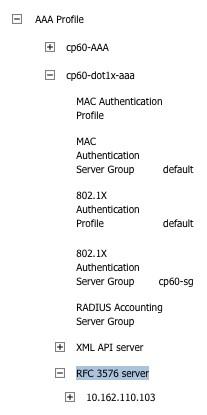
Repeat Creating AAA Profiles for the IronWifi Guest and 802.1x SSID, to create the AAA Profile for the 802.1x SSID. The only difference is that this AAA Profile will have 802.1x settings but no MAC Authentication Profile. See example below:
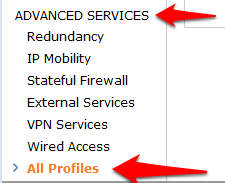
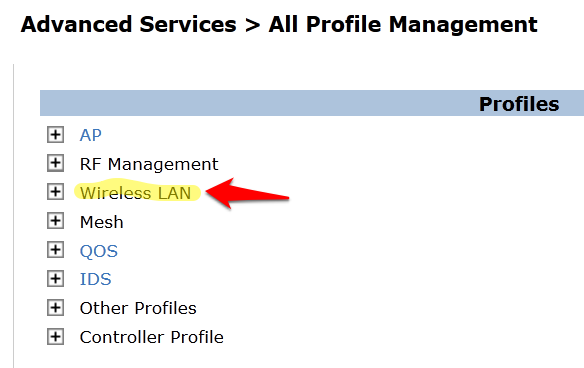
- The next step is to associate our 802.1x SSID and Guest SSID with the AAA Profiles we just created. Navigate to Configuration --> Advanced Services --> All Profiles.
- Expand the Wireless LAN section.
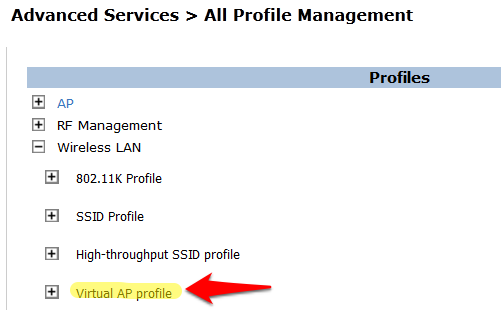
- Expand the Virtual AP profile and locate your Guest and 802.1x SSID profiles.
- Modify each Virtual AP profile to use the appropriate AAA Profile that you created in the previous section. Make sure to click Apply after each change.
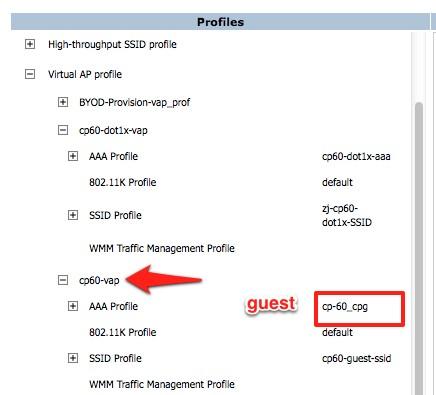
- Click the Save Configuration button at the top of the page once the changes are completed.
! You must also install a valid SSL certificate on your controller/AP, in order to avoid authentication issues !