Knob Emulation
Knob Emulation / Virtual KNOB
Note from FedorCommander. This can be used as Virtual Knob also for other functions if your radio does not have real knob. Big thanks to @theFPVGeek for making this setup and @EbrFPV for testing it.
The following instructions will create a virtual “pot/knob” on your Tango 2 transmitter (or any other transmitter if desired) using 2 momentary switches.
NOTE: Screen captures were from a TBS Mambo running FreedomTX.
How to use virtual knob:
Turning Knob: Use Right switch to increment up (turn up pot) and Left switch to increment down (turn down pot)
Centering Knob: Press Left switch + Right switch together to reset "pot/knob" to 0
IMPORTANT NOTE IF USING EXPRESSLRS: You will need to change the switch mode to WIDE in the ExpressLRS Lua:*
ExpressLRS Lua Script -> Switch Mode -> Wide
Virtual knob configuration:
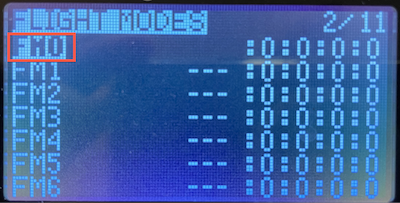
Step1: Flight Mode (2/11): Add Global Variable
Step 1a: Select FM0
Step 1b: Select G1
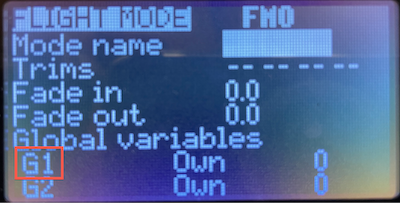
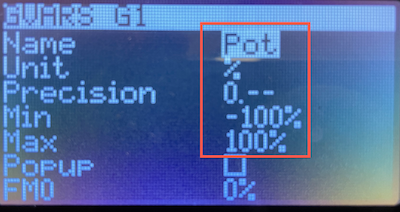
Step 1c: Change G1 settings as depicted
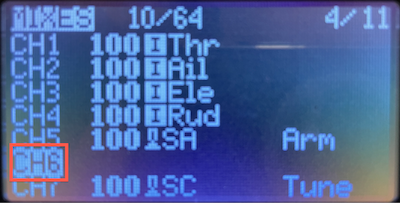
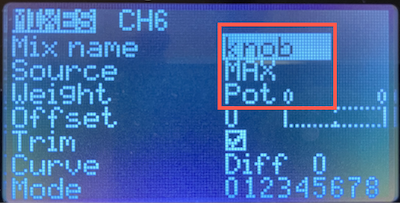
Step 2: Mixes (4/11): Assign channel to be used by the “knob”
Step 2a: Select Channel you will use as a knob. In this example CH6 is used.
Step 2b: Change Mixes settings as depicted
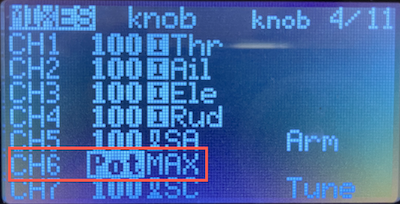
Step 2c: Should now have this in your Mixes
NOTE: Channel will be unique to your setup
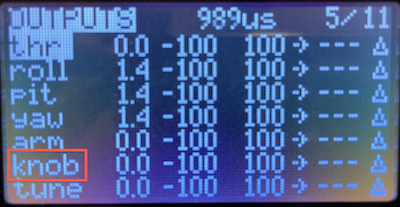
Step 3: Outputs (5/11): Add knob label
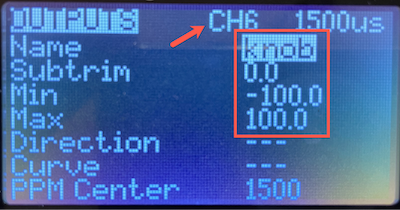
Step 3a: Select the related output channel. In this example knob was previously created so your screen will most likely NOT match this until steps are completed.
Step 3b: Change values as depicted. Note in this example CH6 is used and may be different depending on which channel you use.
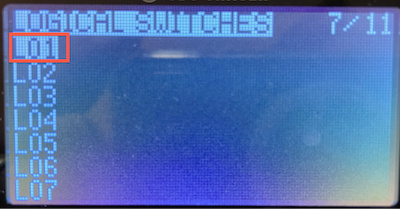
Step 4: Logical Switches (7/11): Add knob reset/center switch
Step 4a: Select L01
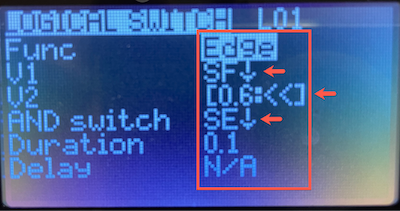
Step 4b: Select momentary switches in the activated position.
- V1: Press on RIGHT momentary button (in this example SF is the R momentary)
- AND Switch: Press LEFT momentary button (in this example SE is the L momentary)
- Note the << that needs to be changed as well
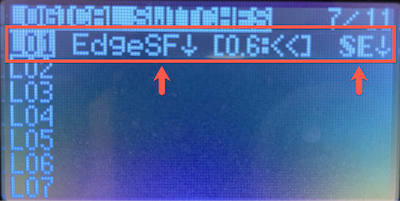
Step 4c: Validate. Note SF & SE could be different depending on what your momentary is assigned.
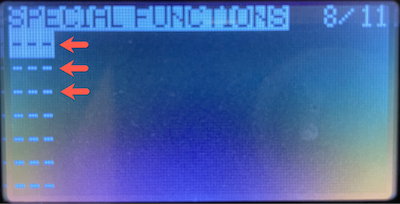
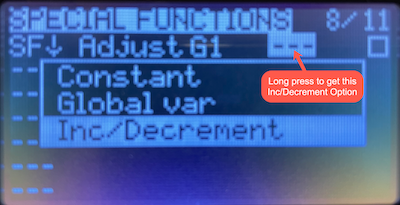
Step 5: Special Functions (8/11): Add LEFT (-1 increments), RIGHT (+1 increments), and Reset/Center (May need to increase this to -5% and +5% or more if “dial” is too slow)
Step 5a: Select each line one by one and configure following the proceeding steps
Here are the values for each line.

Step 5b: Setup Right Momentary Incremental Steps +
- Press RIGHT momentary
- Long press - - - and select Inc/Decrement
- Change value to +1% (May need to increase this to +5% or more if “dial” is too slow)
- Check box
Step 5c: Setup Left Momentary Incremental Steps -
- Press LEFT momentary
- Long press - - - and select Inc/Decrement
- Change value to -1% (May need to increase this to -5% or more if “dial” is too slow)
- Check box
Step 5d: Create “return to zero” switch
- Select L01 “Switch”
- Change Adjust value to 0% (do NOT select Inc/Decrement)
- Check box
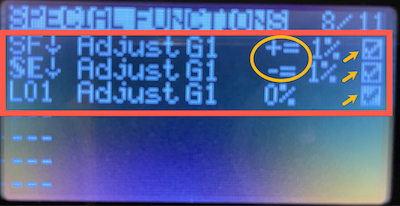
Step 5e: Validate
- “+=” and “-=” will indicate increment/decrement used on the 1st & 2nd Special Functions.
- inc/dec NOT used on 3rd Special Function
- Make sure boxes are checked to enable the special functions
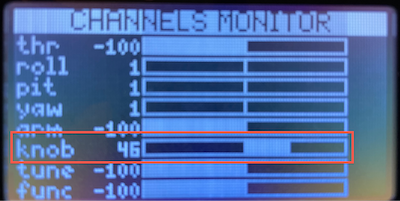
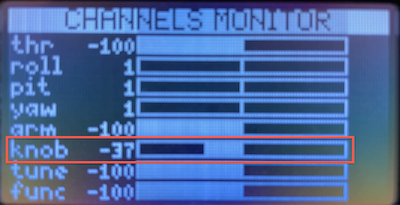
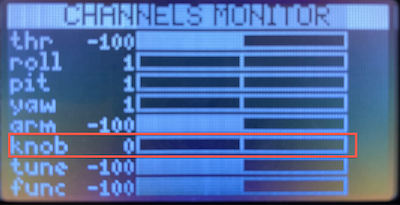
Final Step: Validate Output
- Turning Knob: Use Right switch to increment up (turn up pot) and Left switch to increment down (turn down pot)
- Centering the Knob: Press Left switch + Right switch together to reset "pot/knob" to 0
Go to output screen and observe output and function