The custom-made discord bot for the KnightHacks Discord server.
Setting up your environment
- Make sure you're running with Node v18.x
Ask one of the dev leads or officers in the Discord for the Knight Hacks server template. This can be useful to setting up a private server with the same layout as the Knight Hacks server. This step is not required for development!
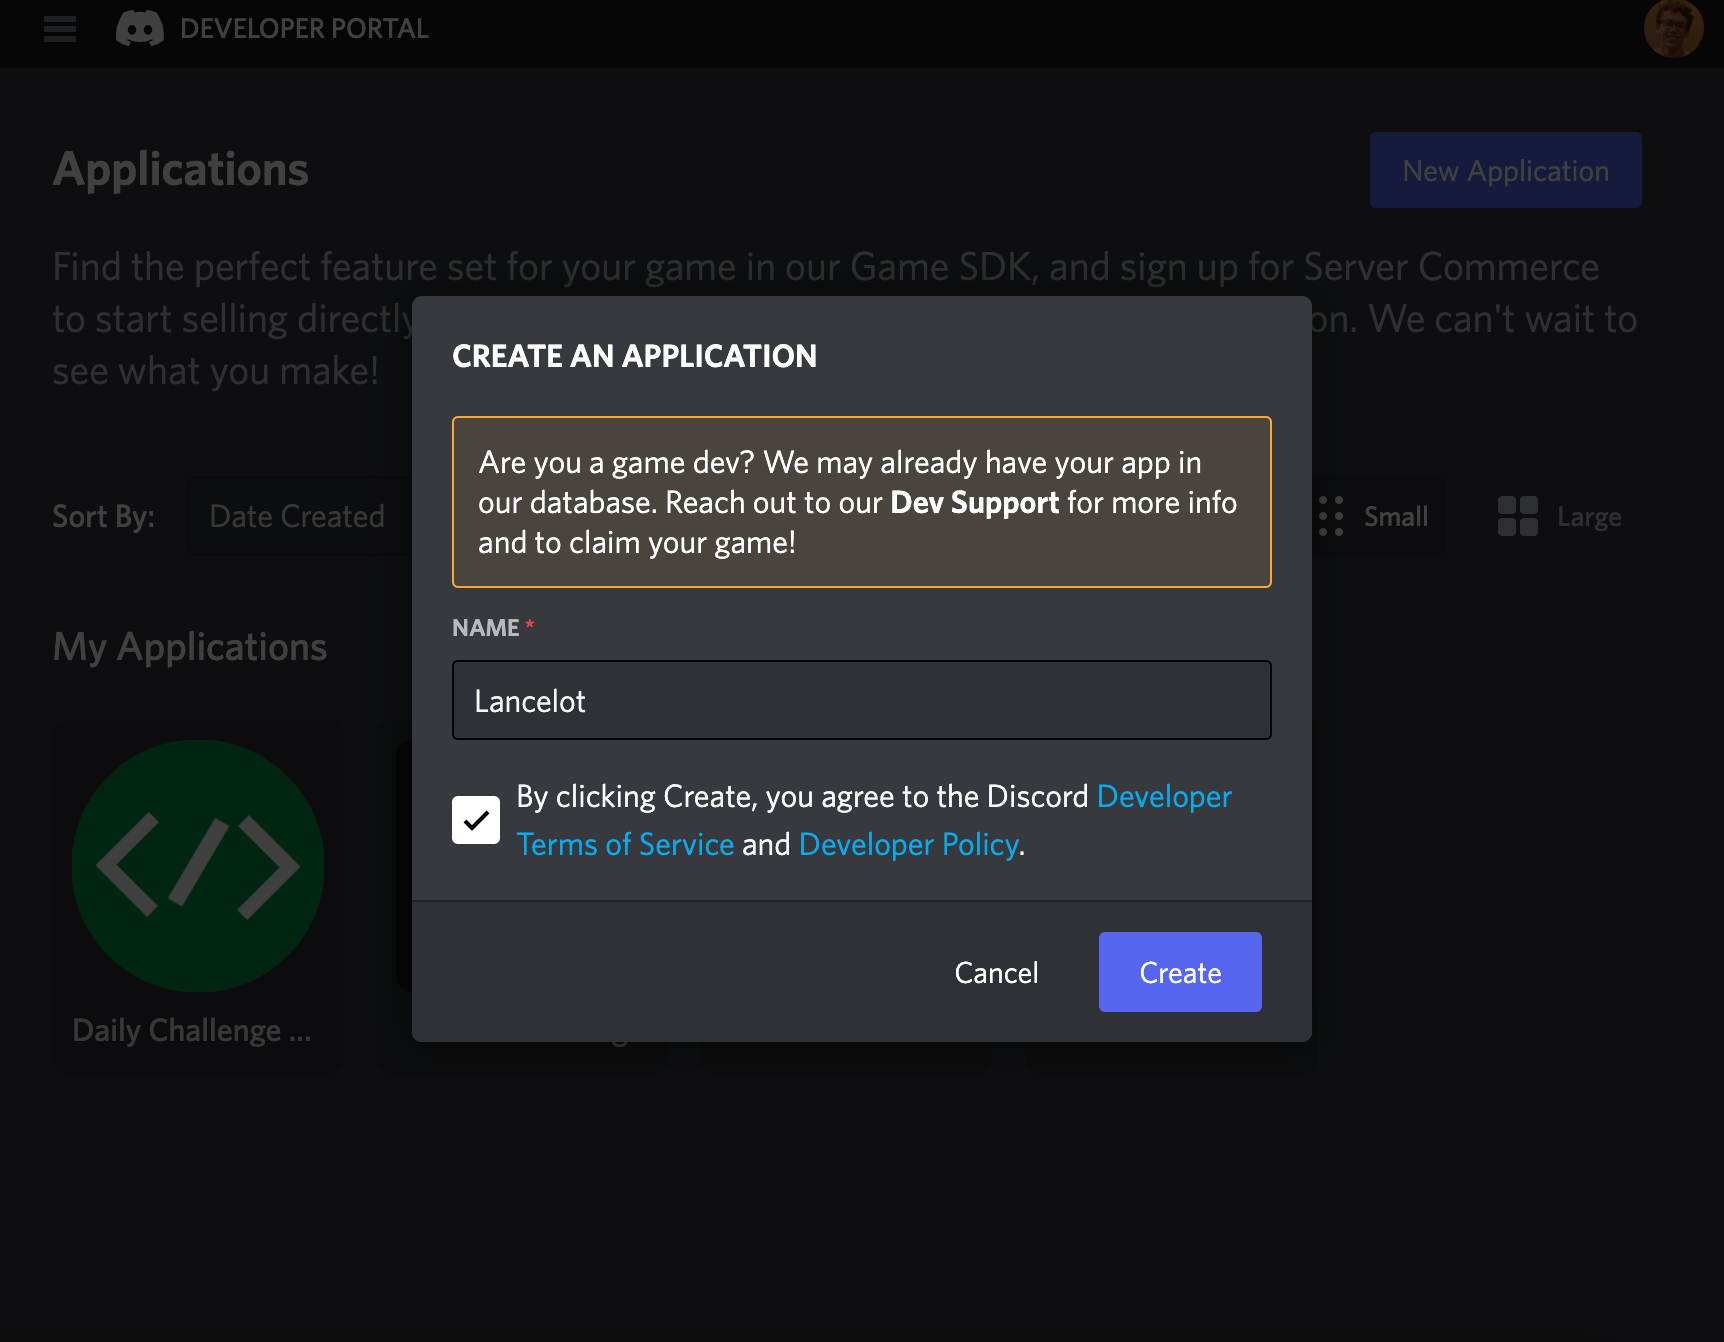
You'll need a token in order to allow your bot to connect to Discord. Go to the Discord Developer Portal to set up your developer account. You will need to click "New Application" and follow the prompts to set up your own test instance of Lancelot.
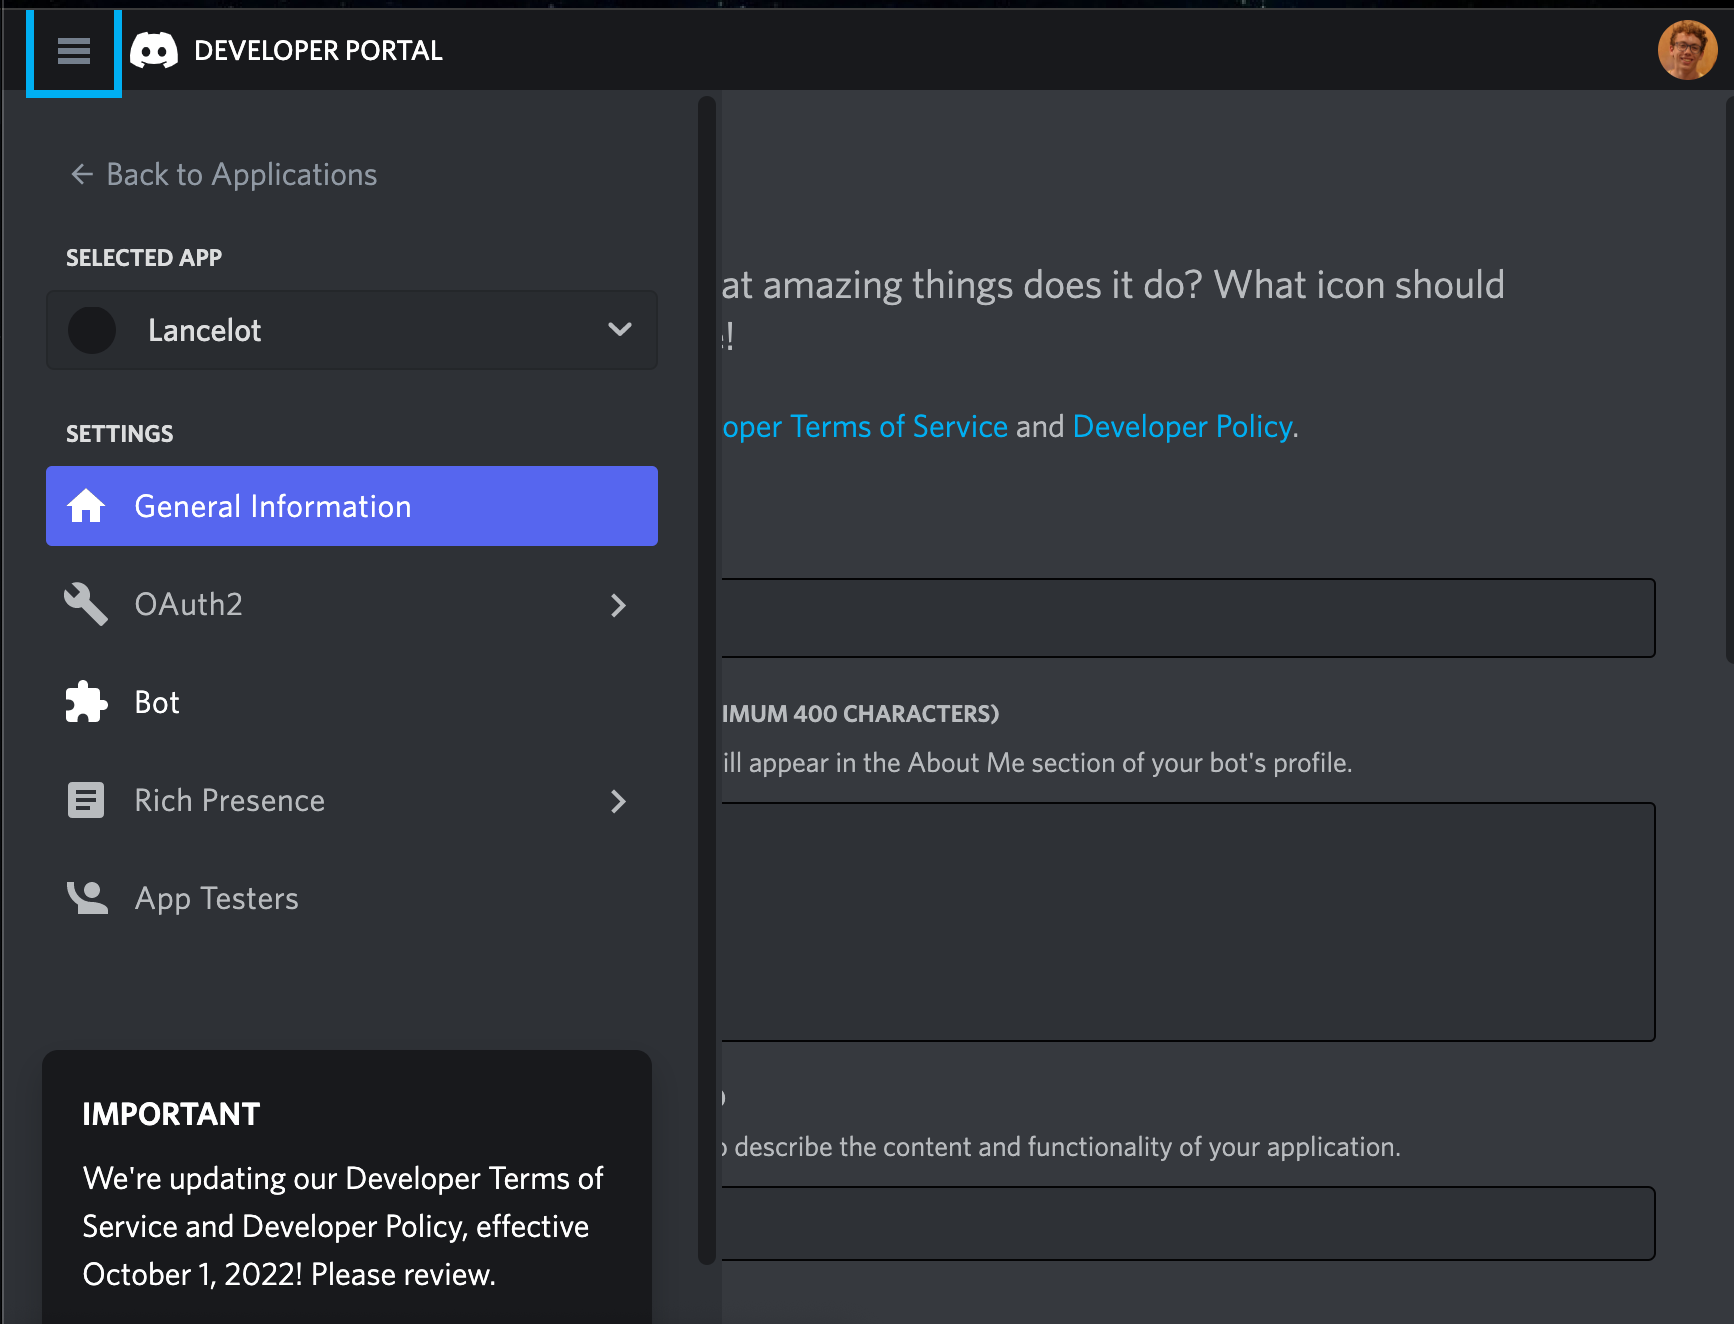
Once you've set up your test instance of the bot, you'll need to set up a test bot user. Click "Bot" with the puzzle piece on the left side of the screen then "Add a Bot."
You should now be able to reset and then copy your token from the middle of the screen.
Don't share this! Anyone who has this token can control your bot account and attach other bots to it or worse. Never publish it to source control software like Git or GitHub.
Create a file called .env in the root of the project folder with the token. This file should be automatically ignored by the Git configuration.
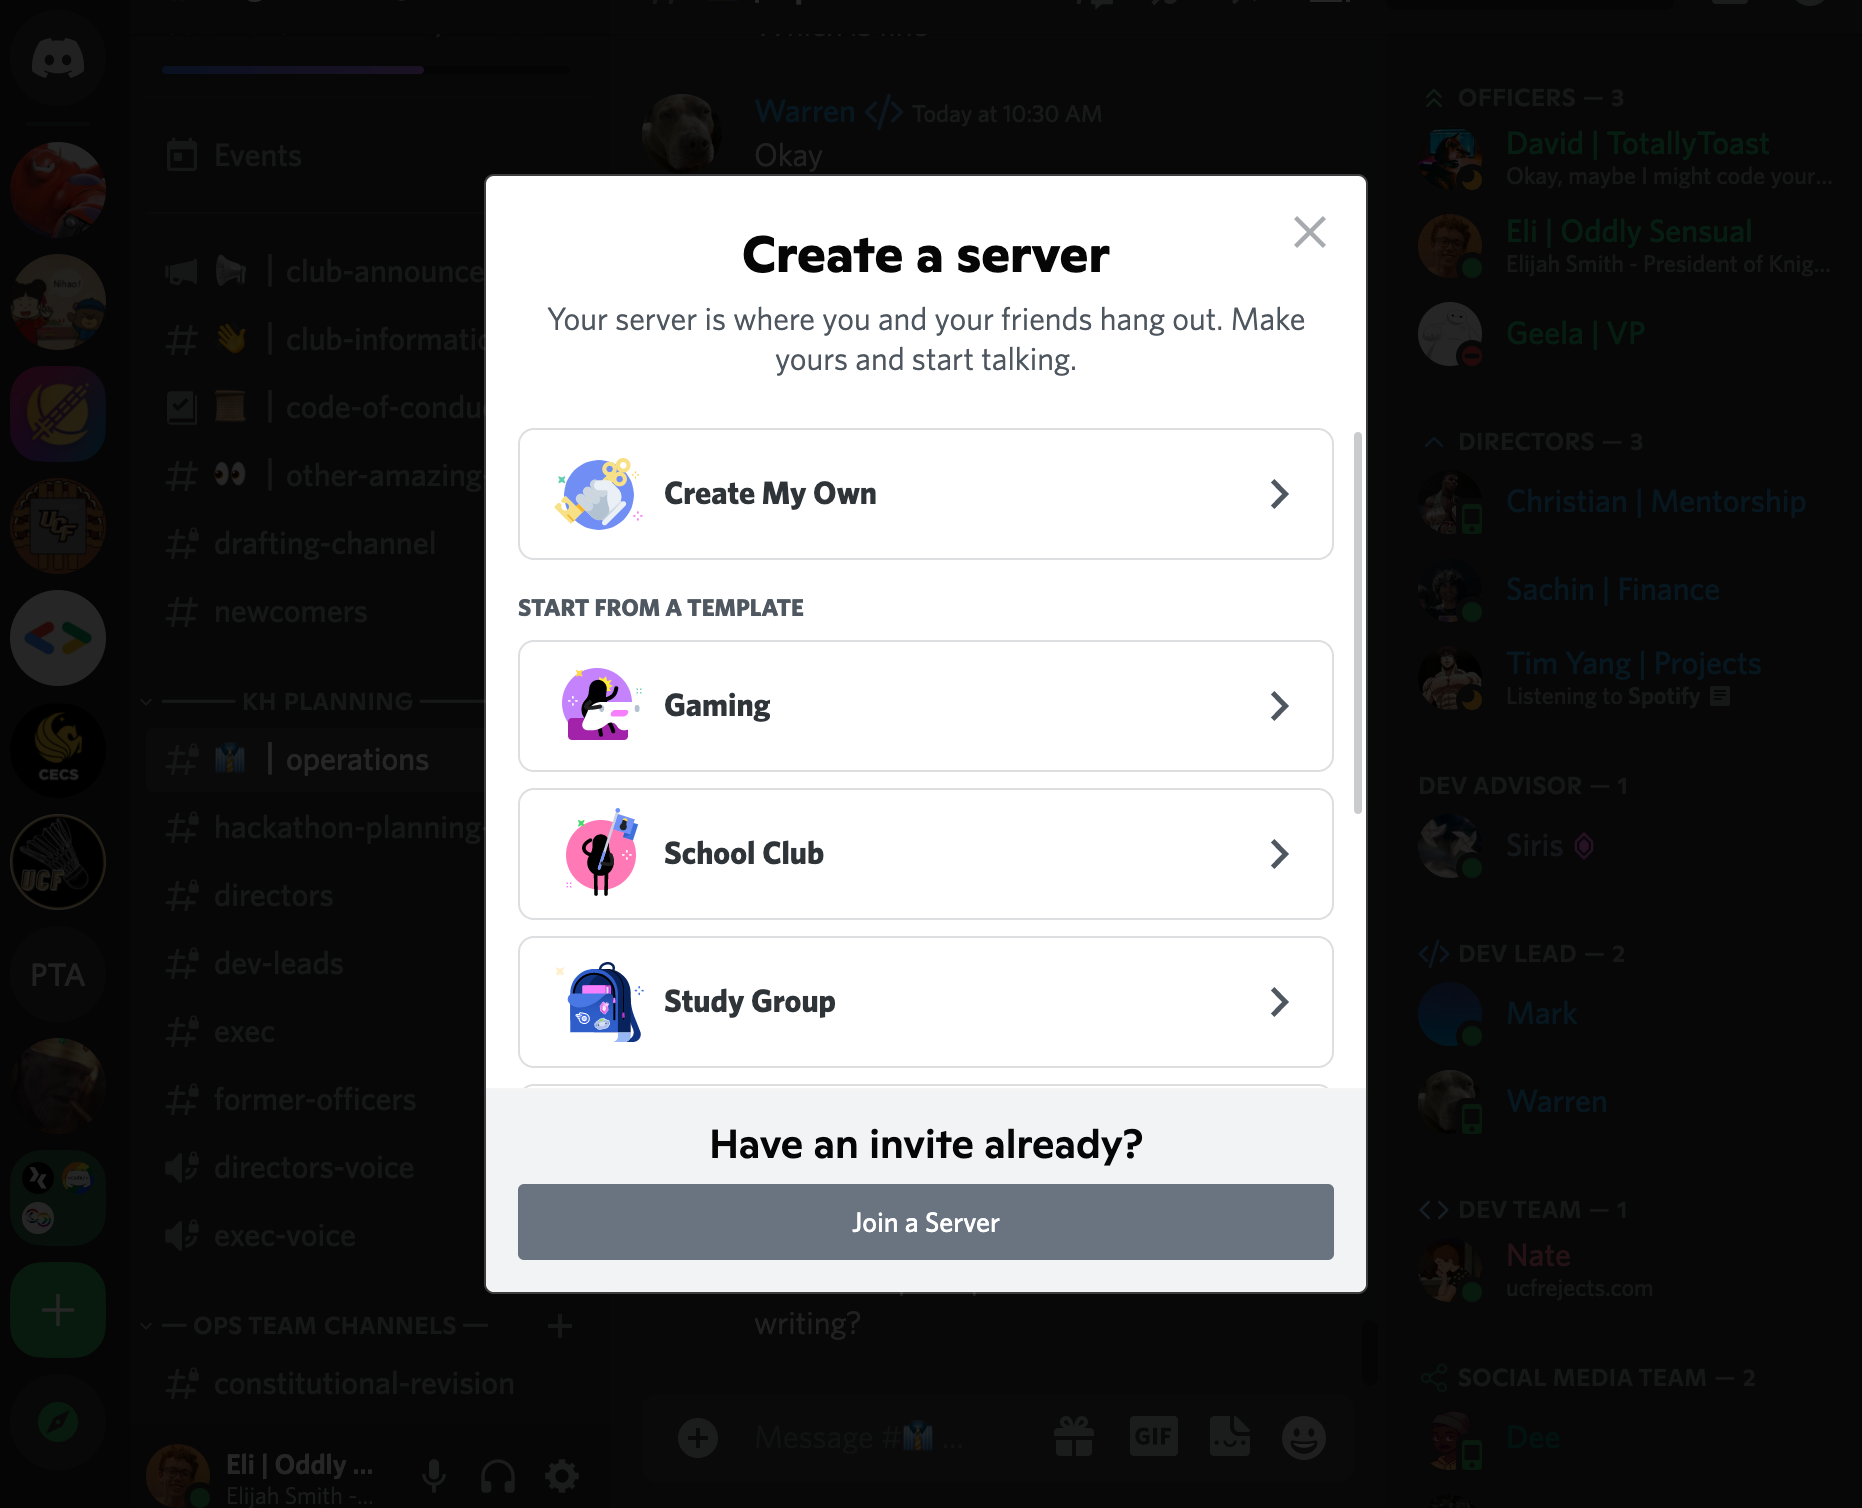
echo "DISCORD_TOKEN=YOUR_TOKEN_HERE" > .envNext, you'll need to create your own testing server for the bot. Go to the plus sign circle at the bottom of your servers and follow the prompts to create your own server.
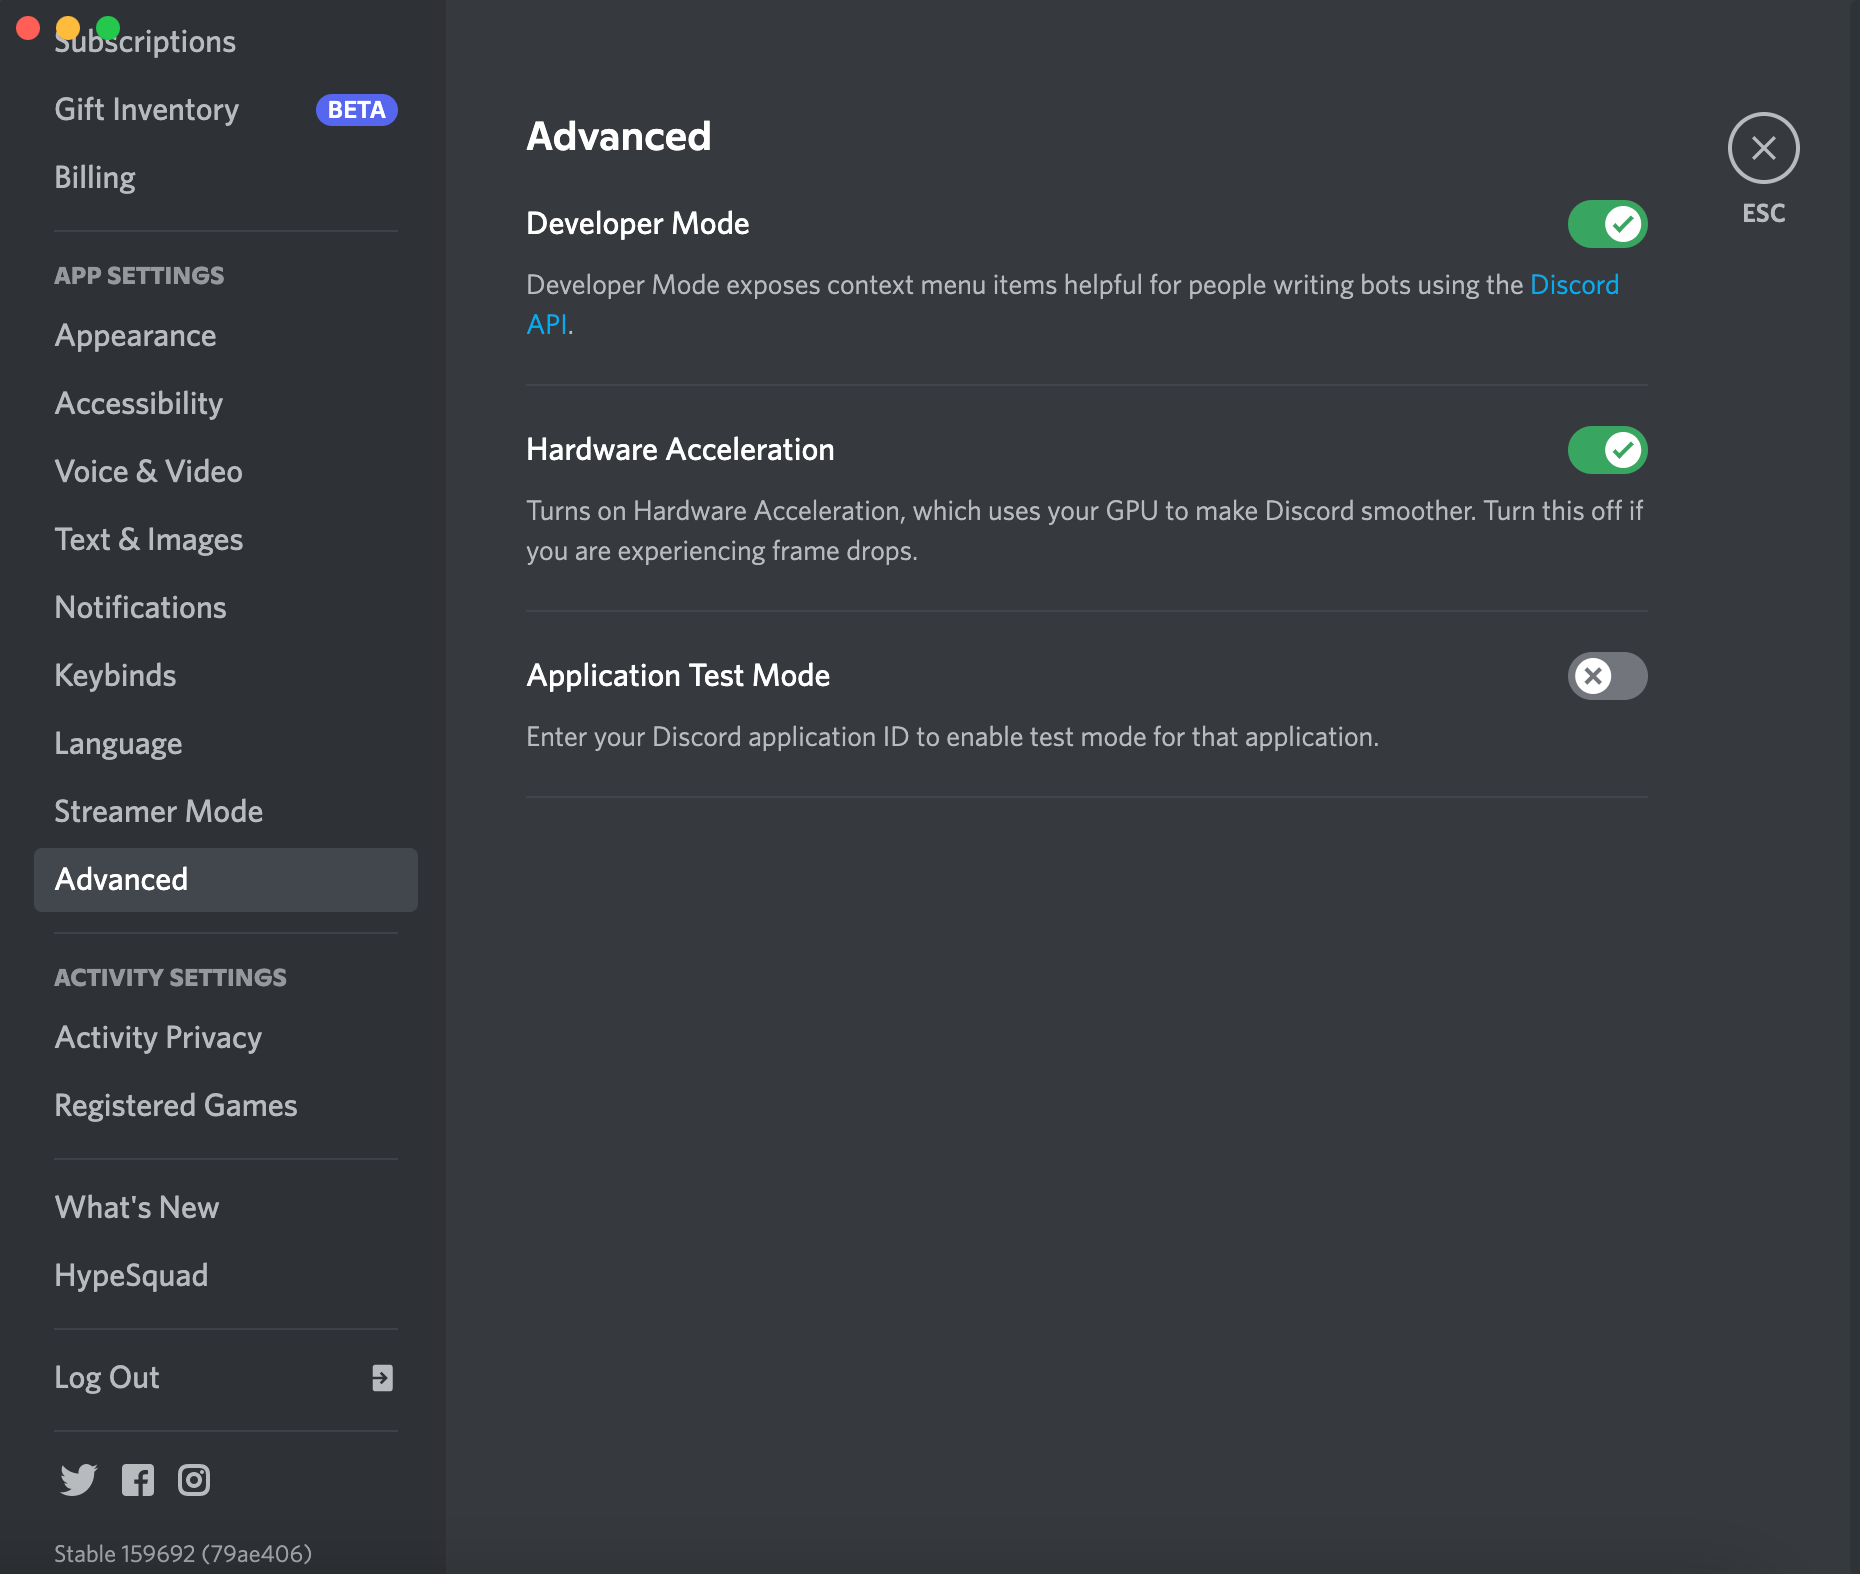
You will need to extract the Guild ID of the server you want to use for testing. Go to the Discord settings and select "Advanced".
Turn the "Developer Settings" option on.
Go back to your servers and right click the testing server. You should now have an option to "Copy ID", which will copy the guild ID to your clipboard. You can also do this with roles and members on your server for features that require those IDs!
Add the guild ID to the .env file:
echo "GUILD_ID=YOUR_GUILD_ID_HERE" >> .envFinally, you'll need to give your test bot the appropriate permissions so it can do things. Head back to the Discord Developer Portal and select your application. Then select "Bot" in the sidebar.
Scroll down, and turn on the "Server Members Intent" and "Presence Intent" options under "Privileged Gateway Intents".
Next, go to the OAuth2 page and select "bot" and "application.command" under "Scopes". A bunch of permissions should appear below in the "bot permissions" section. As this bot becomes more complex, more bot permissions will be required to perform important functions.
For now, you can select "Manage Roles", "Read Messages/View Channels", "Send Messages", "Create Public Threads", and "Manage Messages".
Discord will generate a link below the bot permissions section which you can use to add the bot to a server. The simplest thing to do is to make your own testing server and then follow the link, which will prompt you to add the bot to a server you administer.
You should now be able to start your bot. Happy developing!
Getting started guide: https://discordjs.guide/#before-you-begin
Full documentation: https://discord.js.org/#/docs/discord.js/main/general/welcome